
I had never made gelatin bubbles before but needed to make a bubble gum-inspired cake!
Gelatin bubbles always intrigued me but seemed so complicated. I also despise the smell of unflavored gelatin but decided to put my opinions aside for this project.
After a few rounds of experimenting, I realized gelatin bubbles are easier to make than you’d think. The active time isn’t too bad, but they do take quite a while to dry.

Gelatin Bubble Troubleshooting & Helpful Tips
I followed Cake Central’s tutorial as a starting point and learned a ton throughout this process.
I had some gelatin bubble triumphs, like having some of my gelatin bubbles actually end up being circular!
But I also had some struggles. I repeat, do not turn a fan on and point it directly at the balloons while they are drying…they WILL fly off your counter!!
Clearly, making these gelatin bubbles was an emotional roller coaster. But I promise, this story has a happy ending.
Hopefully you can use the tips I share below to easily make perfect gelatin bubbles.
The recipe included below makes enough bubbles to cover the top of an 8-inch layer cake.

Tip #1: Keep Your Gelatin Warm
The first problem I ran into when making these bubbles was keeping my gelatin the right consistency.
If it cools off too much, it’s hard to dip the balloons in and gets kind of a goopy texture. This makes it difficult to get an even coating on each balloon.
If the gelatin cools off and thickens while you’re dipping the balloons, pop the gelatin into the microwave and heat for 10 seconds to get it back to the right consistency.

The most important thing is to keep an eye on the gelatin and heat it up if it gets too thick. No one wants a lumpy, uneven gelatin bubble!!
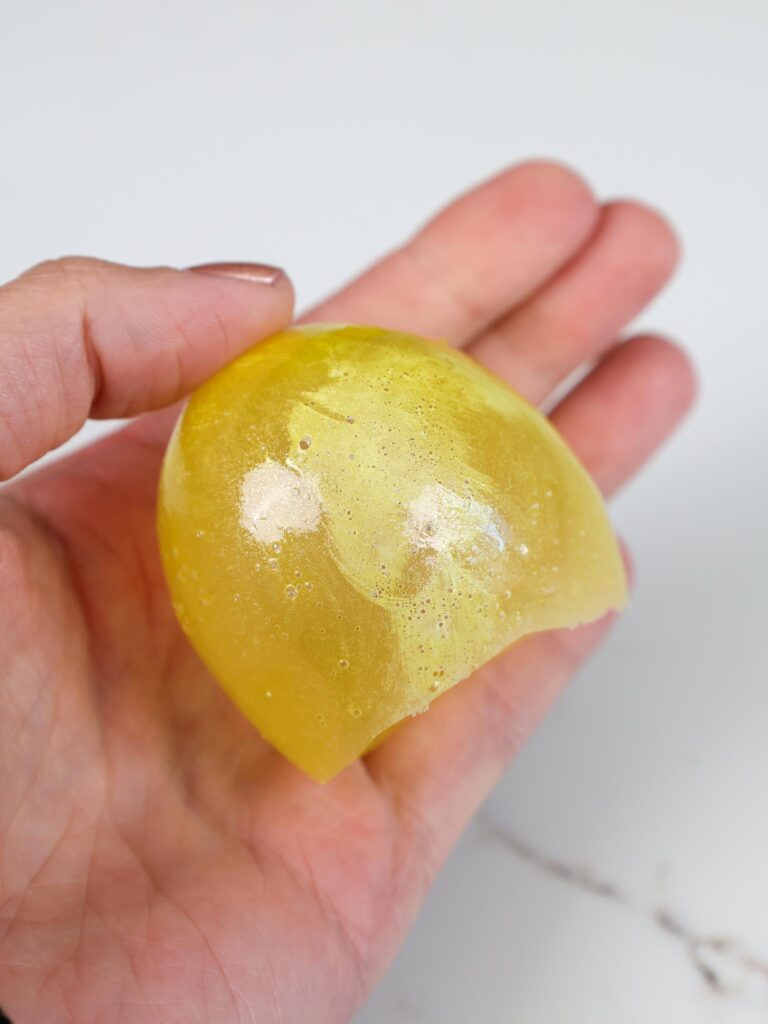
Tip #2: Scoop Out Any Foam or Little Bubbles from the Gelatin
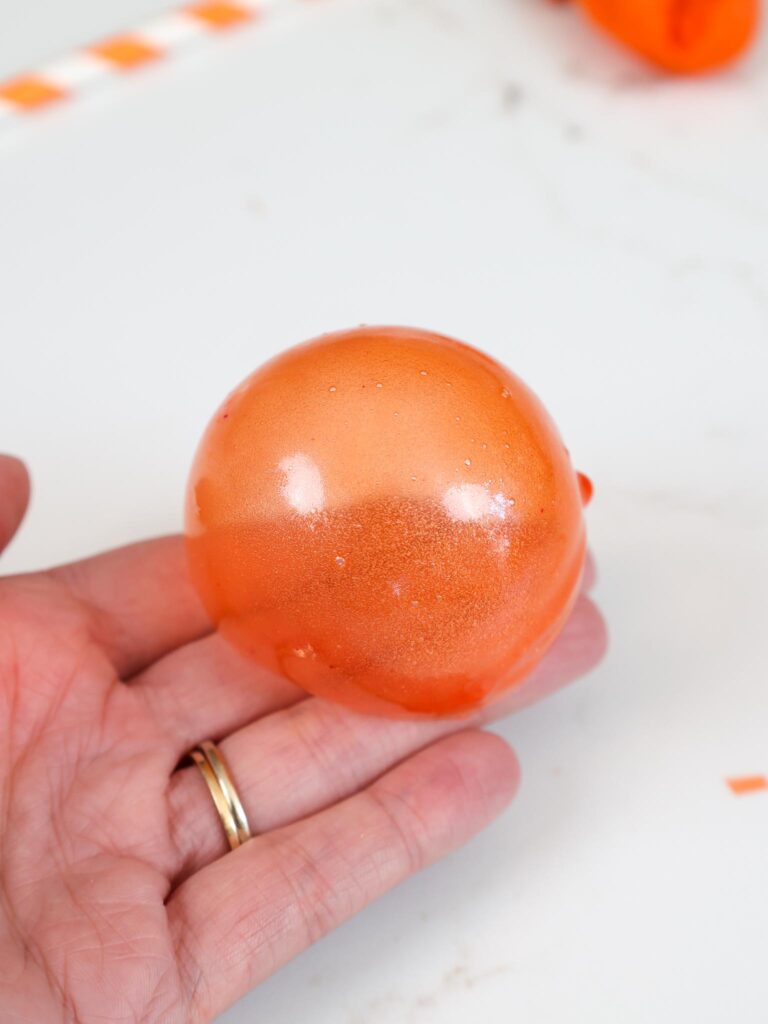
After heating up the gelatin, you may notice small bubbles or foam on top of the gelatin.
Carefully spoon them out of the container. This will cause your gelatin bubbles to have a cloudy, bubbly, surface.
I dipped one balloon into the mixture before removing the little bubbles and this is how it turned out! It was riddled with little bubbles and cloudy once it hardened.
Not terrible, but not quite the look I was after.

Tip #3: Use Small Balloons & Don’t Inflate Them Fully
As I began this project, I blew up some small balloons into varying sizes (1 inch to 3 inches in diameter).
I did my best to shape them into circles. But you know what? BALLOONS AREN’T CIRCLES! They’re oblong. My makeshift way around this was to tie the knot very high up on the neck of the balloon.

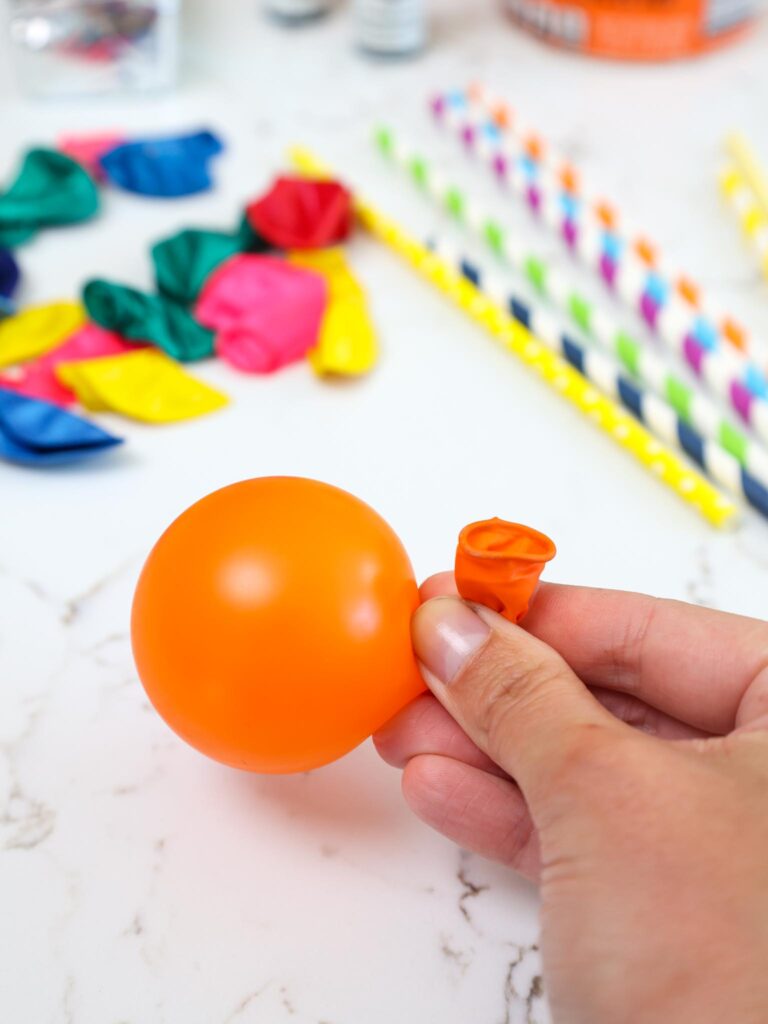
This was easiest to do when the balloons weren’t fully inflated. I recommend leaving yourself a bit of room to work with when blowing them up.
Tip #4: Coat Your Balloons with the Right Amount of Shortening
Trust me on this one. It is absolutely essential that you lather up your balloon with a thin coat of shortening.
This step lets you easily remove the balloon from the hardened gelatin.

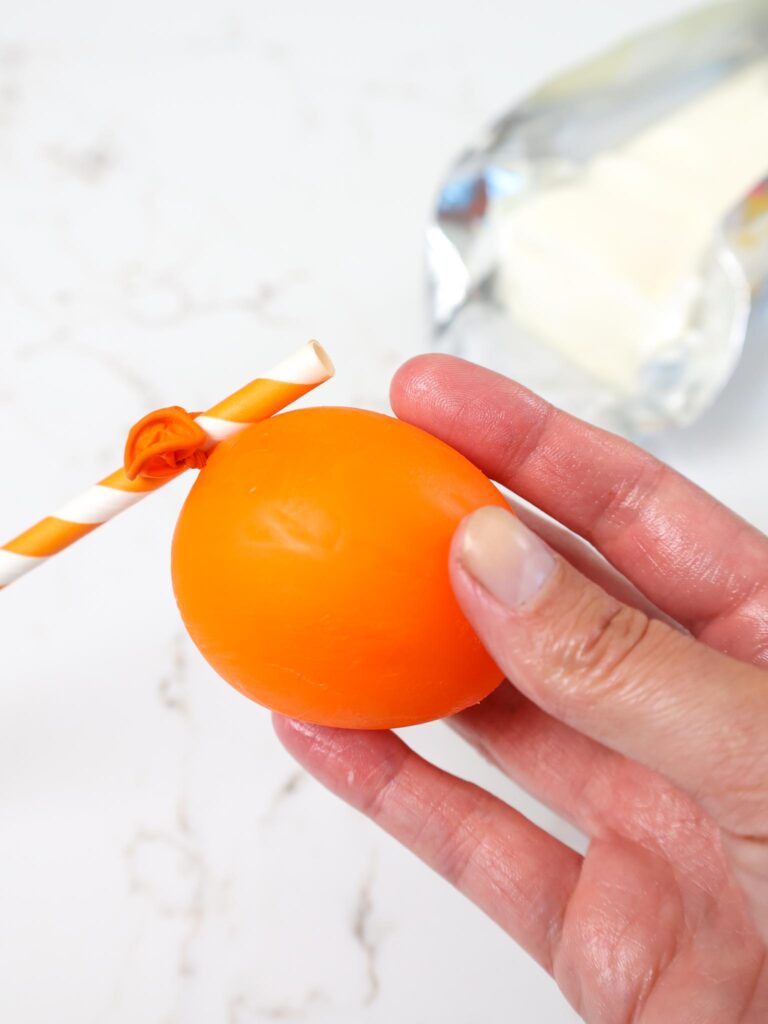
While you may be tempted to completely slather the balloon with shortening, a thin layer works best!
If you don’t wipe away any excess shortening (white areas), the gelatin won’t stick to the balloon and take shape.

You’ll either end up with white cloudy spots on your gelatin bubbles or uncovered batches of balloon. And no one wants that!!

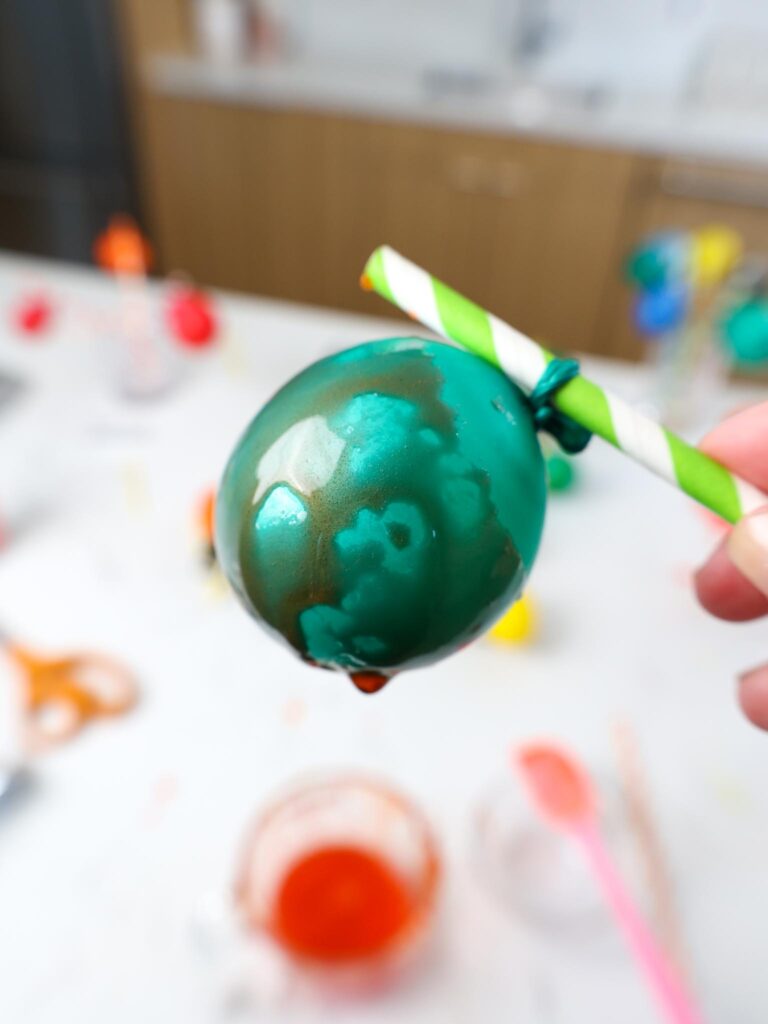
Tip #5: Shake Off the Excess Gelatin
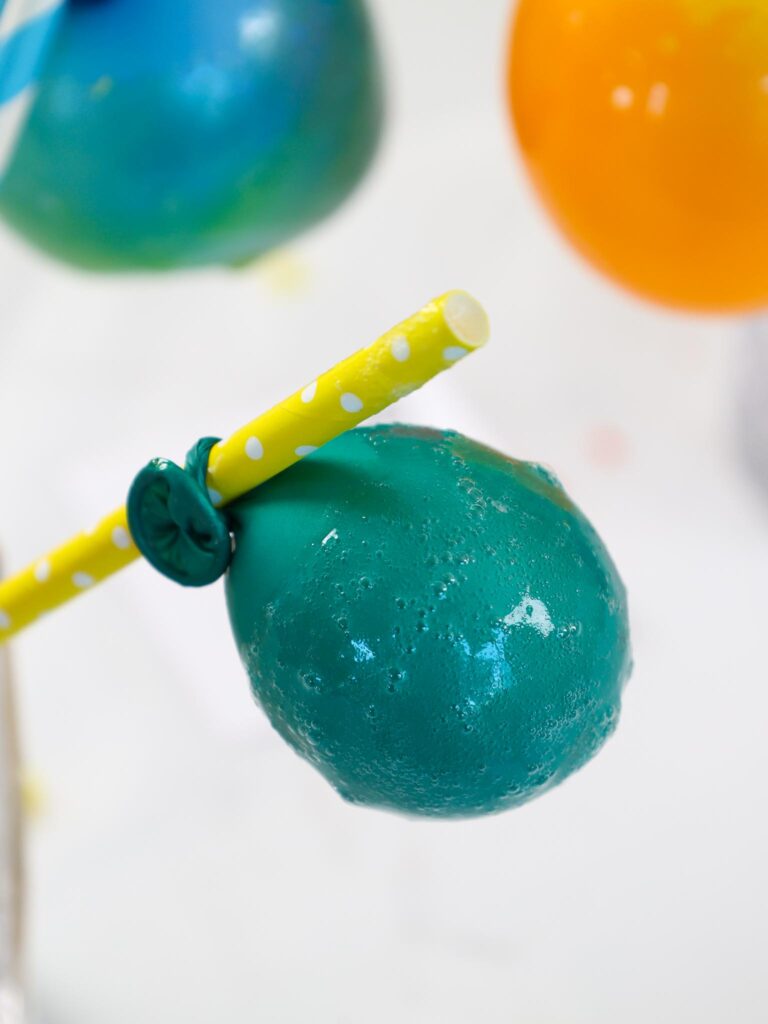
As you dip each balloon into the gelatin, shake off the excess.
If you don’t, the gelatin will drip off the balloon and harden in strands like in the photo below.
If this happens though, don’t worry! You can gently pinch the strand of gelatin to remove it before it fully hardens, and it won’t be very noticeable.

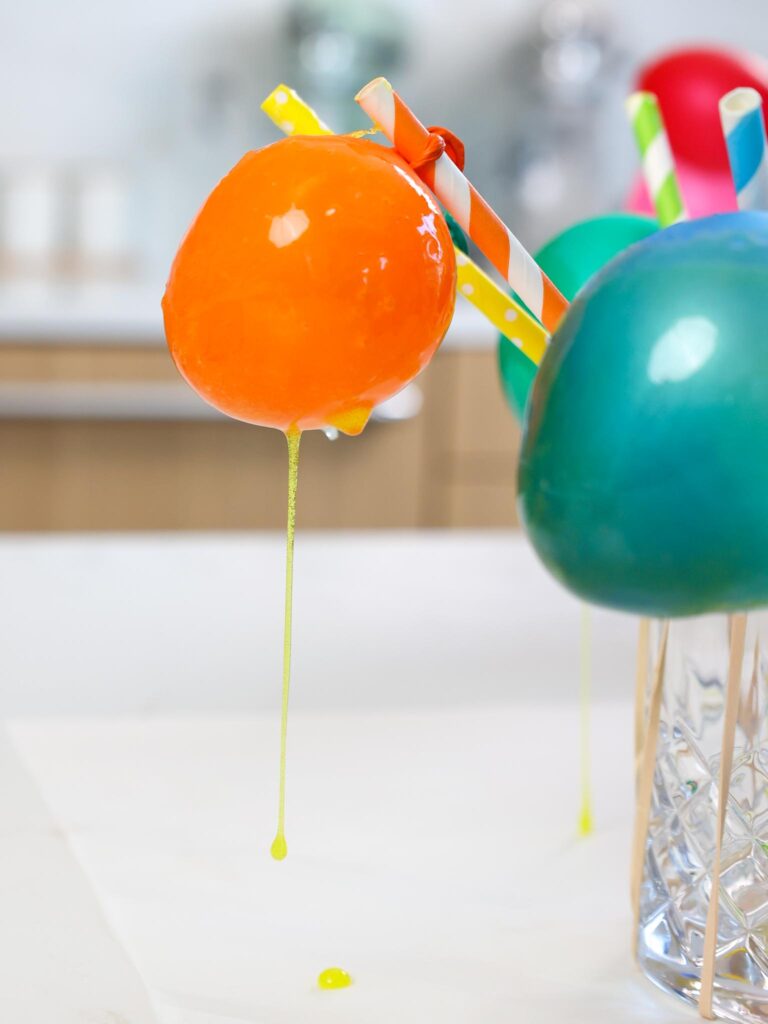
Excess gelatin can also dry at the base of the balloon and make your bubbles appear darker on the bottom.
Tip #6: Carefully Use a Fan to Help the Gelatin Bubbles Dry Faster
This tip helps speed up the drying process. Without a little breeze, these gelatin bubbles can take up to 12 hours to firm up.
I don’t know about you, but I don’t have the patience or the time to wait overnight!! If you do have the time and a safe area you can let these dry, by all means go for it.
If you want to speed up this process, you can use a small fan on a LOW SPEED to shorten the drying time.
In full transparency, when I first pointed my fan at my bubbles, 1/3 of them flew off the counter and fell on the ground.
Start by placing the fan a safe distance away from the bubbles, at the lowest possible speed. With the help of the fan, my bubbles dried after about 4 hours.
One strange thing to keep in mind as the gelatin firms up. The gelatin will actually contract a bit and shrink. This will create loud, crackling sounds.
At first, I was convinced my bubbles were shattering but I was relieved to realize it just meant they were drying quickly!

Tip #7: Pop the Balloons with a Sharp Pair of Scissors
Now that you’ve invested hours into these gelatin bubbles, it might seem crazy to just pop the balloons with scissors.
But I promise your bubbles will be strong once they’ve dried. It also helps if you use a good, sharp pair of kitchen scissors.

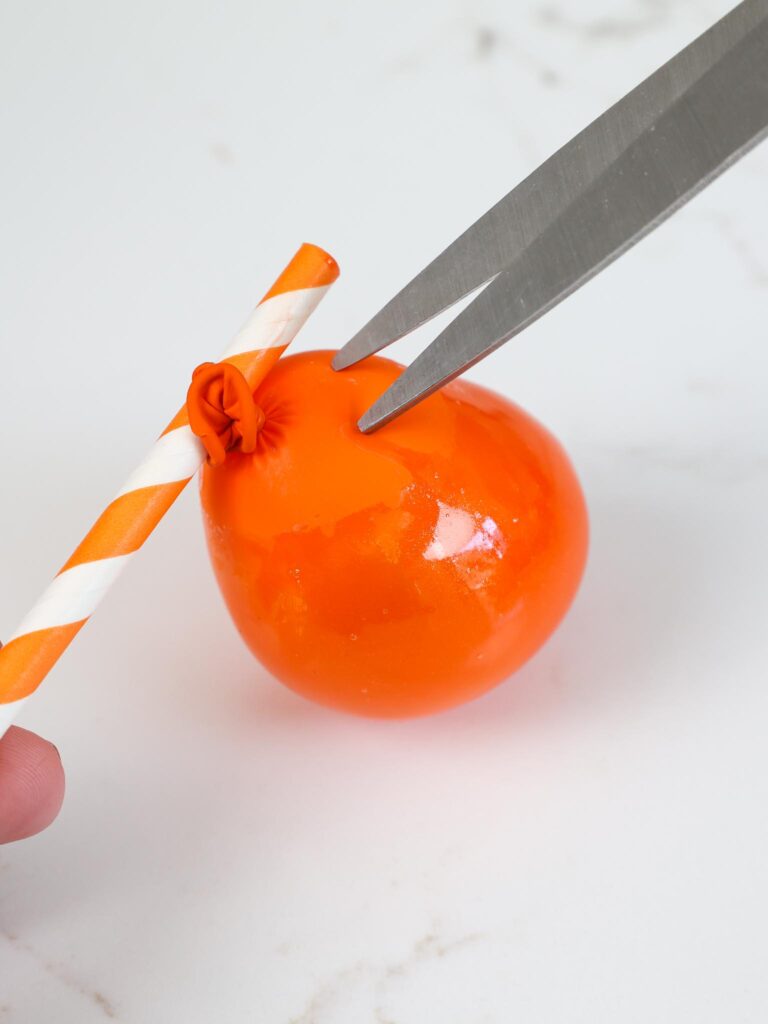
The balloon should easily pull away from the bubbles thanks to the shortening we spread on them!
There were a couple places where I skimped on the shortening, and the balloons got indented as I removed the balloons.
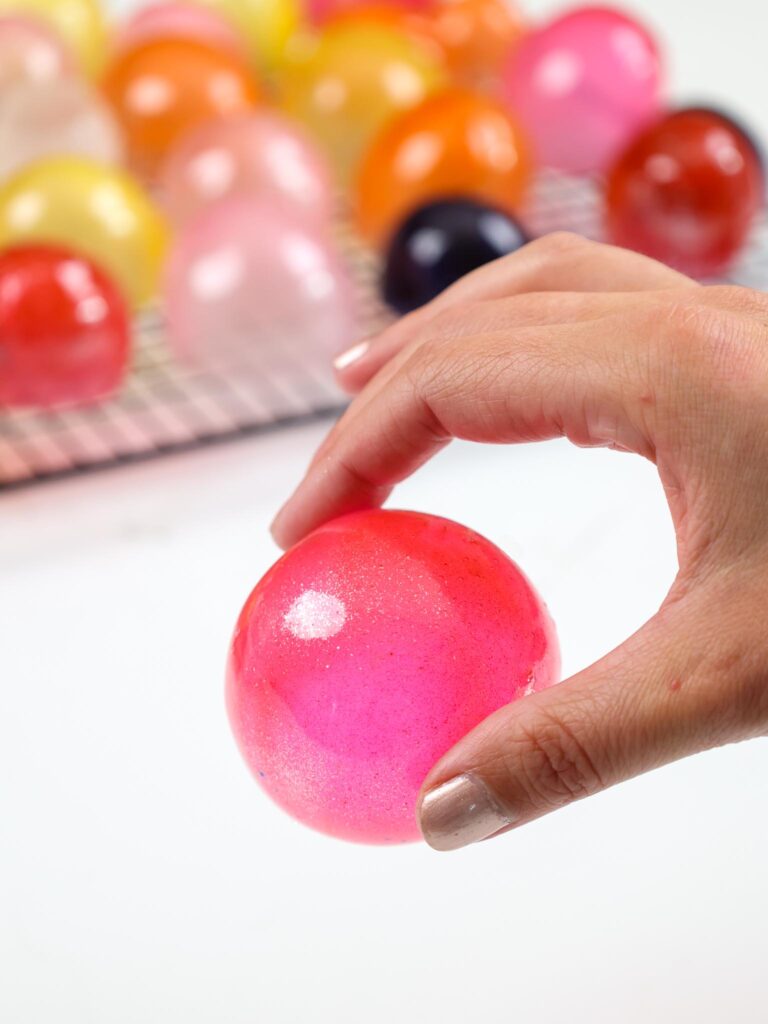
But to my surprise, I realized I could simply pop out the indent!!
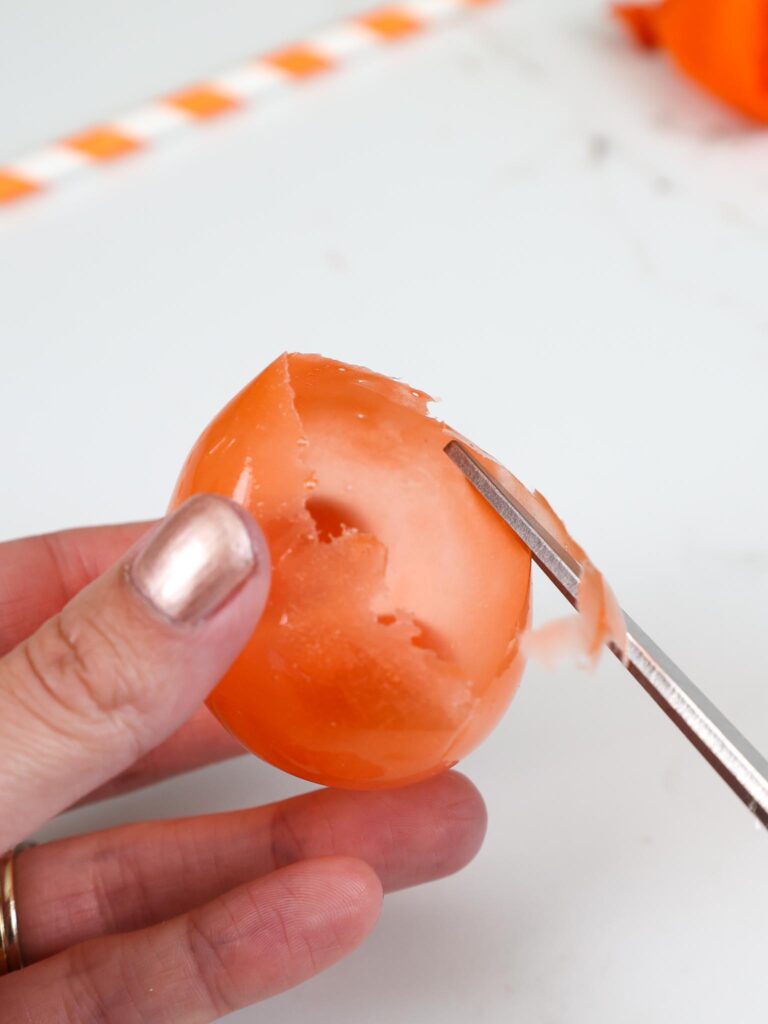
Like I mentioned earlier, you’ll be shocked by how sturdy your bubbles end up being. This is also what makes it easy to trim the jagged edges with scissors.

Tip #8: Make These Gelatin Bubbles in Advance
I recommend making these gelatin bubbles ahead of time because the process is rather time consuming!
The bubbles can be stored in an airtight container for several days at room temperature.
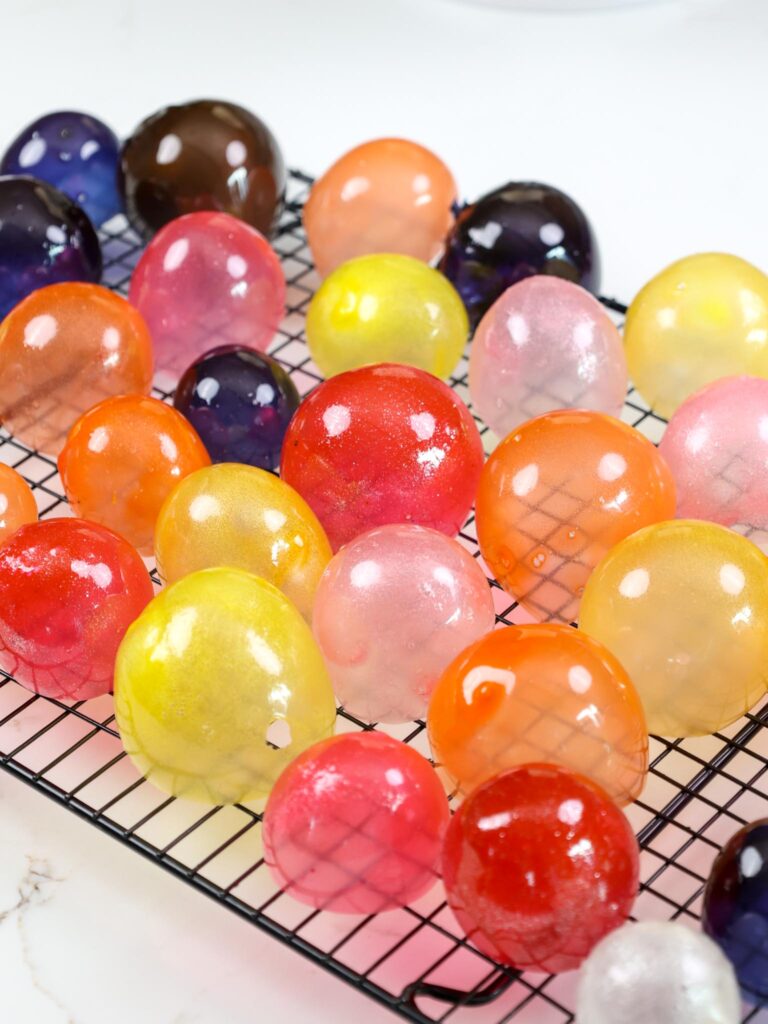

I couldn’t resist sharing a shot of the cake I decorated with these bubbles! Once the bubbles were dry, I used them to decorate this buttercream cake.
I simply pressed them into the buttercream and stacked them on top of each other.


DISCLAIMER: I do not recommend actually eating the bubbles. Although they are edible, they don’t taste great (plain gelatin!!).
These are much more of a decorative touch than an edible garnish.
Let Me Know What You Think!
If you try my gelatin bubble tutorial, I’d love to hear what you think of it! Please leave a comment and rating below.
Don’t forget to tag me @chelsweets and #chelsweets so that I can see your beautiful creations on social media.
Other Tutorials You Might Like:


Gelatin Bubbles


Want to learn how to make gelatin bubbles? This recipe and tutorial walk through the whole process, and make gelatin bubbles that are perfect for decorating cakes!
Ingredients
Gelatin Bubbles:
- 6 Tbsp of unflavored gelatin (56g)
- 3/4 cup of cold water (180g)
- gel food coloring
- 3 Tbsp shortening
- paper towels (to wipe the shortening)
- luster dust (optional)
Additional Tools:
- heatproof bowl
- small balloons
- cooling rack (to dry bubbles)
- sharp scissors
Instructions
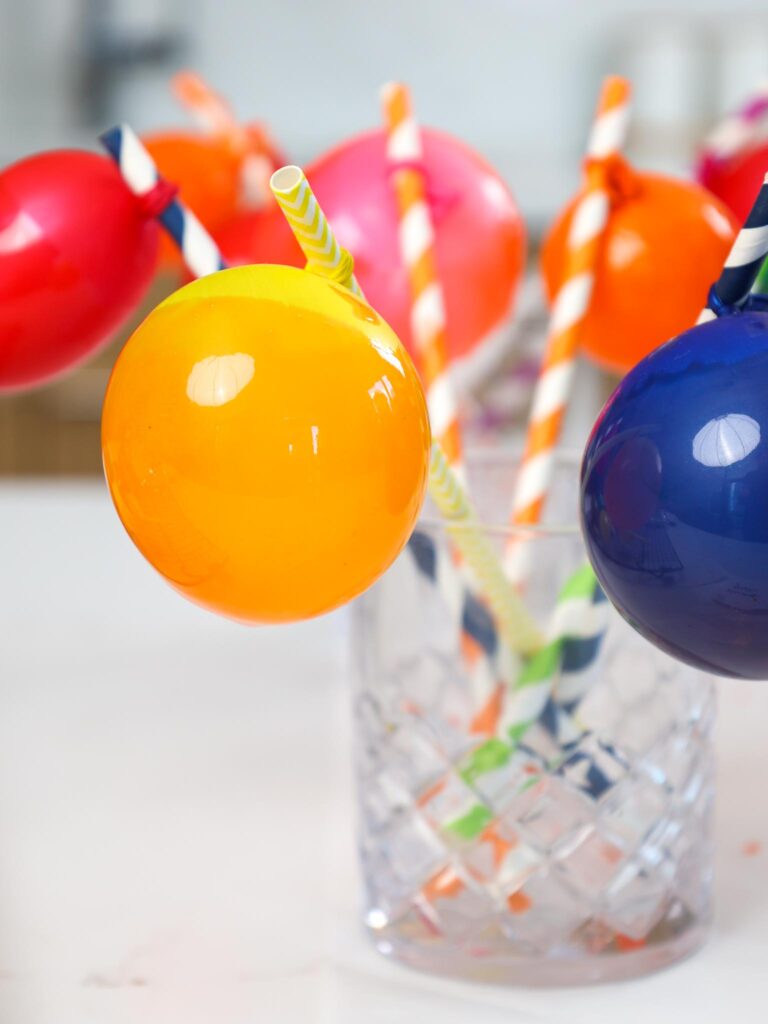
- Partially inflate 30 small balloons, tying a knot high up at the neck of the balloon to make it into a (somewhat) spherical shape. If desired, tie the balloon to the end of paper straw to make it easier to handle.
- Cover each balloon with a thin coat of shortening. You shouldn't be able to see any white streaks of shortening. The bubbles should just look shiny and lightly greased. This will make it easier to remove the balloons later in the process.
- Then 3/4 cup of cold water to a small, heat-proof bowl. Pour in 6 Tbsp of unflavored gelatin (ratio should always be 2 parts water, 1 part gelatin). Gently swirl the water in the bowl to fully hydrate the gelatin in the water. Let the mixture sit for a couple minutes to let the gelatin bloom (absorb water).
- Once the mixture firms up, pop the bowl into the microwave for about 20 seconds (time can vary based on your microwave). The gelatin should be warm and very fluid, but not hot to the touch.
- Stir in a few drops of gel food coloring (and/or luster dust). Make sure the gelatin is fully dissolved at this stage. If it's not, heat it in additional 10 second intervals and stir in between until it's fully melted. If you notice small bubbles or foam on top of the gelatin, carefully spoon it out of the container. This will cause your gelatin bubbles to have a cloudy, bubbly, surface.
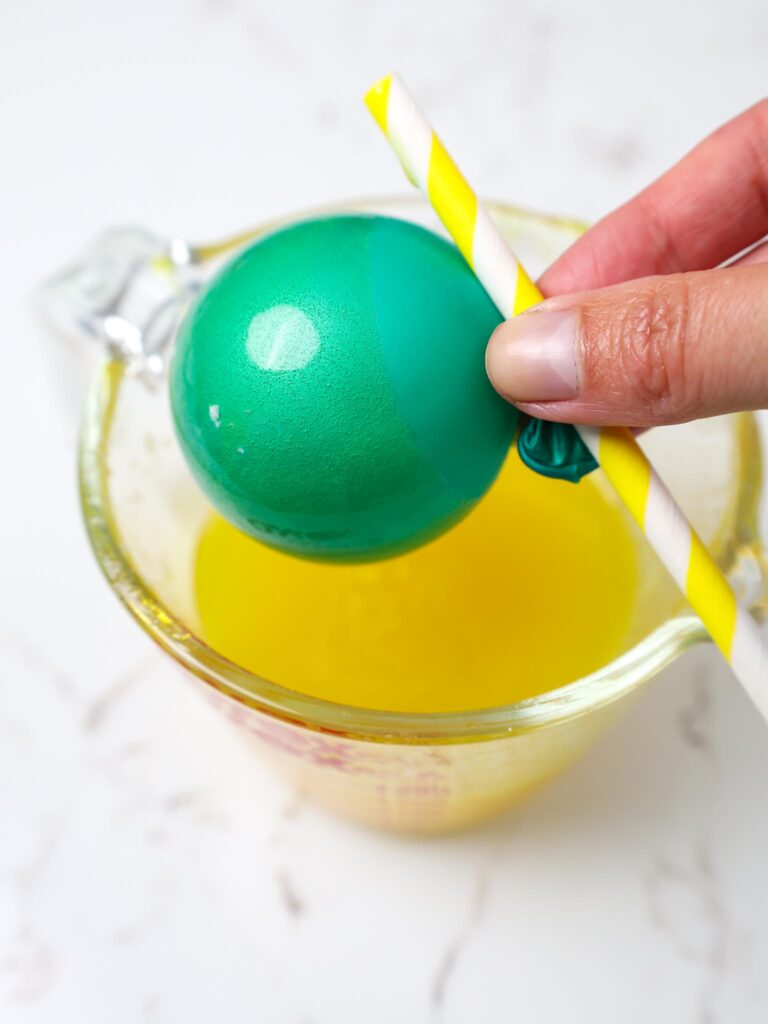
- Gently dip each balloon into the gelatin, rolling it to cover a majority of the balloon. Make sure each balloon is covered in a thin, even coat of gelatin. Gently shake off any excess gelatin. If you tied the balloons to straws, place them in a heavy glass to dry like in the photos above. If you skipped the straws, rest the balloons with the tie side down on a cooling rack.
- If the gelatin cools off and thickens while you're dipping the balloons, pop the gelatin into the microwave and heat for 10 seconds to get it back to the right consistency.
- Once all the balloons are dipped, dip them one more time. Two coats of gelatin help them be stronger and more brightly colored.
- Let the balloons sit for about 12 hours, or overnight to let them fully harden. If you're in a time crunch, you can use a fan to speed up the drying process (it takes about 4 hours with a fan). If using a fan, let the balloons rest for about 30 minutes (I found they had started to harden by this point), then use a small fan (on a LOW SPEED) to speed up the rest of the drying process. Be VERY careful when you do this. If your fan is too strong, it will blow your bubbles right off your counter!!
- Once the bubbles have hardened, use scissors to gently puncture the exposed balloon. Once it shrinks, gently loosen the balloon from the bubble and remove it.
- If the bubbles collapse a bit during this process, don't worry! They are rather sturdy, and any indents can be popped back into place.
- Use sharp scissors to trim away any jagged edges around the base of each bubble. Then use as desired!
Notes
This recipe makes enough gelatin to make about 30 small bubbles.
As the gelatin hardens, it will shrink. This will create loud, crackling sounds. Don't be alarmed if you hear this, it just means the bubbles are drying quickly!
These can be made several days ahead of time. I recommend making them ahead of time, as this process is rather time consuming!
The bubbles can be stored in an airtight container for several days at room temperature.
Nutrition Information
Yield
30Serving Size
1Amount Per Serving Calories 0Total Fat 0gSaturated Fat 0gTrans Fat 0gUnsaturated Fat 0gCholesterol 0mgSodium 0mgCarbohydrates 0gFiber 0gSugar 0gProtein 0g
Megan
Monday 21st of November 2022
Hi! Thanks so much for sharing! Any idea if the gelatin balloons would retain shape/size at room temperature for several weeks? Contemplating them for part of a gingerbread house… :)
Baby Shower Cake: Adorable Design w/ Step-By-Step Tutorial
Thursday 20th of October 2022
[…] first step is to make the gelatin balloons. I am obsessed with the playful look they give this cake! They do take some time to make […]
Teri
Thursday 1st of September 2022
How did you make the 3 bubbles in the front of the cake with the little tail like a real balloon? This cake is AWESOME!!!
Chelsweets
Sunday 4th of September 2022
Aw thanks Teri!! I saved some of the trimmings from the jagged edges of the bubbles and cut them into little triangles! It works like a charm :) Happy baking!
Bubblegum Cake - Chelsweets
Tuesday 2nd of August 2022
[…] lane, below are some of the pictures of my original bubble gum cake from back in 2017! I used gelatin bubbles to decorate […]
Lyn
Wednesday 20th of April 2022
They sounds & looks amazing. I wonder if you added sugar or corn syrup to the mix if it would still work then you could eat them yummm!!! You would have to boil the sugar first to make it syrupy? Worth a try?