
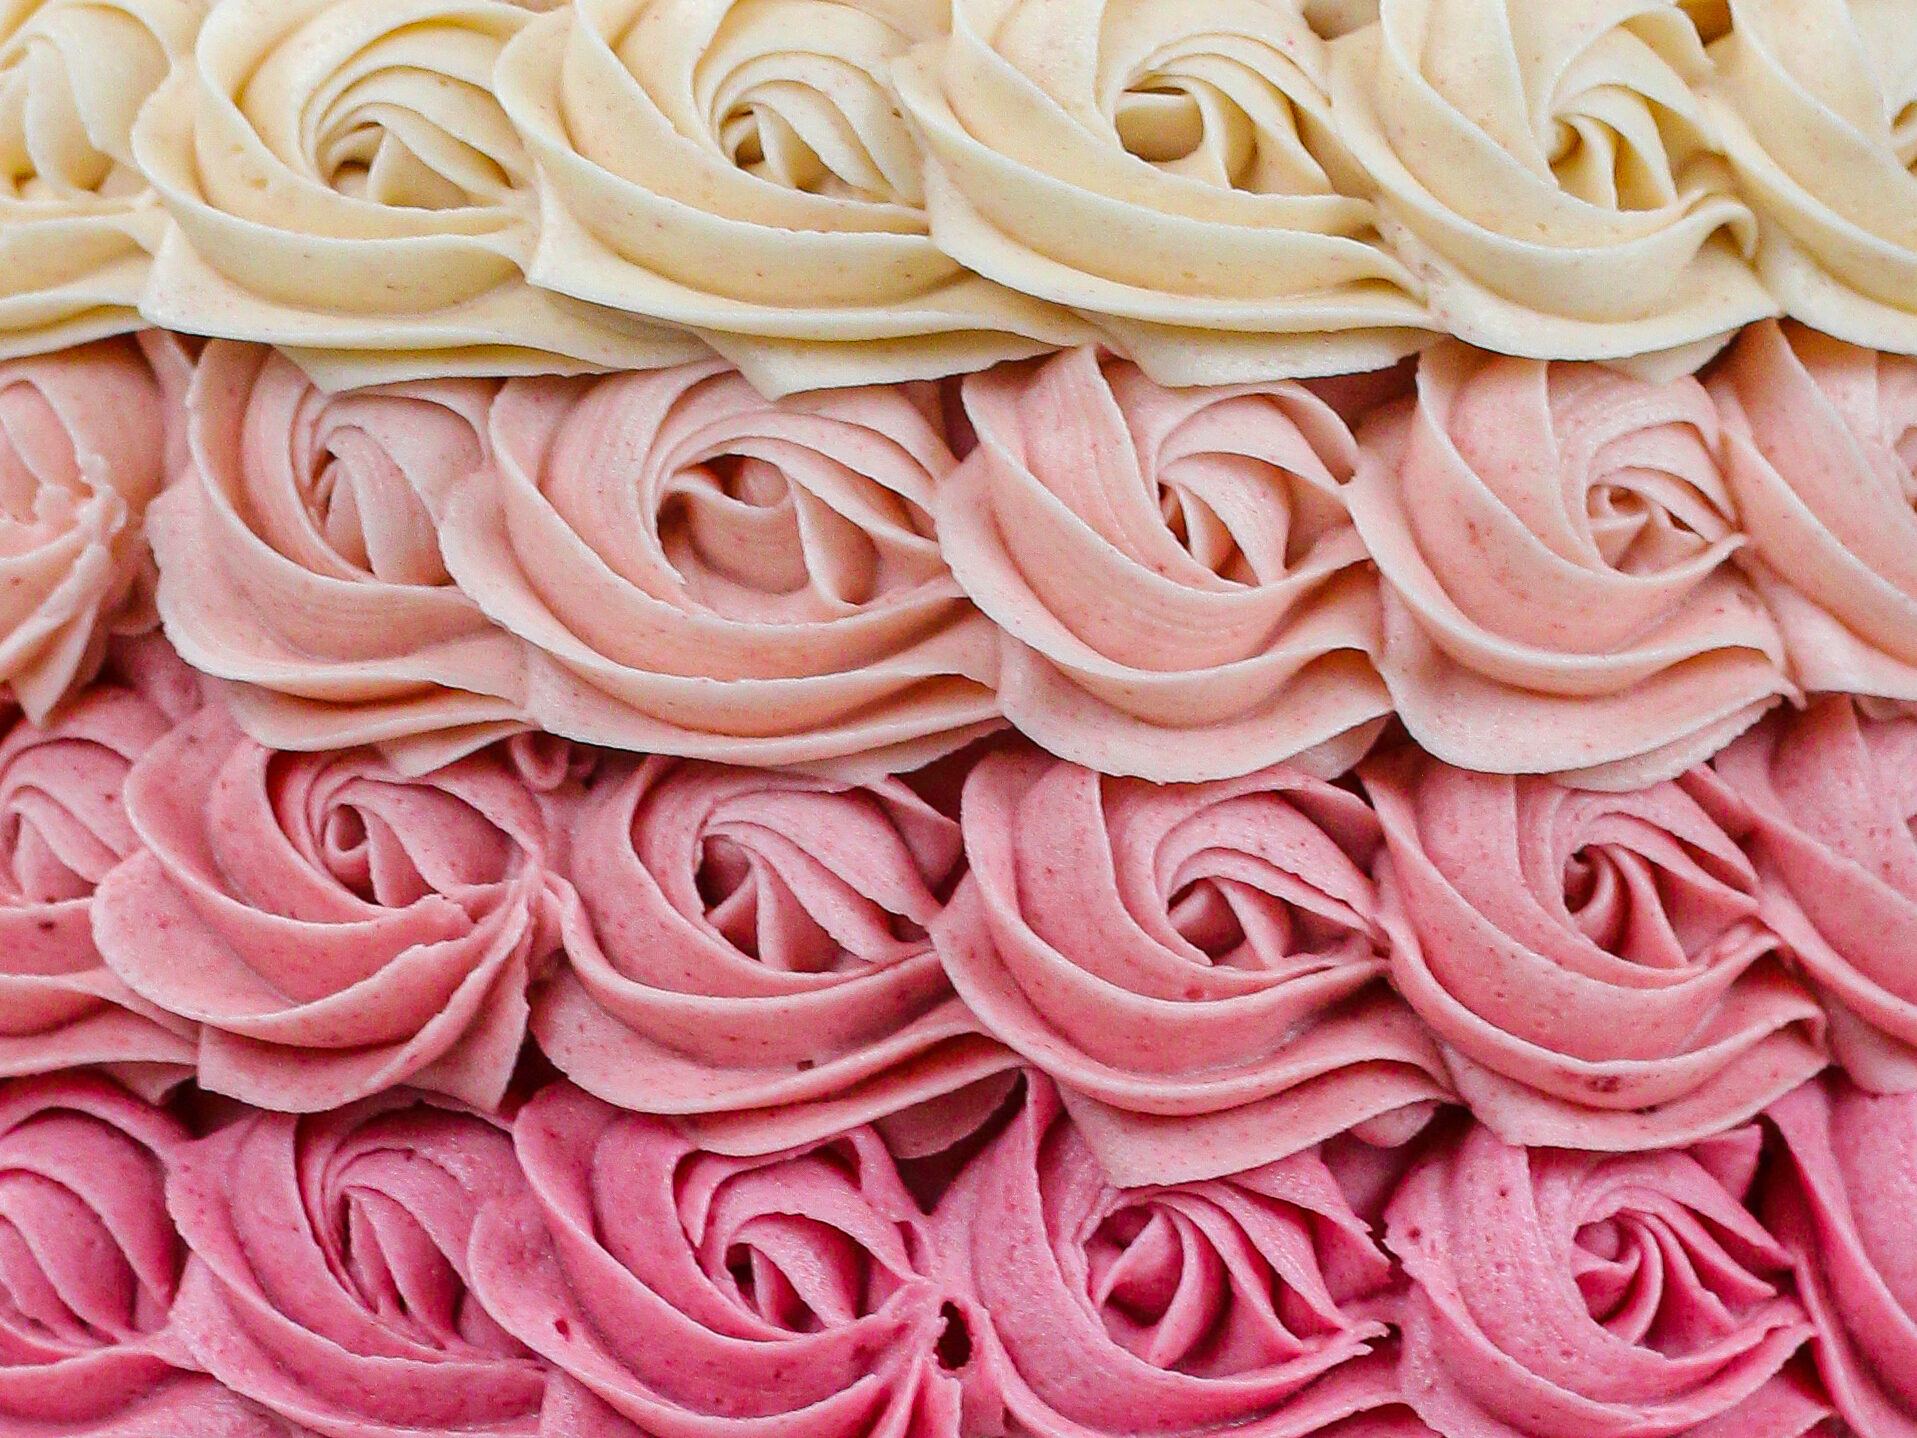
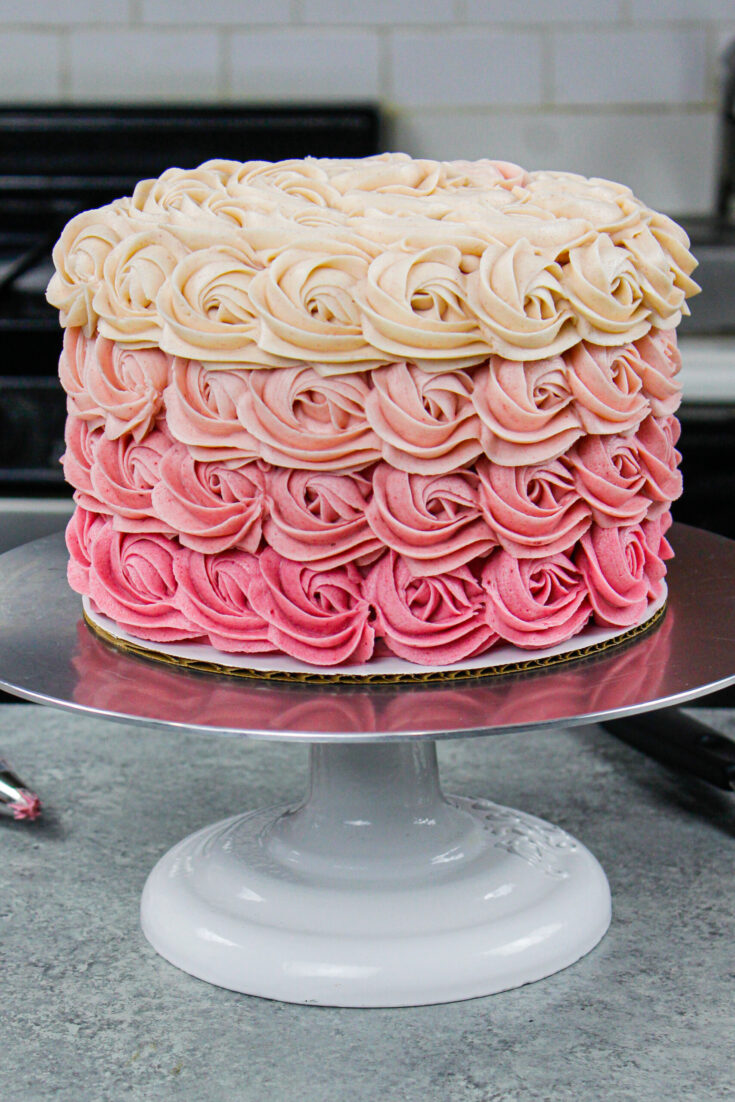
On their own, buttercream rosettes are such an easy and gorgeous way to decorate a cake. Then if you throw some ombre frosting into the mix, you end up with a truly stunning, ombre rosette cake.
With the help of an open star tip like a Wilton 1M, these swirls of frosting make your cake look like a total masterpiece.

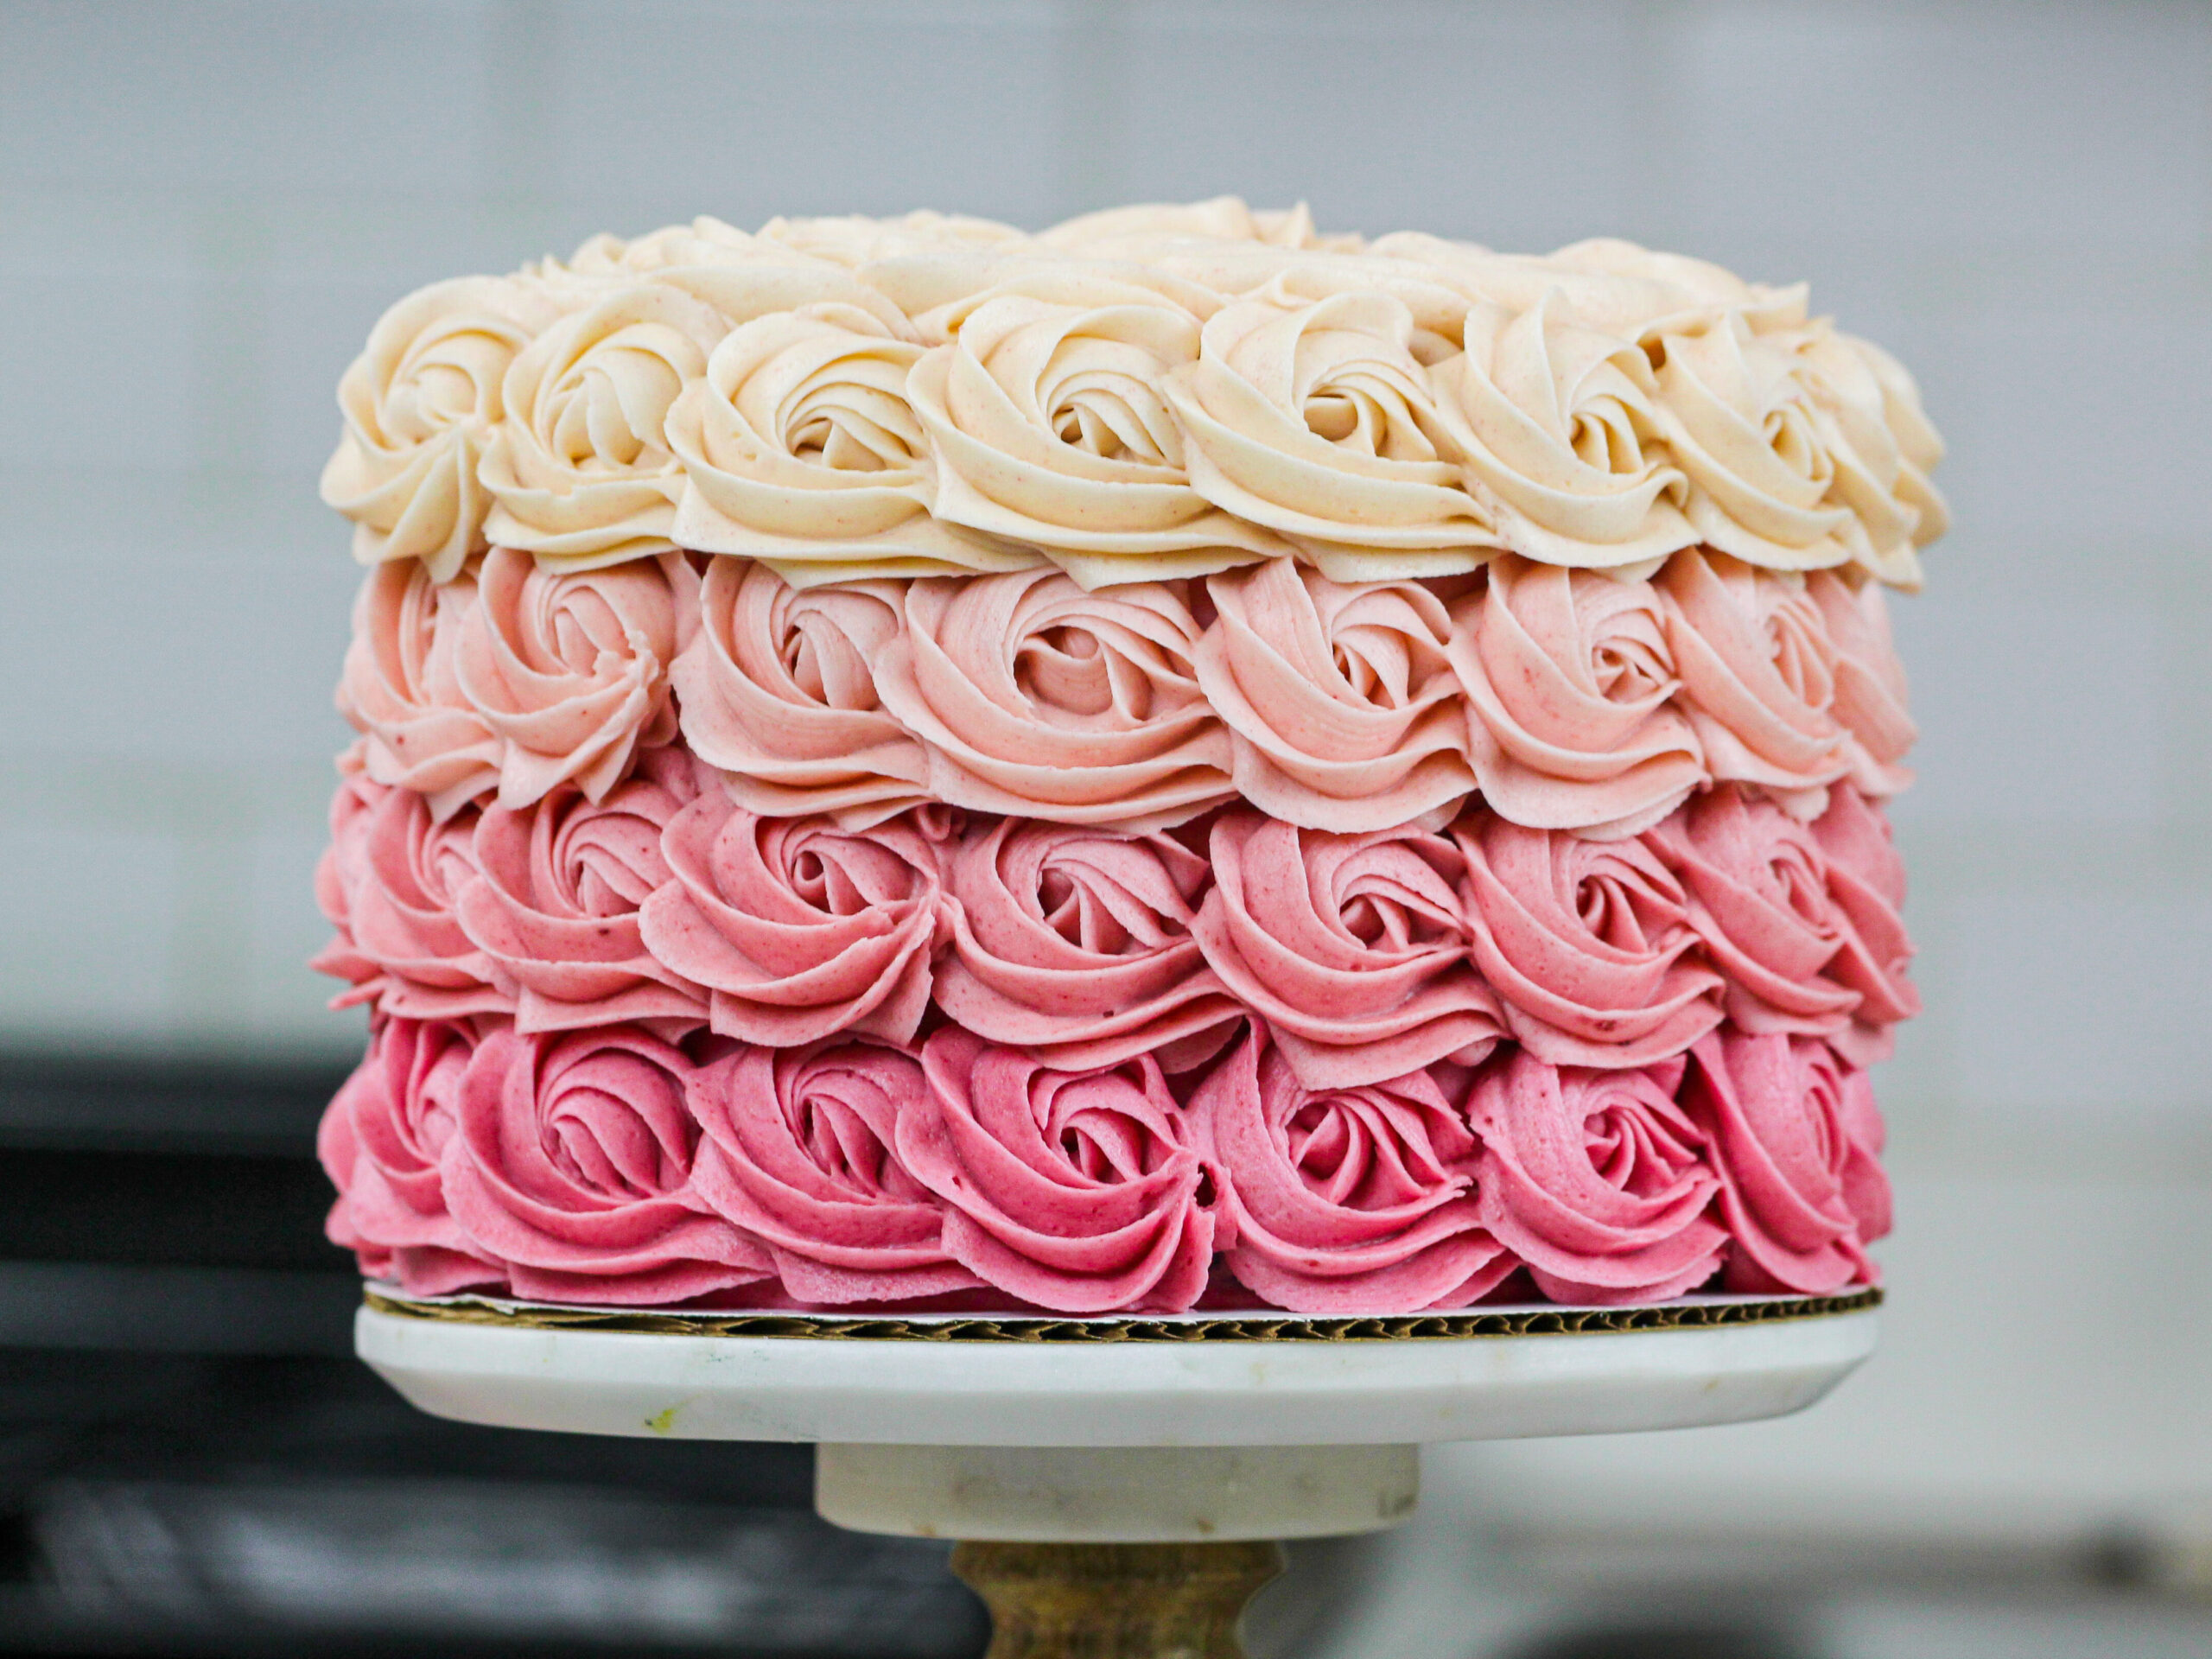
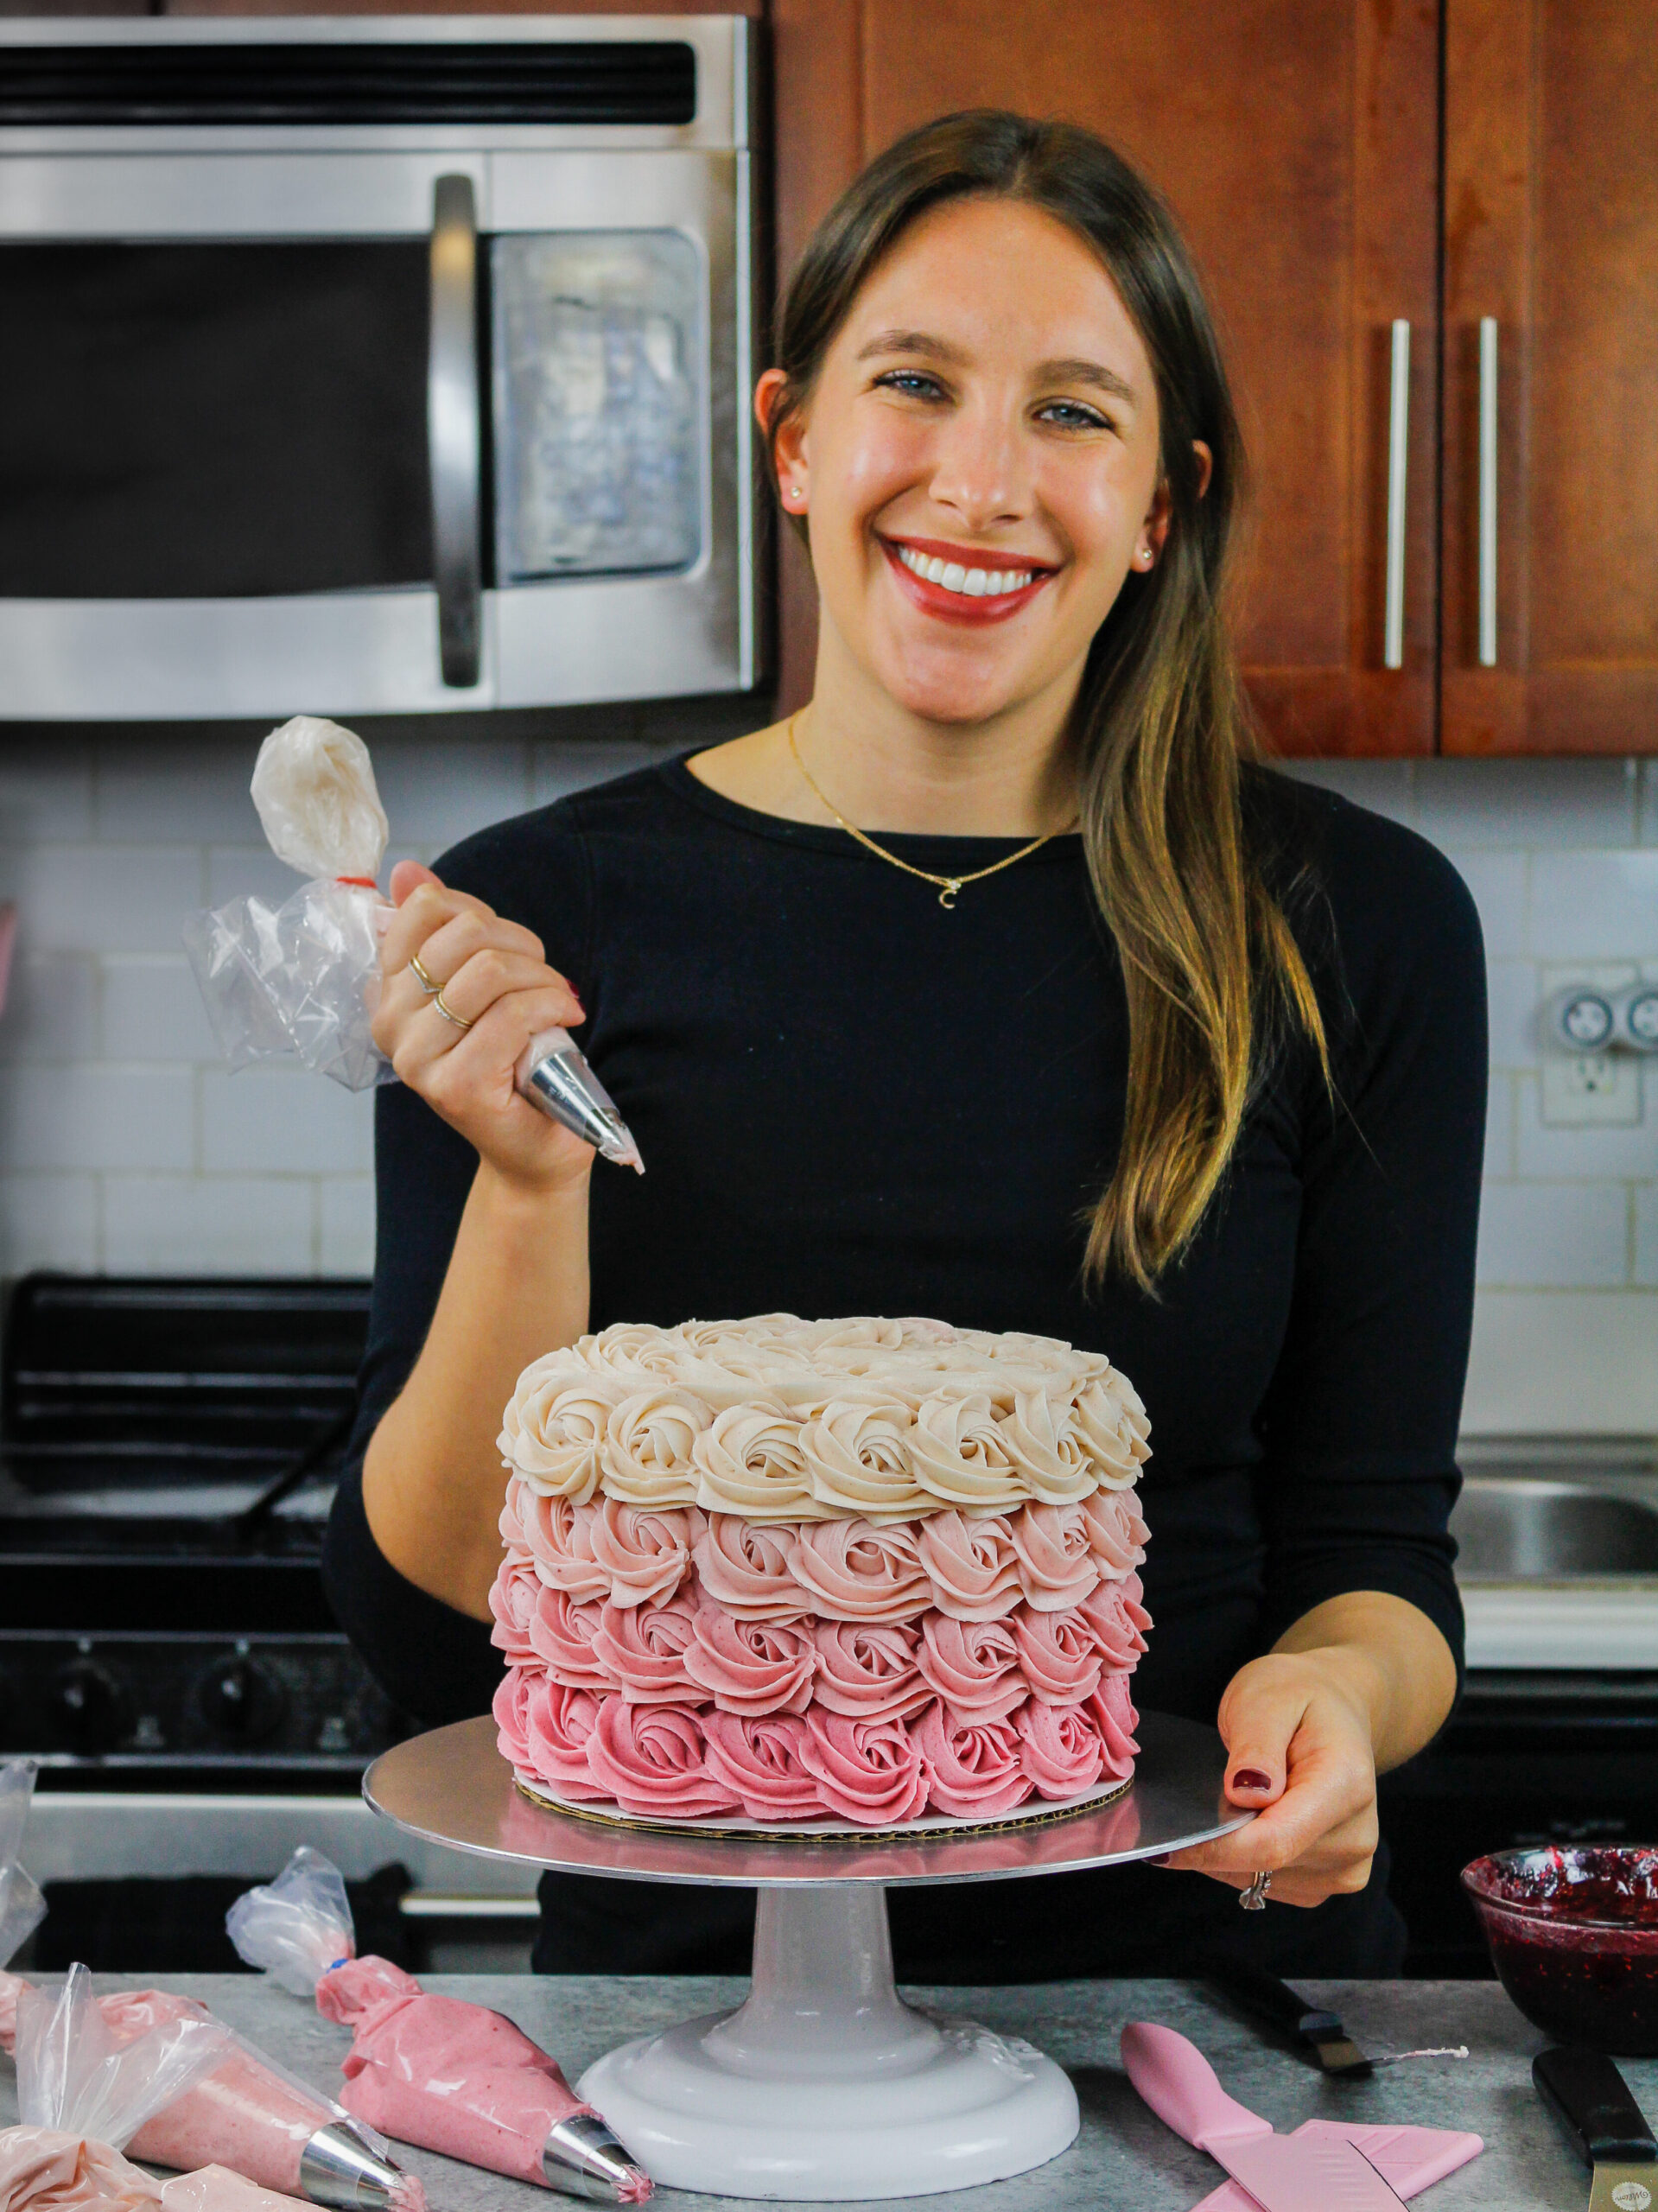
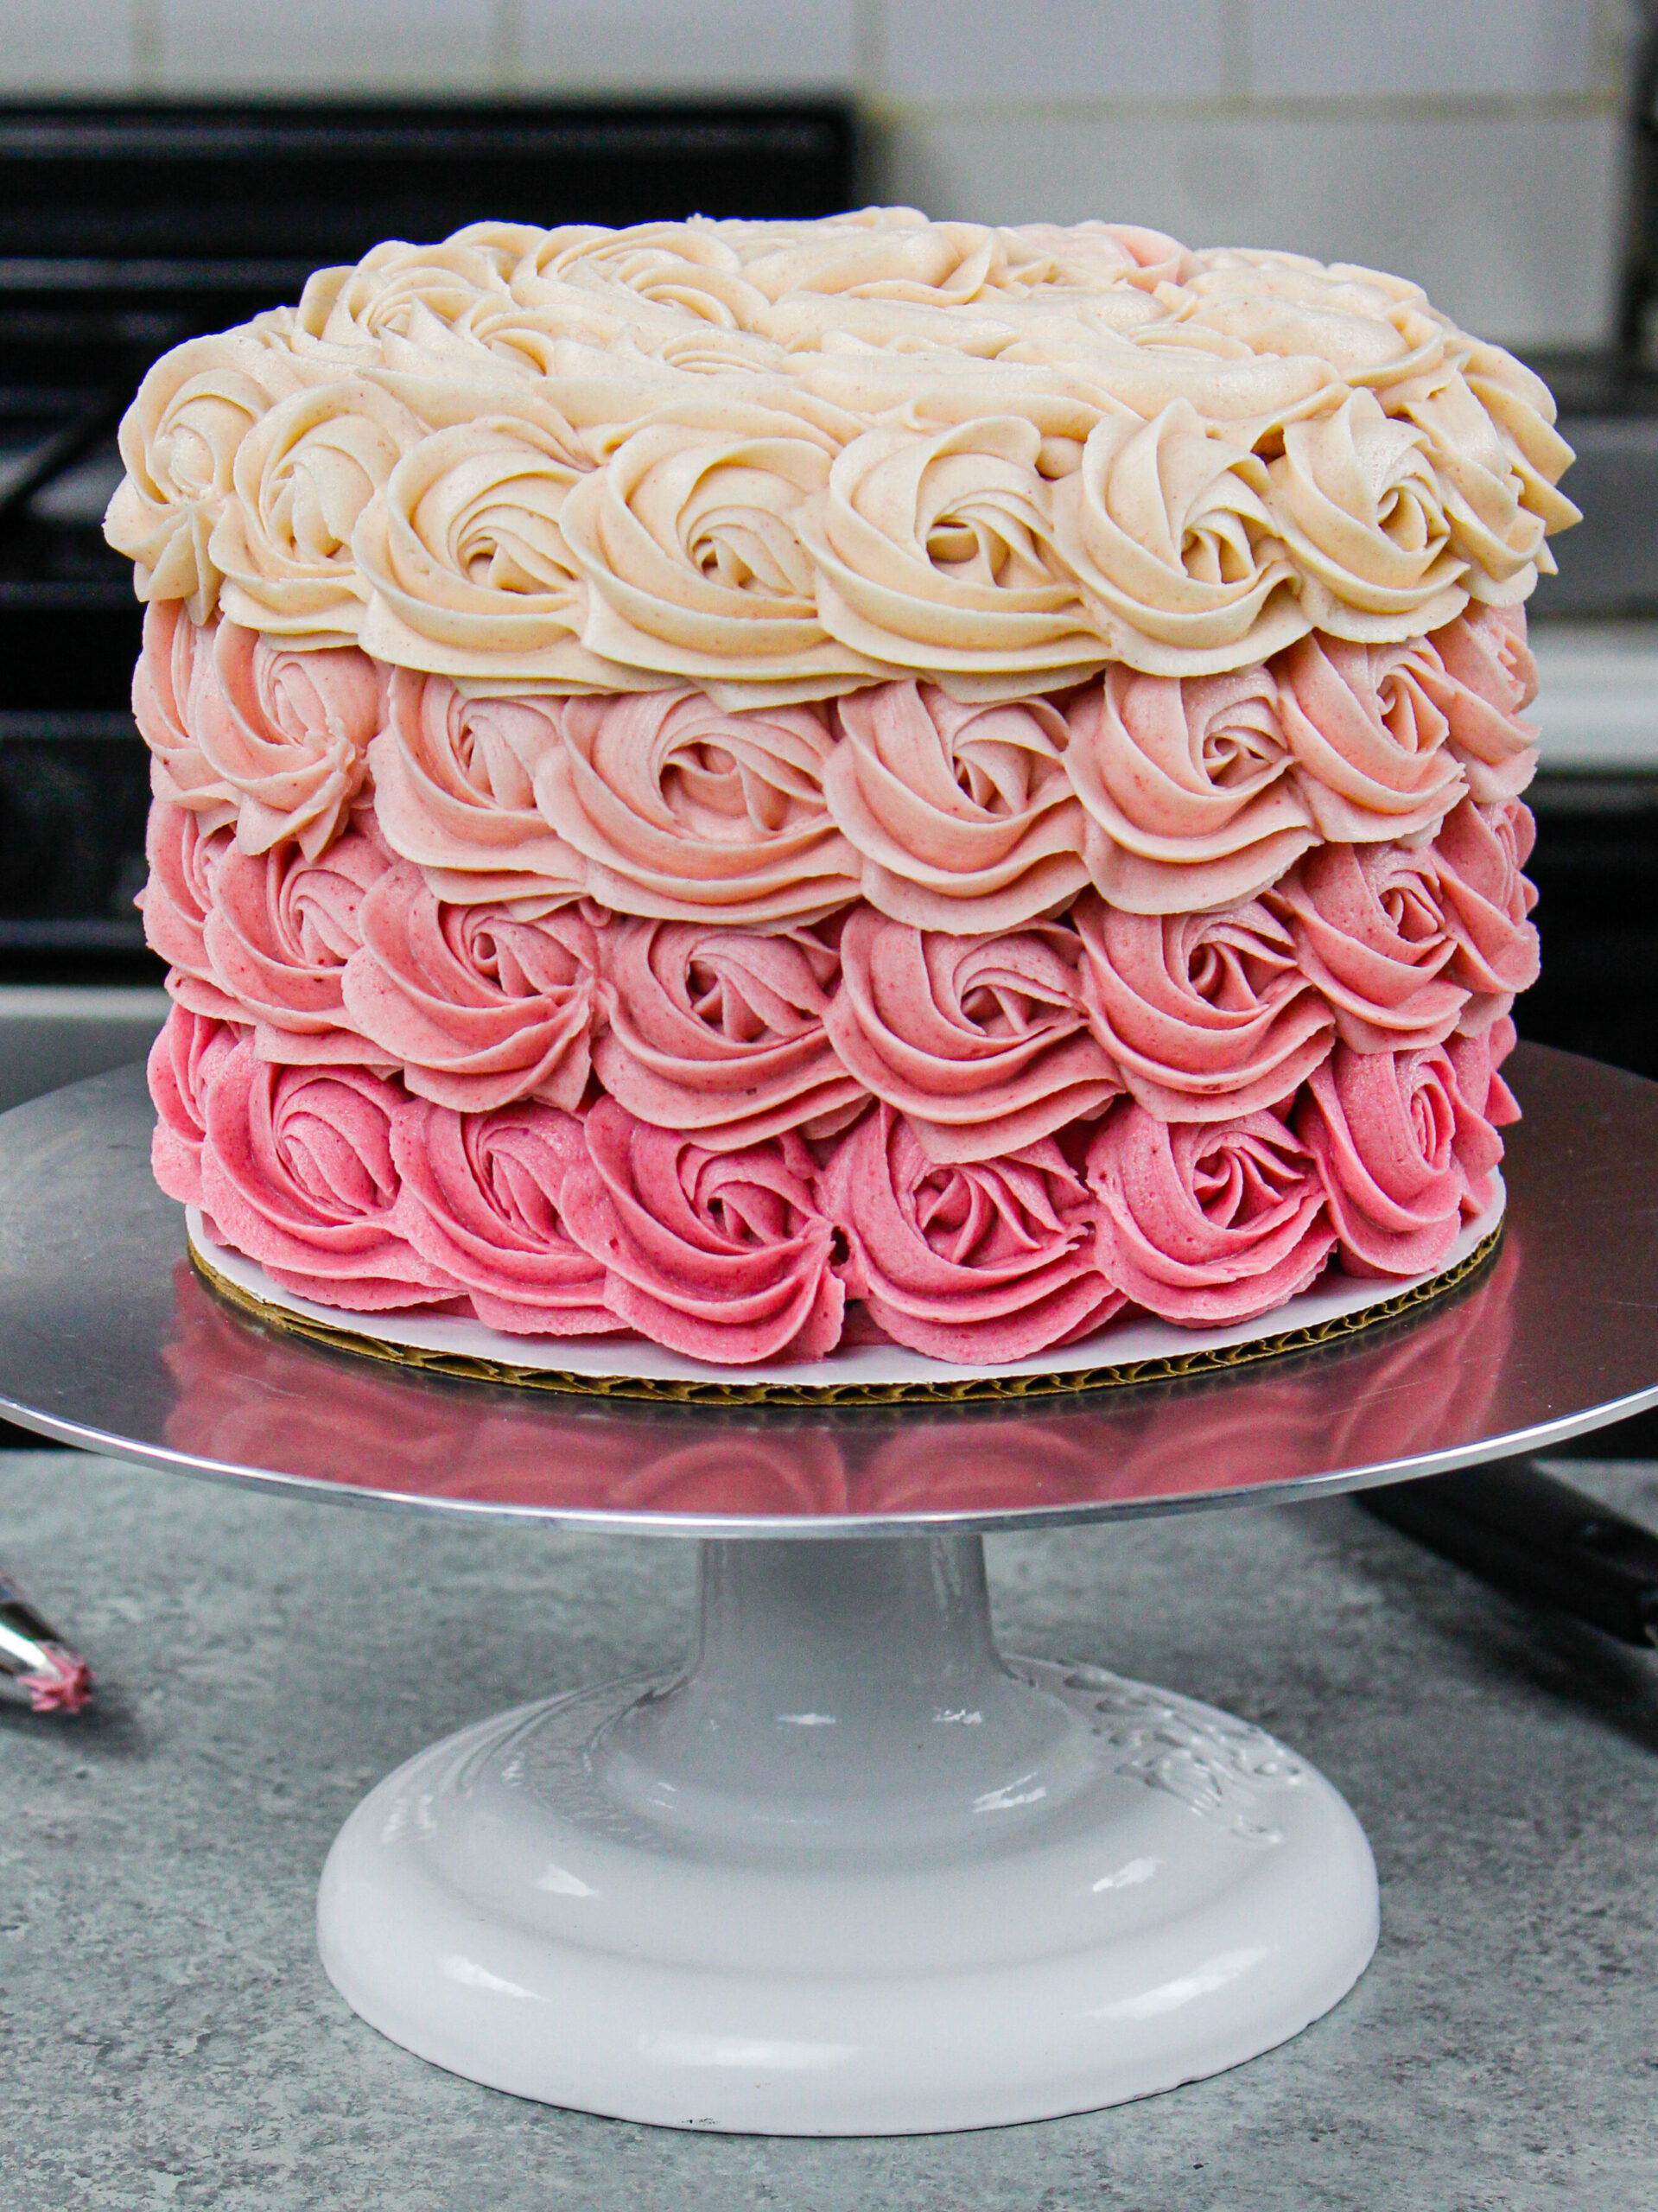
If this technique is new to you, don’t worry! I walk through everything you need to know below to make the perfect ombre rosette cake. I chose to make a pink rosette cake, but you can color your buttercream any color you want!
What Frosting Tip Works Best for Piping Rosettes?
My go-to piping tip (and in my opinion the best piping tip) to use to make buttercream rosettes is an open star tip.
Different brands make different versions of this, but the most common are a Wilton 1M or an Ateco 824.
I used a Wilton 1M to pipe the rosettes on this cake and I love the way they look.

With that in mind, you can also used a closed star piping tip like a Wilton 2D or an Ateco 34.
What You Need to Make an Ombre Rosette Cake
One of the best parts about this cake design is that you really don’t need a ton of tools or fancy equipment. In fact, you don’t even need a spinning cake stand.
The things you will need are:
- Open or closed star frosting tip (like a Wilton 1M or Wilton 2D)
- 4 large frosting bags
- Food coloring – You can use liquid, gel, powder, or natural coloring like raspberry powder!
If you have 4 plastic frosting bag couplers, you only need 1 of these frosting tips. A coupler allows you to add and remove a frosting tip from bag to pag, which means you can use the same frosting tip on all four frosting bags.
If you don’t have frosting couplers, you will need 4 of the same frosting tips.
How to Make Perfect Ombre Buttercream Frosting
Now that we’ve covered what tools you need, let’s talk about making perfectly colored ombre frosting.
The first thing is making sure your have enough buttercream in each color. While you might think you want to make even amounts of each color, you’re mistaken! You need a bit more of the lightest buttercream if you want to be able to cover the entire top of the cake with rosettes.
I like to divide the frosting into four bowls in the following ratios: lightest (2/5), medium (1/5), dark (1/5), darkest (1/5).
Then it’s time to color your buttercream! You can do this with liquid food coloring, gel food coloring, or with natural food coloring (like raspberry powder).
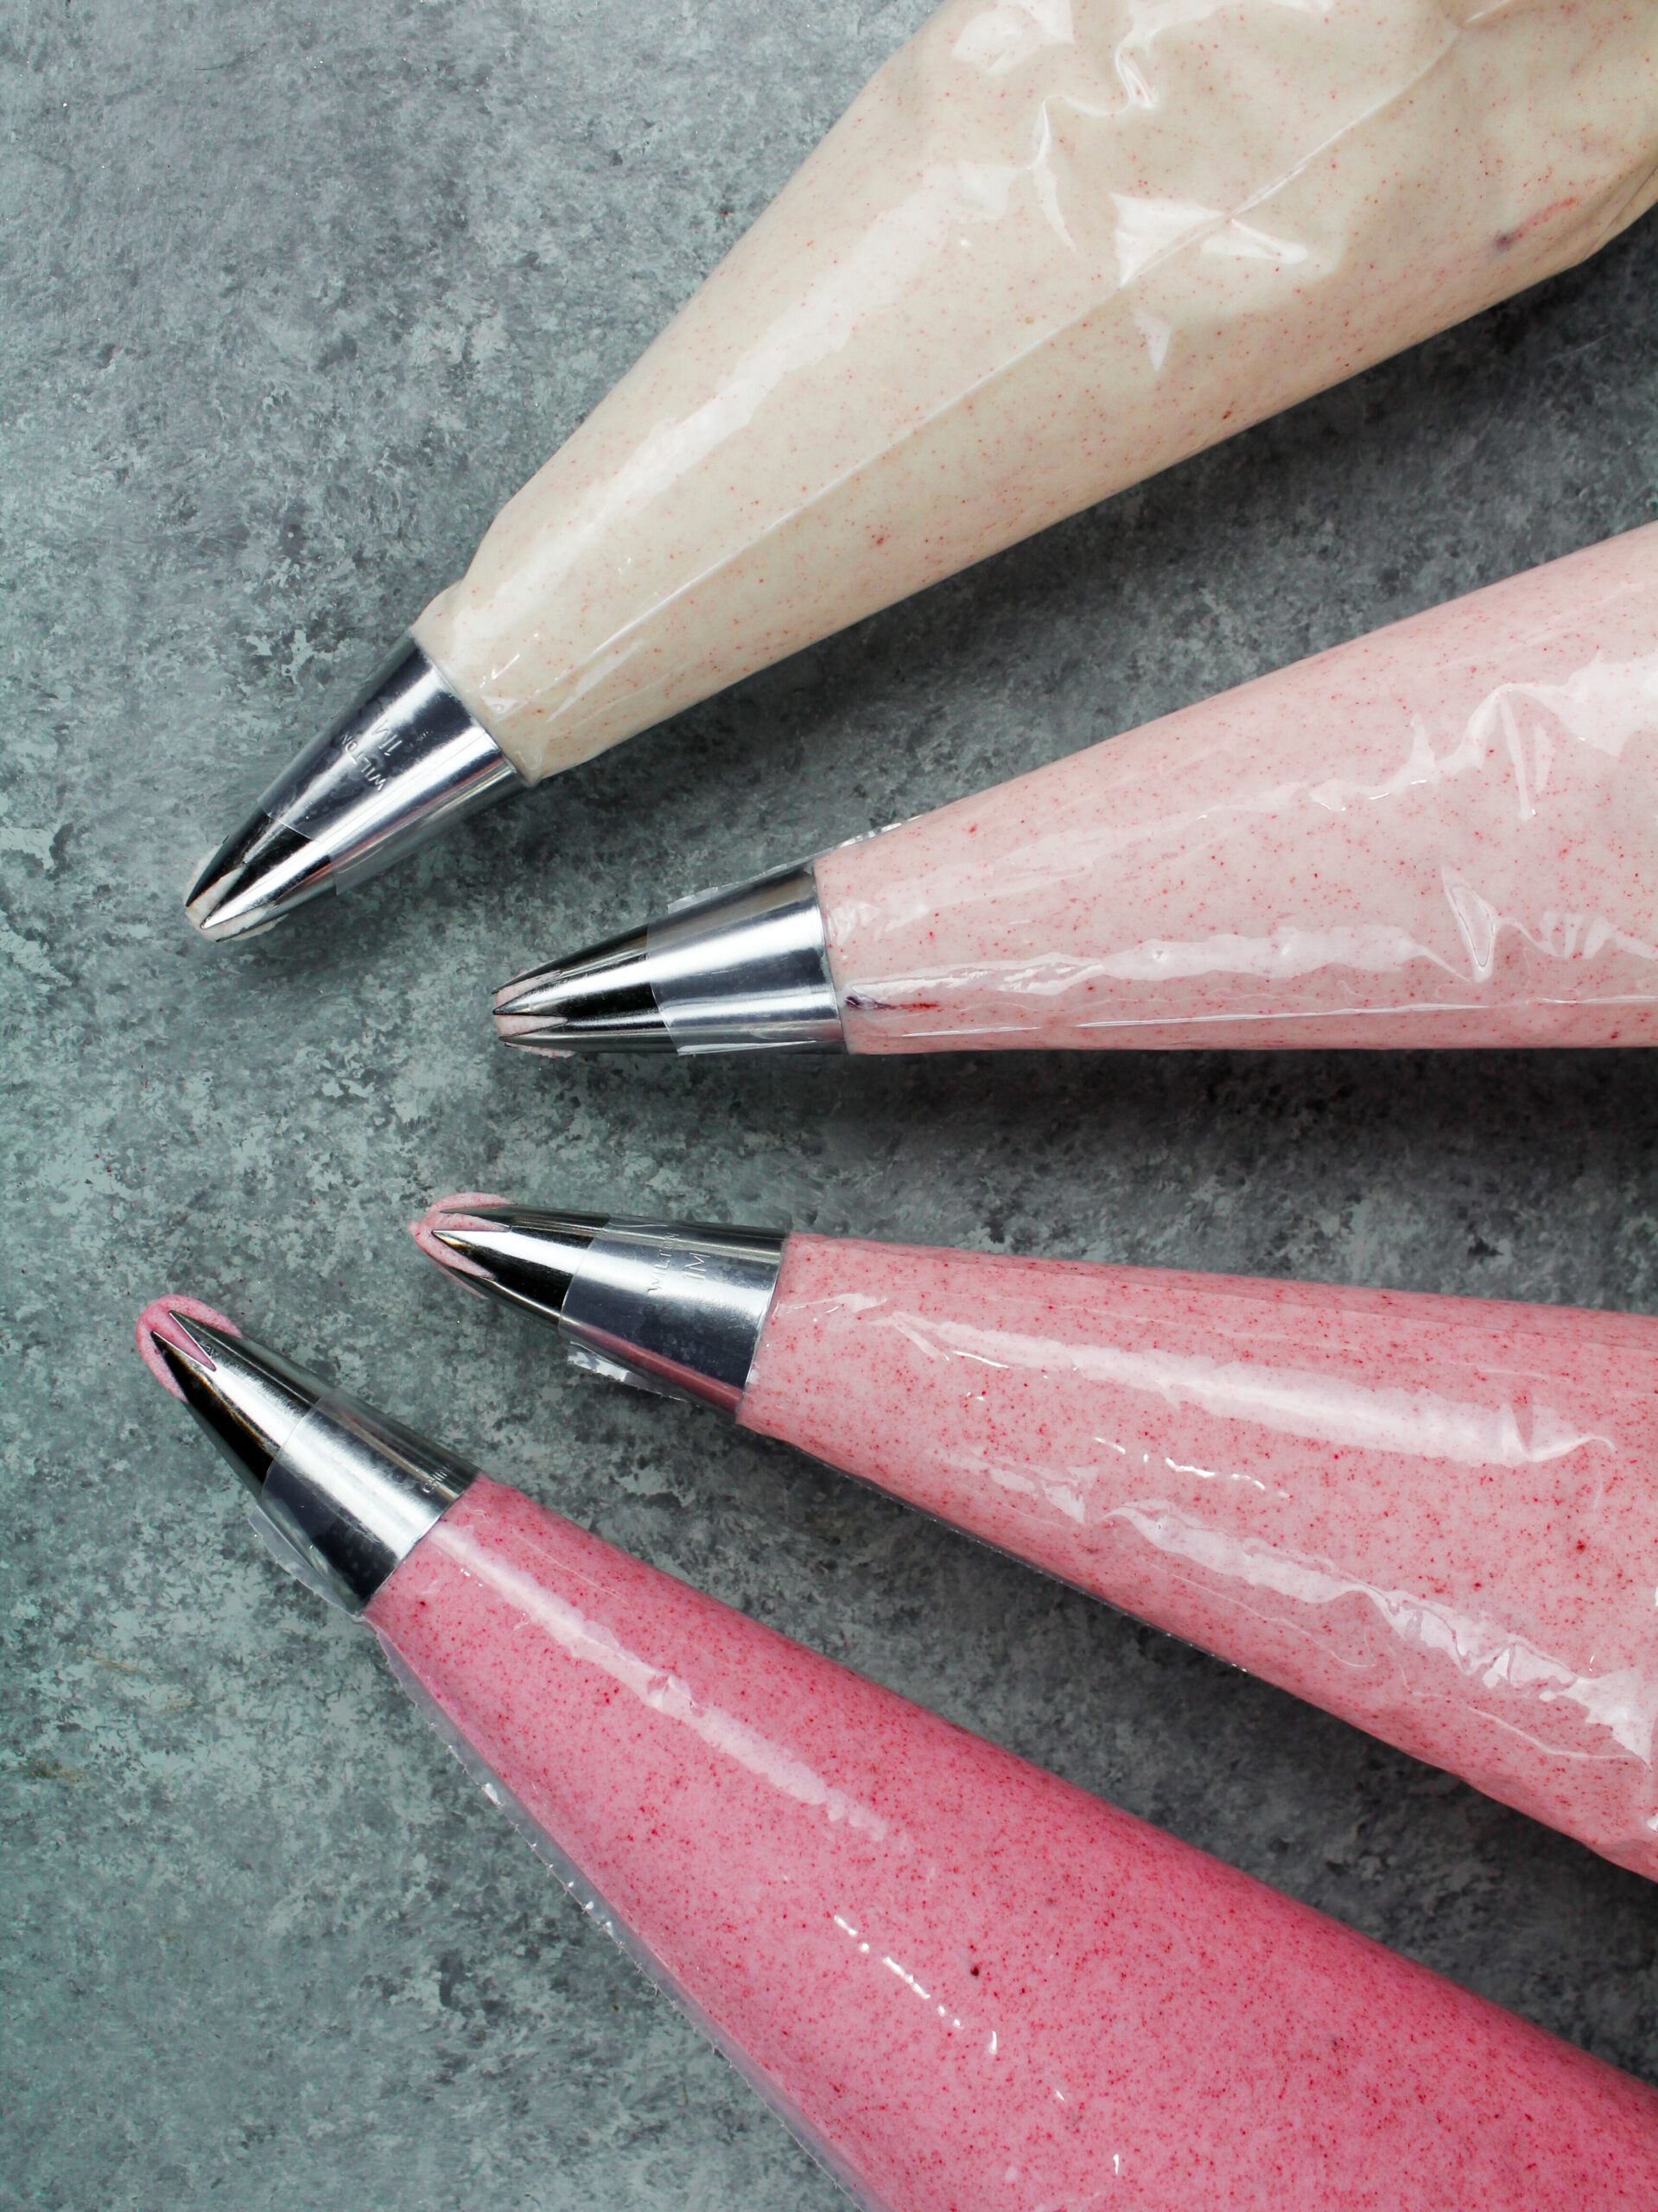

The two key to getting your shades just right is to use just one shade of food coloring, and add it in increasing increments. For example, add one drop to the first bowl, two drops to the second bowl, etc.
I like making all four shades in different bowls so that you can see the shades together before I add them into piping bags. This allows you to make sure that all the shades look good together and enables you to easily make any adjustments if needed.
Properly Crumb Coating a Buttercream Rosette Cake
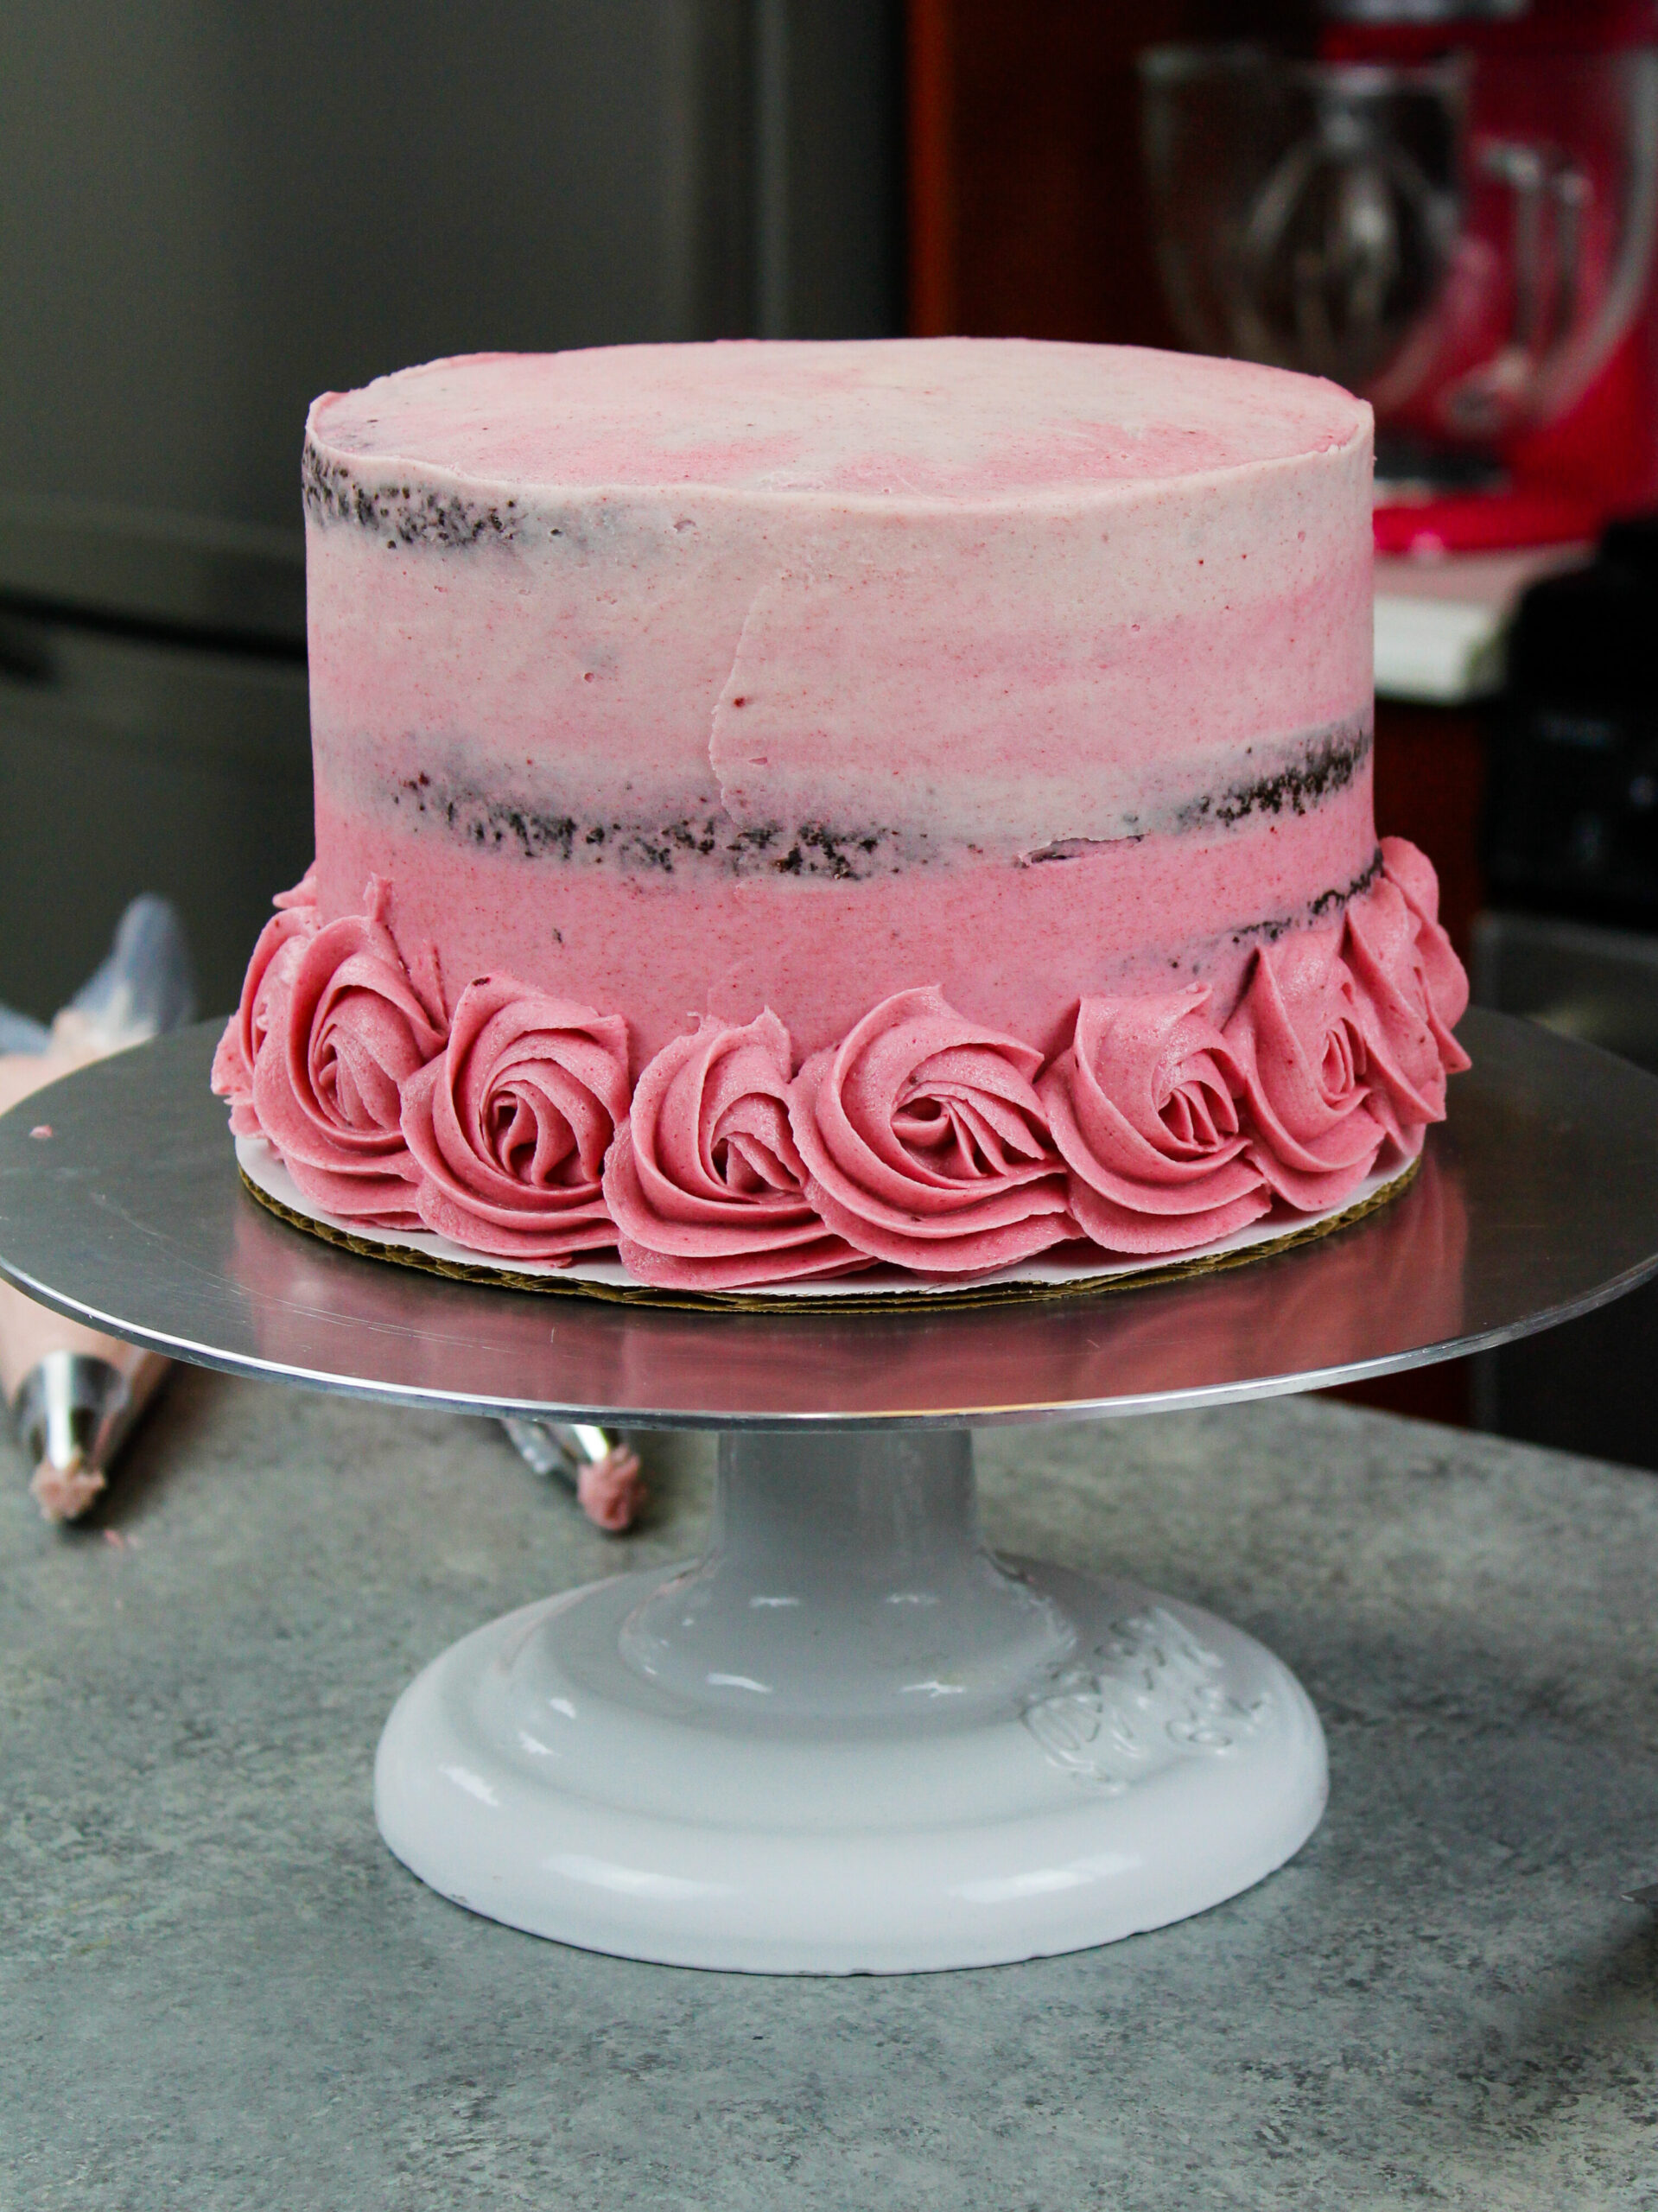
The next thing to consider is the crumb coat, which is the thin layer of buttercream you cover a cake with to trap in any rogue crumbs. I’m sure you’re thinking a crumb coat is a crumb coat, but there is actually a bit of strategy to it when it comes to making an ombre rosette cake.
If you want to use colorful buttercream to pipe your rosettes, I highly recommend using the same color of buttercream to crumb coat your cake. This will help camouflage any little gaps between your rosettes.
For this cake, I used my darked pink frosting for the bottom of my crumb coat and my lightested buttercream on the top.

Practice Makes Perfect
If you aren’t super comfortable with a piping bag or you haven’t piped a buttercream rosette before, I recommend practicing on a piece of parchment or wax paper before you tackle your cake.
Tape down a small piece of parchment paper on your counter and practice the motion. Hold the piping bag perpendicular to the counter and slowly pipe a spiral starting in the center and working your way out.
Once you get to the end of the rosette, stop squeezing and continue moving your hands in the same direction you were piping until the buttercream separates from the piping tip. Try to focus on piping your rosettes in the same direction and roughly same size.
Repeat and continue to practice until you feel comfortable with the motion. Scrape the frosting off the parchment paper and place it back into your piping bag to avoid waste.

How to Pipe Ombre Buttercream Rosettes on a Cake
When you’re ready to pipe rosettes onto your cake, I recommend making three, evenly spaced lines around the cake with an offset spatula. This will allow you to pipe four even rows of rosettes that are all evenly sized and spaced.
Then start with your darkest buttercream and pipe a row of rosettes around the base of the cake. Repeat this process with the remaining ombre frosting, working your way to the top from darkest to lightest.
To give your rosettes a super clean, cohesive look I recommend ending each rosette where you plan to pipe the center of the next rosette (just like I do in the video in this post!). This will allow you to hide the tail of each rosette under the rosette next to it.

Tips for Making the Best Ombre Rosette Cake
- Chill your cake layers in the freezer for about 20 minutes before assembling the cake. This makes them easier to stack and frost.
- Level your room temperature or thawed cake layers with a serrated knife to make them easier to stack.
- Make sure your buttercream is the right consistency. It allows you to easily pipe your rosettes and have them keep their shape.
- Crumb coat your cake in the same color(s) you plan to pipe your rosettes! This will help camouflage and gaps between your rosettes.
- Chill your crumb-coated cake to help the rosettes stay in place as you pipe them.
- Make three, evenly spaced lines around the cake with an offset spatula before piping the rosettes. This will allow you to pipe four even rows of rosettes that are all evenly sized and spaced.
- End each rosette where you plan to pipe the center of the next rosette. This will allow you to hide the tail of each rosette under the rosette next to it.
Making This Ombre Rosette Cake in Advance and Storage Tips
- Make your cake layers in advance and freeze them. It breaks the process up and make it more approachable.
- Make your frosting ahead of time or save any leftover frosting! It can be stored in an airtight container in the fridge for up to a month.
- This frosting can also be stored in the freezer for up to 3 months! Just be sure to give it a good stir once it thaws to make it nice and smooth again.
- A frosted cake can last in the fridge for a week, or in the freezer for a month. The buttercream locks in the moisture and keeps the cake fresh and delicious!

Let Me Know What You Think
If you try this ombre rosette cake recipe, I’d love to hear what you think! Please leave a rating below and a comment to let me know your thoughts.
Other Recipes You Might Like:


Ombre Rosette Cake

This ombre rosette cake recipe is absolutely stunning & surprisingly easy to make! It's made with tender chocolate cake layers & homemade buttercream frosting.
Ingredients
Chocolate Cake Layers:
- 2 cups all-purpose flour (260 grams)
- 2 cups granulated sugar (400 grams)
- 3/4 cup sifted unsweetened cocoa powder (75 grams)
- 2 tsp baking powder (8 grams)
- 1 1/2 tsp baking soda (9 grams)
- 1 tsp salt (6 grams)
- 1 cup very hot water (237 grams)
- 2 tsp. instant espresso of coffee (6 grams)
- 1 cup buttermilk (240 grams)
- 1/2 cup vegetable oil (120 grams)
- 2 tsp vanilla extract (8 grams)
- 1 tsp vinegar (4 grams)
- 2 eggs, room temperature (112 grams)
Pink Ombre Buttercream Frosting
- 3 cups unsalted butter, room temperature (678 grams)
- 1 Tbsp vanilla extract (12 grams)
- 1/4 cup raspberry powder - optional
- 1 tsp salt (6 grams)
- 10 cups powdered sugar (1250 grams)
- 1/3 cup heavy cream (or whipping cream) (75 grams)
- pink food coloring
Optional Filling
- 6 Tbsp raspberry jam
- 1 cup fresh raspberries
Instructions
Moist Chocolate Cake Layers:
- Preheat oven to 350°F. Line four 7" or three 8" pans with parchment rounds, and grease with non-stick baking spray. If you don't have enough pans, you can bake these layers in batches! The batter will be fine if it sits out at room temperature for an hour or two.
- Combine 2 cups all-purpose flour, 2 cups sugar, 3/4 cup baking cocoa, 2 tsp baking powder, 1 1/2 tsp baking soda, and 1 tsp of salt in a large bowl. Whisk together until combined.
- In a separate, medium-sized bowl, add 2 tsp instant espresso or coffee into 1 cup of hot water, and stir until dissolved.
- Add in 1 cup buttermilk, 1/2 cup oil, 2 tsp vanilla extract and 1 tsp vinegar into the instant espresso mixture. Give the mixture a quick stir to combine the ingredients.
- Pour the wet ingredients into the dry ingredients. Mix by hand until fully incorporated.
- Stir in 2 eggs eggs, one at a time.
- The batter will be on the thin side, but that’s the consistency you're after!
- Divide the batter evenly between the cake pans, and bake for about 24-27 minutes.
- Remove from oven, and let the cakes sit for about 5 minutes. Gently run an offset spatula around the rim of the cake pans to loosen them.
- Place cake layers into the freezer for 30 minutes to accelerate the cooling process. Once the layers are fully cooled, carefully flip the pans and remove the layers.
- Use a serrated knife to level the tops of the layers. If you're making them in advance you can wrap and freeze them.
Pink Ombre Buttercream Frosting:
- Beat 3 cups of unsalted butter on a medium speed with a stand mixer and paddle attachment or a hand mixer until smooth (1-2 minutes).
- Mix in 1 Tbsp of vanilla extract, 1/4 cup raspberry powder (optional), and 1 tsp salt on a low speed.
- Slowly add in 10 cups of powdered sugar. Half way through add in 1/3 cup of heavy cream to make the frosting easier to mix.
- Continue to mix on low speed for a few minutes, until the desired consistency is reached.
- Place 2/5 of the frosting into a separate bowl, and evenly divide the remaining frosting between 3 separate bowls.
- The bowl with the most frosting will be the lightest shade of pink. Mix an increasing amount of pink food coloring (gel, liquid, or natural) into the remaining bowls. For example, add one drop to the first bowl, two to the second bowl, three to the third, etc.
- Mix the coloring into each bowl of frosting until they're fully colored and adjust the coloring as needed until you have 4 beautiful yet distinct shades of pink (deep pink, medium pink, light pink, white-ish pink)
- Place each shade of frosting into its own piping bag fit with an open star piping tip. Seal the top of each bag with a rubber band and set aside.
To Assemble and Decorate This Ombre Rosette Cake:
- Stack and frost the cake layers on a greaseproof cake board or plate. Use a dab of frosting to help stick the first cake layer to the board.
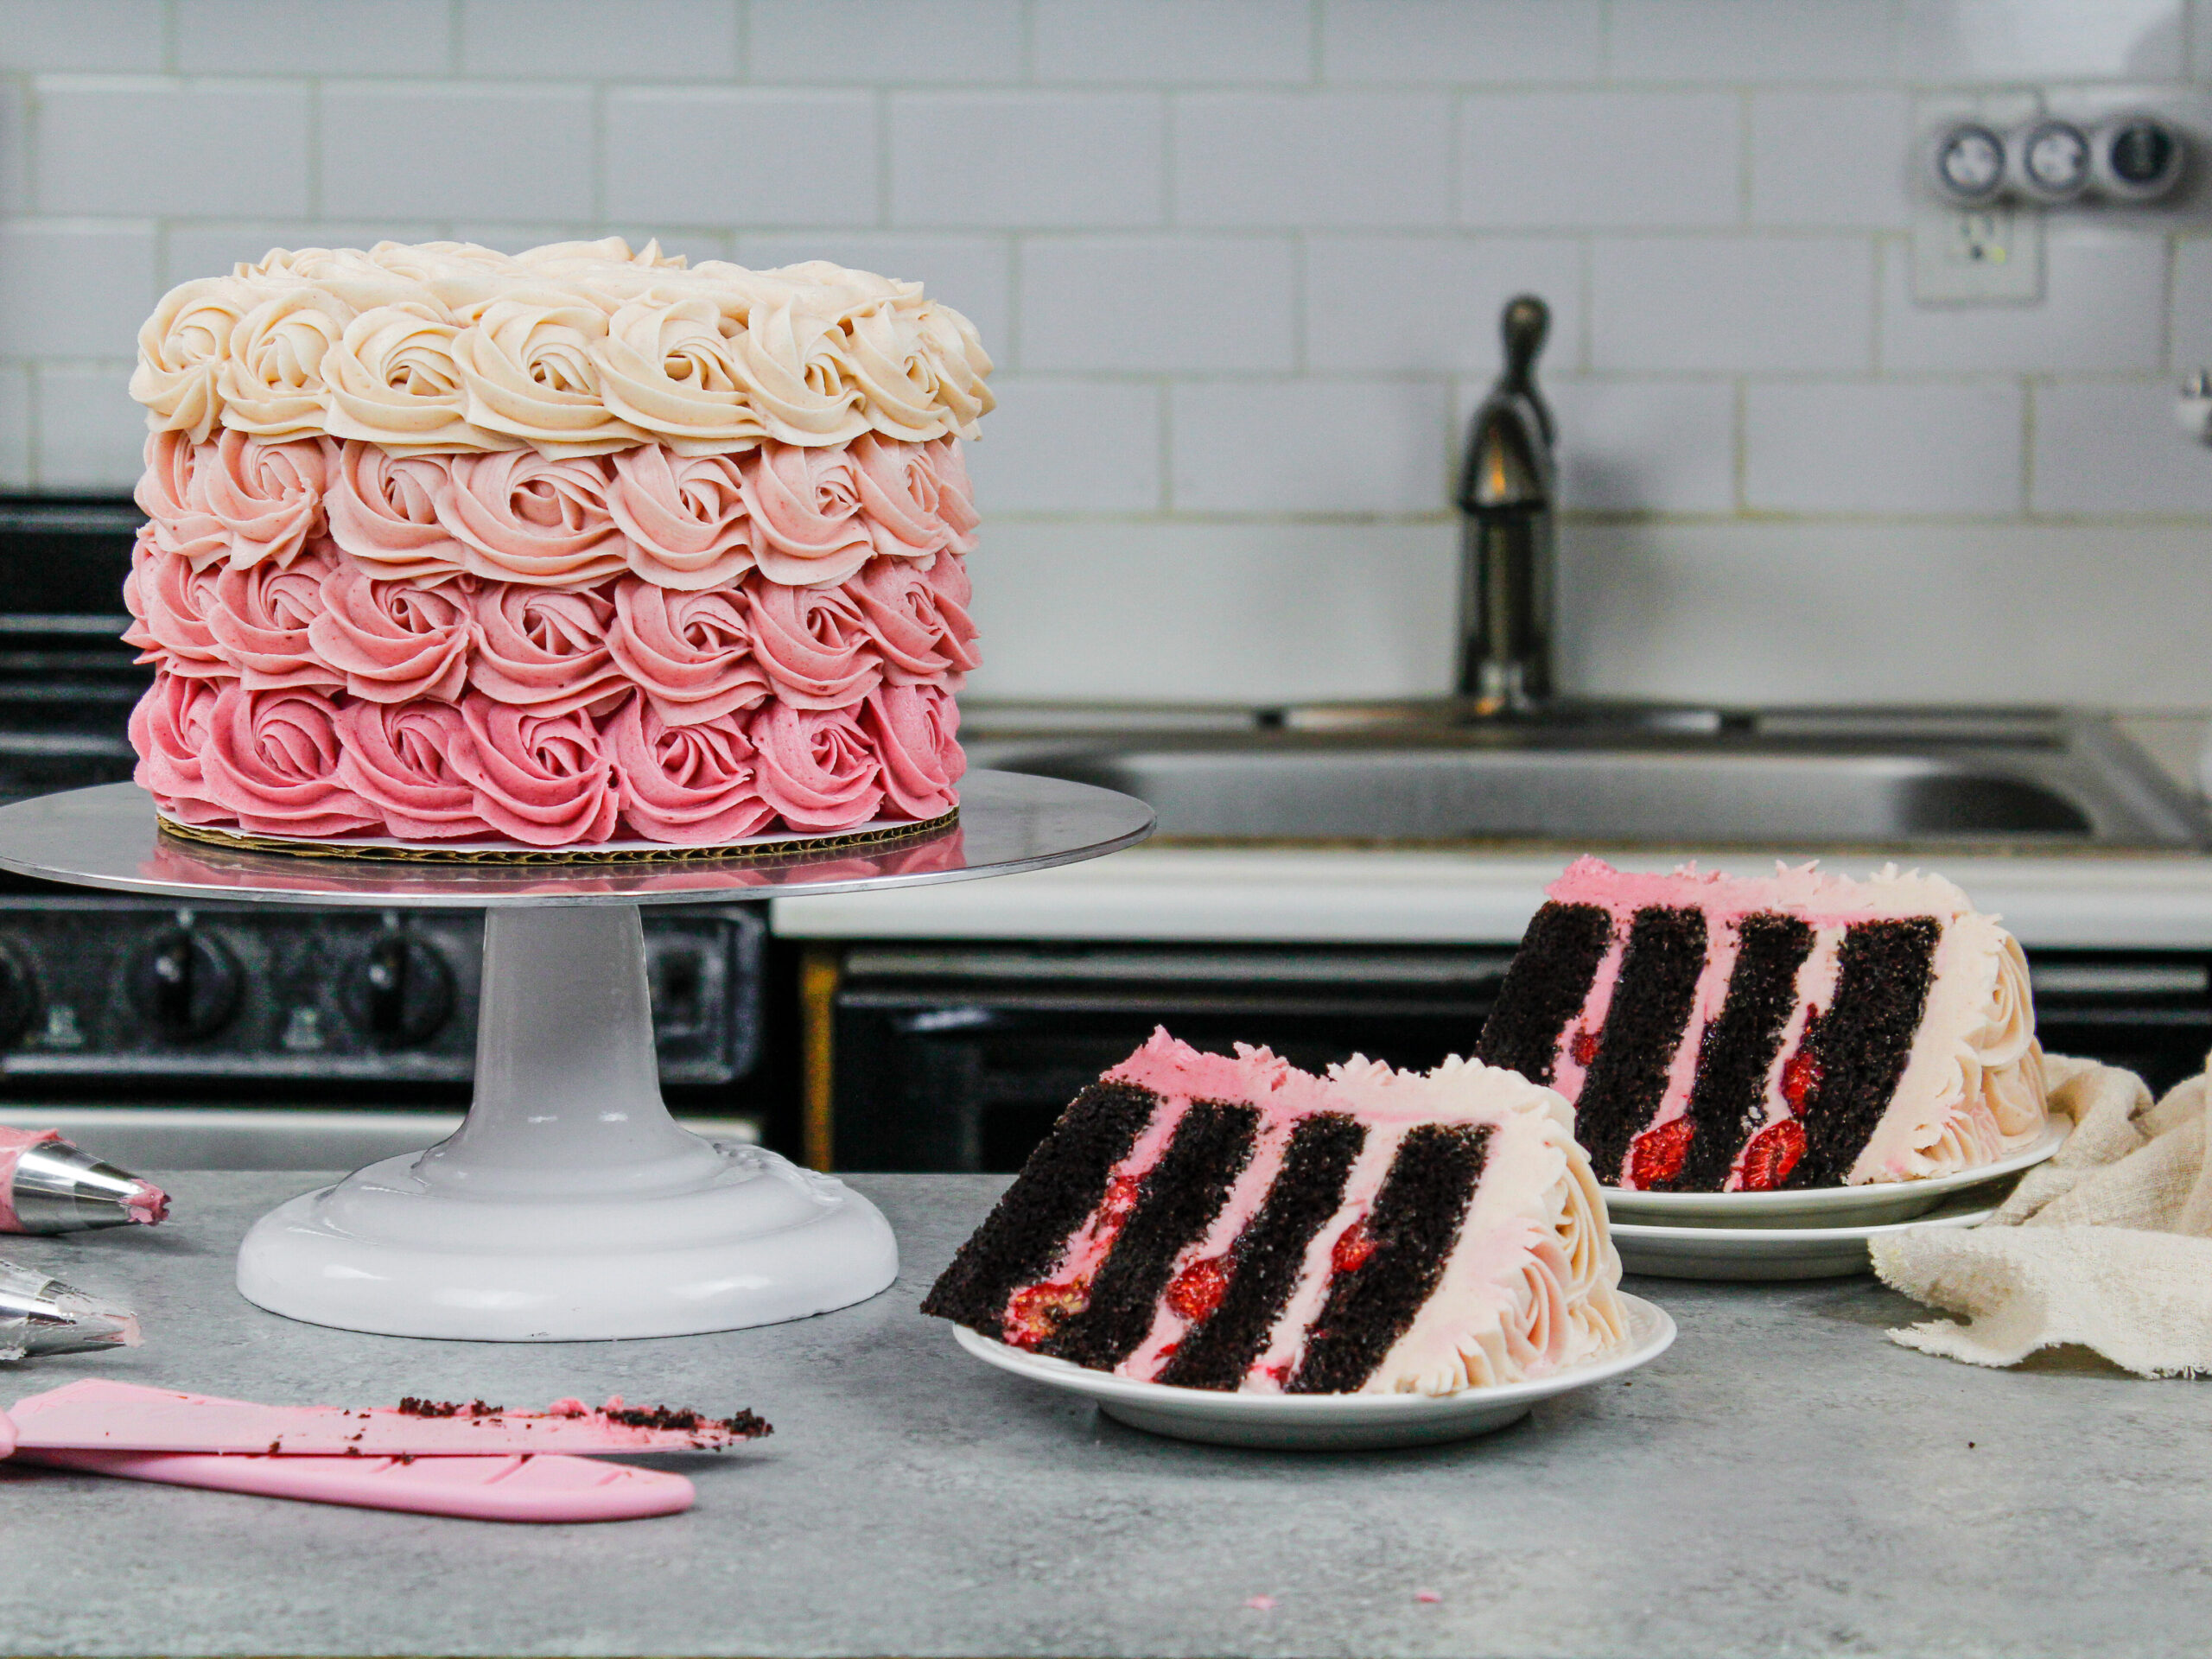
- Cover the first cake layer with an even layer of the deepest pink buttercream, then pipe a ring of buttercream around the edge. Spread 2 Tbsp of raspberry jam on top of the frosting and top with 1/3 cup of fresh raspberries.
- Repeat with the remaining cake layers, using the medium pink frosting on the 2nd layer and then the light pink frosting on the 3rd cake layer.
- Add a thin coat of frosting around the the cake using the overhanging frosting to fully cover the cake layers.
- Smooth using a bench scraper, then chill the cake in the fridge (30 minutes) or freezer (10 minutes) until the frosting is firm to the touch.
- Make three, evenly spaced horizontal lines around the cake with an offset spatula. This will allow you to pipe four even rows of rosettes that are all the same size and properly spaced out.
- Then start with your darkest buttercream and pipe a row of rosettes around the base of the cake. Make sure you pipe your rosettes in the same direction as you go, and feel free to take breaks if your hand gets tired.
- Repeat this piping process with the remaining ombre frosting, working your way to the top from darkest to lightest frosting.
- To give your rosettes a super clean, cohesive look I recommend ending each rosette where you plan to pipe the center of the next rosette. This will allow you to hide the tail of each rosette under the rosette next to it.
- Chill the cake in the fridge for at least 30 minutes once it's decorated to help the rosettes set into place before you cut in.
Notes
Tips for Making the Best Ombre Rosette Cake
- Chill your cake layers in the freezer for about 20 minutes before assembling the cake, to make it easier to stack and frost.
- Level your room temperature or thawed cake layers with a serrated knife to make them easier to stack.
- Make sure your buttercream is the right consistency so that you can easily pipe your rosettes and have them keep their shape.
- Crumb coat your cake in the same color(s) you plan to pipe your rosettes! This will help camouflage and gaps between your rosettes.
- Chill your crumb-coated cake to help the rosettes stay in place as you pipe them.
- Make three, evenly spaced lines around the cake with an offset spatula before piping the rosettes. This will allow you to pipe four even rows of rosettes that are all evenly sized and spaced.
- End each rosette where you plan to pipe the center of the next rosette. This will allow you to hide the tail of each rosette under the rosette next to it.
Making This Ombre Rosette Cake in Advance and Storage Tips
- Make your cake layers in advance and freeze them. It breaks the process up and make it more approachable.
- Make your frosting ahead of time or save any leftover frosting! It can be stored in an airtight container in the fridge for up to a month.
- This frosting can also be stored in the freezer for up to 3 months! Just be sure to give it a good stir once it thaws to make it nice and smooth again.
- A frosted cake can last in the fridge for a week, or in the freezer for a month. The buttercream locks in the moisture and keeps the cake fresh and delicious!
Nutrition Information
Yield
24Serving Size
1Amount Per Serving Calories 621Total Fat 33gSaturated Fat 18gTrans Fat 0gUnsaturated Fat 13gCholesterol 84mgSodium 349mgCarbohydrates 79gFiber 2gSugar 66gProtein 4g
Gelatin Bubbles: Recipe and Step-By-Step Tutorial
Thursday 14th of April 2022
[…] Ombre Rosette Cake Chocolate Drip Cake How to Frost a Cake Smoothly French Macarons Yield: 20 […]
Jamie Weitzel
Tuesday 8th of February 2022
Is this entirely colored with the raspberry powder or did you use some gel food coloring too?
How Much Buttercream Do I Need? Helpful Chart & Guide
Thursday 13th of January 2022
[…] style (semi-naked, smooth, buttercream rosettes, large swirls on top, on […]
Blue Mirror Glaze Cake: Recipe & Step by Step Video Tutorial
Thursday 13th of January 2022
[…] Ombre Rosette Cake […]
How to Make a Rosette Cake: Easy Recipe & Step by Step Tutorial
Sunday 24th of October 2021
[…] purple rosette cake, but you can color your buttercream any color you want and you can even try an ombre effect by using 3 different shades of the same […]