
Lately I’ve been trying to get back to basics. While I’ve shared tons of my favorite cake recipes, I’ve never shared a detailed post on how to frost a cake smoothly. Can you believe it?!
This in-depth post shows exactly how to decorate and frost a cake, from start to finish.
It’s great for new bakers out there or anyone who struggles to frost cakes with smooth sides.
I share what cake boards I use, how to keep your cake layers from sliding around, how to crumb coat (or dirty ice) a cake, and of course how to get smooth sides for a beautiful, finished look.

I’m also going to run through common issues most new bakers run into when they’re frosting layer cakes! This will cover questions like:
- Why are the sides of my cake bulging?
- Why are my cake layers sliding?
- How can I avoid tearing my cake layers while I’m frosting a cake?
- Why is my cake lopsided?
- How can I prevent my cake from sweating / having condensation?
I usually work with American buttercream because it’s my favorite frosting to eat, but this tutorial can be used with any type of buttercream from Russian to Swiss Meringue.
The Tools You’ll Need to Smoothly Frost a Cake
To set yourself up for success, it helps to have the right tools. It’s not 100% necessary to have all of these tools, but they will make your life a lot easier when it comes to cake decorating.
- spinning cake stand (this is my favorite, but a plastic stand like this would work too!)
- greaseproof cake board or completely flat plate
- large and/or small offset spatula
- bench scraper
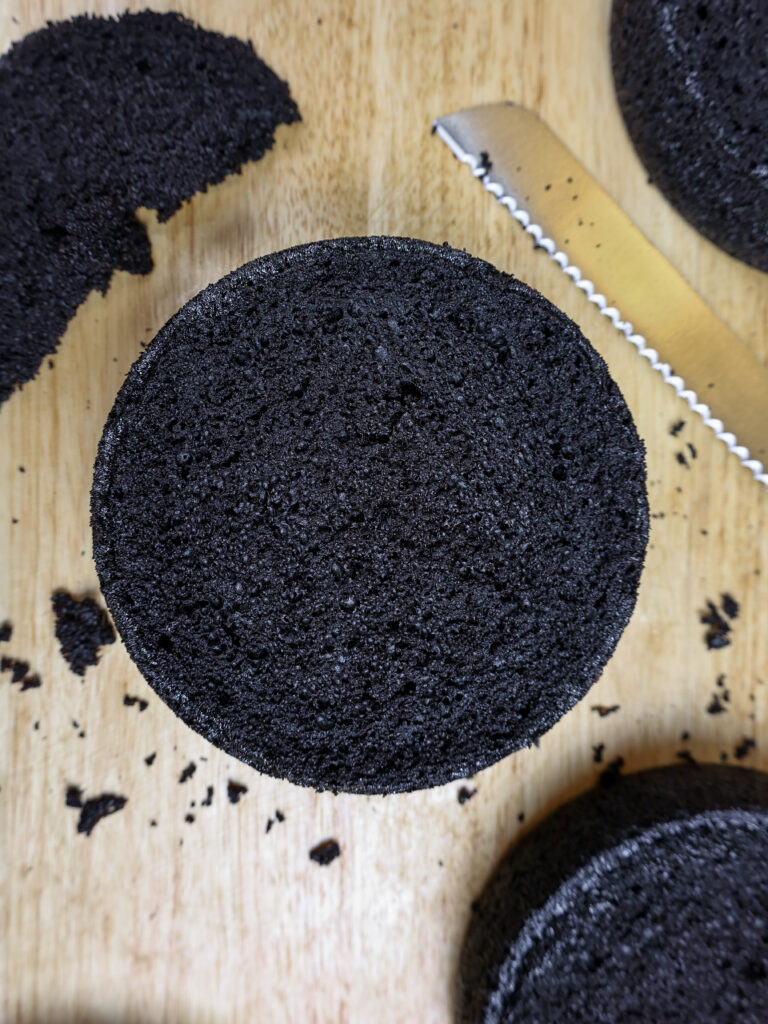
Step 1: Level Your Cake Layers Once They’ve Completely Cooled
This first step is to level your cake layers! This should be done once the cake layers have fully cooled to room temperature. If they’re still warm, they will crumble and you’ll have a real mess on your hands.
Use a serrated knife to carefully level the top of each cake layer.
This will make your cake so much easier to frost and helps avoid bulging frosting or air bubbles that can get trapped between uneven cake layers.

Step 2: Chill Your Cake Layers
This step might sound odd, but I highly recommend chilling your cake layers in the freezer for about 20 minutes before assembling your cake.
It makes them so much easier to handle and minimizes crumbing.
It also prevents your cake layers from sliding around as you’re frosting them.
The cold cake layers cause the buttercream to stiffen up a bit, which makes your cake more stable once it’s assembled.
If you make your cake layers in advance and freeze them, just take them out of the freezer and unwrap them about 20 minutes before you plan to use them.
Step 3: Stack Your Cake Layers
Then it’s finally time to stack your cake layers! Start by spreading a tablespoon of buttercream on the center of your cake board or cake stand.
This will act like glue and help keep your base cake layer in place as you build this cake.
Next, spread a thick, even layer of buttercream on top of each cake layer with an offset spatula. As you stack your cake layers, make sure they’re aligned and straight.
I like to use my bench scraper as a guide and press it against the side of the cake to see if the layers are aligned.

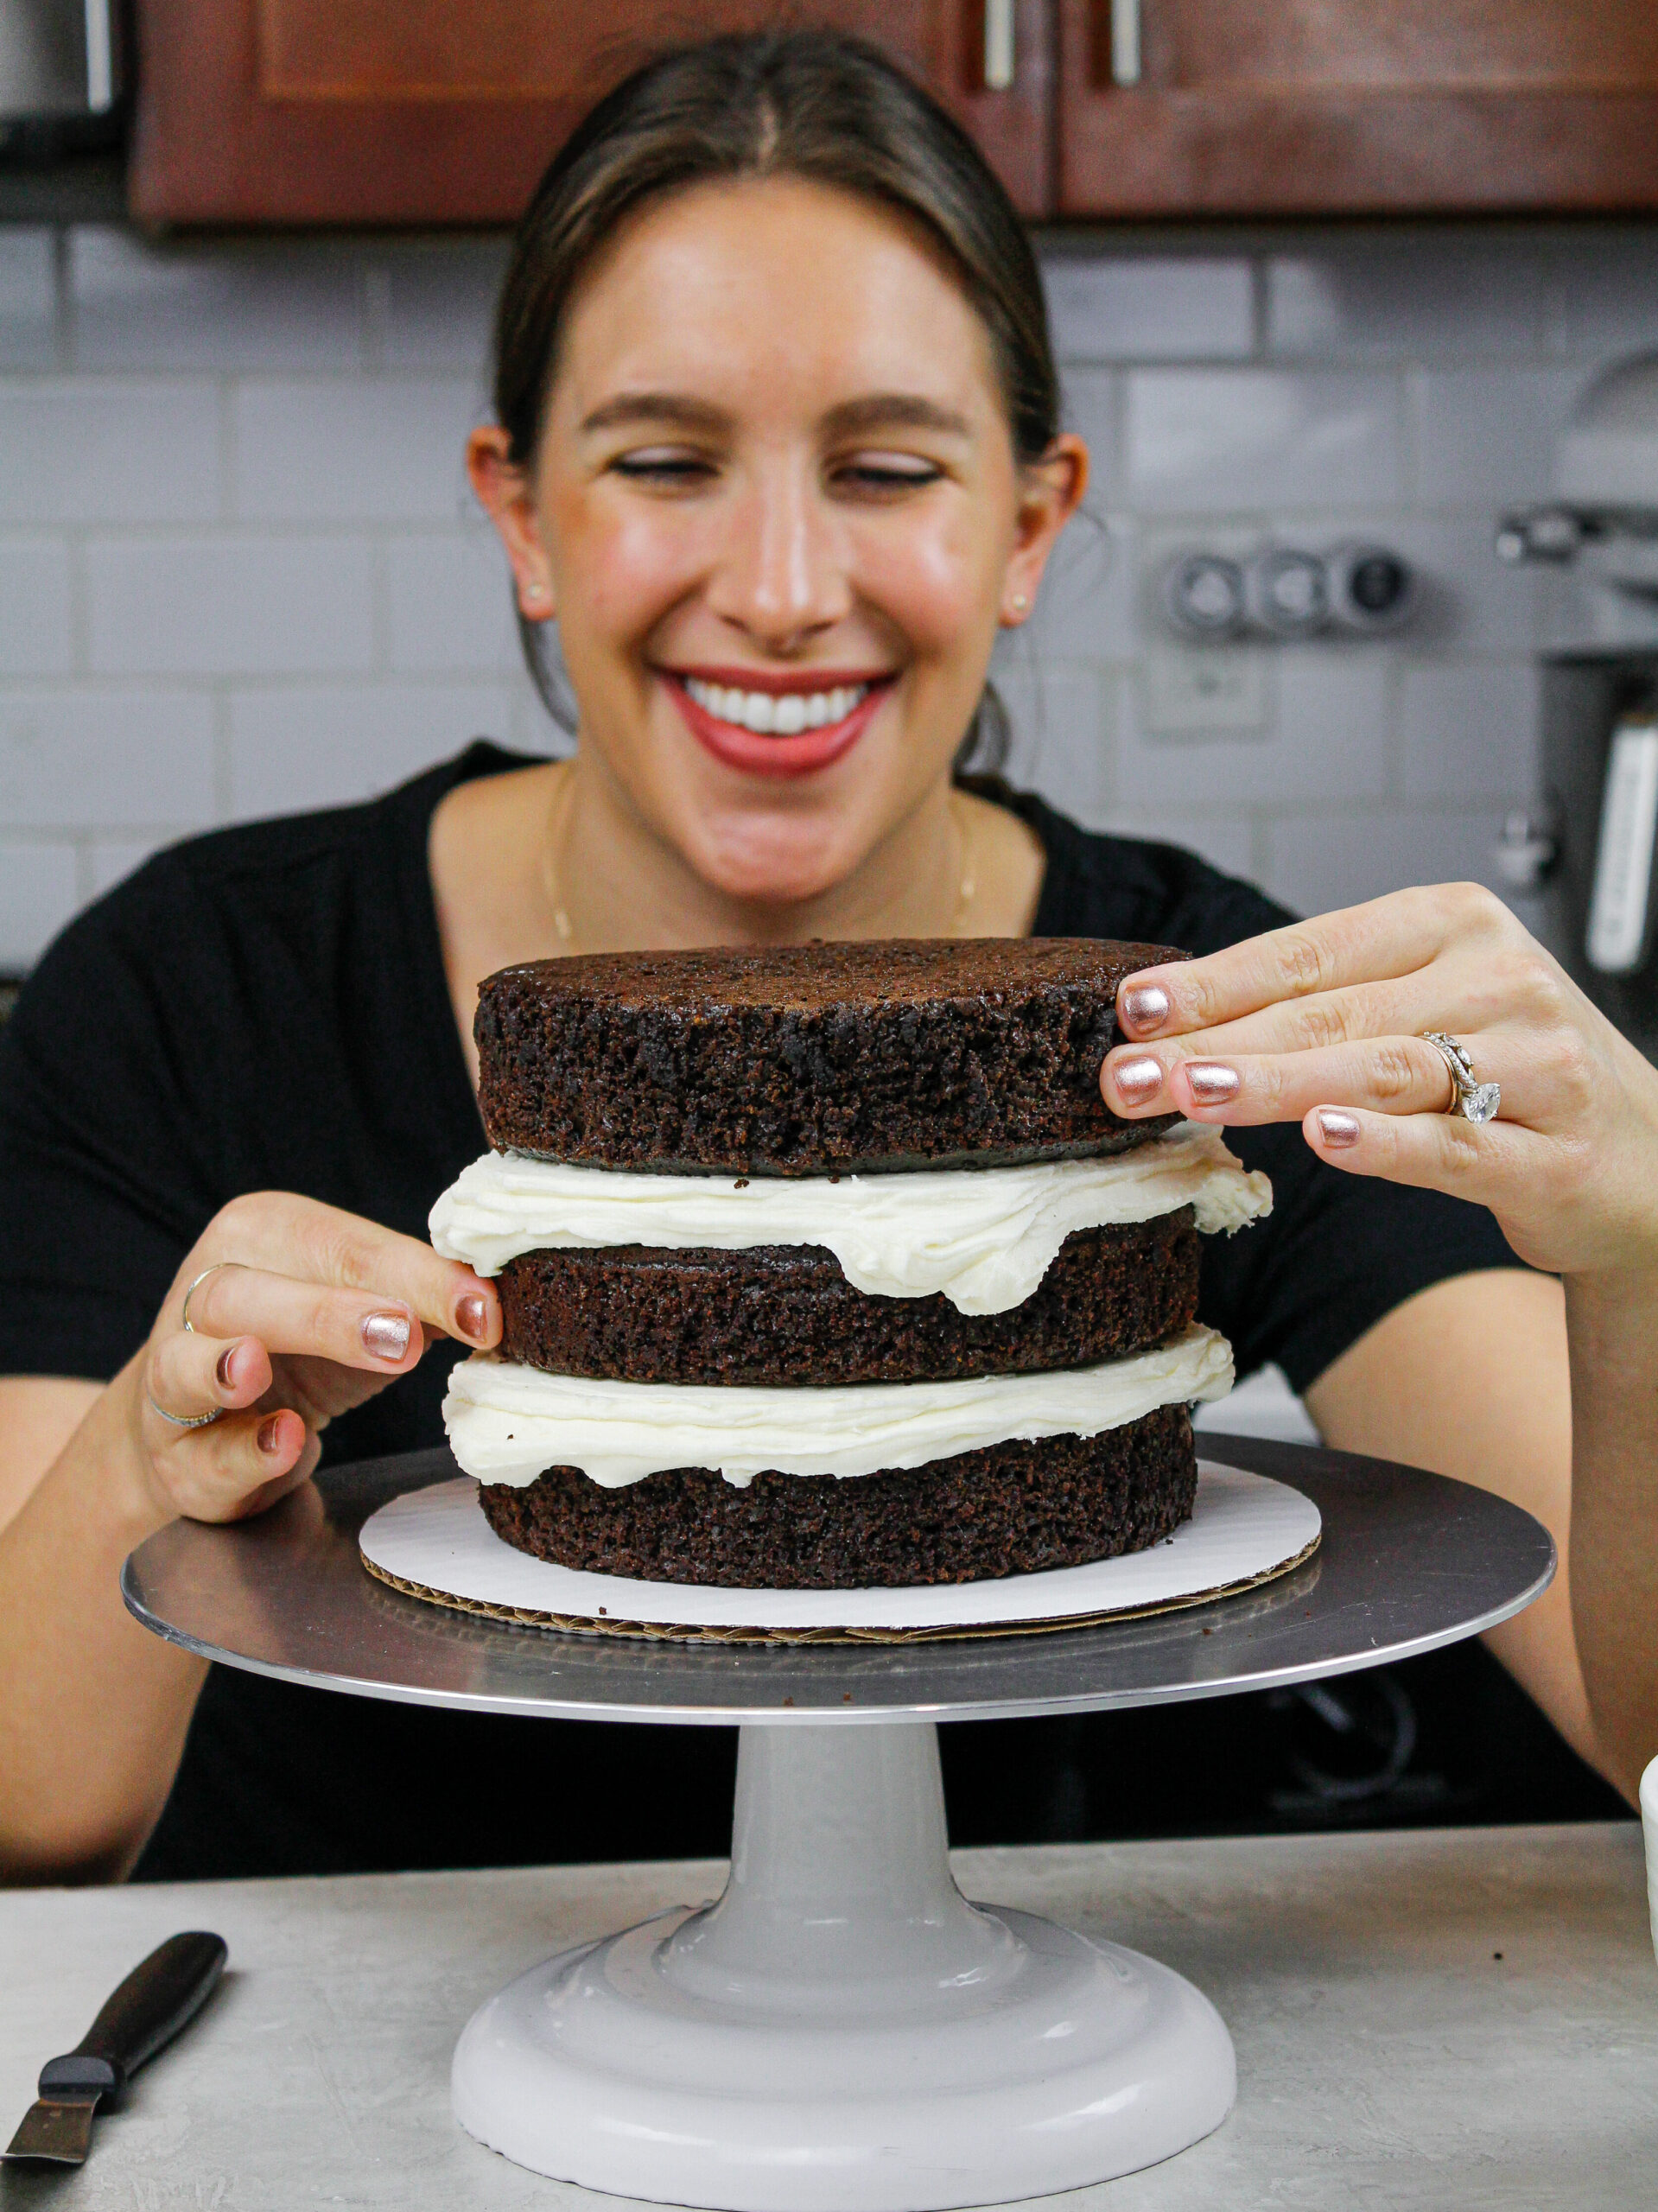
Once your cake layers are stacked, press down on the top layer with both of your hands.
This helps press any air that might be trapped between the layers out. This little trick helps your cake layers settle before you add your crumb coat.
You want to press firmly enough to slightly compress your cake layers, but not hard enough to force the frosting out between your cake layers.
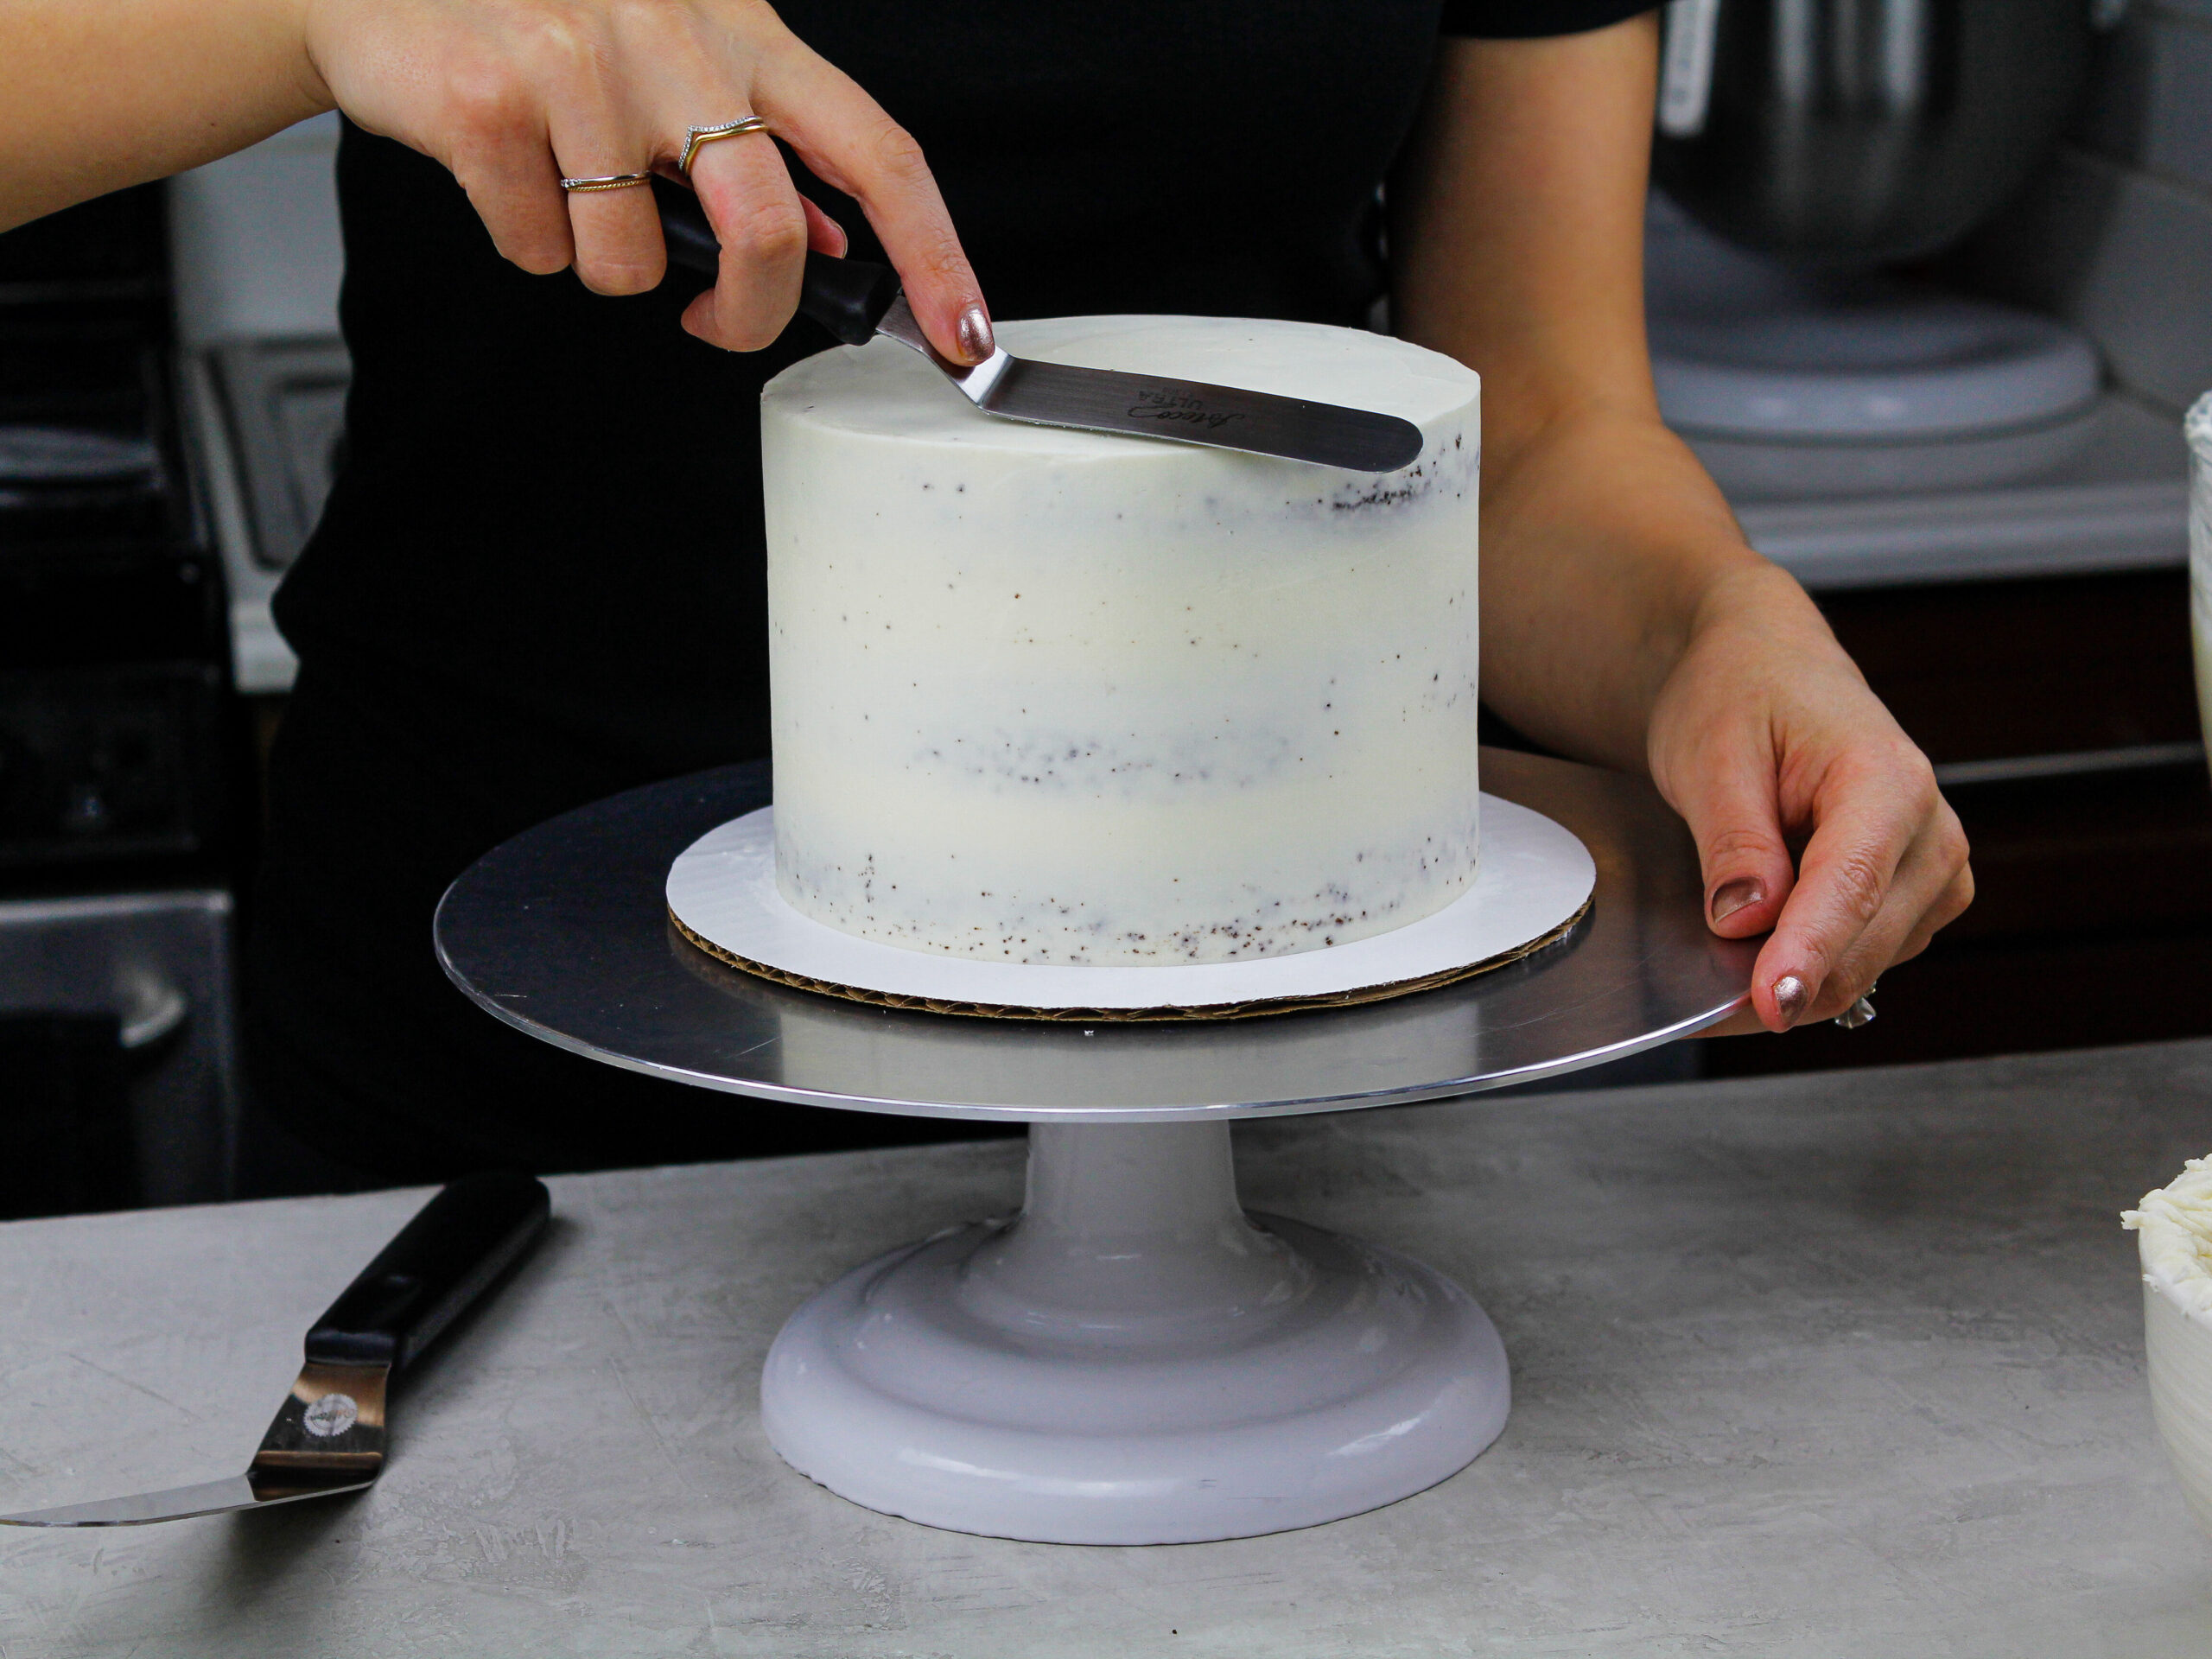
Step 4: Crumb Coat & Chill
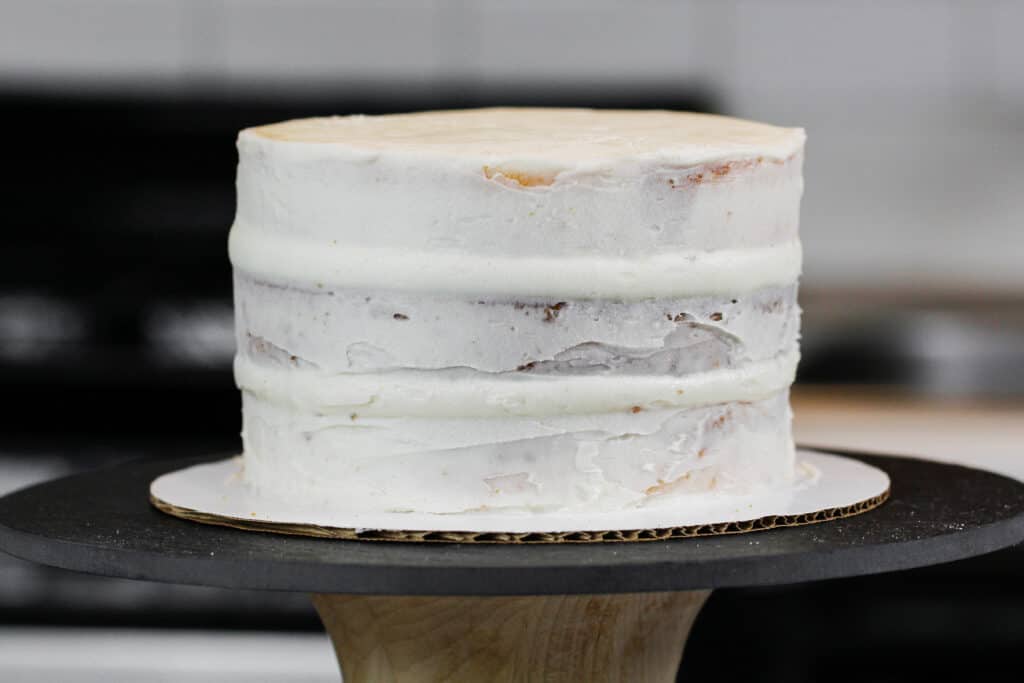
Once your cake layers are stacked, cover your cake in a thin layer of frosting. This is called a crumb coat, and it traps those pesky crumbs to make it easier to get a perfect second layer of frosting.
Start by spreading a thin layer of frosting on the top of the cake with a large offset spatula, then spread additional buttercream around the sides of the cake.


Once the cake layers are fully covered, use your bench scraper to smooth the frosting around the side of the cake. You want to apply a moderate amount of pressure.
It should be just enough to smooth the frosting, but not enough to tear the edges of your cake layers.
Scrape off the bench scraper after each pass around the cake to remove excess buttercream into a separate bowl. You don’t want to accidentally mix your yucky crumb frosting back into your main frosting bowl.
Once you’ve smoothed the side of the cake, use a small offset spatula to drag any overhanging frosting around the top edge of the cake into the center.
This motion can take a bit of practice to get used to, but it gets easier the more you do it.

The crumb coat doesn’t have to be completely smooth, but the smoother it is the easier it will be to smooth your second coat of frosting.
This is also a great opportunity to practice the steps you’ll take when you smooth your second coat of frosting. It’s essentially the exact same motions, just with a thinner layer of frosting.
Once you’re happy with your crumb coat, pop the cake into the fridge for 20 minutes or the freezer for 5 minutes. Chill the cake until the frosting is firm to the touch.
Step 5: Add on the Second Coat of Frosting
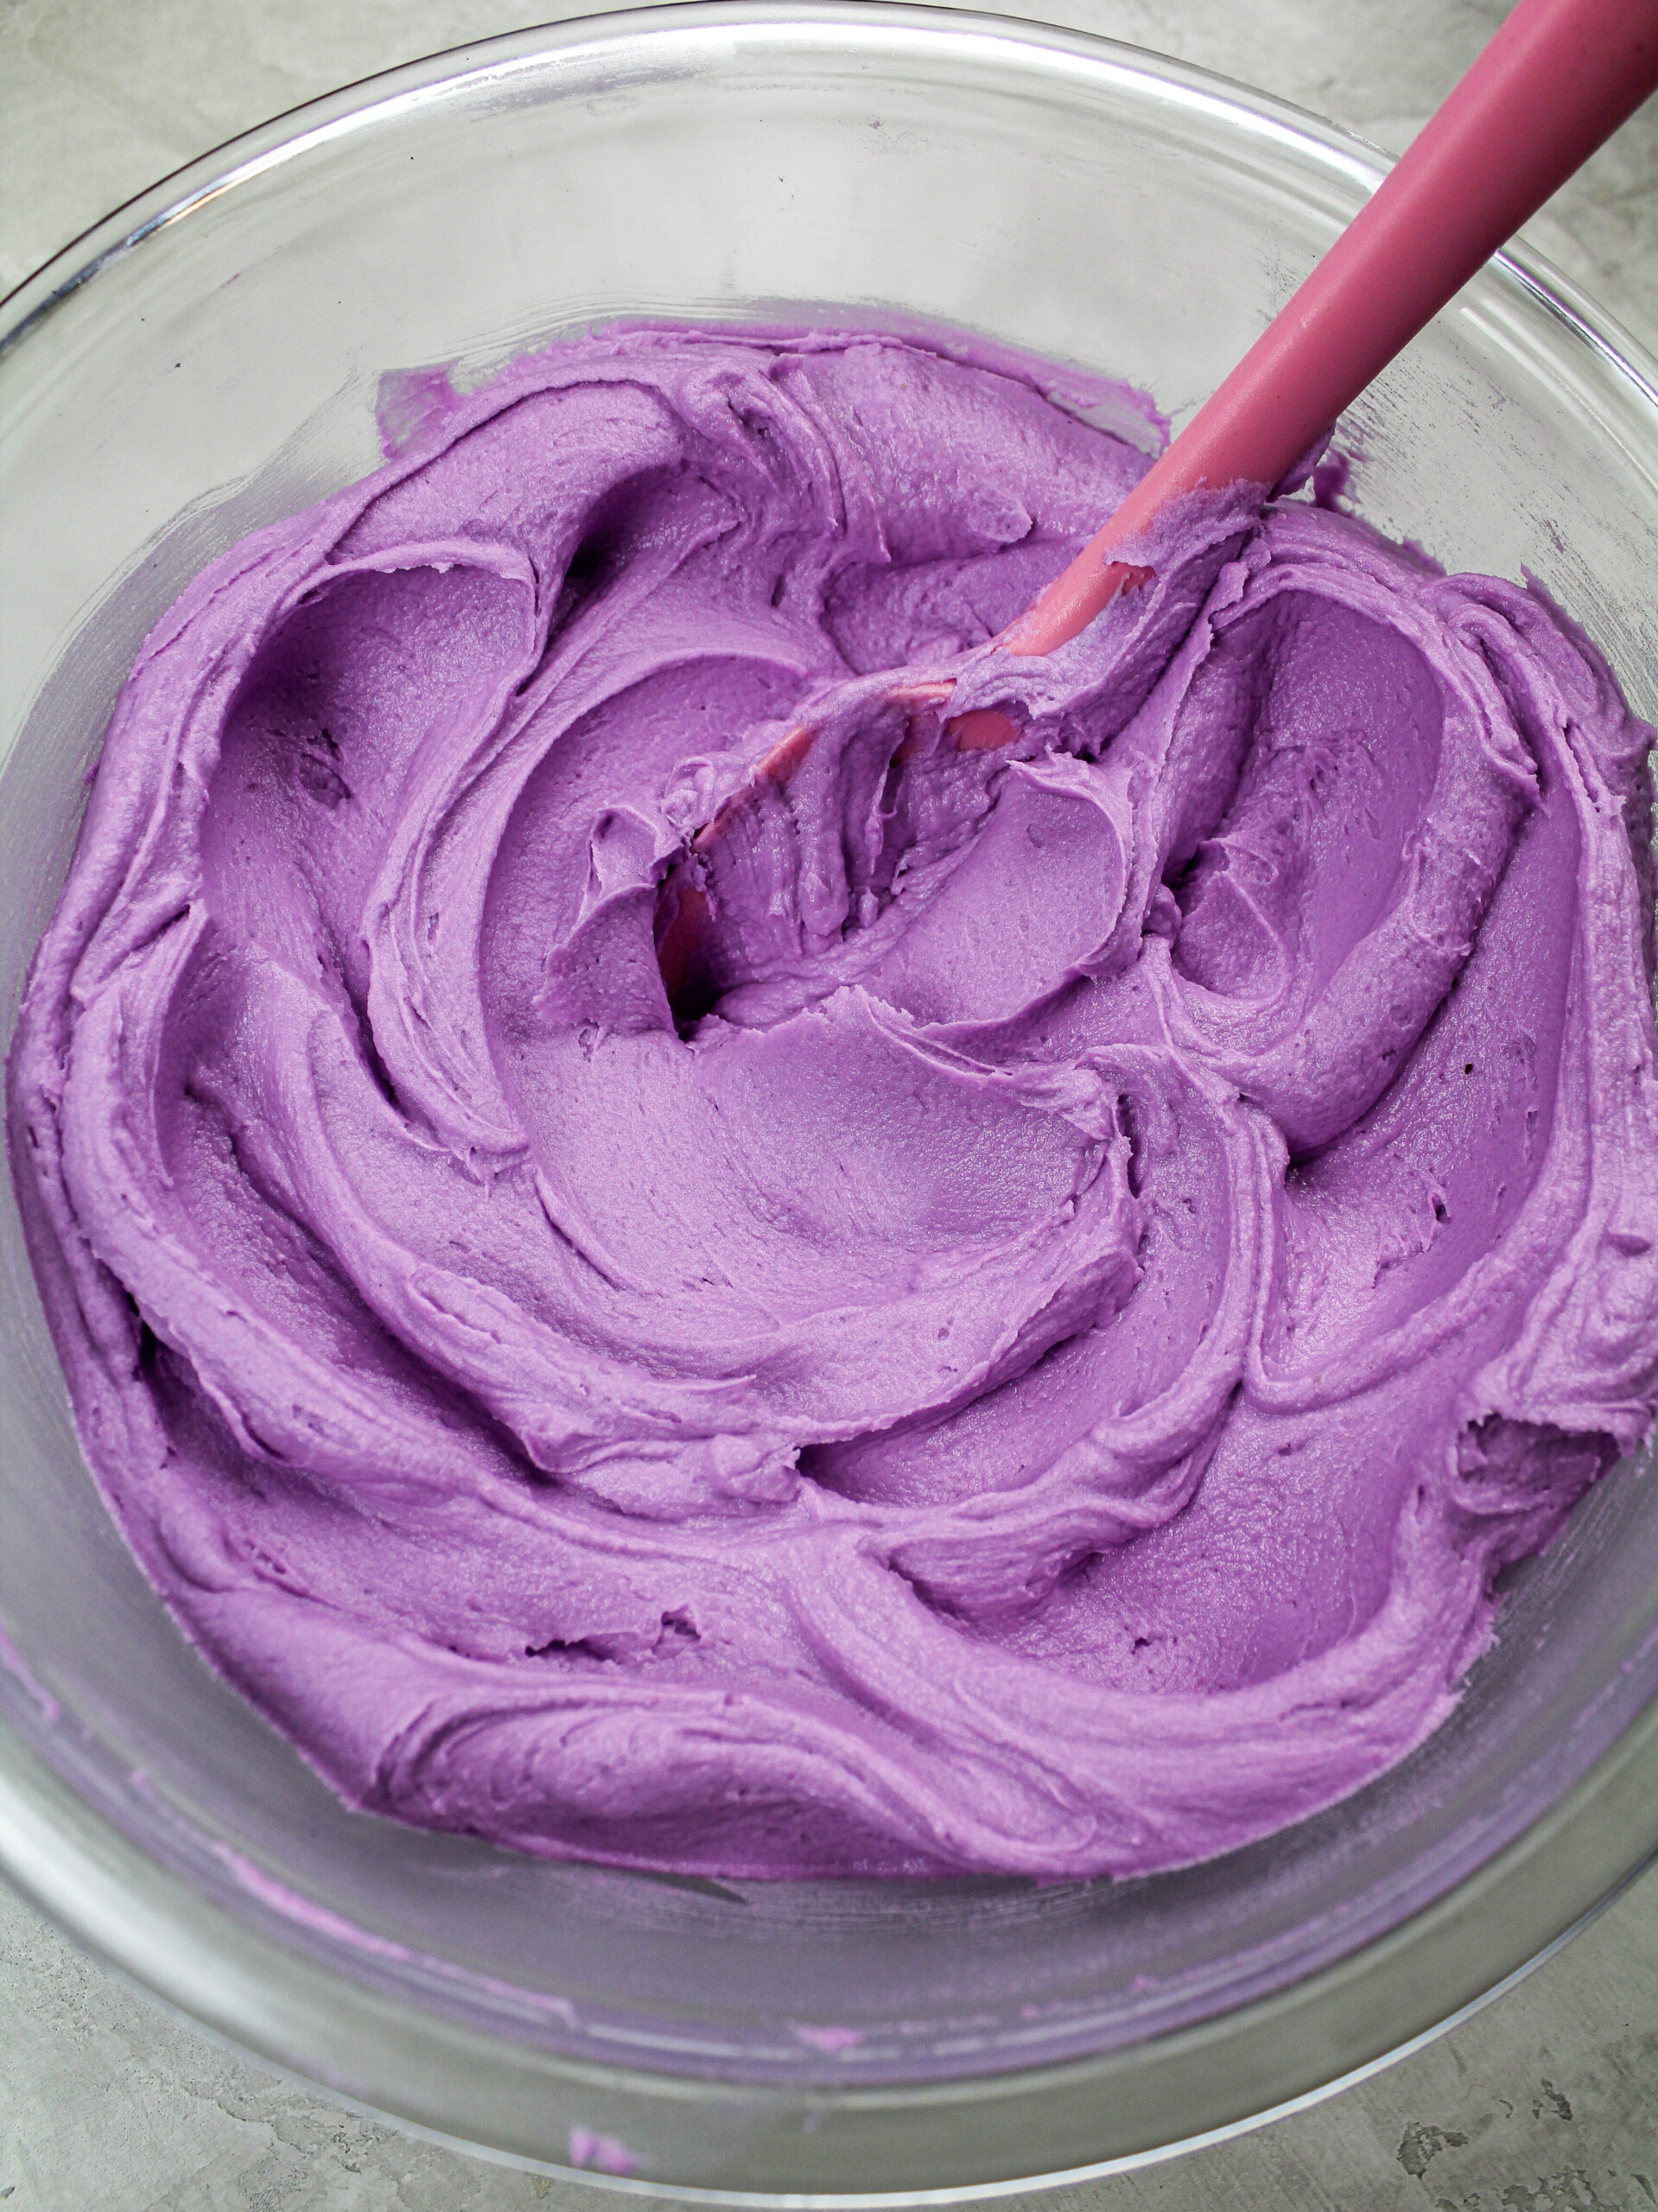
Remove your cake from the fridge or freezer and refresh your buttercream by giving it a good stir. I find that as my frosting sits out it develops air bubbles.
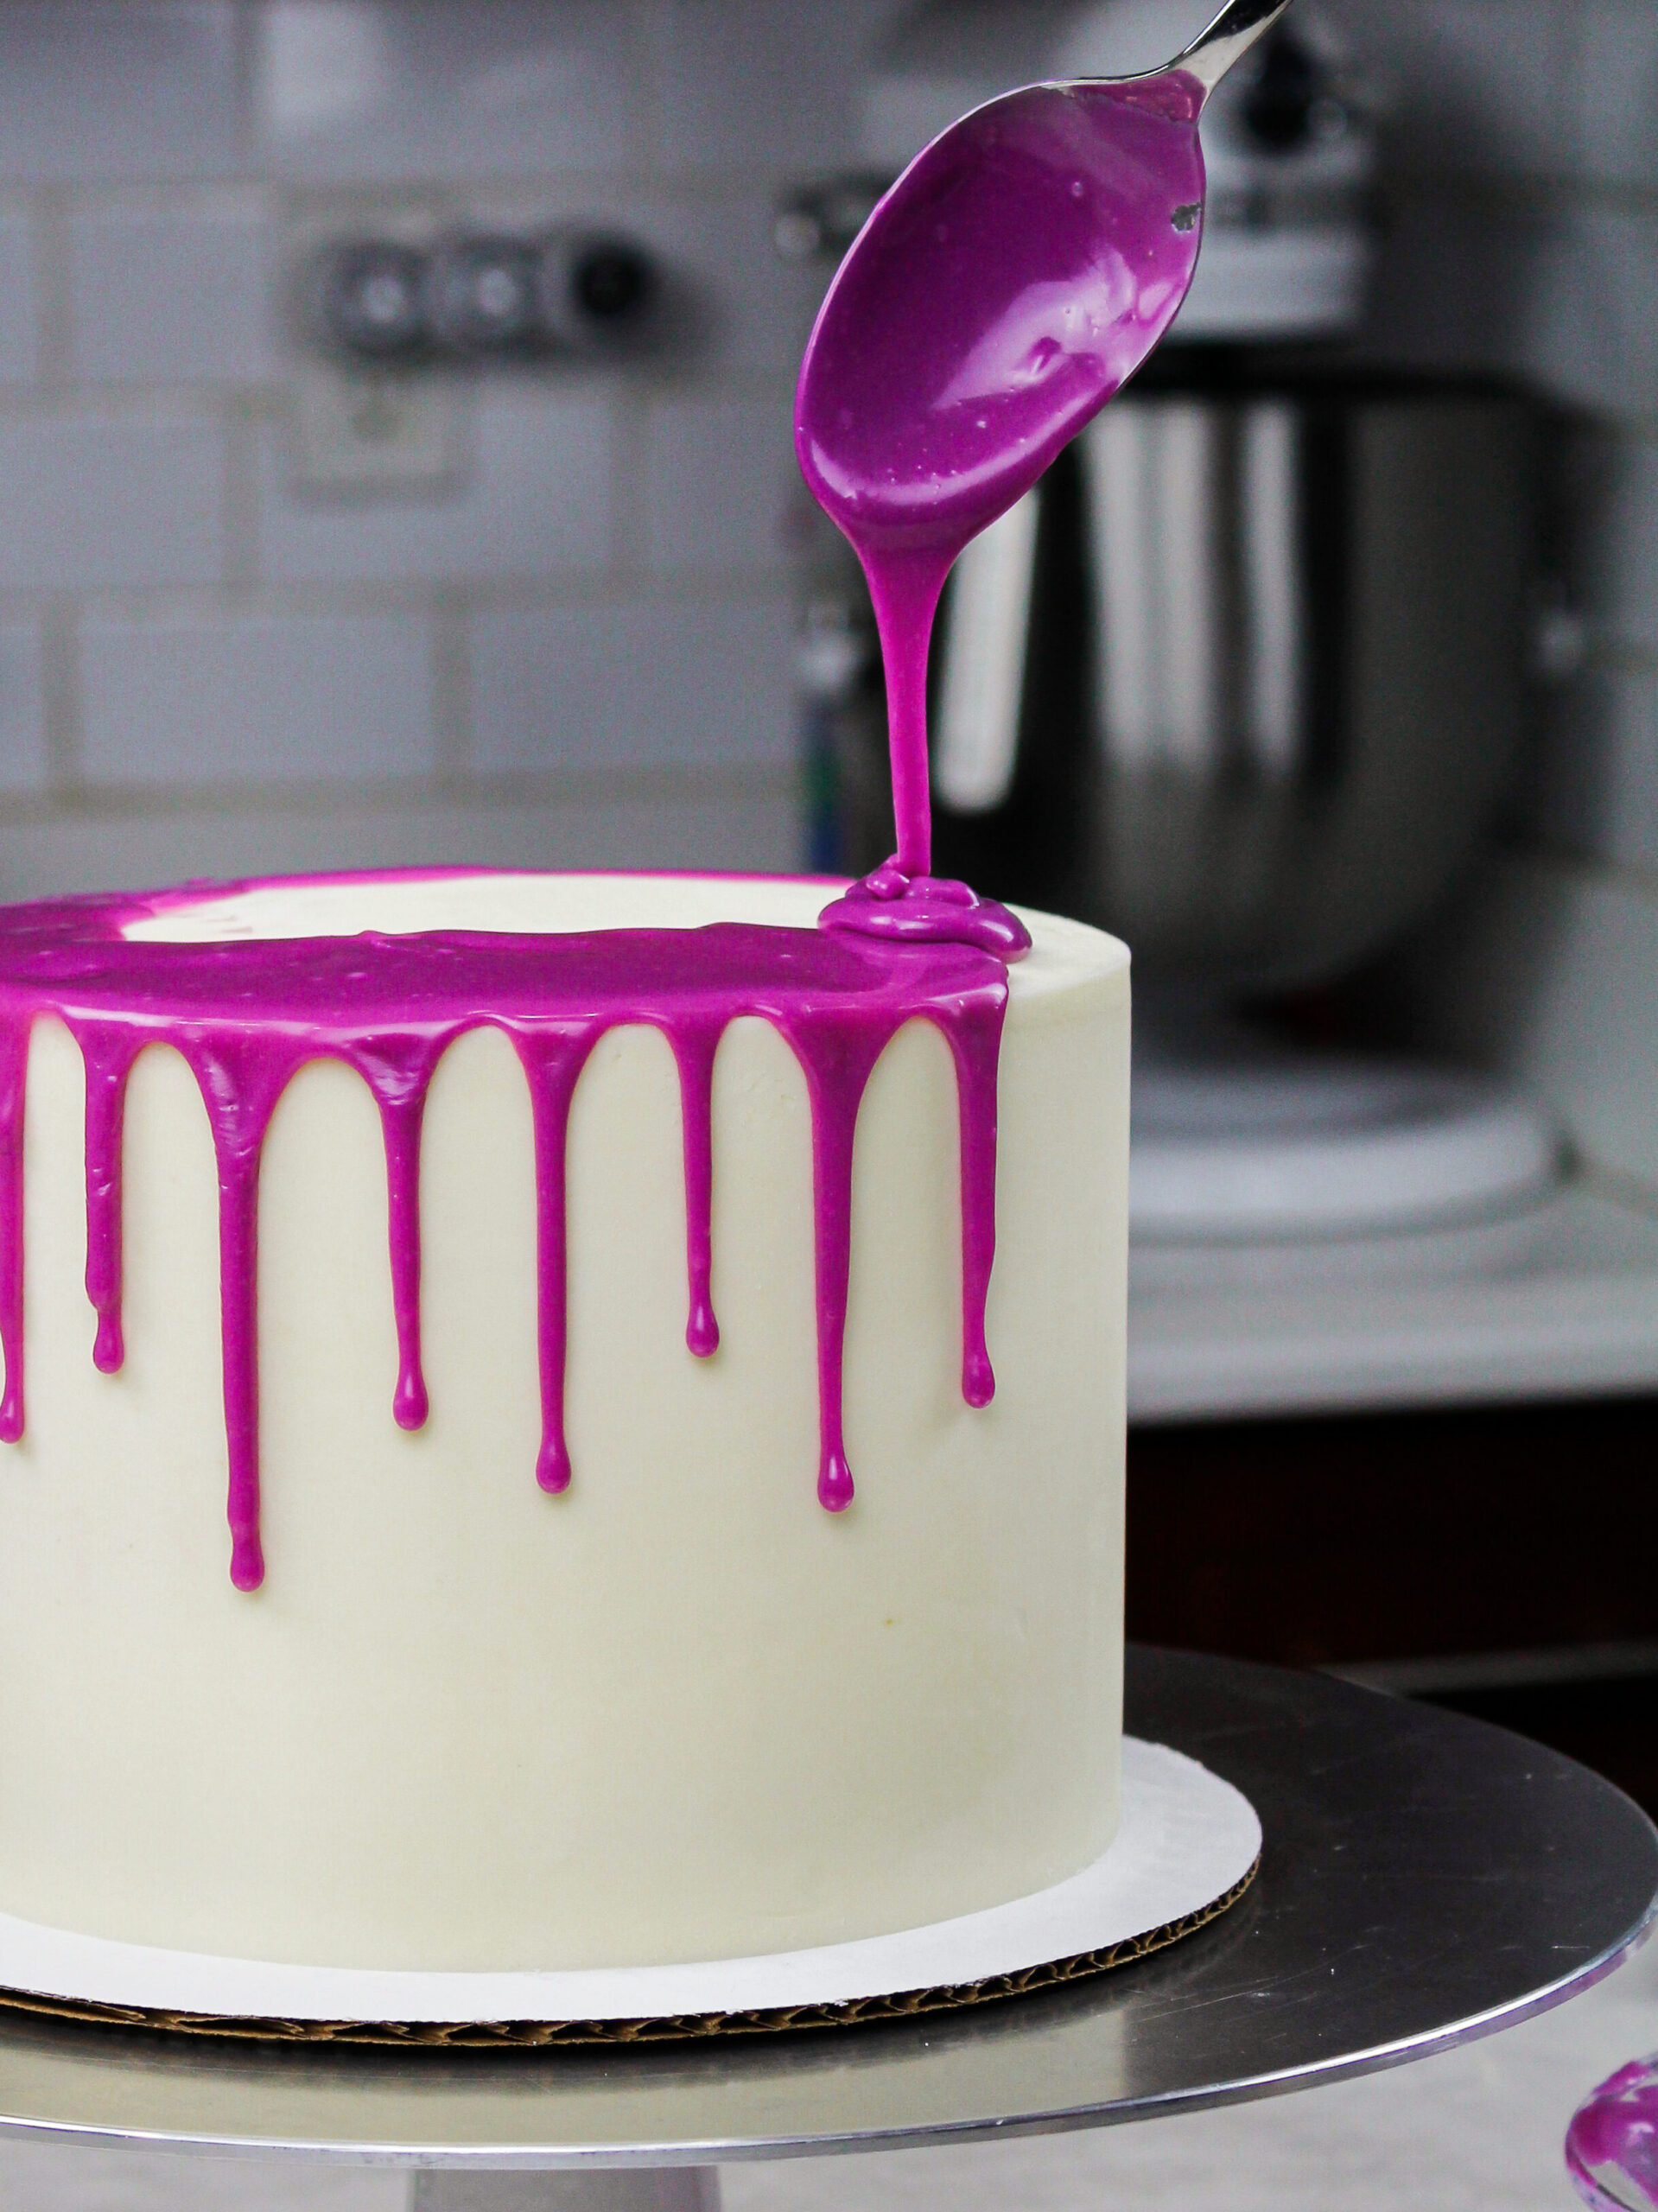
Stir your frosting with a rubber spatula for a couple minutes to get it back to a silky-smooth consistency. I also colored my frosting purple during this step to make it easier to see and photograph.

Then add on your second layer of frosting. Spread a thick layer of frosting on top of the cake with a large offset spatula, then spread more buttercream around the sides of the cake.
This layer should be quite a bit thicker than your crumb coat. You shouldn’t be able to see your cake layers at this point.
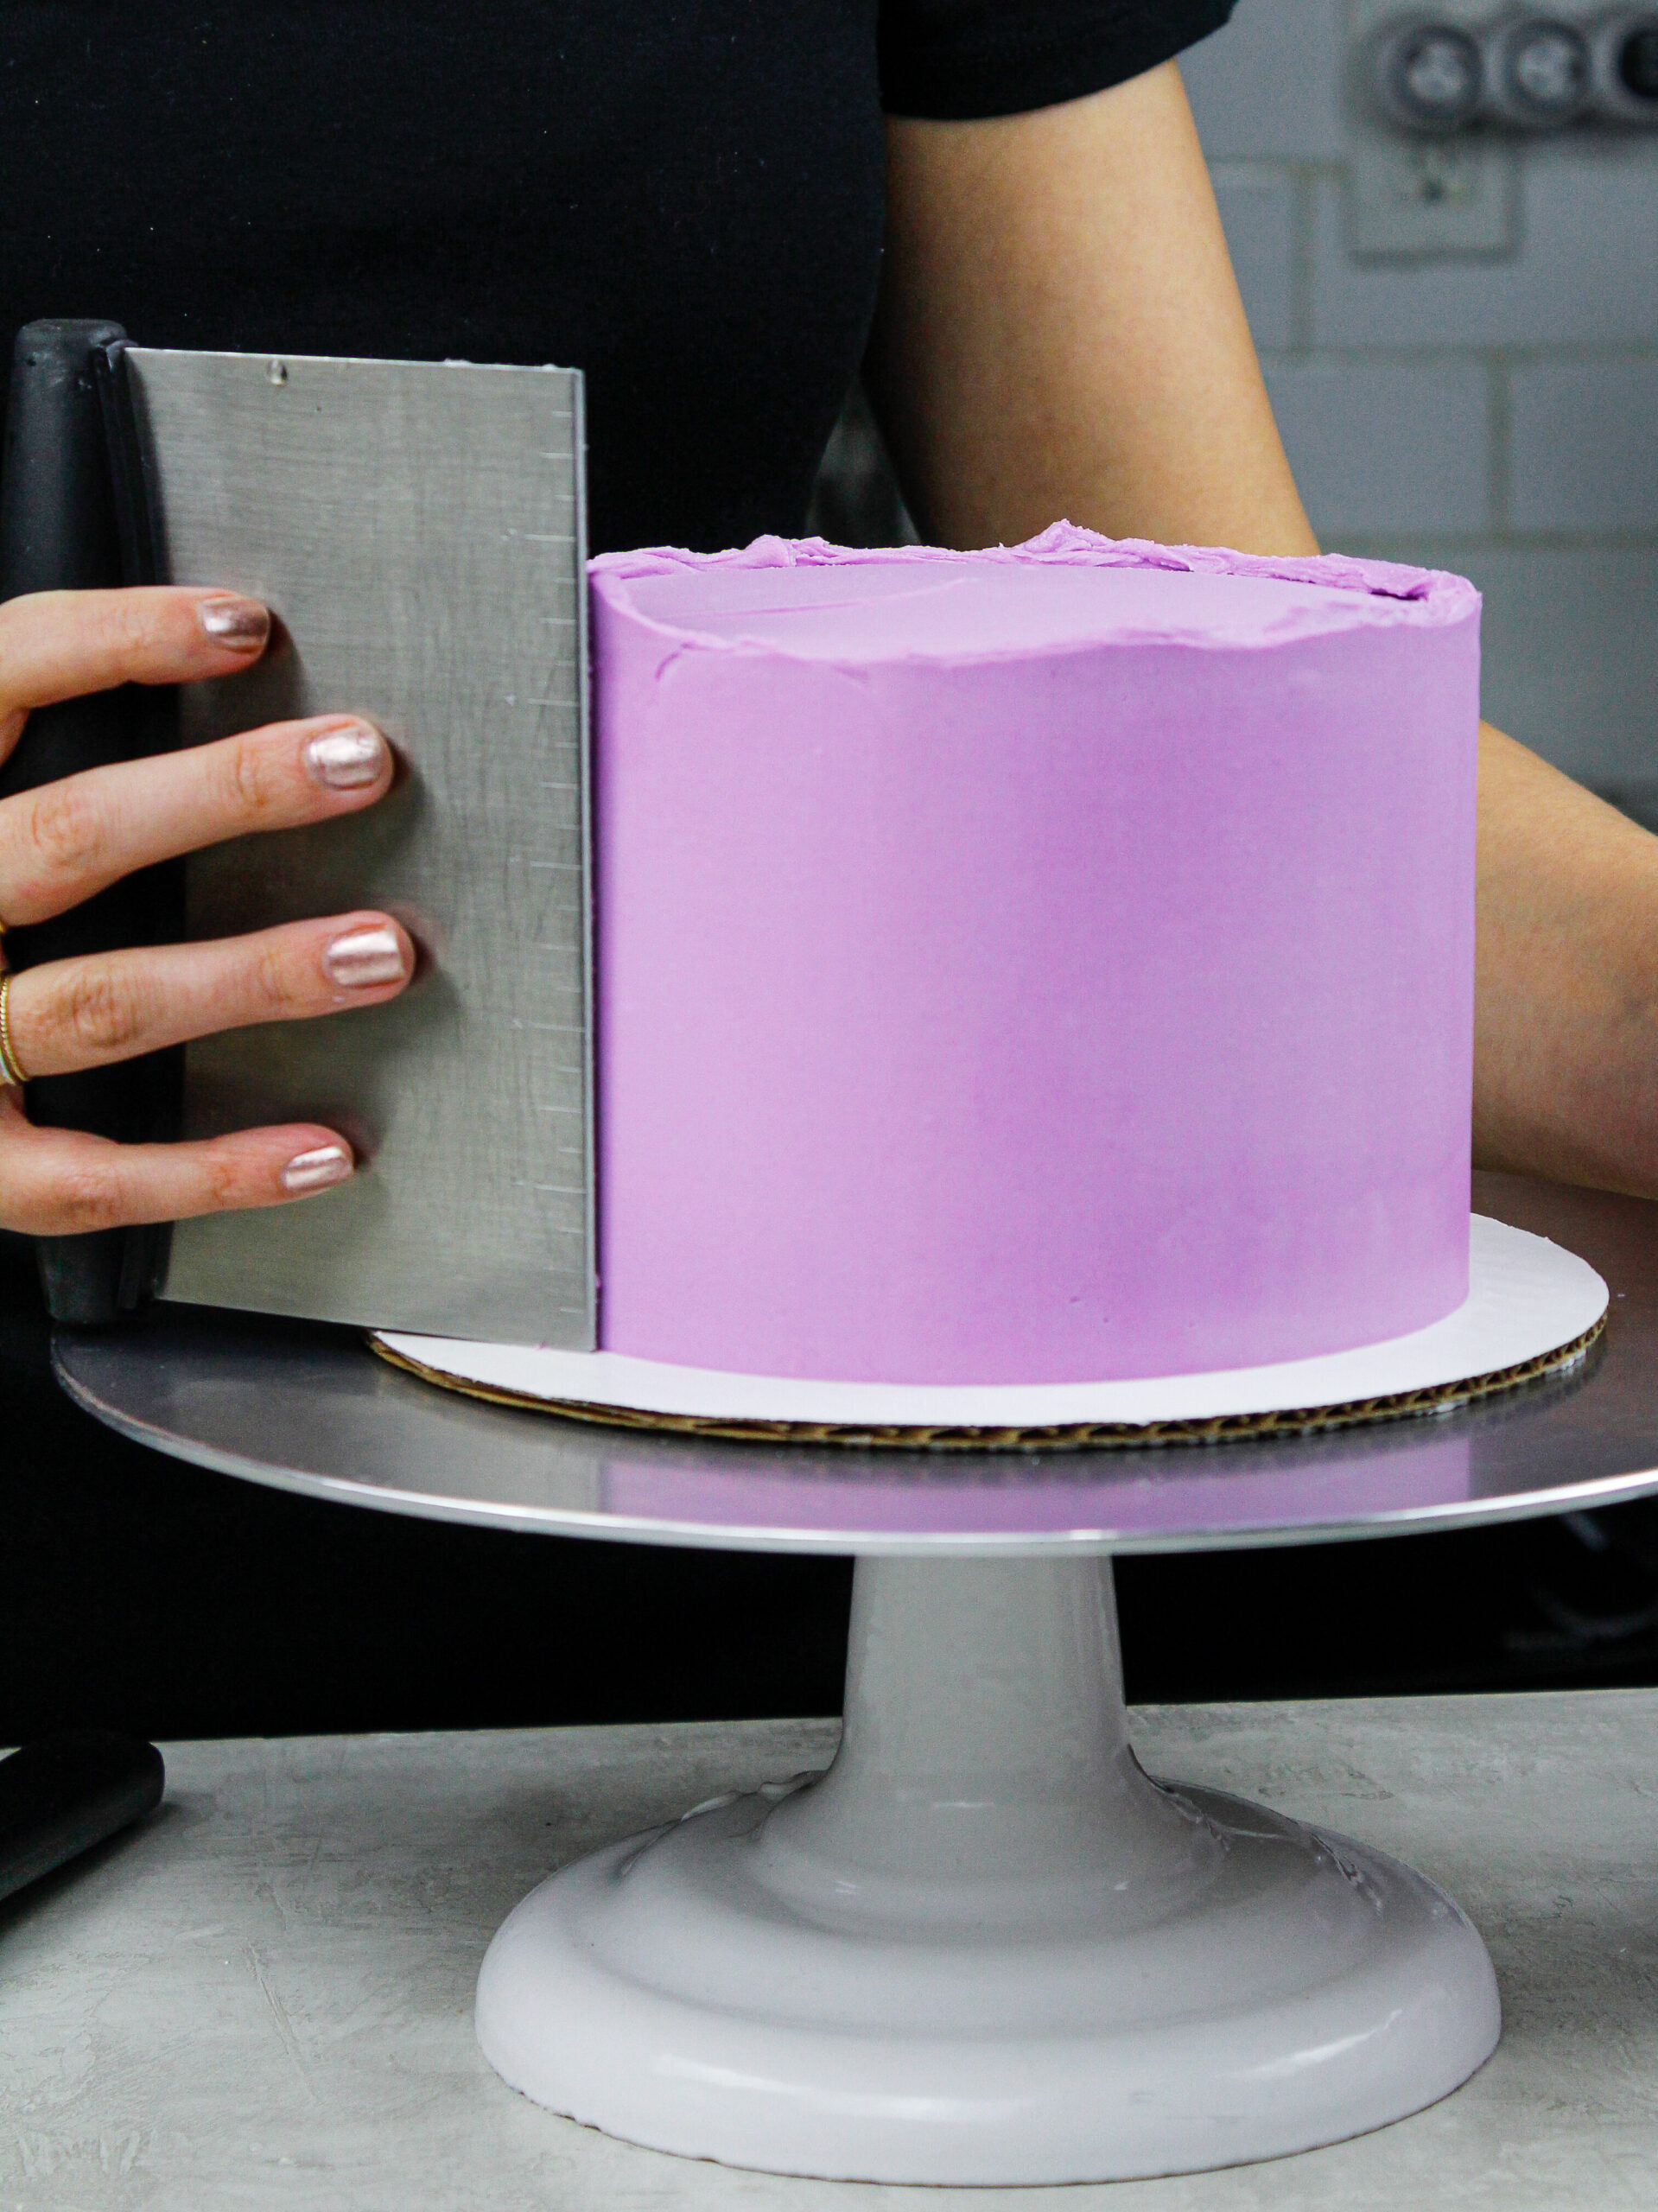
Use your bench scraper to smooth the frosting around the side of the cake. The goal here is to spread the frosting around the cake more so than to scrape it off.
Try to hold your bench scraper at an angle that’s almost parallel to the cake. Apply a moderate amount of pressure and scrape off excess buttercream after each pass around the cake.

Step #6: Patch the Frosting Gaps
After your first few passes you might notice some small spots or patches that need more frosting.
Add small dabs of extra buttercream to these areas, then smooth again with your bench scraper using slightly less pressure.
Repeat this process until the sides of your cake are smooth.
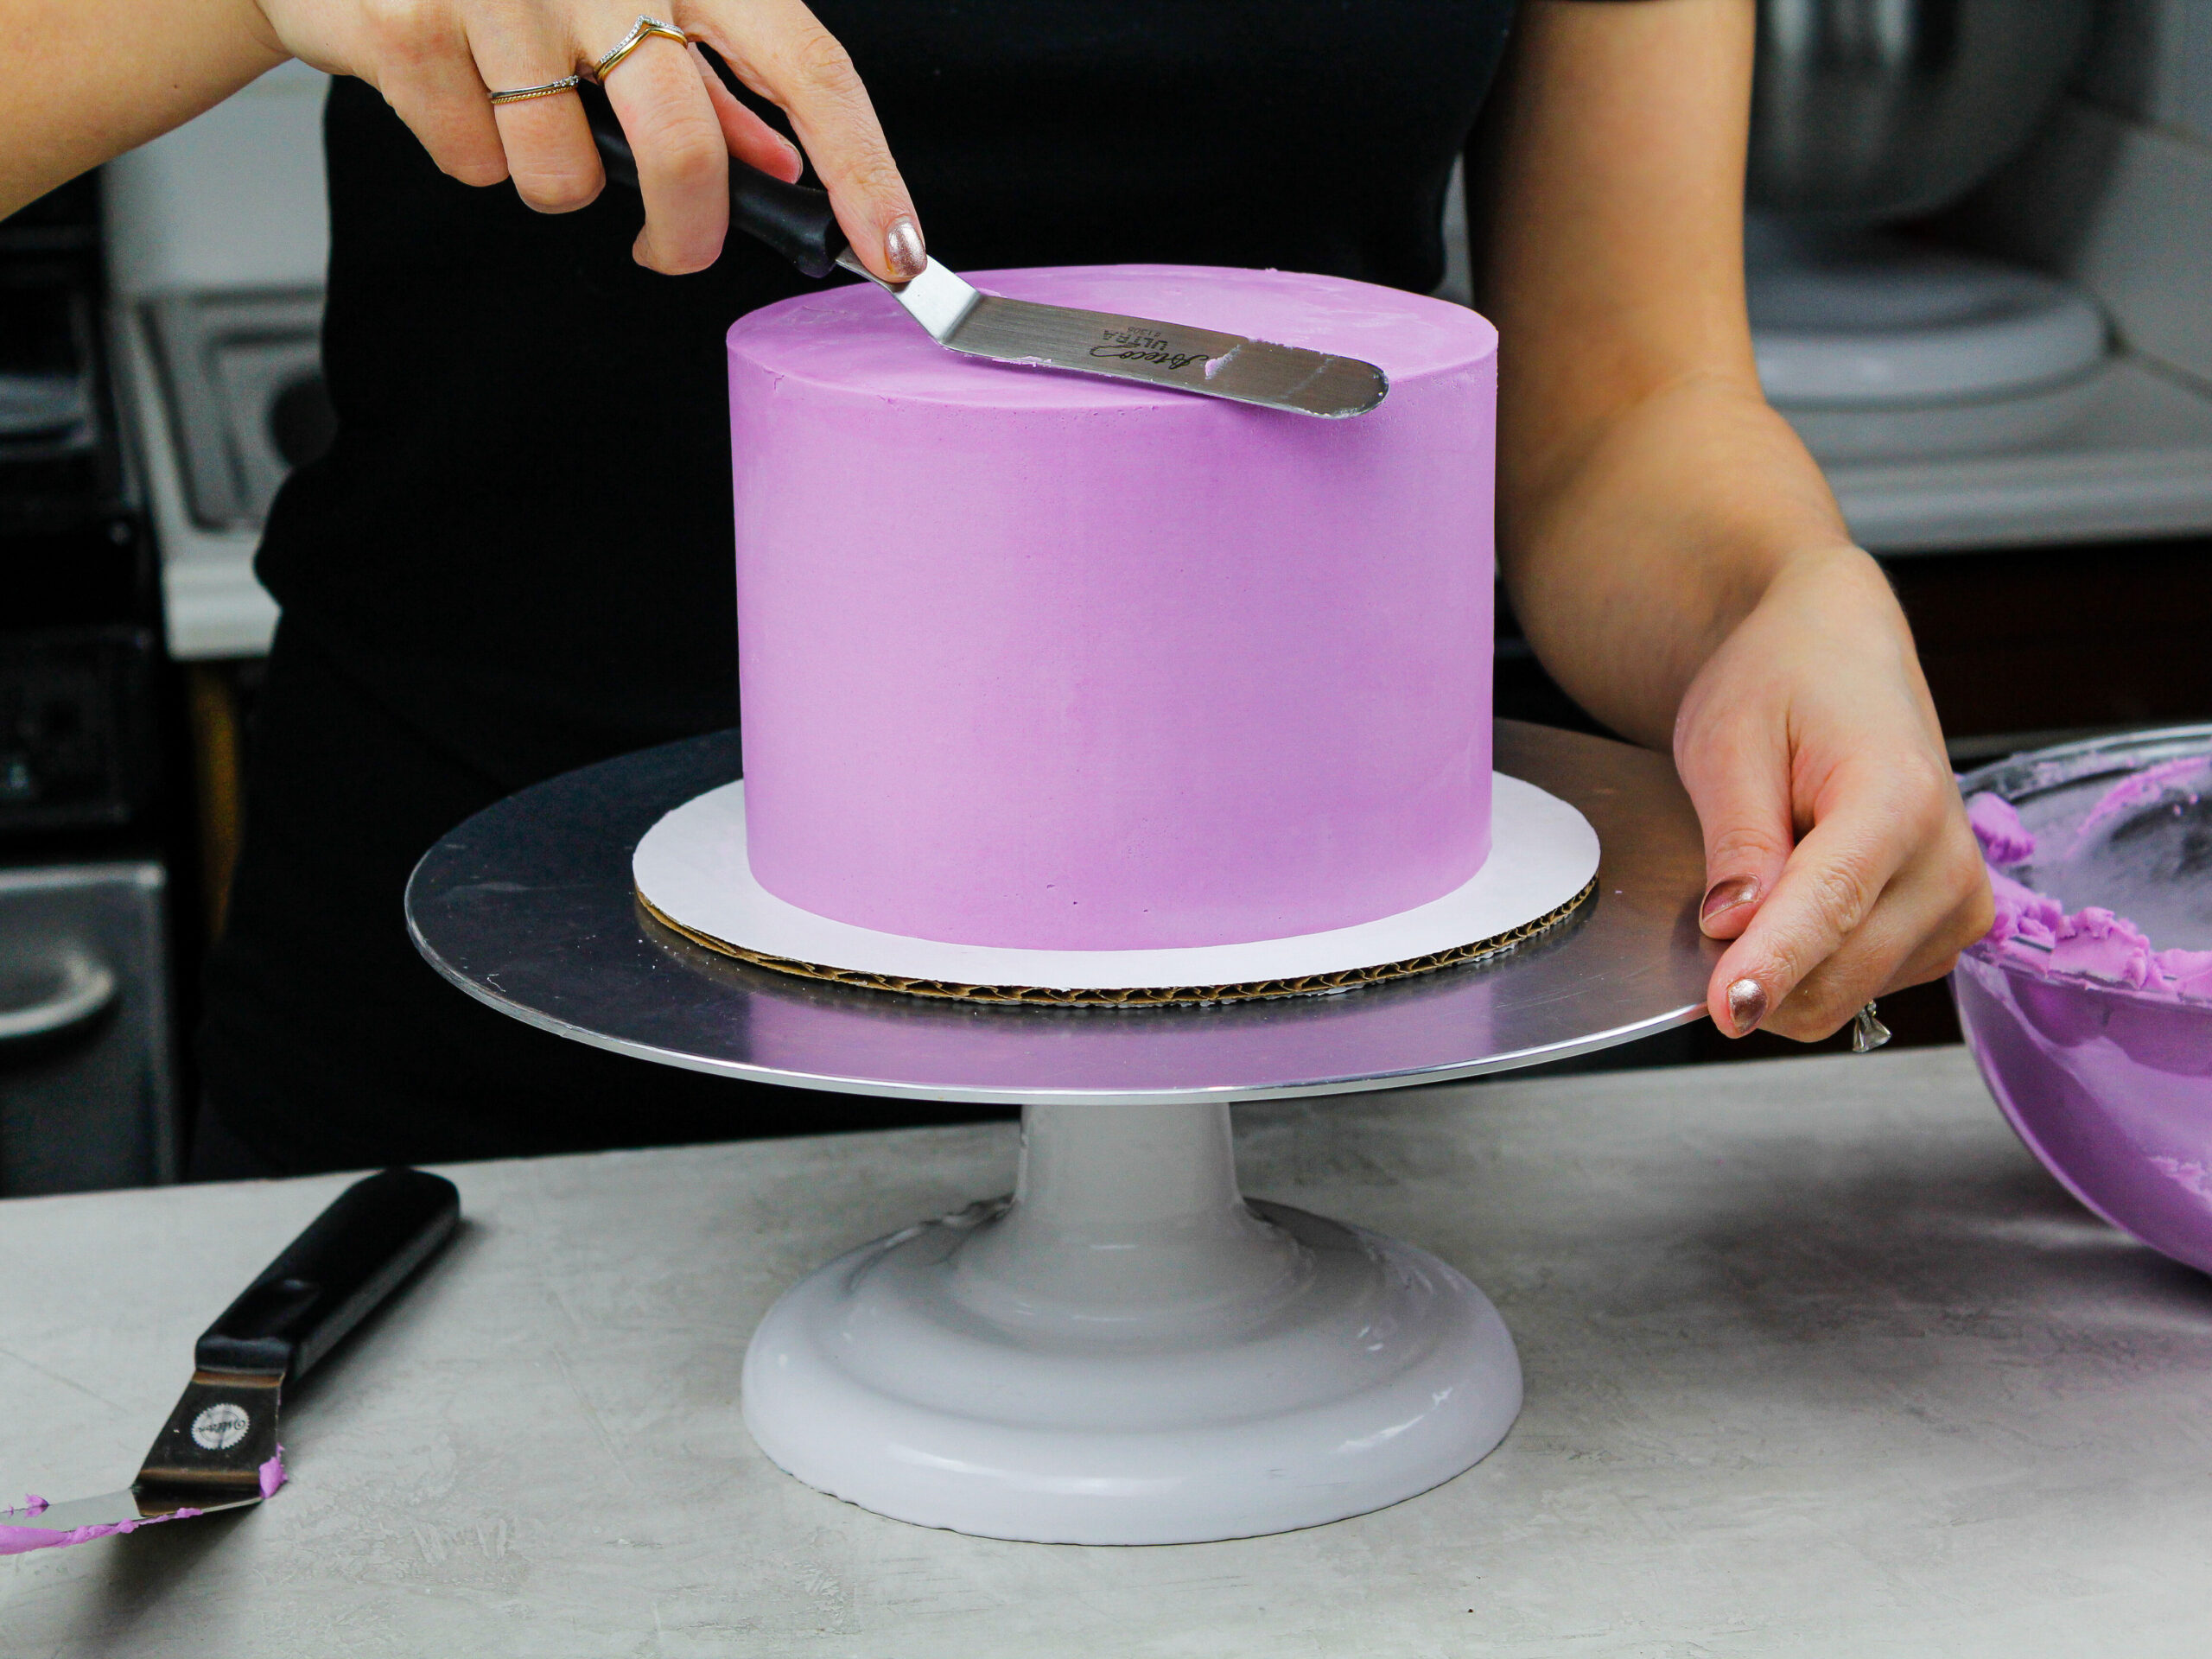
Step #7: Heat Things Up
Once your frosting is mostly smooth, it’s time for my favorite frosting smoothing hack. Run your bench scraper under hot water and dry it, then VERY slowly smooth the frosting with it.
The heat from the metal ever so slightly melts the frosting, creating a shiny, silky smooth finished look.
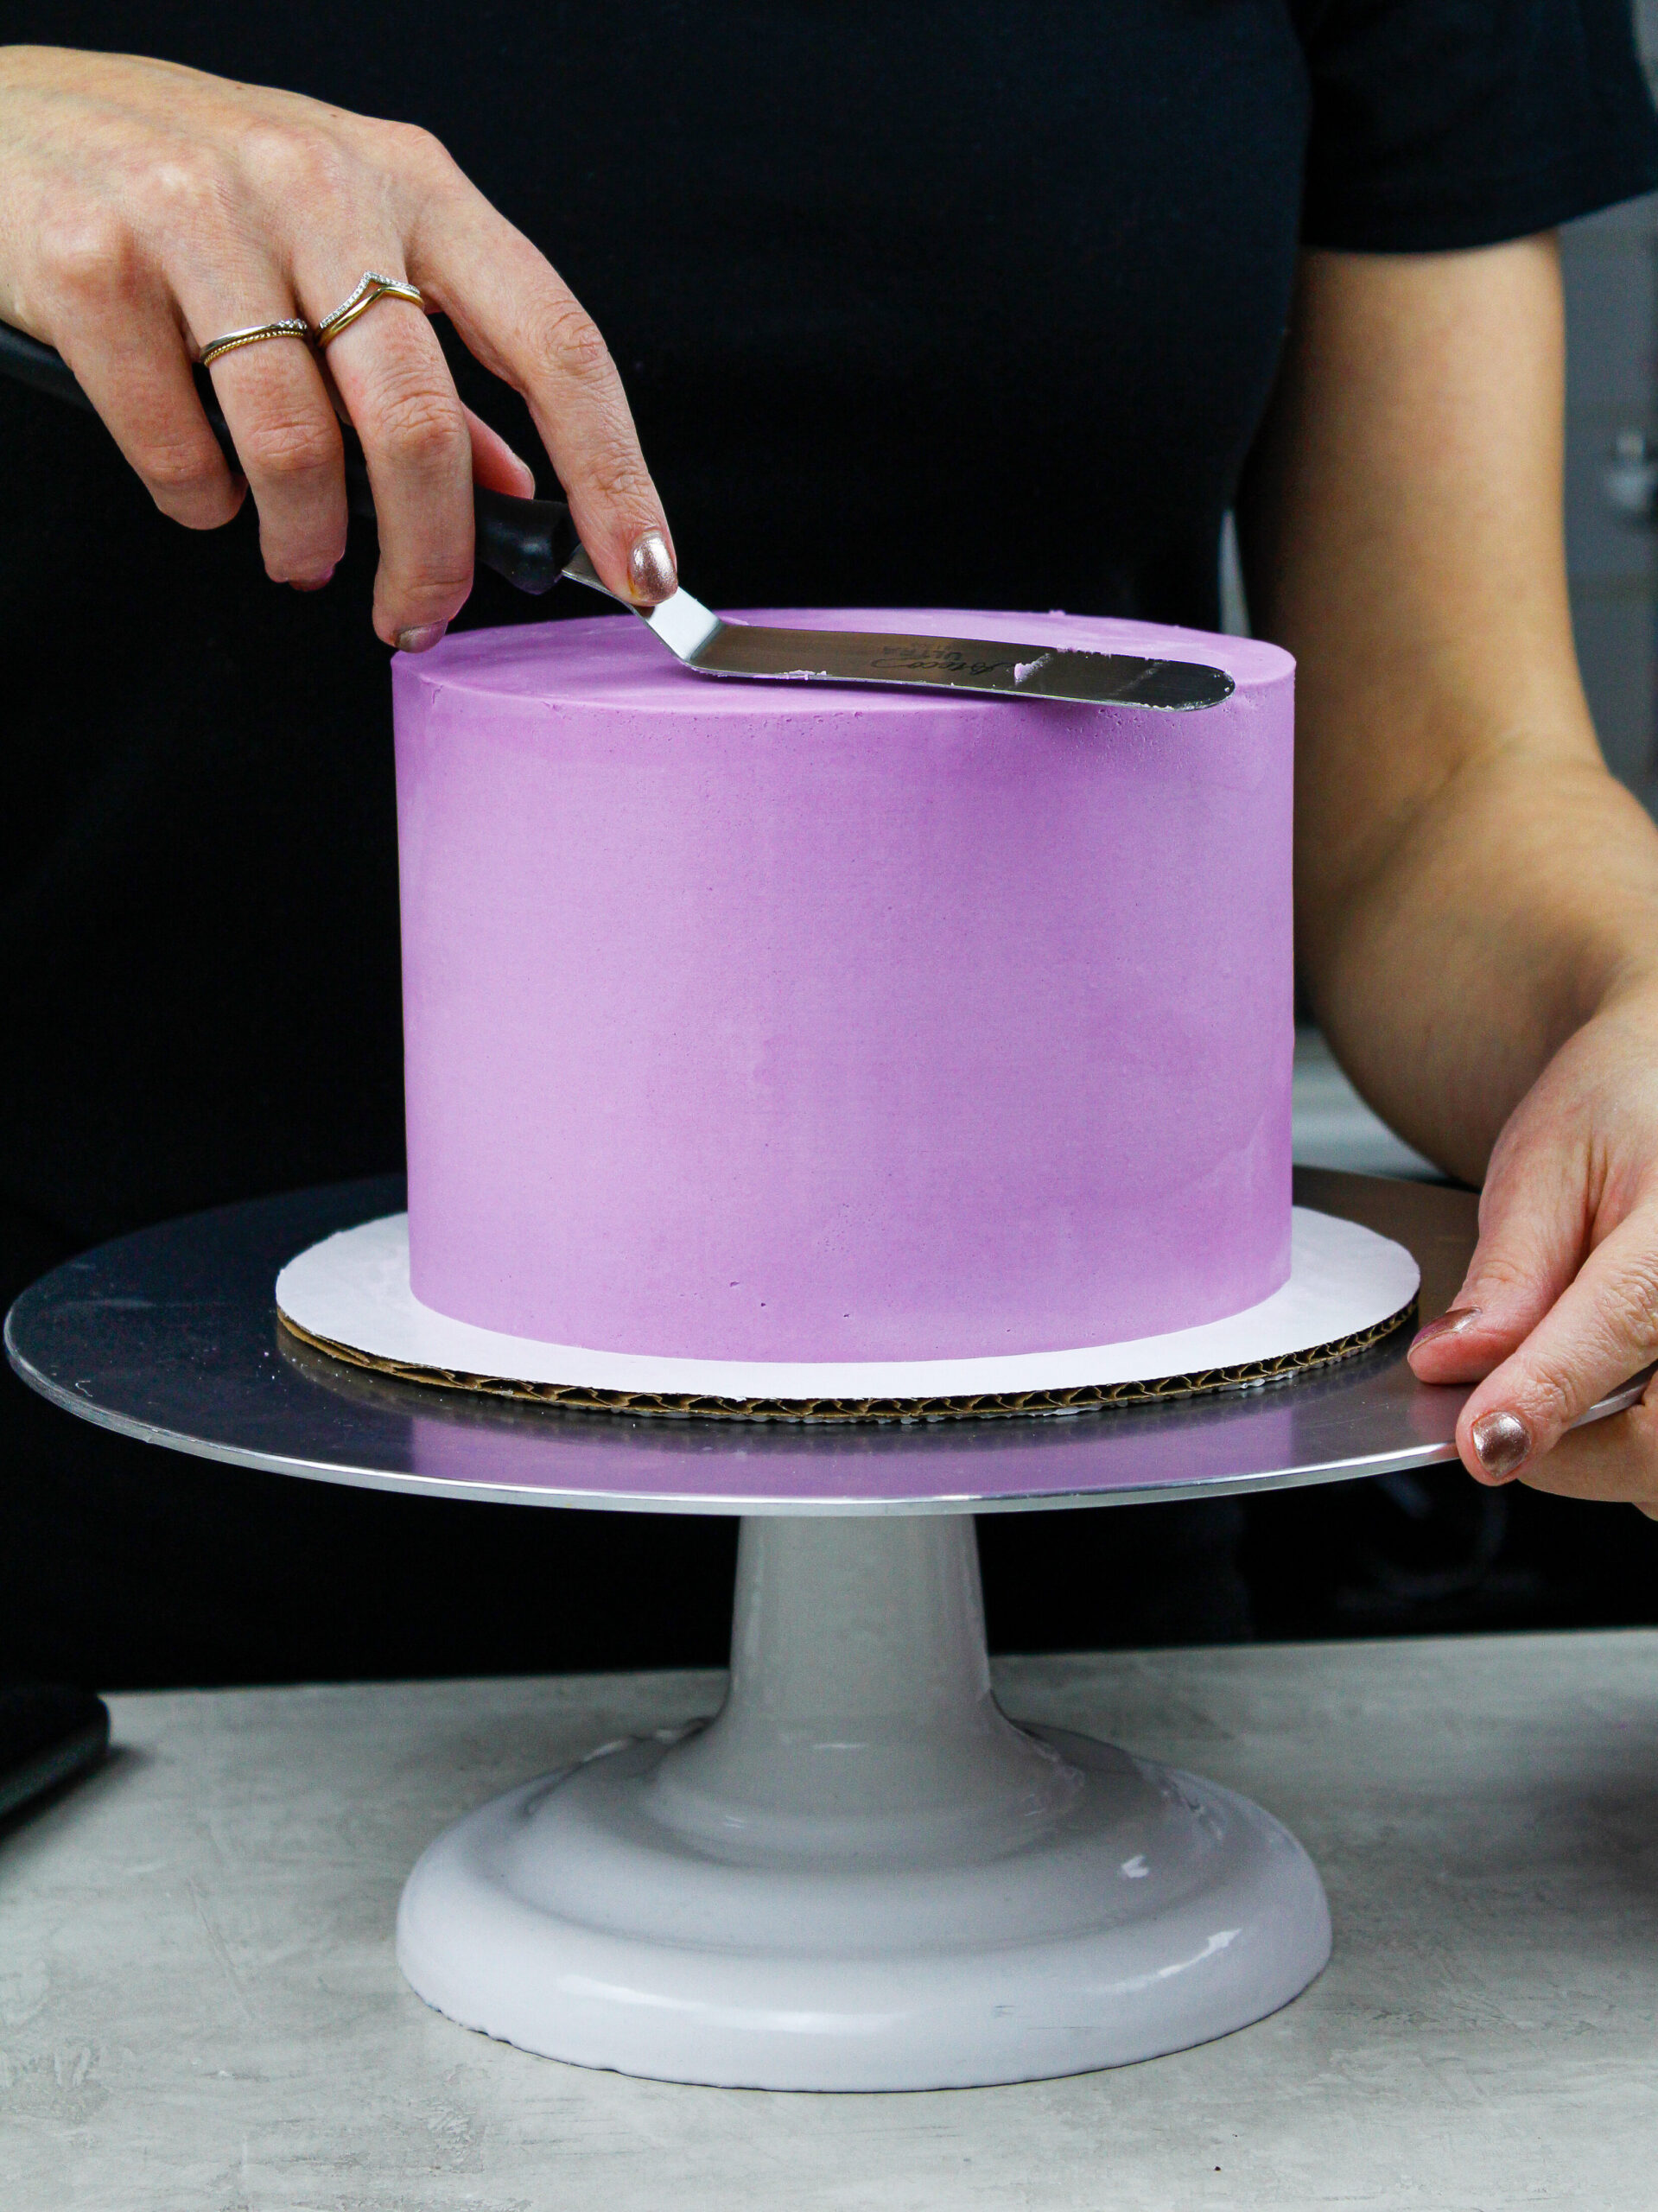
Once you’ve smoothed the side of the cake, there should be a lip of frosting around the top of the cake. You need to make sure the frosting goes up past the top of the cake to get sharp edges on your cake.
Use a small offset spatula to swipe the excess frosting around the top edge of the cake into the center and remove it after each pass. If you let the frosting buildup in the center, your cake might end up with a domed top!

It’s important that you wipe the buttercream off your small offset spatula after each pass, or else your edges won’t look as clean.
Step 8: Keep Practicing
These movements might not feel natural or intuitive the first few times you frost a cake, and that’s totally ok! It takes a lot of practice to master them and gain the muscle memory.
Even after making cakes for years, it still takes me 10-20 minutes to smooth my second coat of frosting.
It always looks like such a fast process in my videos, but that’s just the magic of editing. It’s a slow process but is worth it in the end! Slow and steady wins the race 🙂
Troubleshooting
While I’d love to think you’ll be able to frost a cake smoothly after reading this, I know that sometimes things don’t go to plan.
Below are some common issues people run into when frosting a cake along with ways to fix them.
For the most part, leveling and chilling your cake layers is the answer to so many problems! It takes a bit of extra time but makes the process so much easier.
Why Are Sides of My Cake Bulging?
There are a few different things that can cause your frosting to budge out between your cake layers as it sits.

The most common cause is that the cake layers haven’t been leveled, which can cause air to get trapped between the layers. Using leveled cake layers helps avoid this, as well as pressing down on the cake layers once they’re stacked.
Another possibility is that your buttercream is too thin. It’s important that your buttercream is the right consistency when you’re assembling and frosting your cake.
Why Are My Cake Layers Sliding?
There’s nothing more frustrating than having your cake layers slide all over the place while you’re trying to frost your cake.
This can happen if your cake layers aren’t chilled, your buttercream is too thin, or if you’re filling your cake with a soft filling like jam.
There are a few things you can do to prevent this. I highly recommend chilling your cake layers in the freezer for 20 minutes before assembling your cake.
It also helps to use a thick, stable buttercream (like my American buttercream).
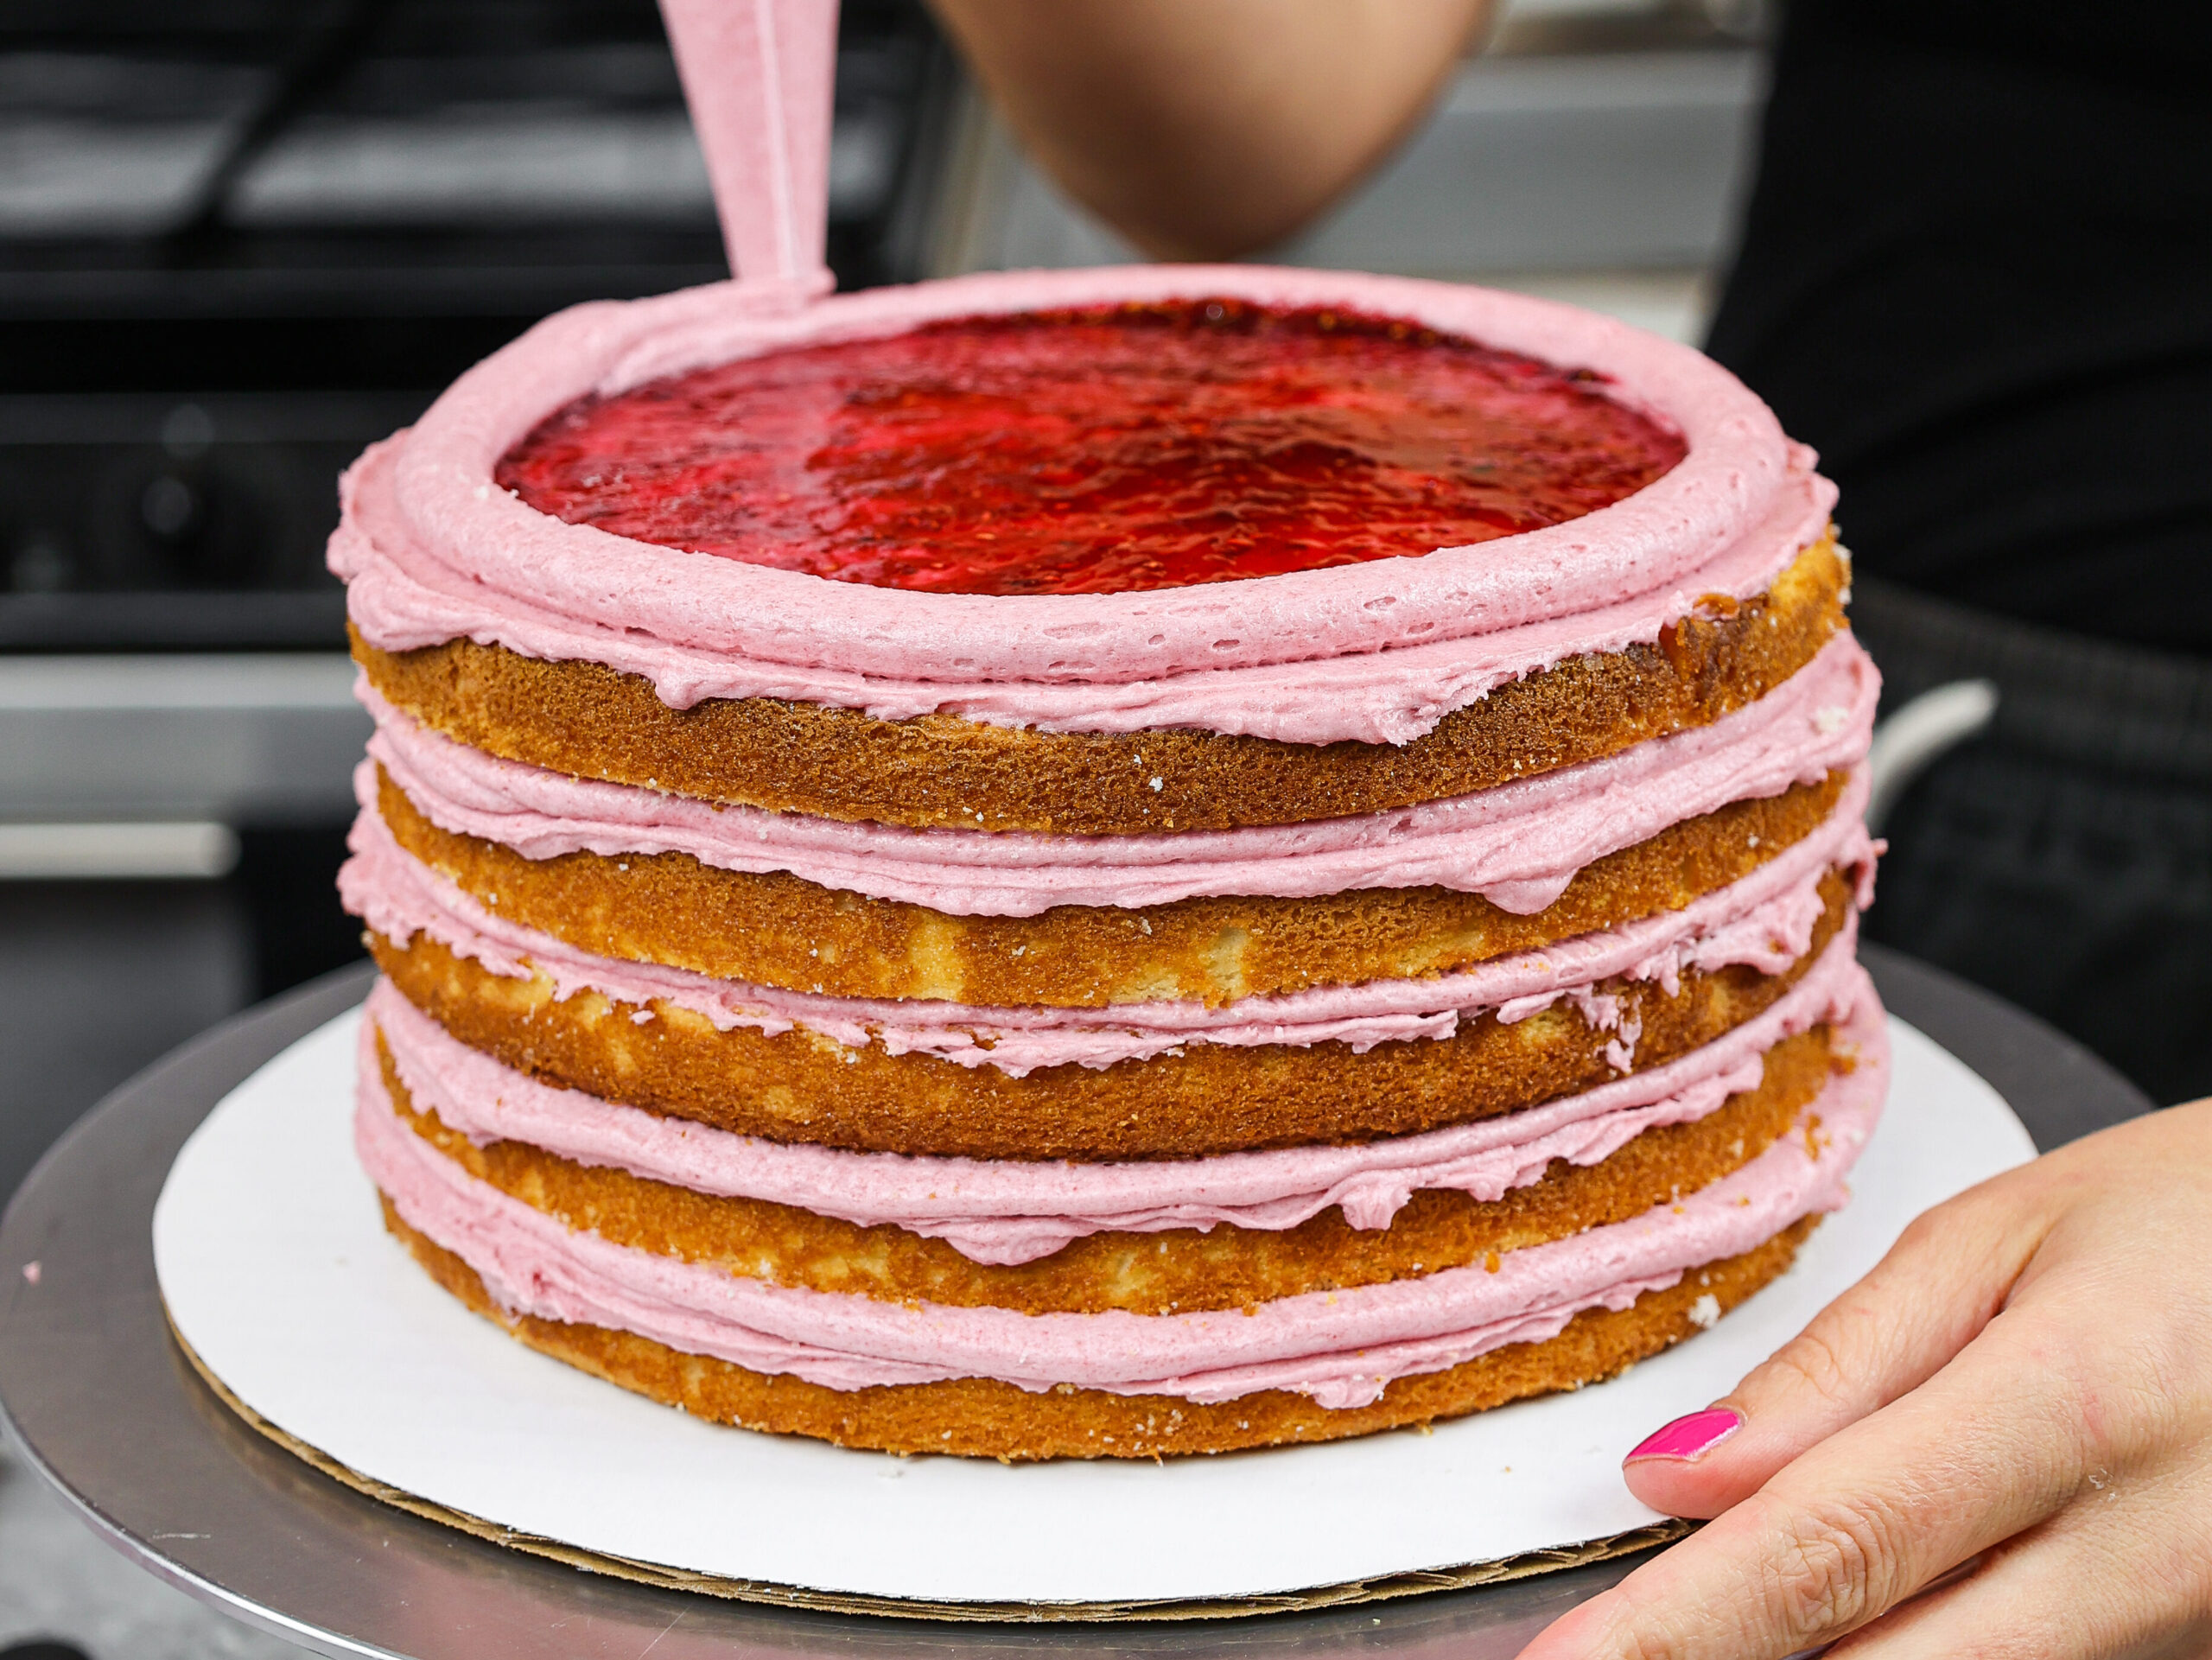
If you are filling your cake with a soft filling, be sure to pipe a buttercream ring around the filling to keep it in place and avoid adding too much filling.

How Can I Avoid Tearing My Cake Layers While I’m Frosting a Cake?
If you’ve had your cake layers tear while frosting your cake, you may want to chill your cake layers and make sure your buttercream isn’t too thick.
Some cake recipes are also easier to frost than others, so if you’re really struggling you may want to use a sturdier cake recipe like my vanilla layer cake recipe.
Why is My Cake Lopsided?
If your cakes are turning out lopsided, it’s most likely because you aren’t leveling your cake layers. Use a serrated knife to level the top of each cake layer before assembling your cake.
I also recommend checking your cake’s shape once it’s stacked to make sure it’s level. Some people even use a real level to make sure things are properly aligned.
This is usually for bigger cakes like wedding cakes, but it’s a great way to check!
How Can I Prevent My Cake from Sweating or Having Condensation?
Another common cake issue is condensation. If you live in a warm or humid climate, this is super common.
Try to chill your cake in the fridge instead of the freezer to minimize the temperature shock, and keep your kitchen as cool as possible! If you have a fan or AC, be sure to have them on as you make your cake.
Let Me Know What You Think
I hope this tutorial teaches you how to frost a cake smoothly and helps you get the smoothest sides on your cakes!
Tag me @chelsweets and #chelsweets if you share your cakes on social media so I can see your amazing creations.
Other Post You Might Like:


Margaret
Friday 28th of October 2022
Would the cake layers dry out if you freeze them? Or will they stay nice a moist? I have this one cake that is a favorite of most but my layers keep sliding. I haven't master that yet.
Chelsweets
Saturday 29th of October 2022
Hi Margaret,
Not at all! I freeze my cake layers all the time and they taste amazing!! I love doing that because it helps break up the process and makes cake decorating a lot more fun. I walk through how to properly wrap cake layers here: https://chelsweets.com/how-to-make-cake-layers-in-advance/
Hope that helps, happy baking!
rah
Thursday 22nd of September 2022
Thank you!! We were supposed to have a mini cake for our wedding but the baker cancelled last minute due to Covid and there was no time to order from elsewhere. I haven't baked a cake in years but using your instructions I was able to make it as pretty as possible!
Chelsweets
Friday 23rd of September 2022
Oh no! I'm so happy this post helped and that you were able to make cake for your big day :) Thank you for sharing Rah!!
Hocus Pocus Cake: Easy Recipe w/ Step-By-Step Video Tutorial
Sunday 4th of September 2022
[…] you’re having a hard time getting smooth sides on your cake, check out my post on how to frost a cake smoothly or watch my tutorial on […]
Small Batch WASC Cake Recipe - The Perfect 6-Inch Layer Cake
Sunday 3rd of July 2022
[…] How to Frost a Cake Smoothly Cake Batter Calculator 6-Inch Marble Cake Cake Troubleshooting Guide Yield: 16 […]
Chocolate Blackberry Cake - The Perfect 6 Inch Cake Recipe
Sunday 3rd of July 2022
[…] How to Frost a Cake Smoothly 6-Inch Marble Cake Cake Batter Calculator Cake Troubleshooting Guide Yield: 16 […]