
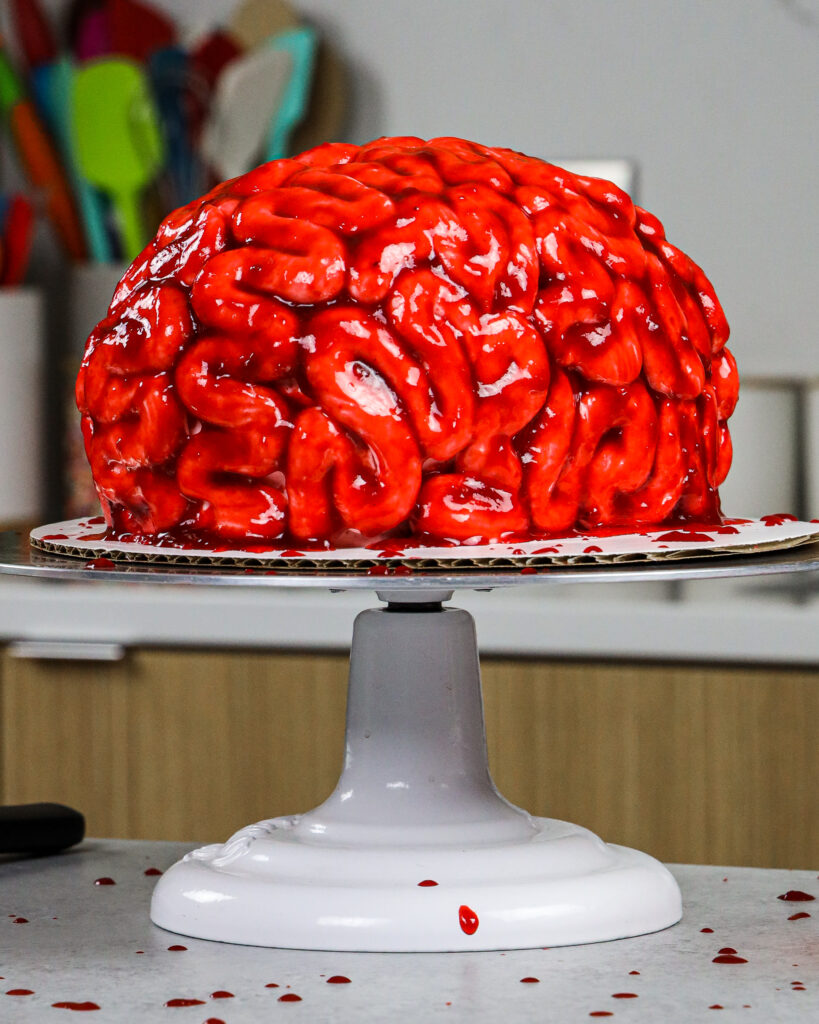
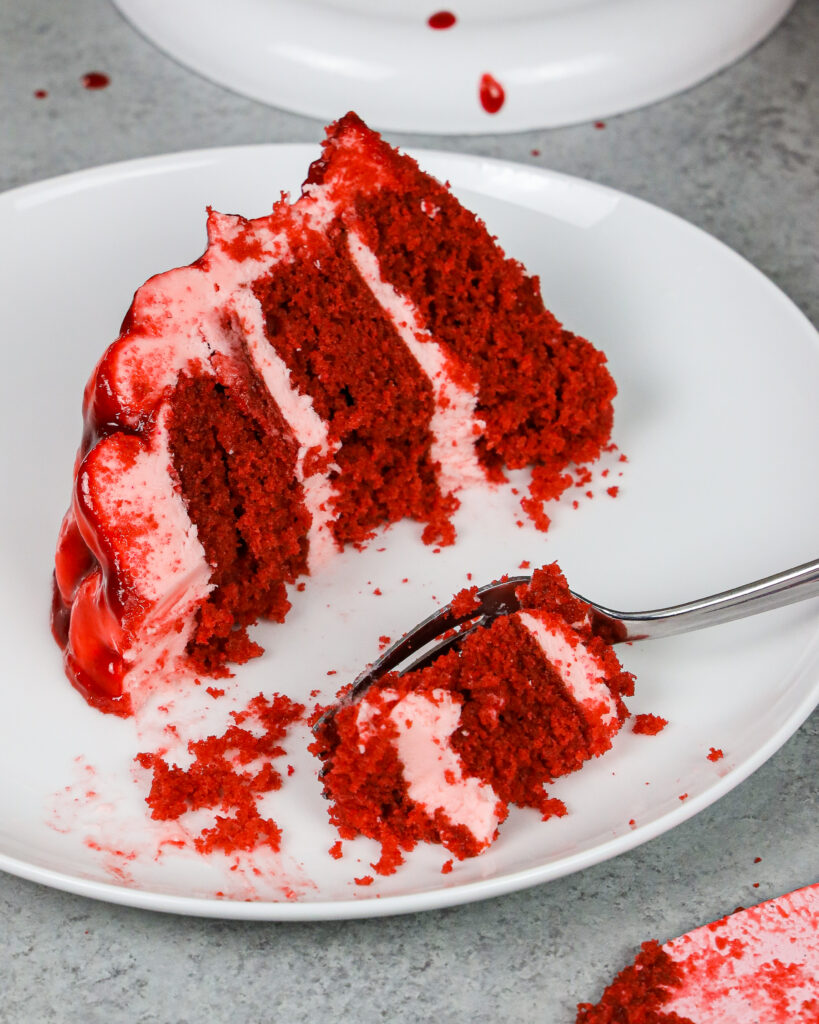
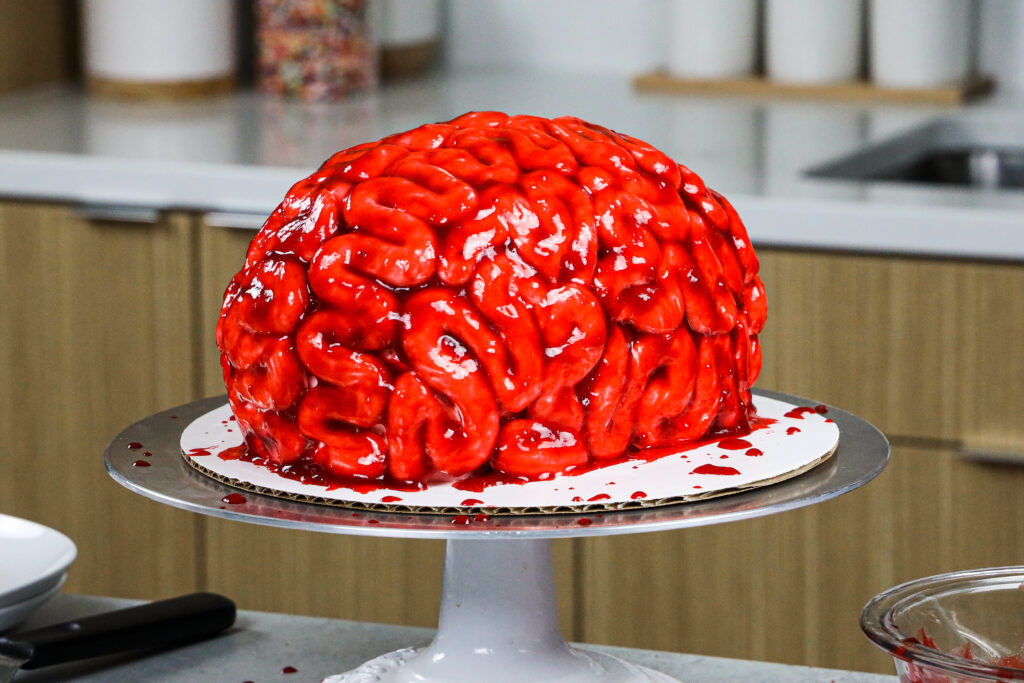
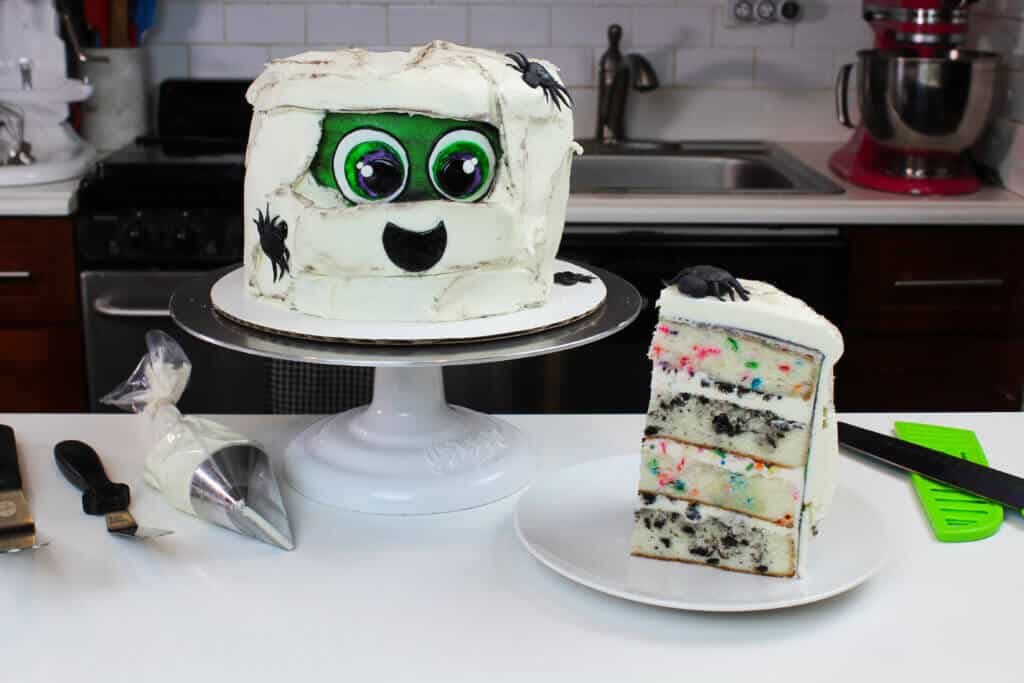
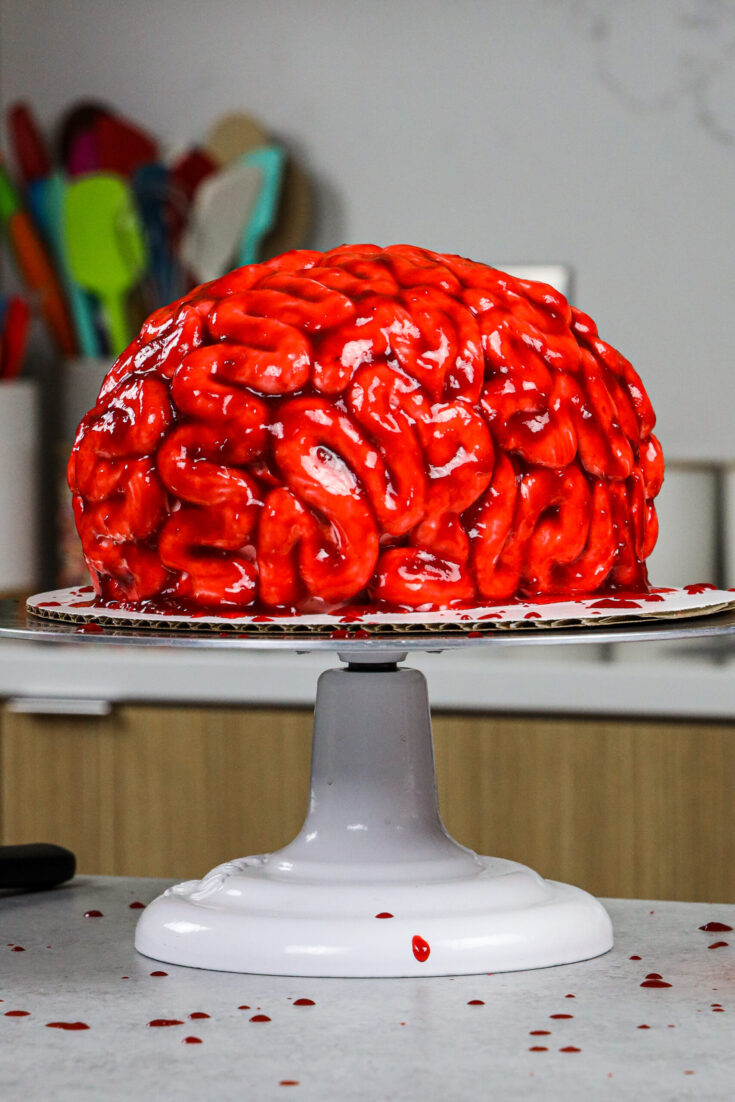
I had so much fun making my spider cake last week I wanted to make another Halloween-inspired cake. This brain cake recipe is equal parts spooky and delicious!
It’s made with tender red velvet cake layers, pink cream cheese buttercream and raspberry jam blood. I love this design because it’s relatively easy to make and you don’t need any fancy pans or molds.

I share all my tips on how to make a brain cake without a mold or fondant below, so buckle up and get ready for some fun!
Making this Brain Cake: Step-by-Step Tutorial
Let’s walk through each step of this brain cake together to make sure it turns out as amazing as possible.
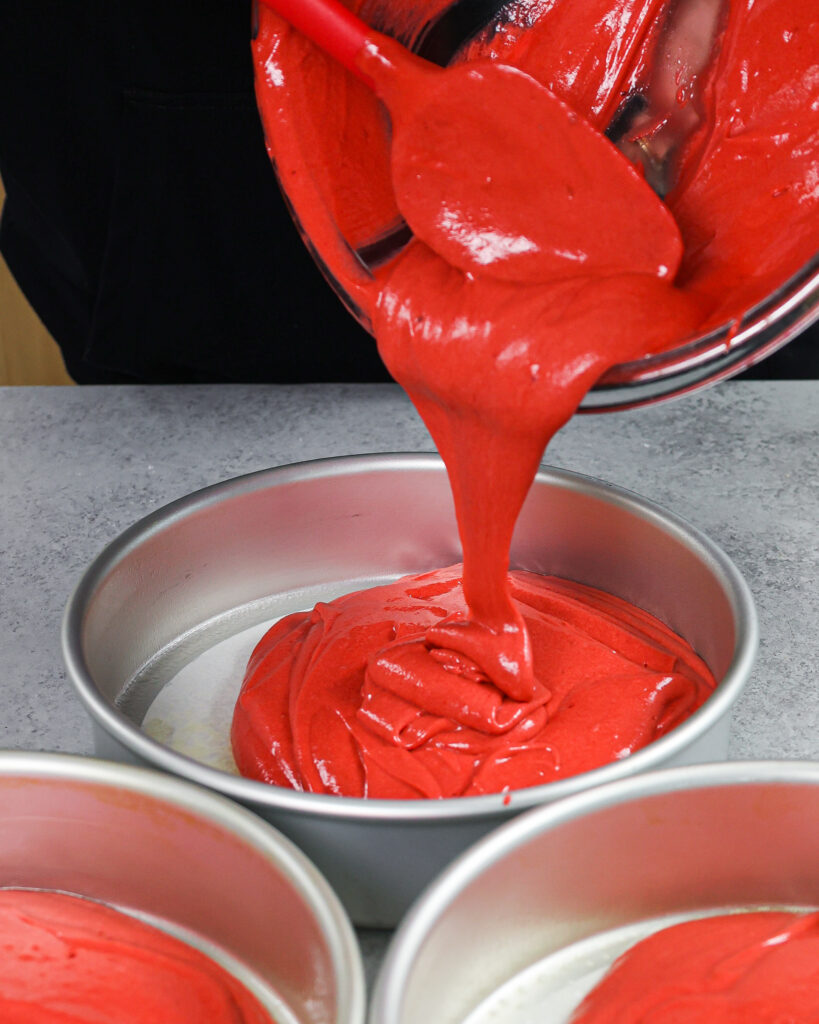
Step 1: Bake the Red Velvet Cake Layers
Fill 3 greased & lined 8-inch round cake pans with red velvet cake batter and bake until a toothpick comes out with a few moist crumbs.
Bake time can vary quite a bit based on your oven, so keep an eye on the cake once it’s been in the oven for 27 minutes.

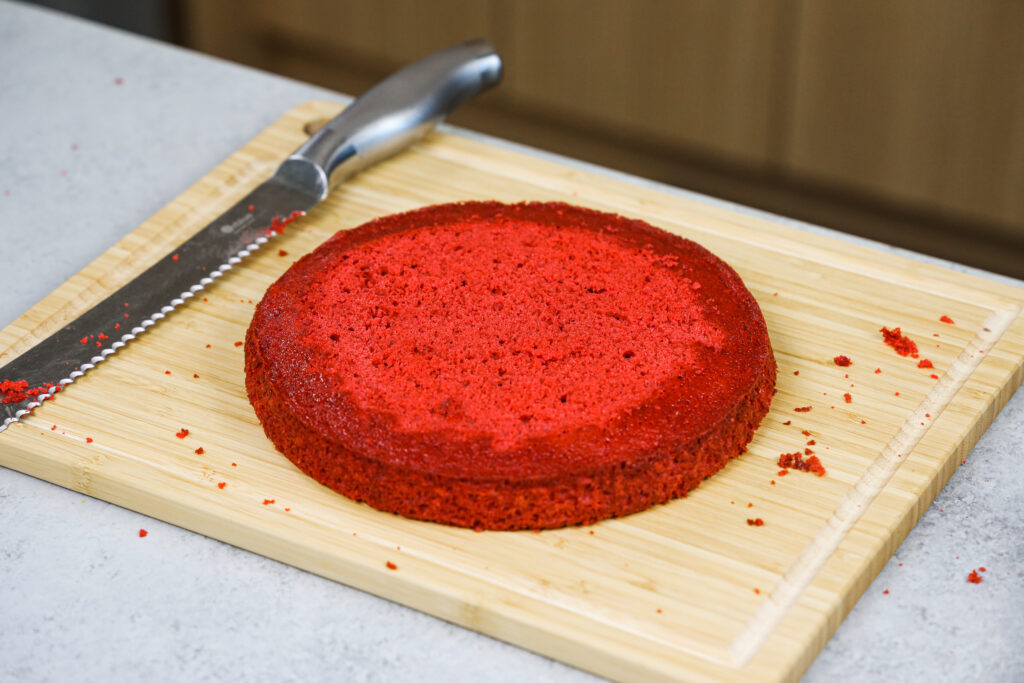
Allow the cake layers to cool in their pans for 10 minutes, then run a small offset spatula around perimeter. Carefully flip the layers out of their pans and place on a wire rack to finish cooling.
Level two of the cake layers with a serrated knife once they’re fully cooled, leaving one rounded to go on top of the cake.

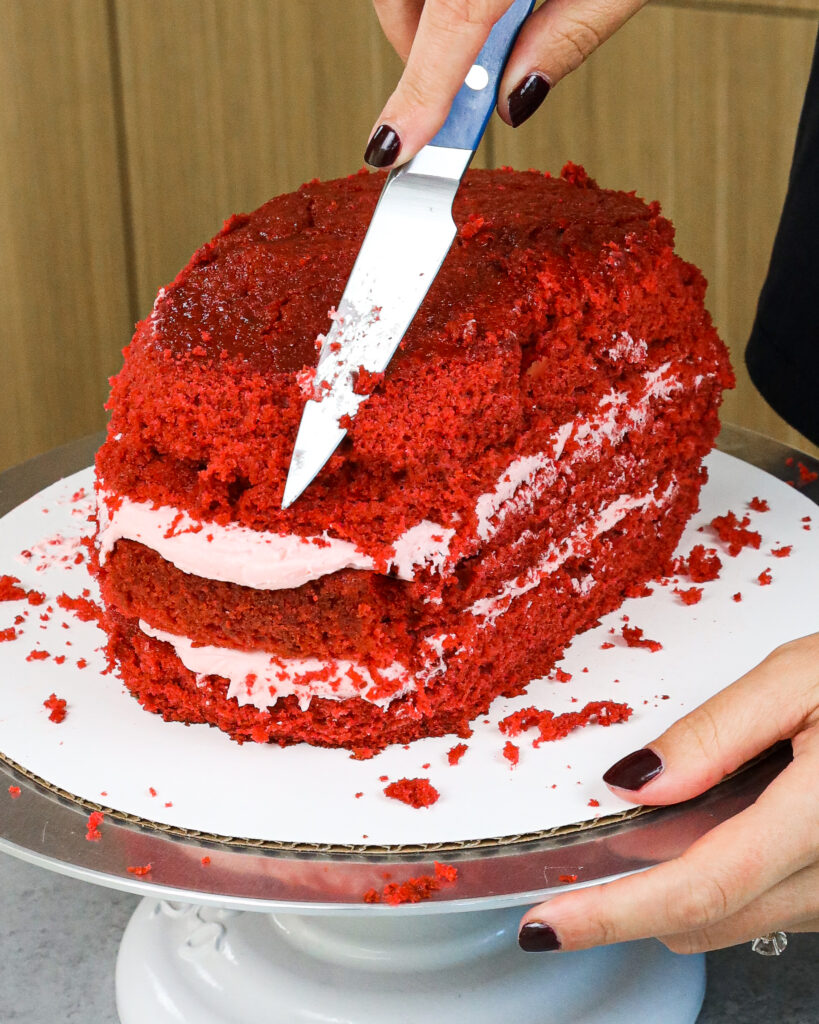
Stack the cake layers on top of each other and cut 2 sides of the cake to create an oval/brain shape. Use a small, sharp knife to make the top of the cake a bit more rounded.
If your cake layers seem to be tearing or you’re having a hard time cutting them, pop the cake layers in the freezer for about 20 minutes. It will help them keep their shape better and make them a lot easier to cut.
In the video and photo below I trimmed the cake layers once they were stacked and frosted, but I found that trimming them earlier in the process wastes less frosting and makes the whole process easier.

If you’re making these cake layers in advance, wrap and freeze them at this point.
Step 2: Make the Cream Cheese Buttercream Frosting
While the cake layers bake and cool, make the cream cheese buttercream frosting with either an electric hand mixer or a stand mixer.
If your frosting seems too thick after mixing together all your ingredients, add in additional cream (1 tablespoon at a time). Or if the frosting is too thin, add in more powdered sugar (quarter of a cup at a time).
If you’re unsure how thick your frosting should be, you can learn what consistency you’re looking for in my frosting consistency post.
Once the frosting reaches the desired consistency, add a small squirt of red food coloring and mix until the frosting is a light shade of pink and evenly colored.
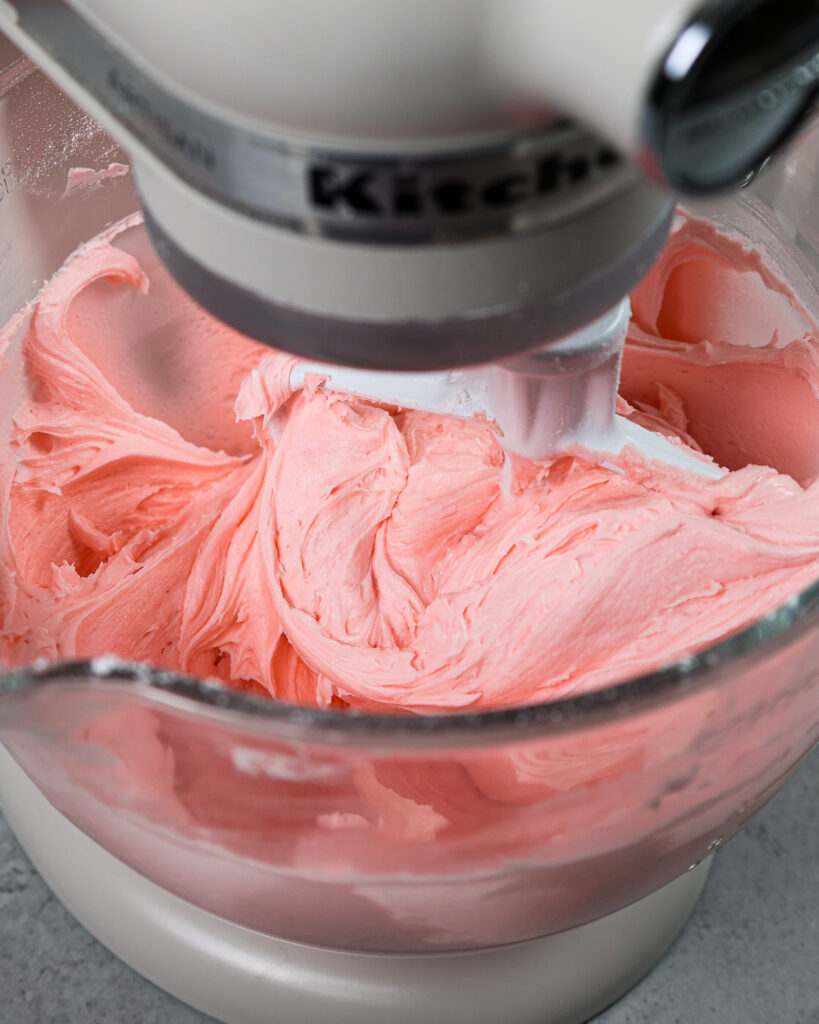

Cover the pink frosting with a piece of plastic wrap to prevent a crust from forming, then set aside.
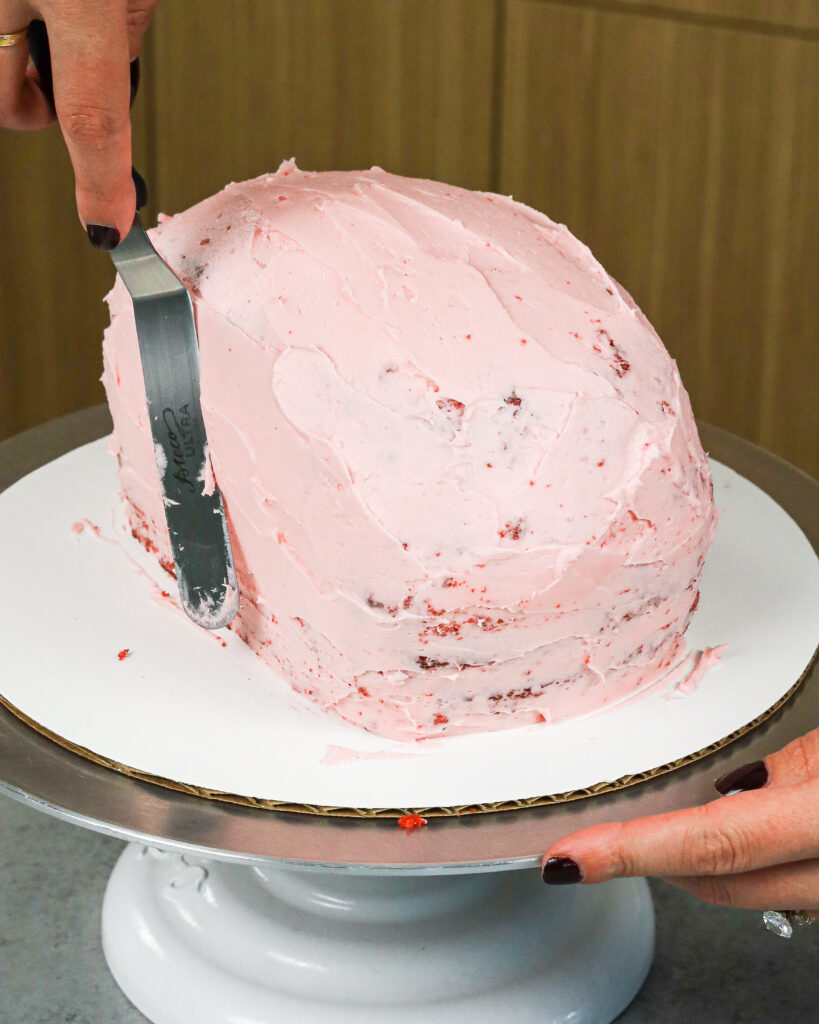
Step 3: Stack and Crumb Coat the Cake Layers
Stack and frost the cake layers on a greaseproof cake board or large plate, using a dab of frosting to help stick the first cake layer to the board.
Spread an even layer of frosting between each cake layer.
Add a thin coat of frosting around the cake that fully covers the cake layers.
Smooth using an offset spatula or small acetate sheet, then chill the cake in the fridge (20 minutes) or freezer (5 minutes) until the frosting is firm to the touch.

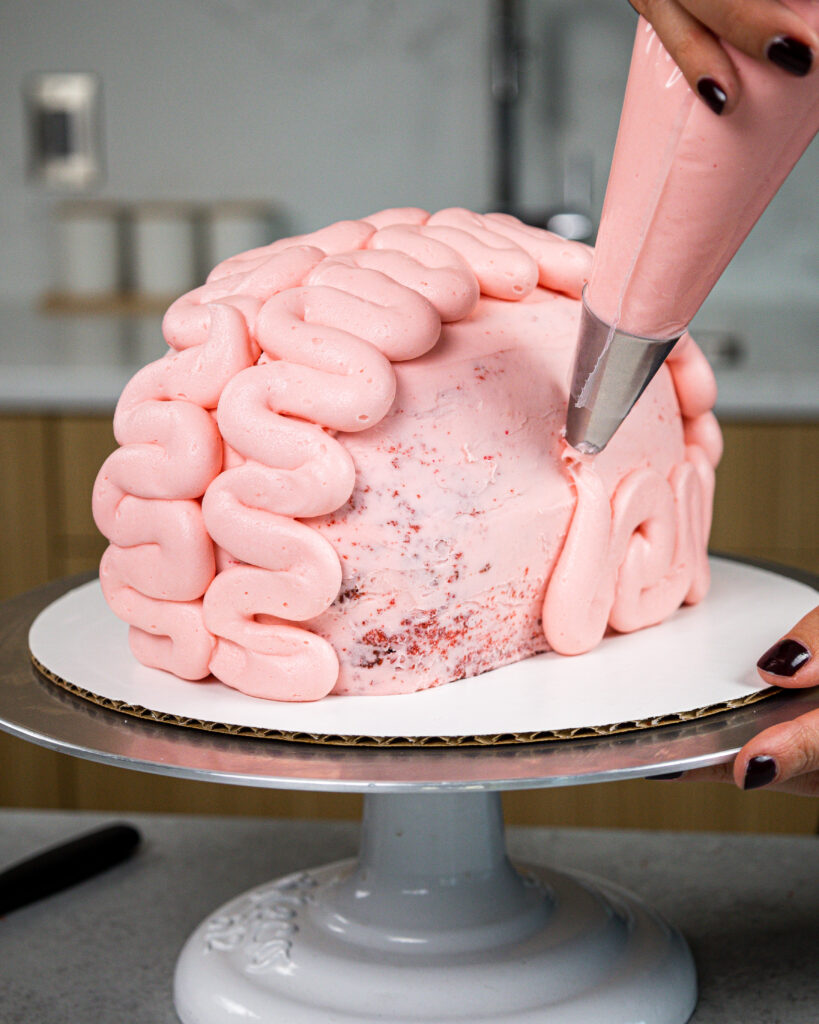
Step 4: Pipe Pink Frosting on the Chilled Cake
Now let’s talk about how to frost this brain cake! Place the remaining pink frosting in a large piping bag fit with a large round tip like an Ateco 805.
Remove the cake from the fridge or freezer and use an offset spatula or butter knife to create a line down the center of the cake to create the right and left hemisphere of the brain.
Pipe squiggly lines one each side of the cake to look like a brain. Once the cake is fully covered, chill the cake in the fridge (30 minutes) or freezer (10 minutes) again until the frosting is completely firm to the touch.

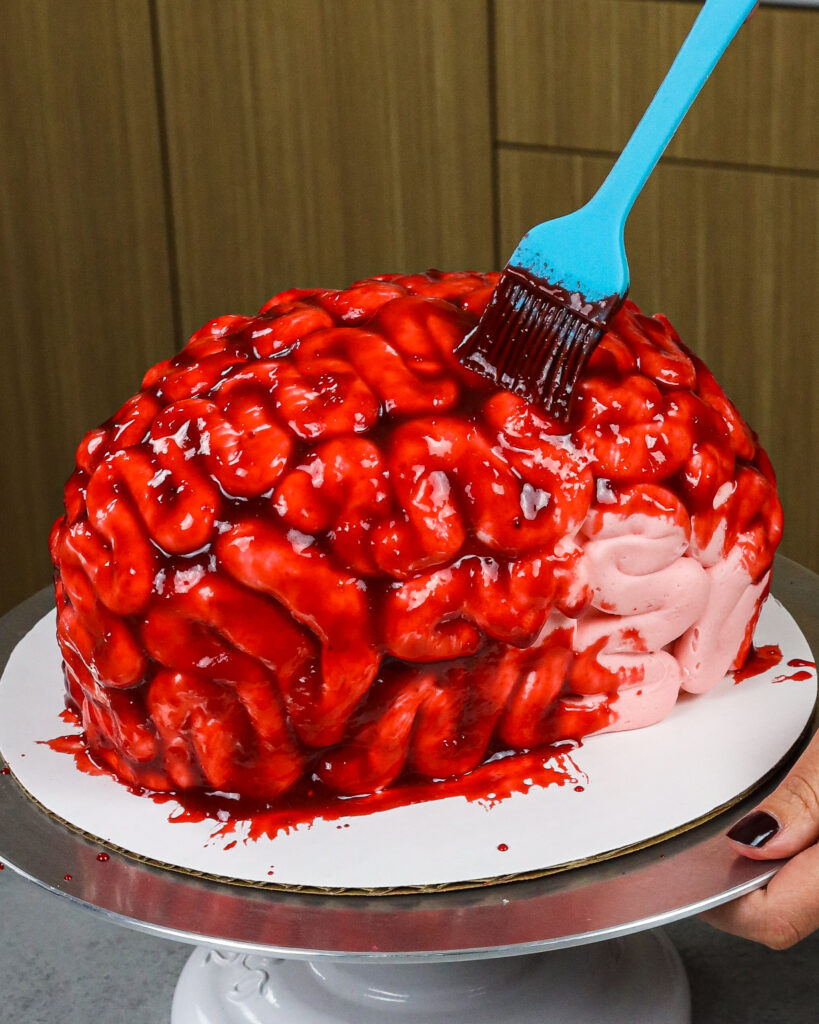
Step 5: Take Things Up a Notch with Raspberry “Blood“
While the cake chills, place the seedless raspberry jam, 3 tablespoons of water and a squirt of red gel food coloring in a small bowl. Whisk together until the jam has a thinner, smooth consistency and is bright red.
Remove the cake from the fridge or freezer and use a pastry brush to spread a thick layer of the jam mixture over the pink frosting.
Make sure you get the raspberry jam “blood” into all the nooks and crannies between the frosting squiggles. Then add a bit around the base to make this cake look even scarier and enjoy!

Substitutions and Swaps – Red Velvet Cake Layers
This halloween brain cake uses quite a few ingredients and I know you might not have all of them on hand. Or if you have food allergies or restrictions, I’ve got you covered.
Below are some swaps and substitutions that can be made in this cake recipe.
- Cake Flour – This recipe turns out best with cake flour, but you can use a gluten free flour blend if that’s all you have on hand. Or if you can’t find cake flour you can make your own using this technique.
- Granulated Sugar – I do not recommend reducing the amount of sugar or changing the type of sugar, as it will change the texture of the cake layers.
- Unsalted Butter – If you only have salted butter on hand you can use it in place of the unsalted butter in this recipe. Just be sure to omit the salt that this cake recipe calls for. You can also use vegan butter in its place (and also omit the salt)!
- Eggs – If you have an egg allergy you can try using flaxseed eggs or an egg replacer but it will affect the texture of the layers.
- Buttermilk – You can also use full fat yogurt, sour cream, whole milk, or an alternative yogurt or milk (almond, soy, oat) if you’re dairy free.
- Vegetable Oil – You can use any flavorless oil in this recipe. Canola or even sunflower oil would work great!

Substitutions and Swaps – Cream Cheese Buttercream Frosting
- Unsalted Butter – If you only have salted butter on hand you can use it in place of the unsalted butter. Just be sure to omit the salt that this frosting recipe calls for. You can also use vegan butter in its place (and omit the salt)!
- Cream Cheese – The full fat version that comes in a brick works best for this recipe. If you don’t like cream cheese frosting, use additional butter in place of the cream cheese in this recipe.
- Heavy Cream – Whole milk or alternative milk (soy, almond, oat) will work fine in this frosting recipe if that’s what you have on hand.
- Gel food coloring – Natural food coloring (like raspberry powder) or liquid food coloring can be used if needed.
Tips for Making the Best Brain Cake:
- Be sure to properly measure your flour (spoon into the cup measure, then level) or use a kitchen scale to measure your dry ingredients.
- Use gel food coloring to avoid throwing off the consistency of the frosting and cake layers or giving them a bitter taste.
- Ingredients at room temp mix together better, so be sure you set out any cold ingredients ahead of time.
- Mix your cake batter just until the ingredients are incorporated. This will ensure your cake layers are tender and soft.
- Chill your cake layers in the freezer for about 20 minutes before assembling the cake. This makes it easier to trim, stack, frost.
- Make this brain cake vegan or dairy free if needed! Use your favorite type of dairy free milk to replace the buttermilk and heavy cream, and use vegan butter sticks in place of the butter. For the eggs I recommend using an egg replacer like this.
- Don’t stress if your piped frosting isn’t perfect or if there are some small gaps, the frosting is going to get completely coated in jam and no one will notice!!
- Use the leftover cake trimmings to make cake pops, enjoy them as a snack with leftover buttercream or crumble up the layers and sprinkle on top of ice cream! Store them in an airtight container at room temperature for up to 3 days.


Making this Brain Cake in Advance & Storage Tips:
- Make your cake layers in advance and freeze them. It breaks the process up and makes it more approachable.
- Make your frosting ahead of time too or save any leftover frosting. It can be stored in an airtight container in the fridge for up to 2 weeks. Or store it in the freezer for up to a month. Be sure to give it a good stir once it thaws to get the consistency smooth again.
- A frosted cake can last in the fridge for up to a week. The buttercream locks in all the moisture, keeping the cake fresh and delicious.
- If you cut into the cake and have leftovers, use any remaining frosting to cover the cut section to keep it moist. It can be stored in the fridge like this for up to a week.

Let Me Know What You Think!
If you make this halloween brain cake, I’d love to hear what you think of it! Let me know by leaving a rating below.
If you plan to share on social media, you can tag me @chelsweets and use #chelsweets so that I can see your amazing creations!
Other Recipes You Might Like:


Brain Cake

This brain cake is perfect for Halloween! It's made with moist red velvet cake layers, pink buttercream and raspberry jam blood.
Ingredients
Red Velvet Cake
- 2 1/2 cups cake flour (300g)
- 2 Tbsp unsweetened cocoa powder (10g)
- 1 tsp baking soda (6g)
- 1/2 tsp fine salt (3g)
- 1/2 cup unsalted butter, room temperature (113g)
- 1 3/4 cups granulated sugar (350g)
- 2 large eggs, room temperature (112g)
- 1 1/4 cups buttermilk, room temperature (300g)
- 1/2 cup vegetable oil (120g)
- 2 tsp vanilla extract (8g)
- 1 tsp white vinegar (4g)
- 2 squirts of red gel food coloring (or 1 Tbsp liquid food coloring)
Cream Cheese Buttercream Frosting
- 1 1/2 cups unsalted butter, room temperature (339g or 3 sticks)
- 1 cup full-fat cream cheese, room temperature (226g or 8 oz.)
- 1 Tbsp vanilla extract (12g)
- 1 tsp fine salt (6g)
- 8 cups powdered sugar (1000g)
- 3 Tbsp heavy cream or whipping cream (45g)
- small squirt of red gel food coloring (or 1 tsp liquid food coloring)
Edible Fake Blood
- 1/2 cup seedless raspberry or strawberry jam
- 3 Tbsp water (45g)
- [1/4 tsp red gel food coloring or 1 tsp liquid food coloring - optional]
Additional Tools / Decorations
Instructions
Red Velvet Cake
- Preheat oven to 350 F / 175 C. Grease three 8-inch or 3 7-inch cake pans with homemade cake release or non-stick baking spray and parchment paper. Set aside.
- In a medium bowl, sift together 2 1/2 cups cake flour, 2 Tbsp cocoa powder, 1 tsp baking soda and 1/2 tsp salt. Set aside.
- In a large bowl or the bowl of a stand mixer, use either a hand mixer or a stand mixer fit with a whisk attachment to cream together 1/2 cup of butter and 1 3/4 cups granulated sugar. Mix on a medium high speed for 1-2 minutes until the mixture becomes lighter in color. Scrape the sides and bottom of the bowl as needed with a rubber spatula.
- Mix in 2 large eggs on a medium speed until fully combined.
- Add in 1 1/4 cups buttermilk, 1/2 cup of oil, 2 tsp vanilla extract, 1 tsp white vinegar, and 2 squirts of red food coloring. Mix on a low speed until combined. The mixture might look broken at this stage but I promise it will come together once we add in the dry ingredients.
- Slowly mix the dry ingredients into the wet ingredients a low speed in two additions. Mix until just combined and you can no longer see any visible streaks of cake flour.
- Divide the batter evenly between the prepared pans. Bang the pans on your counter a few times to release any air bubbles that might be trapped in the batter. Bake for 27-30 minutes, or until a toothpick inserted in the center of the cake comes out with a few moist crumbs.
- Remove the pans from oven and let them cool for 10 minutes then run a small offset spatula around perimeter. Carefully flip the layers out of their pans and place on a wire rack to finish cooling.
- Level two of the cake layers with a serrated knife once they're fully cooled, leaving one rounded to go on top of the cake.
- Stack the cake layers on top of each other and cut 2 sides of the cake to create an oval/brain shape. Use a small, sharp knife to make the top of the cake a bit more rounded. If your cake layers seem to be tearing or you're having a hard time cutting them, pop the cake layers in the freezer for about 20 minutes. It will help them keep their shape better and make them a lot easier to cut. In the video and photo below I trimmed the cake layers once they were stacked and frosted, but I found that trimming them earlier in the process wastes less frosting and makes the whole process easier.
- If you're making these in advance, wrap and freeze them at this point.
Cream Cheese Buttercream Frosting:
- Beat 1 1/2 cups of butter and 1 cup of cream cheese on a medium speed for 30 seconds with a paddle attachment until smooth. If you don't like cream cheese frosting use additional butter in place of the cream cheese in this frosting recipe.
- Add in 1 Tbsp vanilla and 1 tsp salt, and beat on low until the ingredients are fully incorporated.
- Slowly mix in 8 cups of powdered sugar and 3 Tbsp of heavy cream on a low speed. Place a kitchen towel over your mixer to prevent powdered sugar clouds from coating your kitchen. Scrape the sides and bottom of the bowl as needed with a rubber spatula.
- If the frosting seems too thick, add in additional cream (1 Tbsp at a time). If the frosting is too thin, add in more powdered sugar (1/4 cup at a time). Once the frosting reaches the desired consistency, add a small squirt of red food coloring and mix until the frosting is a light shade of pink and evenly colored.
- Cover the frosting with a piece of plastic wrap to prevent a crust from forming. Set aside.
Edible Blood Recipe:
- Place the seedless raspberry jam, 3 tablespoons of water and 1/4 tsp of red gel food coloring in a small bowl. Whisk together until the jam has a thin, smooth consistency and is bright red. Cover and set aside.
Decorating this Brain Cake:
- Stack and frost the cake layers on a greaseproof cake board, using a dab of frosting to help stick the first cake layer to the board. Spread an even layer of frosting between each cake layer.
- Add a thin coat of frosting around the cake that fully covers the cake layers. Smooth using an offset spatula or small acetate sheet, then chill the cake in the fridge (20 minutes) or freezer (5 minutes) until the frosting is firm to the touch.
- Place the frosting in a large piping bag fit with a large round tip like an Ateco 805.
- Remove the cake from the fridge or freezer and use an offset spatula or butter knife to create a line down the center of the cake to create the right and left hemisphere of the brain. Pipe squiggly lines one each side of the cake to look like a brain. Don't stress if your lines aren't perfect or if there are some small gaps, the frosting is going to get completely coated in jam and no one will notice!!
- Once the cake is fully covered, chill the cake in the fridge (30 minutes) or freezer (10 minutes) again until the frosting is completely firm to the touch.
- Remove the cake from the fridge or freezer and use a pastry brush to spread a thick layer of the jam mixture over the pink frosting. Make sure you get the blood into all the nooks and crannies between the frosting squiggles! Then add a bit around the base to make this cake look even scarier and enjoy!
Notes
My Tips for Making the Best Brain Cake
- Ingredients at room temp mix together better! Set out any cold ingredients ahead of time.
- Properly measure your cake flour (spoon into the cup measure, then level). Or better yet, use a kitchen scale to measure your dry ingredients.
- Mix your cake batter just until the ingredients are incorporated once you've added in the cake flour. This will ensure your cake layers are tender and fluffy.
- Use a scale to weigh your cake pans as you fill them. Make sure each pan has the same amount of batter will make your cake layers bake to the same heigh and bake more evenly.
- Bang your cake pans on the counter before putting them in the oven. This brings any air bubbles that are trapped in the batter to the surface.
- Level your room temperature or thawed cake layers with a serrated knife to make them easier to stack.
- Chill your cake layers in the freezer for about 20 minutes before assembling the cake. It makes it so much easier to trim, stack and frost them!
- Don't stress if your piped frosting isn't perfect or if there are some small gaps, the frosting is going to get completely coated in jam and no one will notice!!
- Use the leftover cake trimmings to make cake pops, enjoy them as a snack with leftover buttercream or crumble up the layers and sprinkle on top of ice cream! Store them in an airtight container at room temperature for up to 3 days.
Making this Brain Cake in Advance & Storage Tips
- Make your cake layers in advance and freeze them. It breaks the process up and makes it more approachable.
- Make your frosting ahead of time or save any leftover frosting! It can be stored in an airtight container in the fridge for up to a month.
- This frosting can also be stored in the freezer for up to 3 months! Just be sure to give it a good stir once it thaws to make it nice and smooth again.
- A frosted cake can last in the fridge for a week, or in the freezer for a month. The buttercream locks in the moisture and keeps the cake fresh and delicious!
Nutrition Information
Yield
20Serving Size
1Amount Per Serving Calories 611Total Fat 31gSaturated Fat 15gTrans Fat 0gUnsaturated Fat 14gCholesterol 88mgSodium 333mgCarbohydrates 81gFiber 1gSugar 65gProtein 4g
Susan
Sunday 30th of October 2022
Is it best to wait and pastry brush the jam just prior to serving or can I do it the night before? I am making this for a work party…thank you!
Chelsweets
Saturday 5th of November 2022
Apologies for the delayed response on this Susan! Either would be fine, the only thing that really matters is that the cake is chilled before you brush on the jam. I'd suggest doing it the night before to make your life easier. I hope the cake turned out great and that your coworkers loved it :)
V.
Thursday 20th of October 2022
I made this for my kind's school fundraiser. I didn't make the cake (used a box to save time) but I did make the frosting and the glaze from this recipe. both were phenomenal. I would have liked the piping portion of the video to be a bit slower because that's where I struggled the most. Otherwise, I have gotten tons of compliments. Thanks!
Chelsweets
Sunday 23rd of October 2022
Hi Valerie,
So happy to hear that!! And love that this tutorial was used for such a great cause :) Thank you for sharing, and noted on the video! I'll keep that in mind for the future. Thanks!
Amy True
Thursday 7th of July 2022
This cake is wonderful!! SO tasty - plus I got to scare people at my Halloween party by telling them I’d taken a brain from somebody. :)))
Eyeball Cupcakes: The Perfect Halloween Dessert - Chelsweets
Sunday 9th of January 2022
[…] Brain Cake […]
Carolyn
Wednesday 27th of October 2021
I made the Taco cake for my daughter's birthday. she is obsessed with tacos. she and friends go ALL the time Taco Truck hunting in town as well as out of town, sometimes miles. When she was presented with it, she was overwhelmed with it, and immediately asked which bakery we got it from. I told her I made it by watching your video. She was totally amazed. thank you for taking the time to make these videos for amateur bakers like myself who enjoy decorating beautiful cakes for others. Thank you so very much !!!!