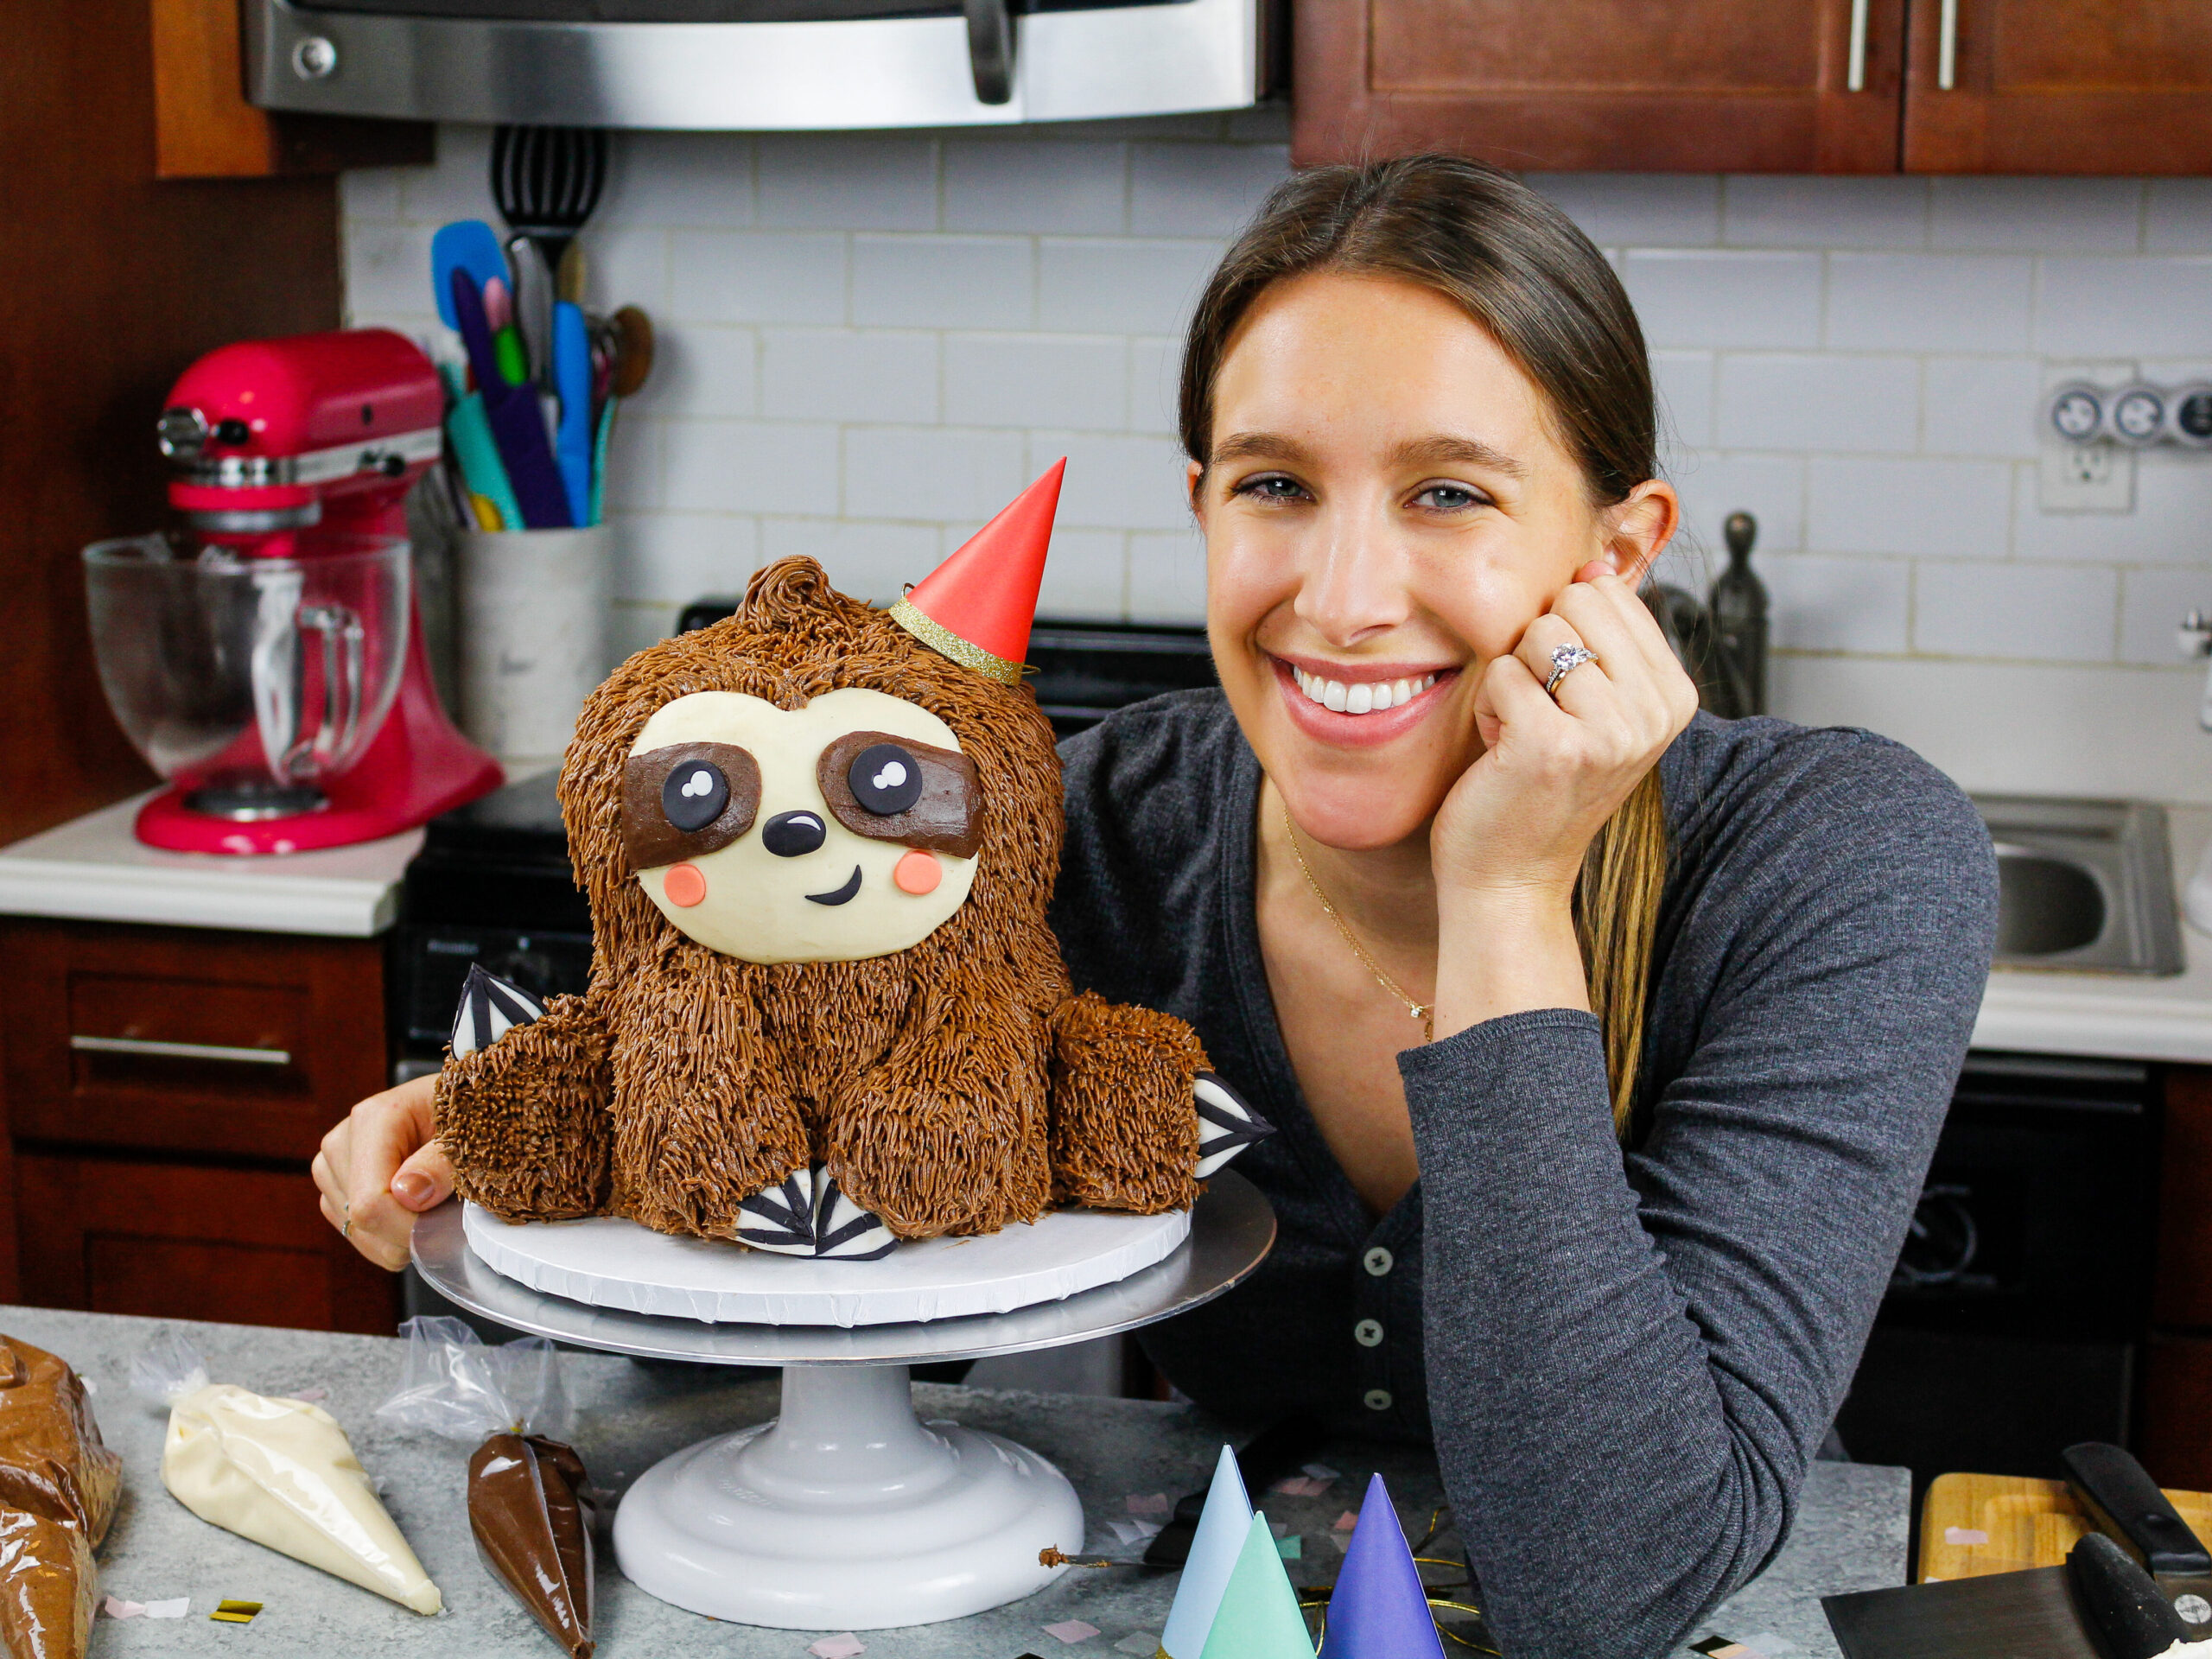
I never thought I’d say this, but this week I’m making a sloth cake as part of my animal cake series!
I got a lot of requests for this cake, and while it might seem random a lot of people out there really love sloths… including Kristen Bell!!
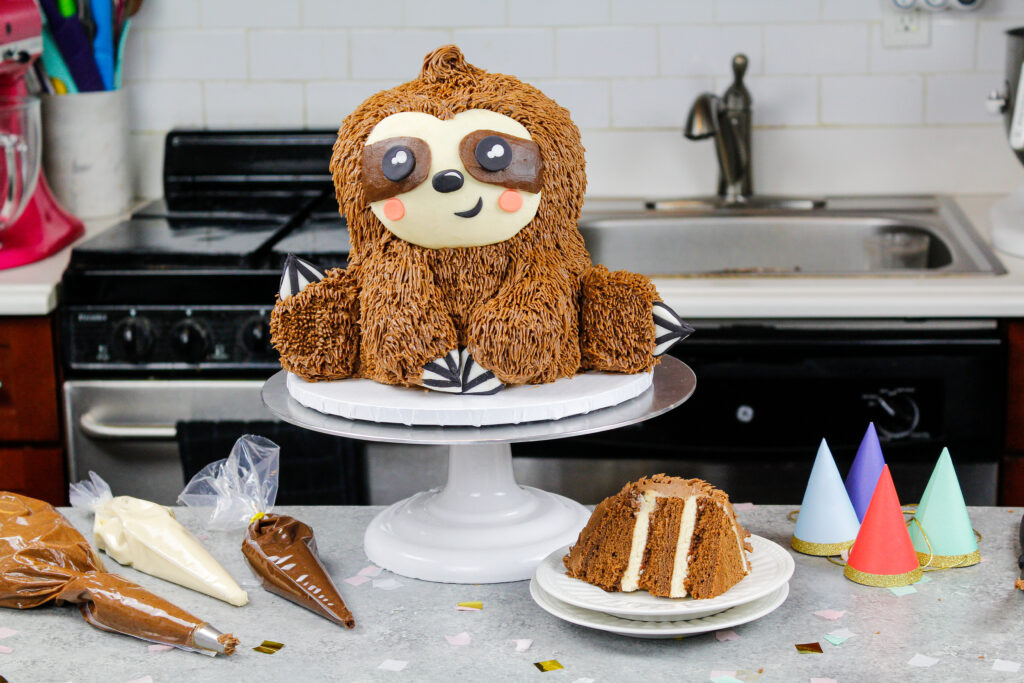
This sloth cake is made with tender chocolate cake layers and loads of chocolate peanut buttercream frosting fur!
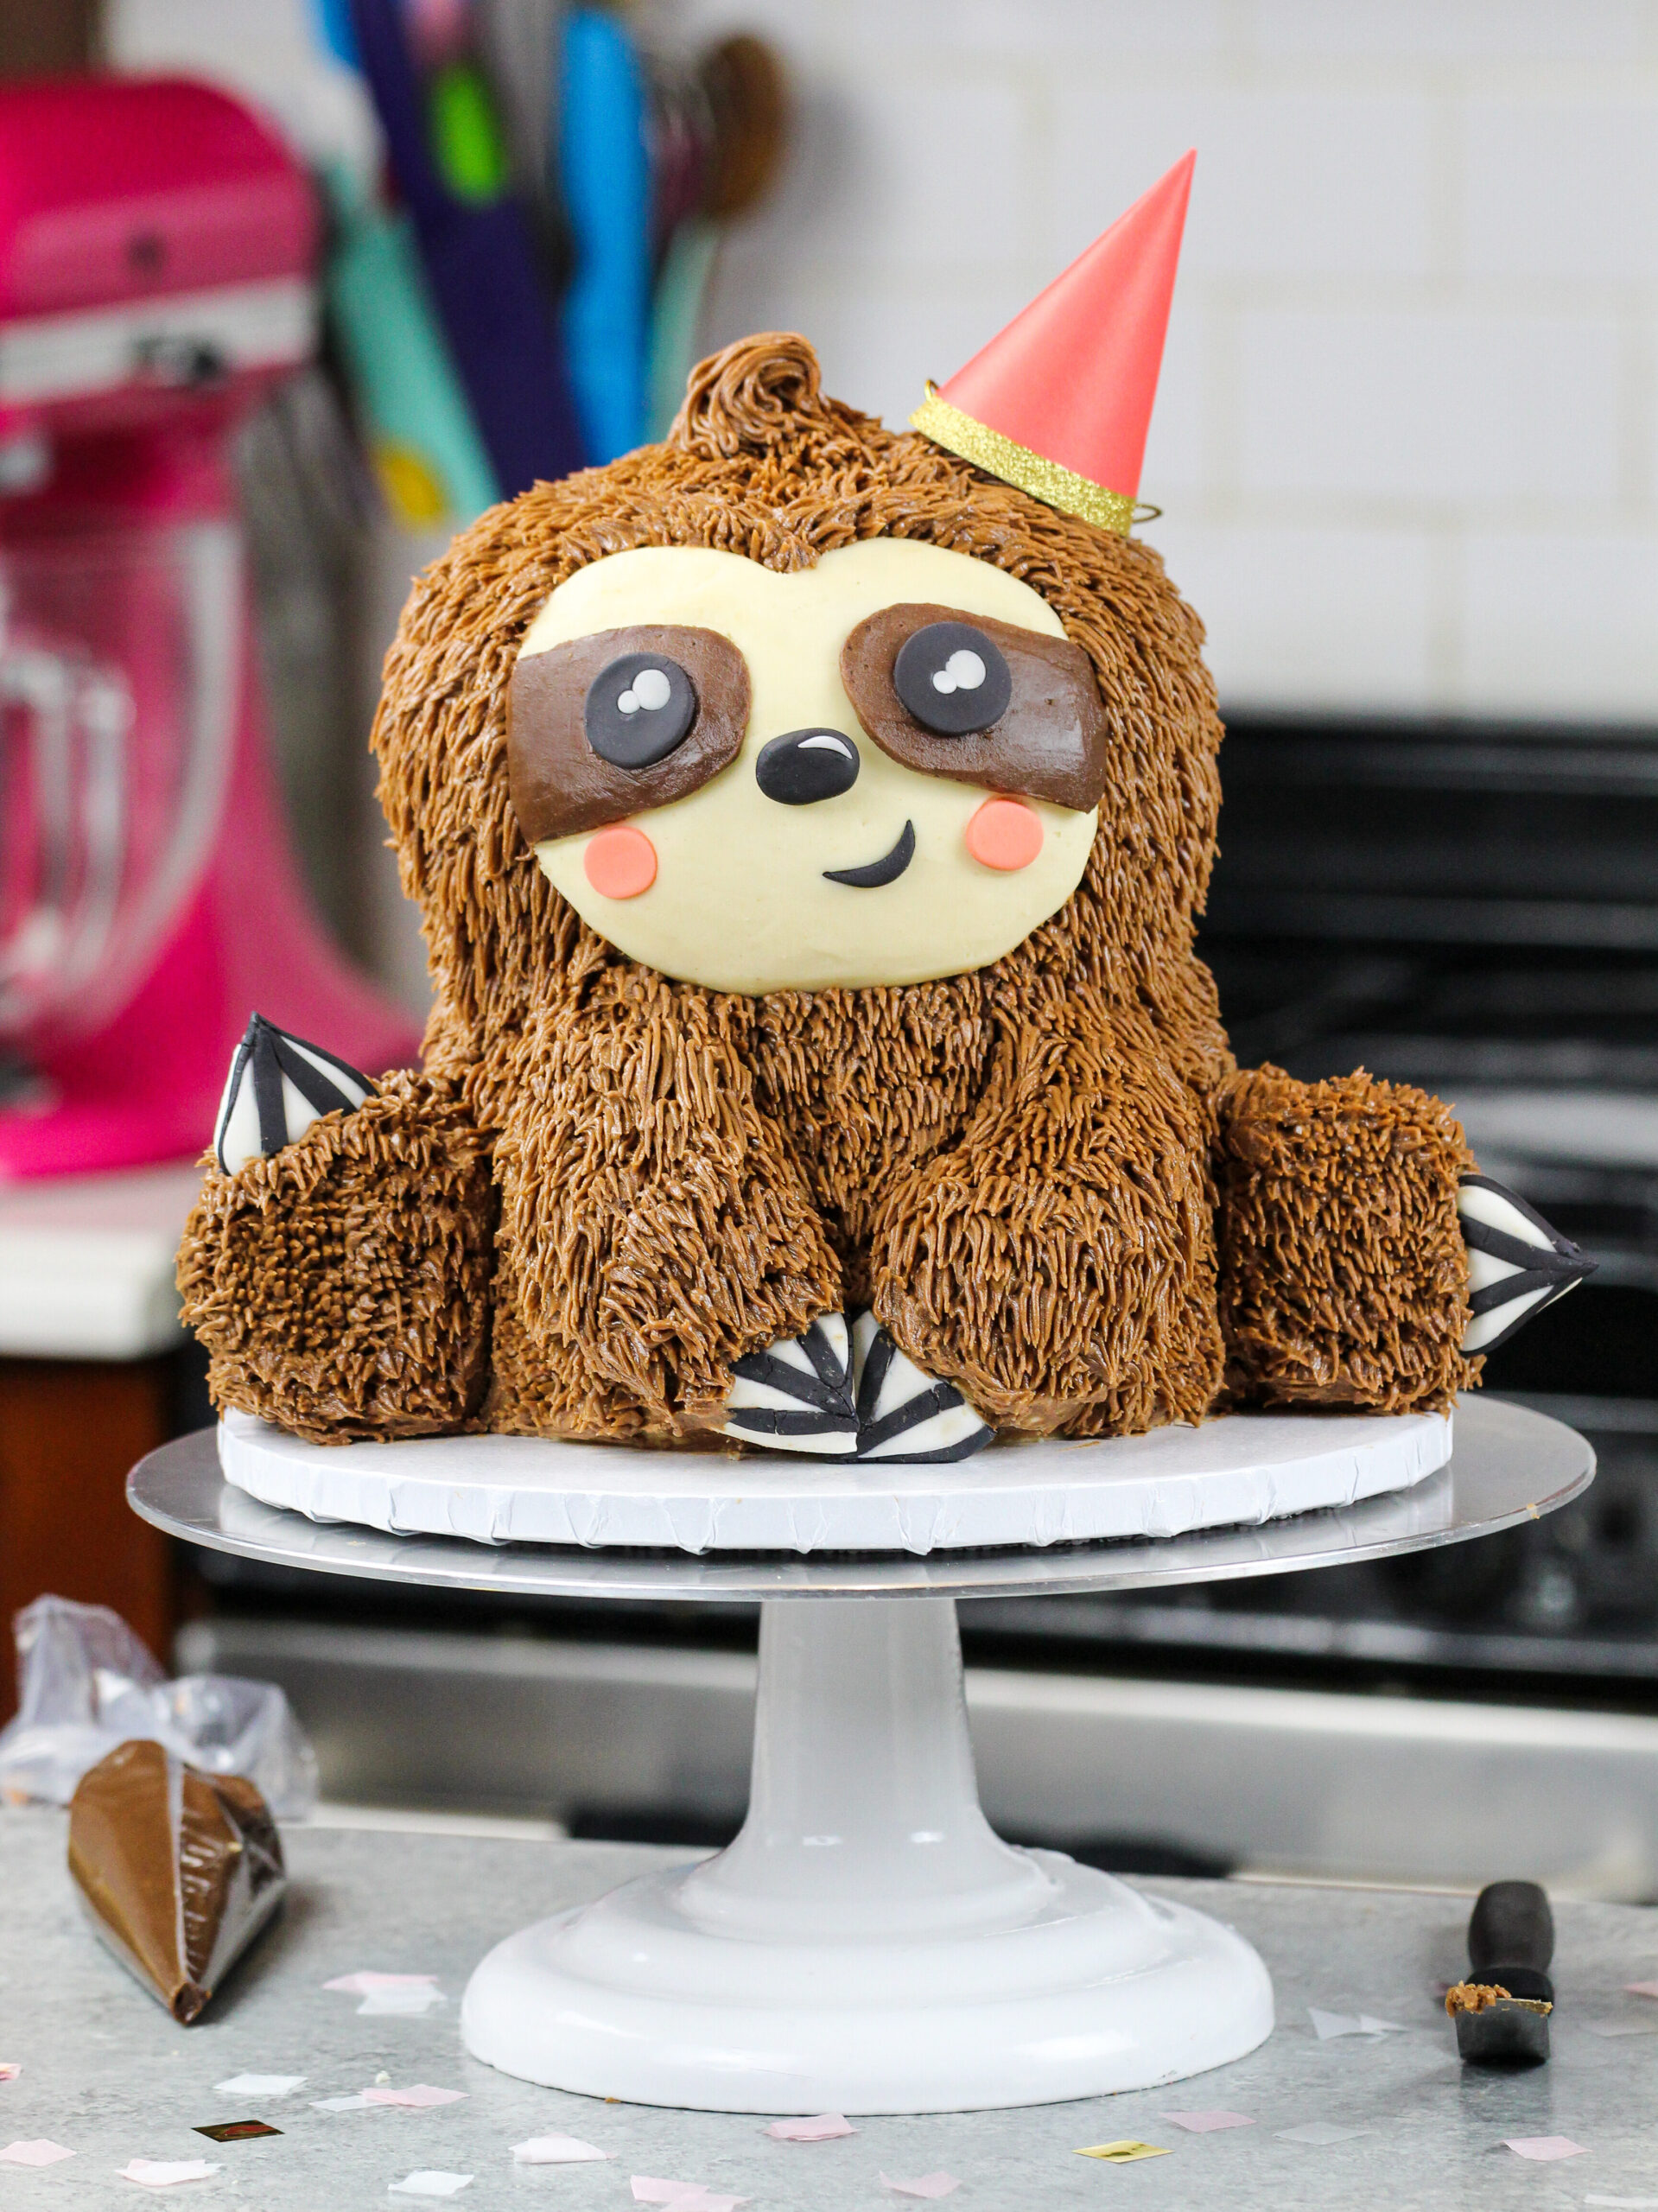
How to Make a Sloth Birthday Cake
Making this sloth cake is a slow and steady process, no pun intended! Below I walk through each step and share process shots for my visual learners out there.
Step 1: Make the Chocolate Cake Layers
This sloth cake is made with 6 chocolate cake layers that are 6-inches in diameter. I used my fluffy chocolate cake recipe, but any chocolate cake batter can be used.
If you have a domed cake pan, you can use it to make one of the cake layers for the top of the sloth’s head.
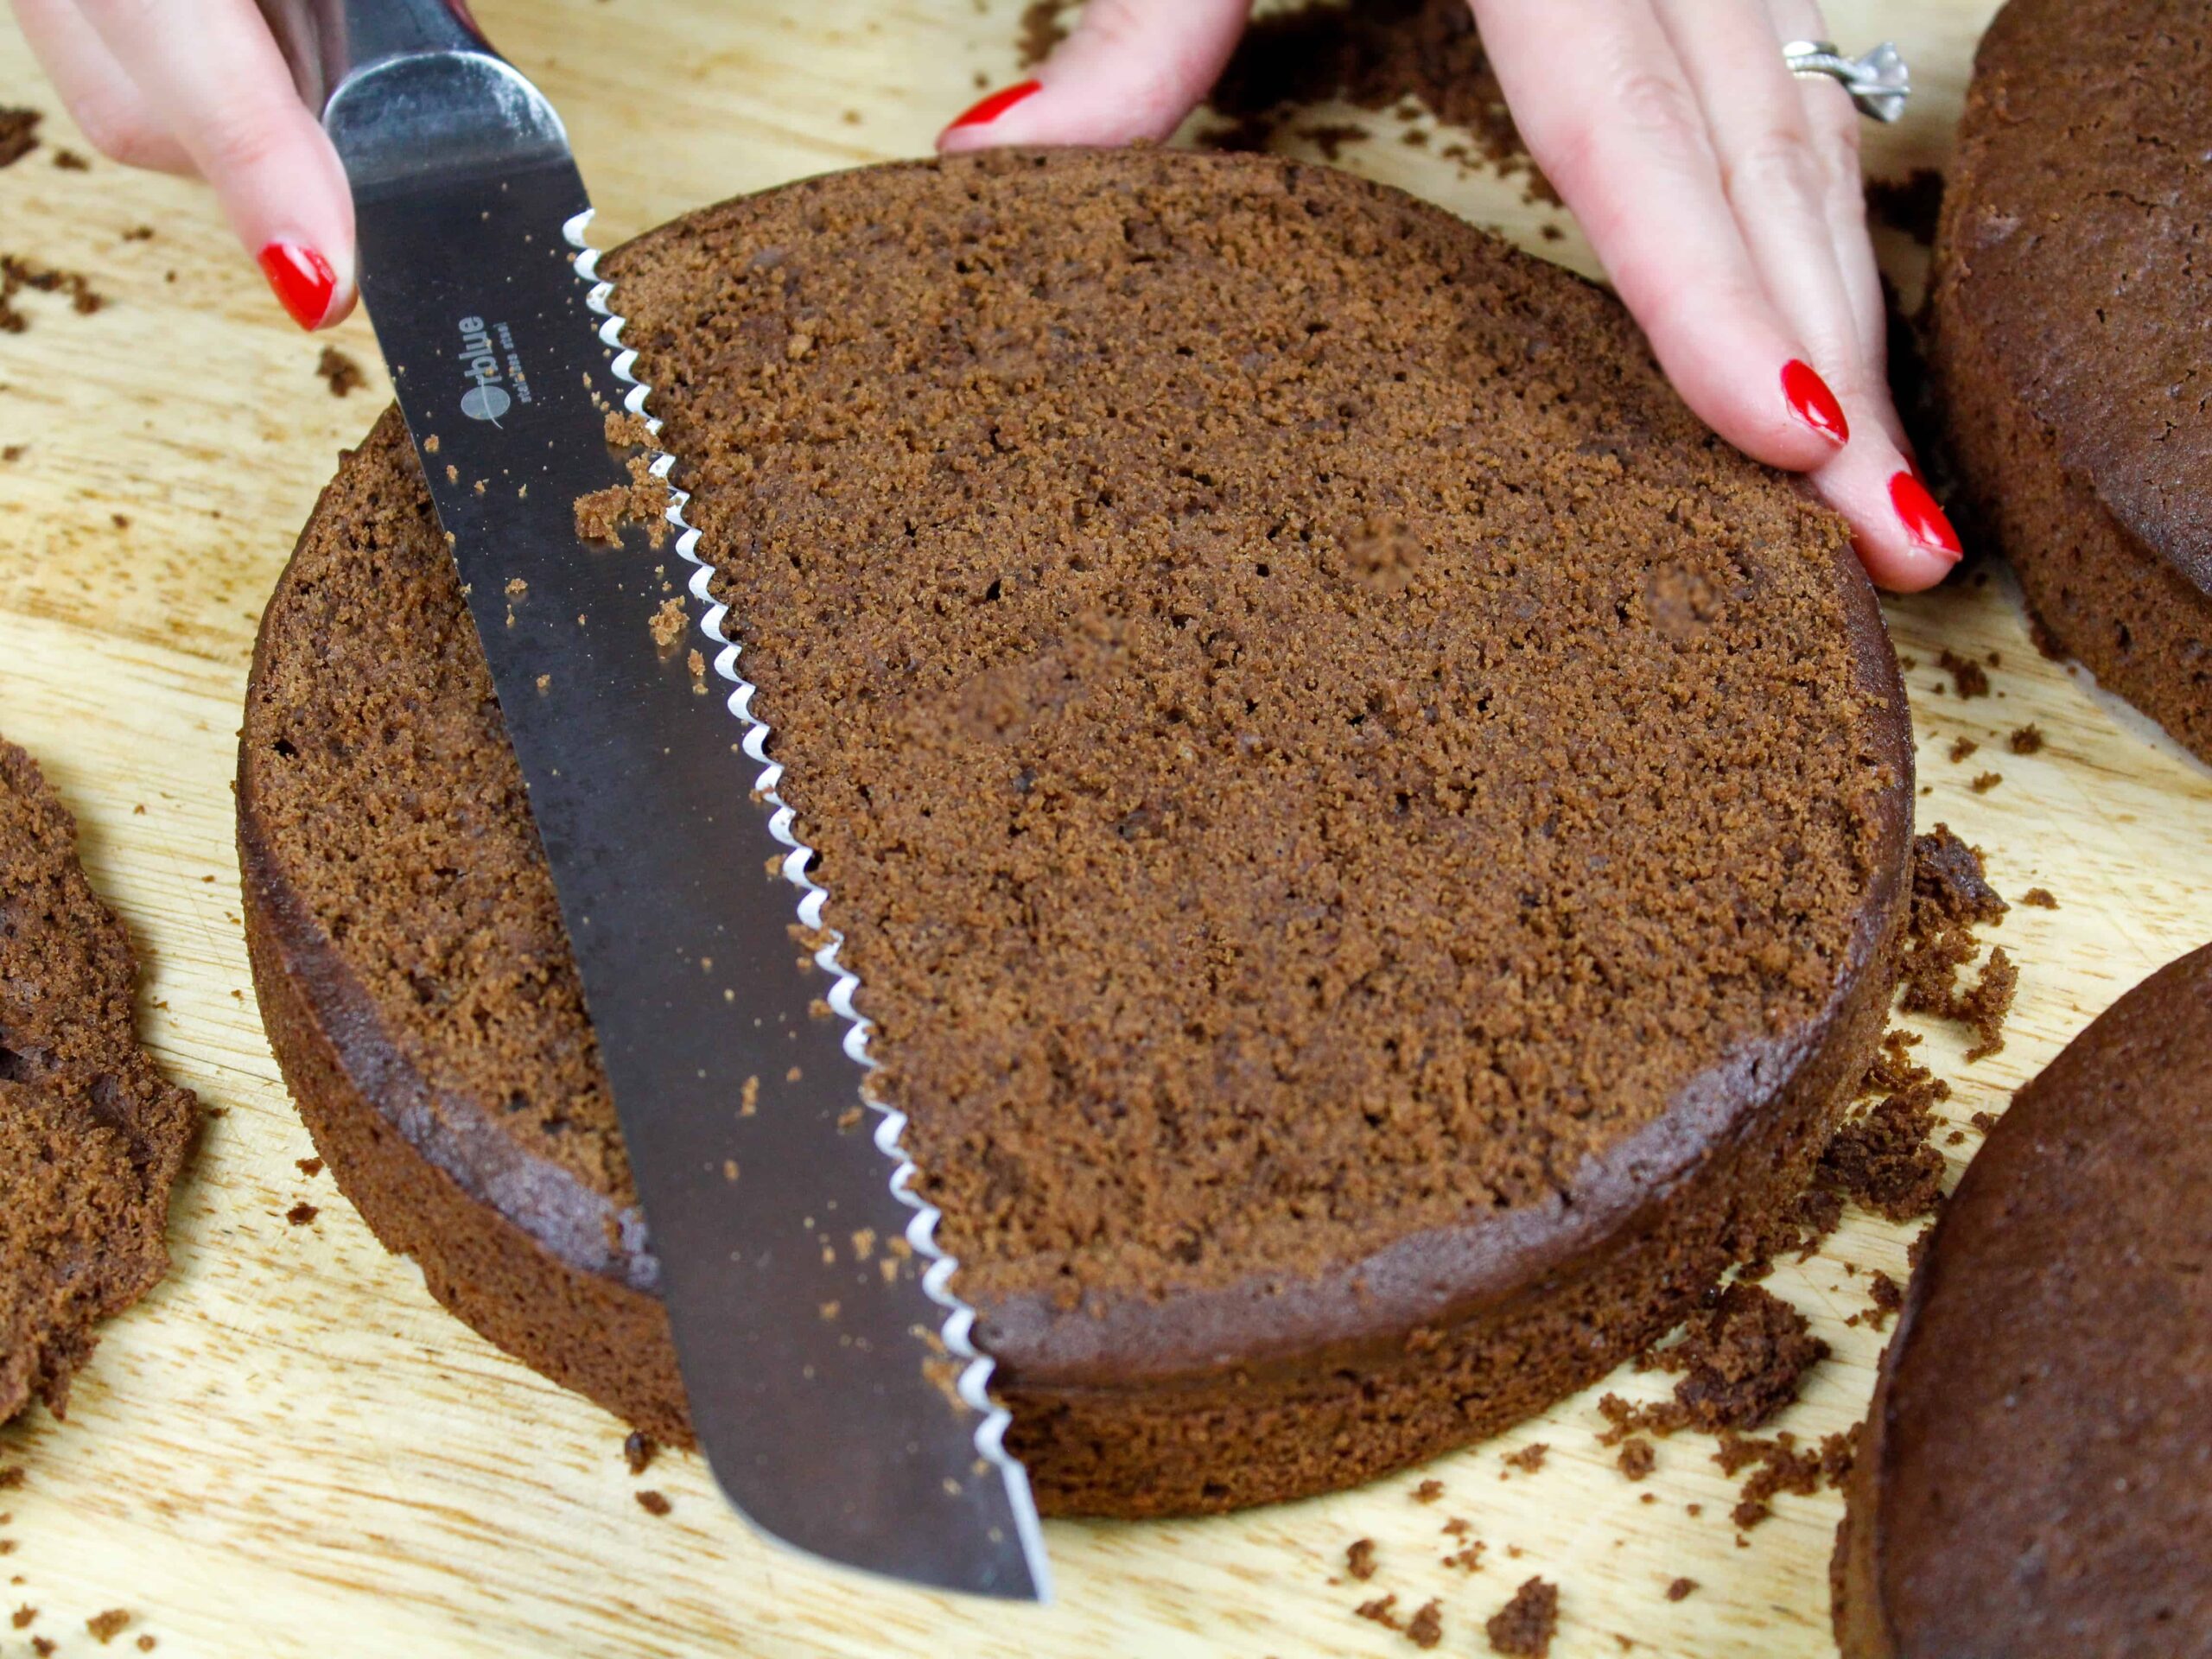
If you don’t, no worries! You can use a serrated knife to trim one of the cake layers to give it a rounded shape once it has cooled to room temperature.
I also trimmed two of the layers at an angle to give the sloth’s neck a bit more shape.
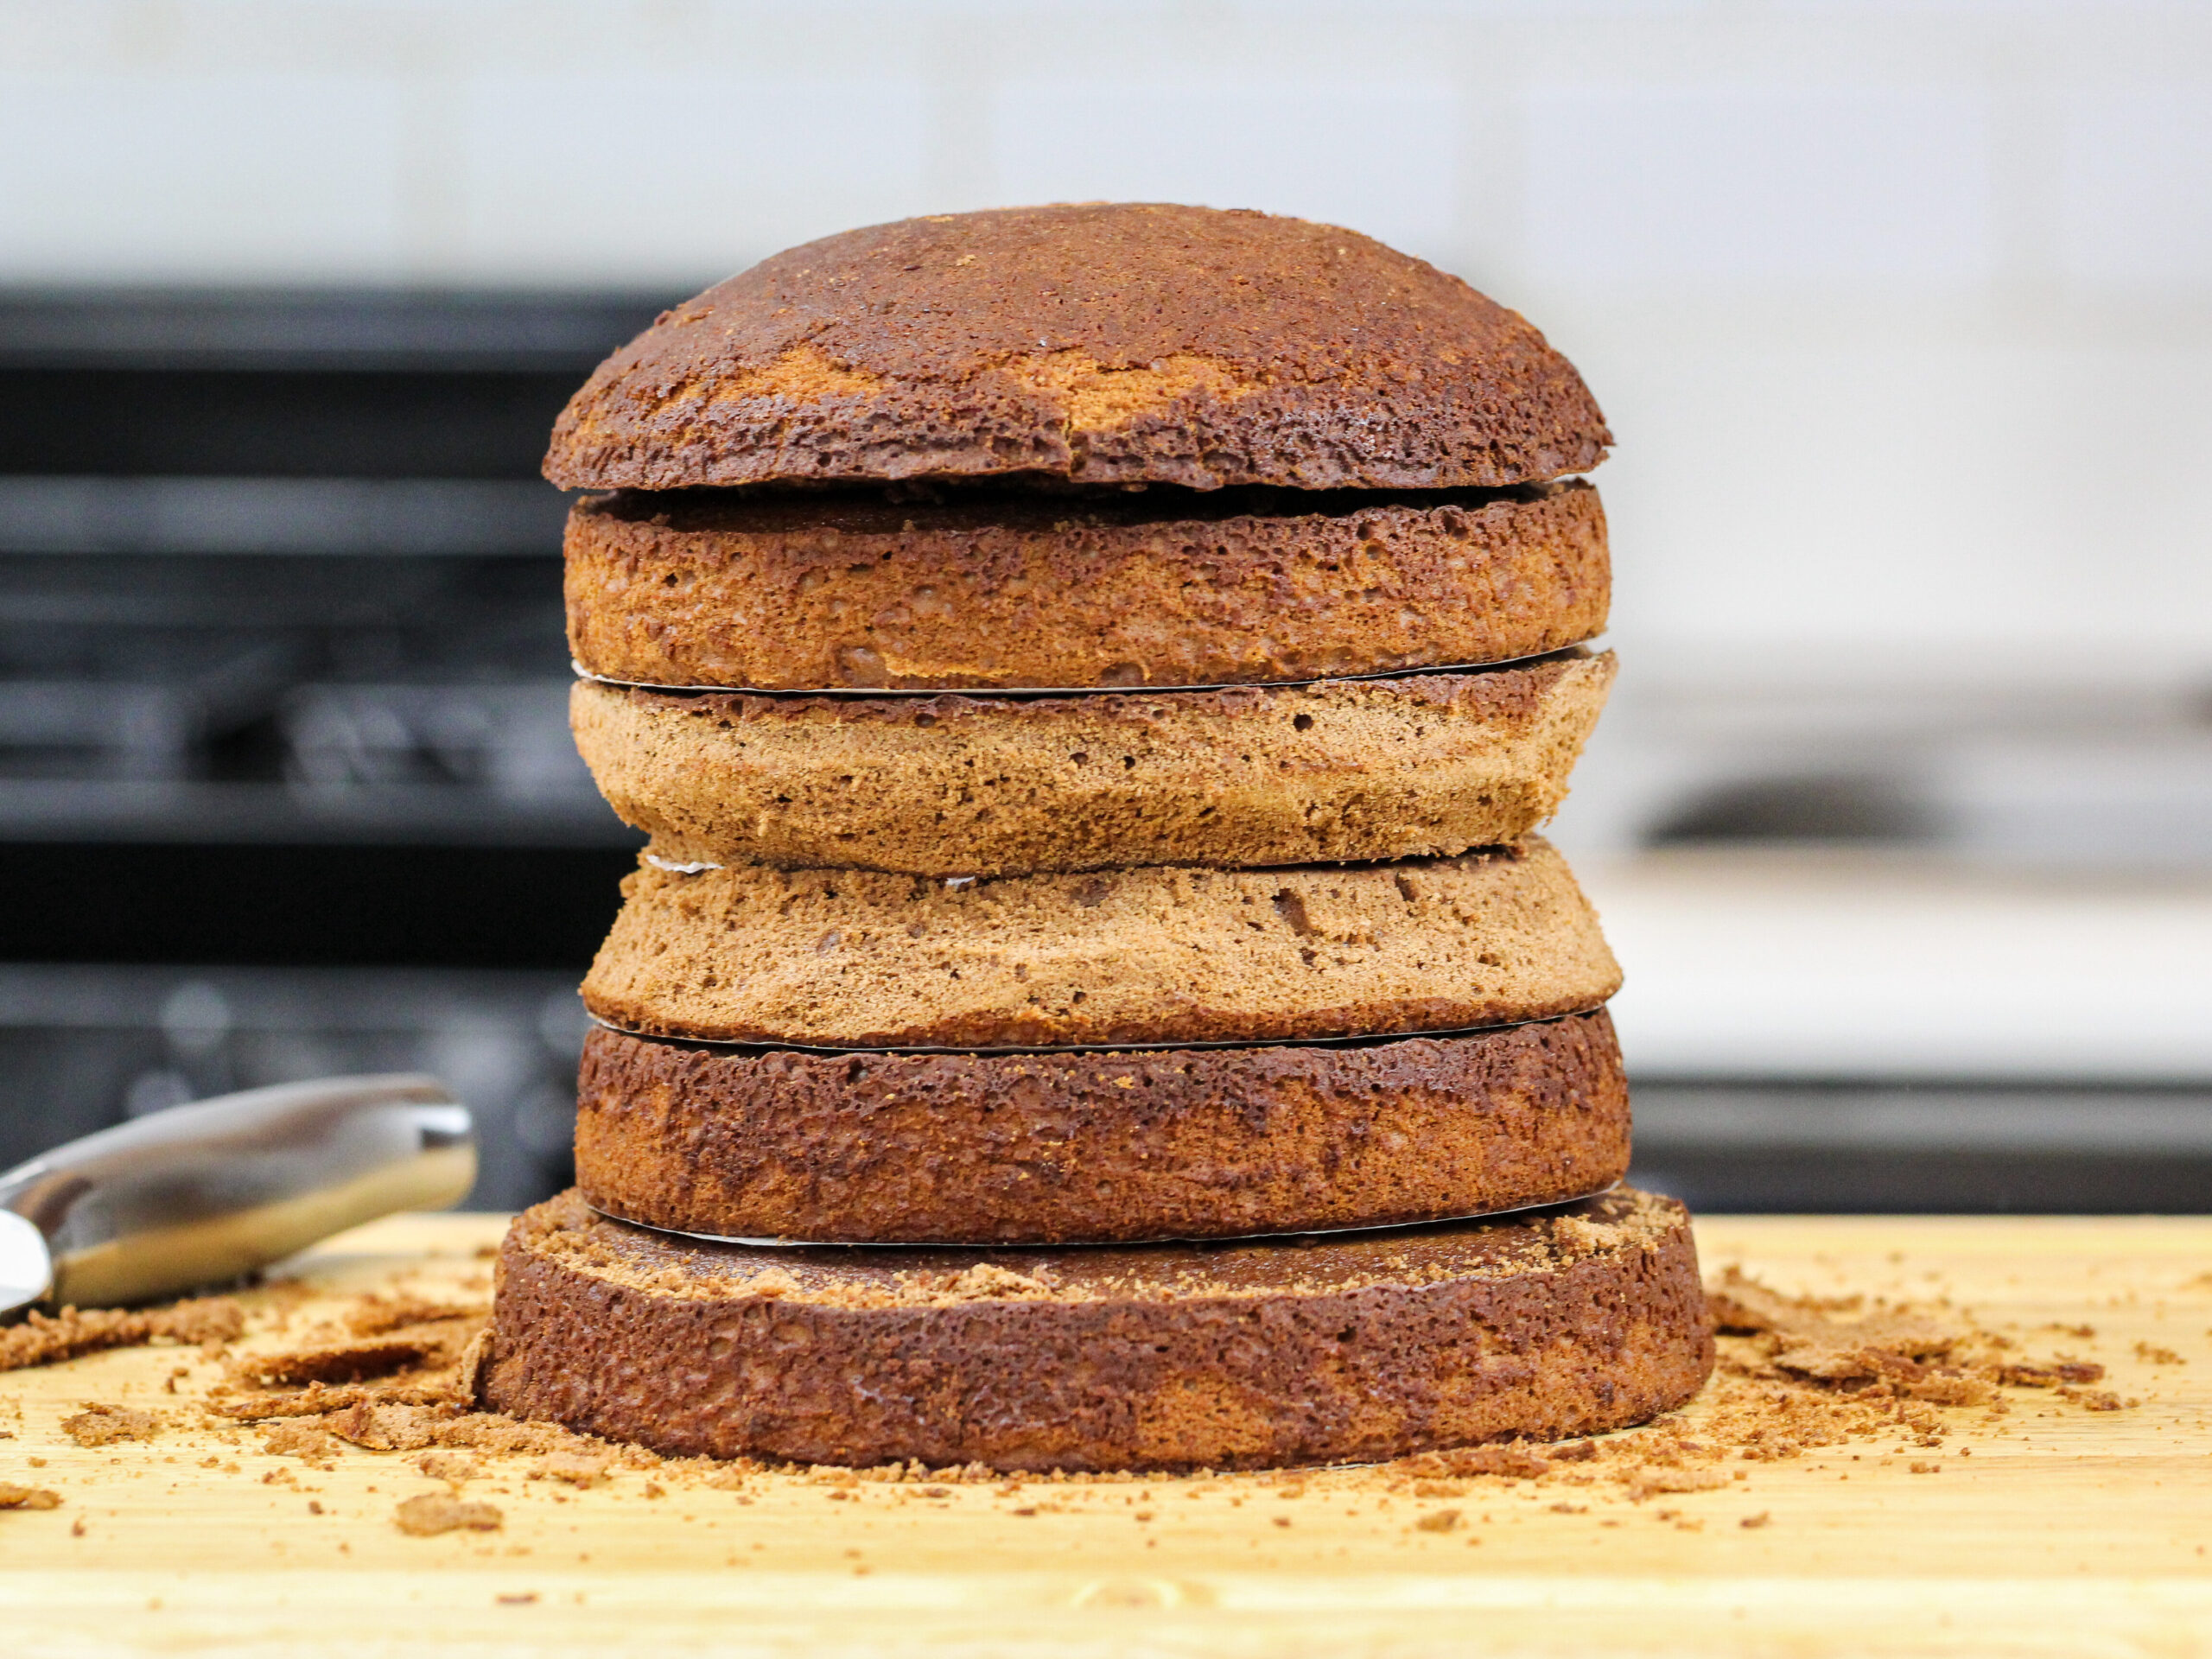
If you want to make your cake layers in advance, wrap and freeze them like this. They can be made up to a month in advance!
When you’re ready to assemble the cake, unwrap the frozen layers and allow them to thaw for about 20 minutes before you plan to frost the cake.
Step 2: Make the Chocolate Peanut Buttercream Frosting
While the cake layers bake and cool, I like to make the chocolate peanut butter frosting.
This recipe makes three different colors of frosting using a peanut butter frosting base, thanks to the addition of cocoa powder and melted dark chocolate.
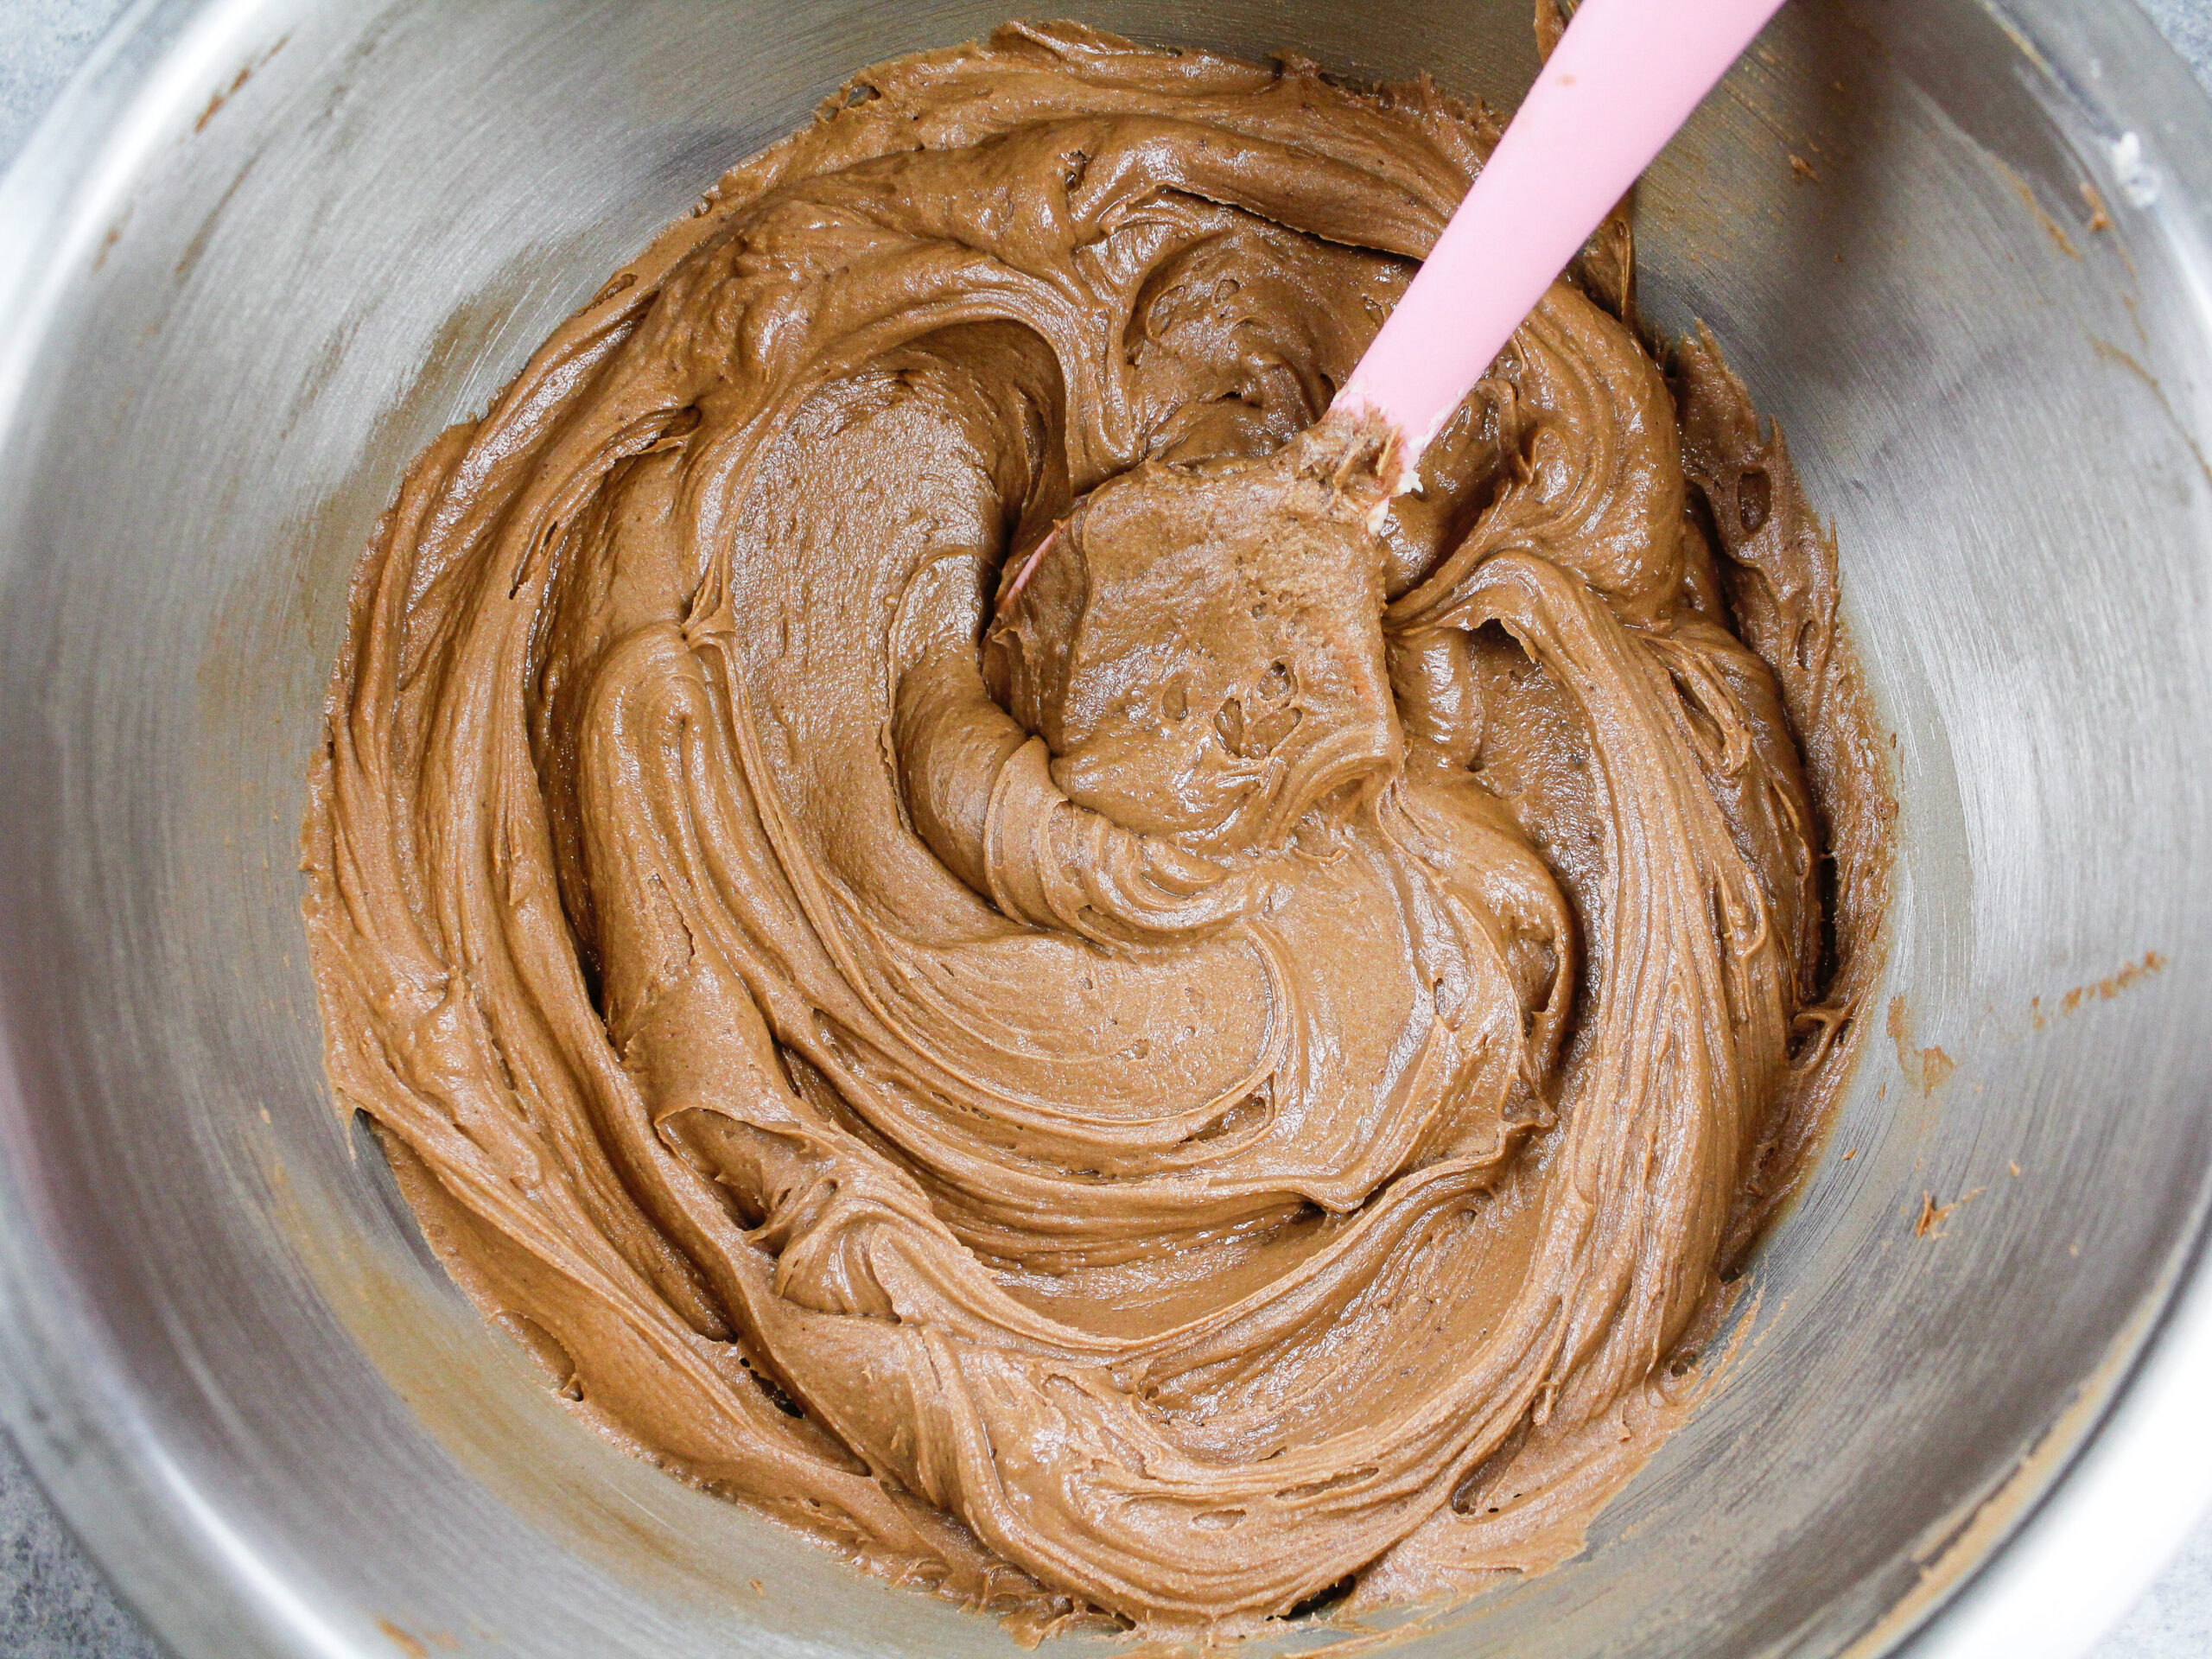
As you add in these additional ingredients, it’s important that your frosting has the right consistency so that you can easily pipe with it.
If the frosting is too thick, add in additional cream (1 Tablespoon at a time). If the frosting is too thin, add in more powdered sugar (1/4 cup at a time).
Step 3: Make the Sloth’s Face
While I’m always team buttercream, there are some situations where using a bit of fondant just makes sense.
We’ve already put so much energy into making the cake layers and buttercream from scratch, a tiny but of fondant never hurt anyone.
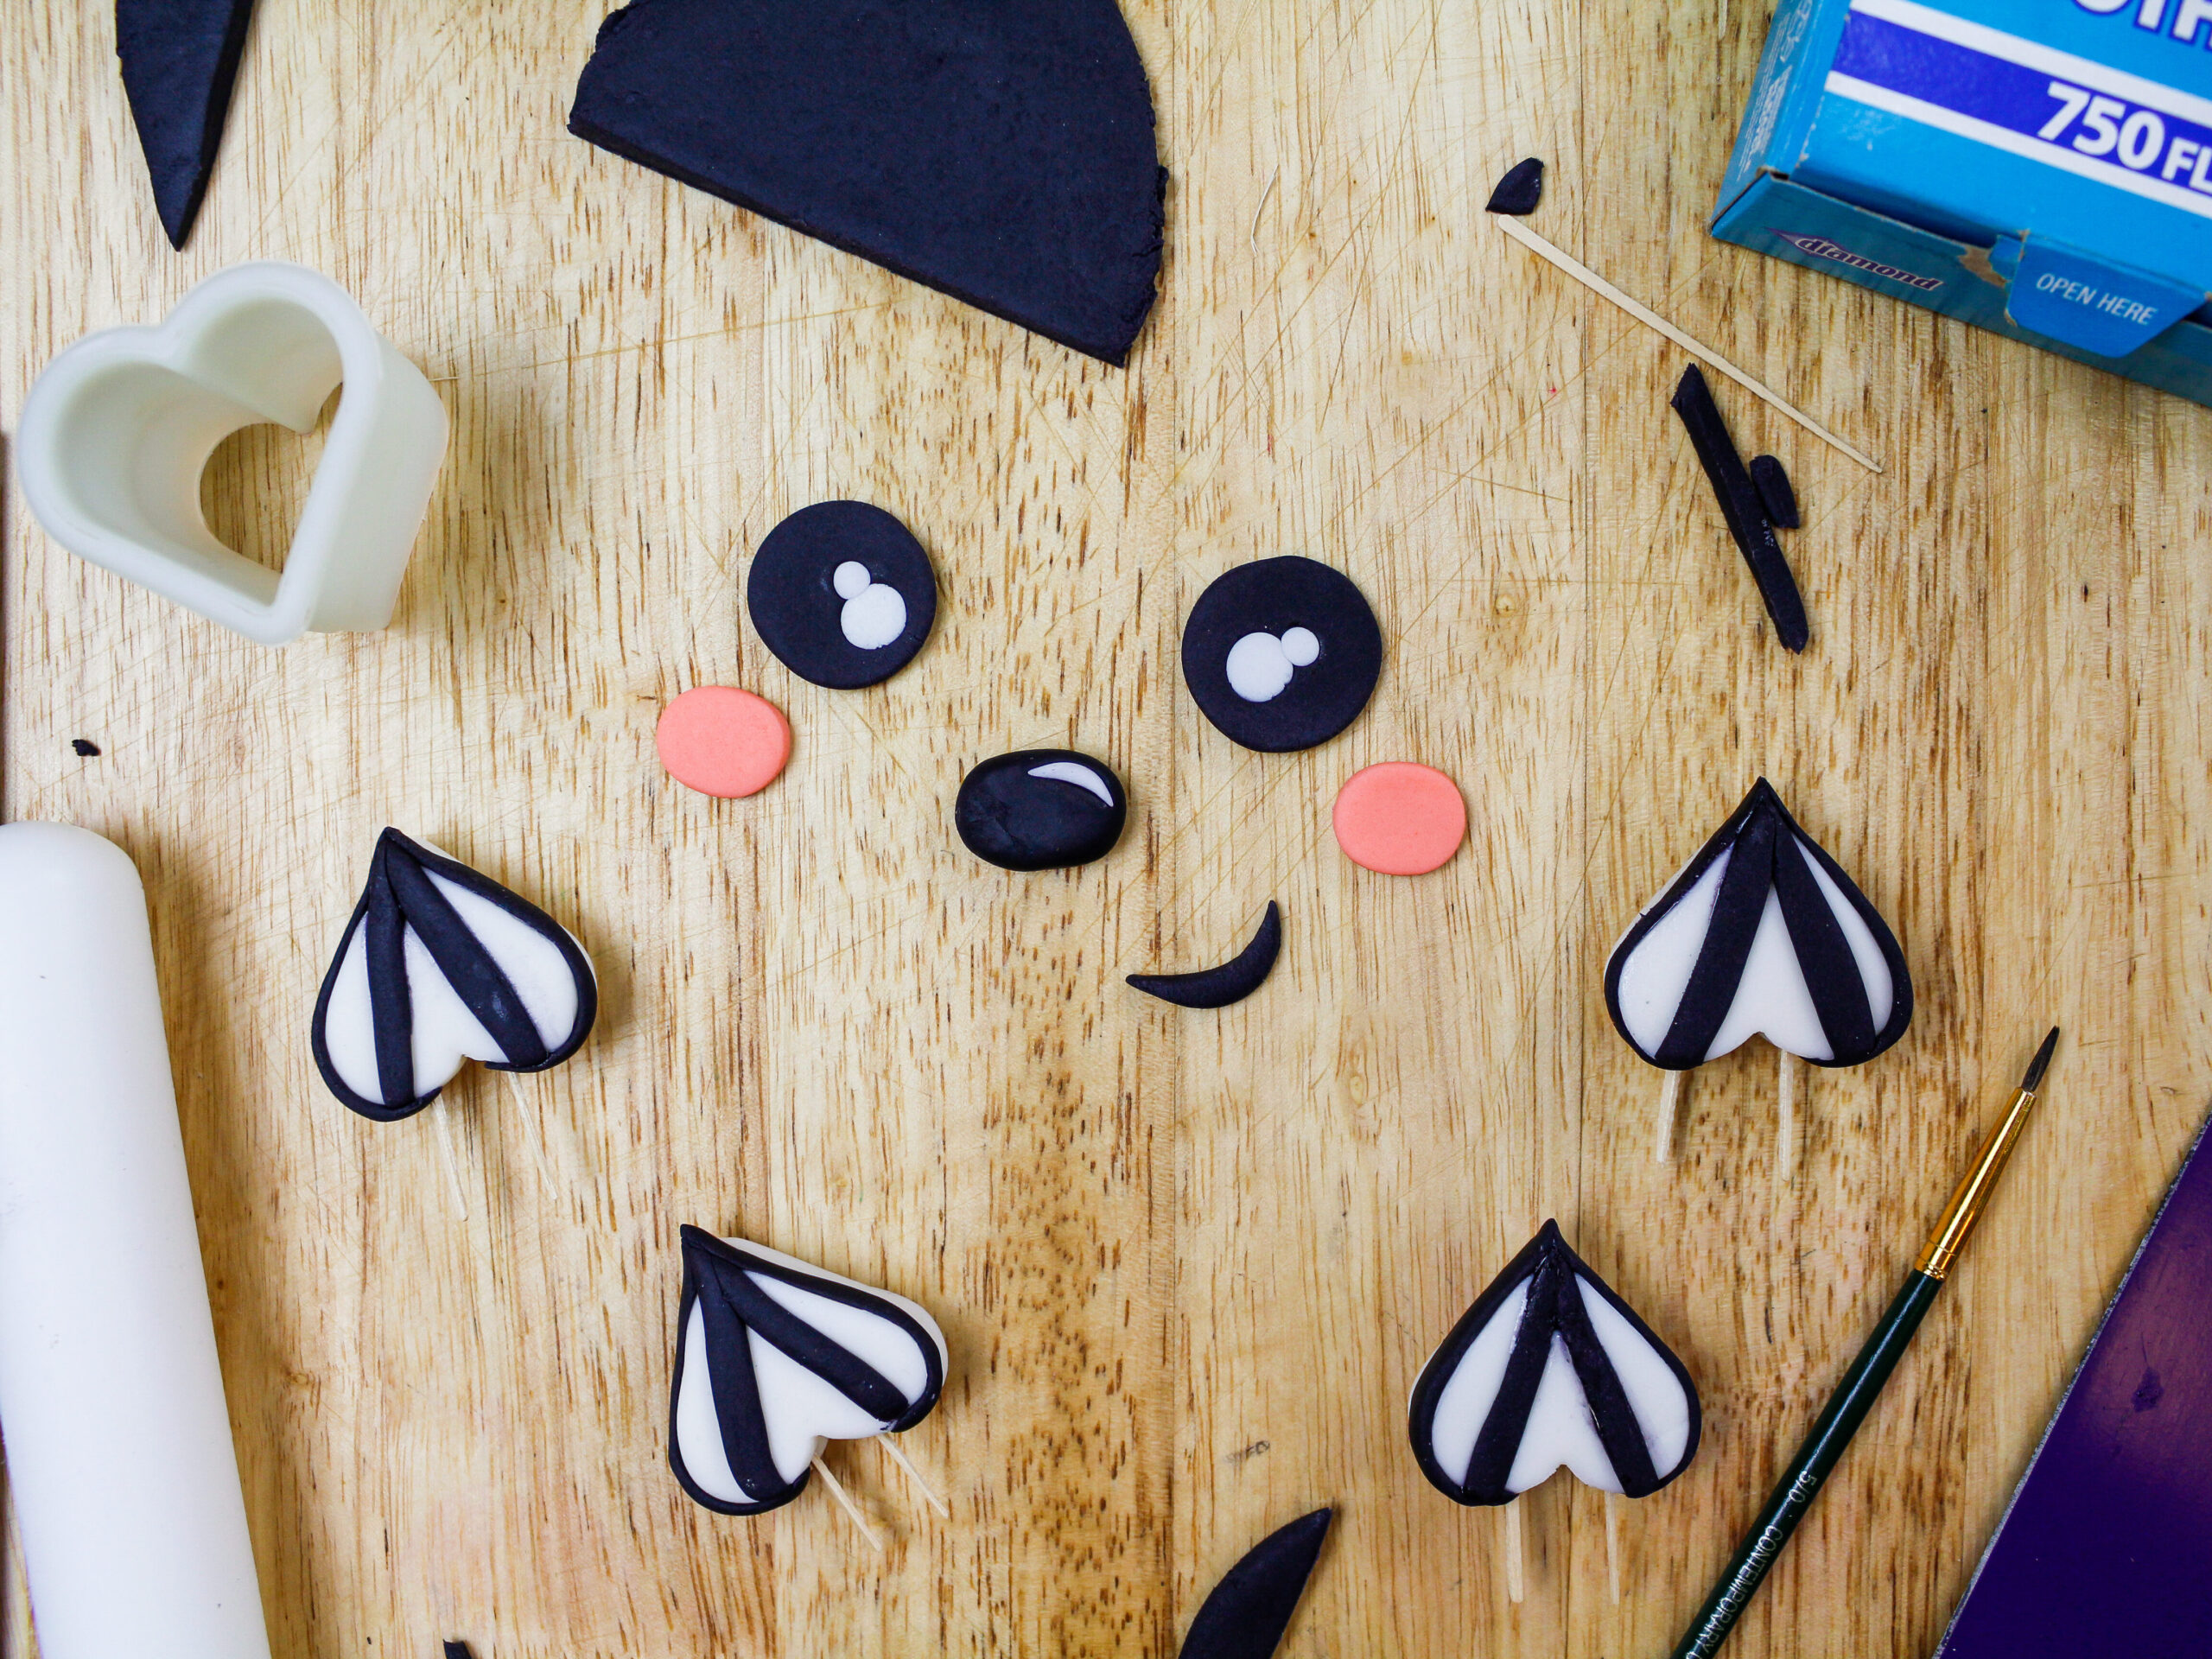
I used a little bit of black and white fondant to make the little face and nails for this sloth. I like to shape these before I start assembling the cake so they have a bit of time to firm up.
Small circle cutters and either a square or heart shaped cutter can help you to get the shape of the eyes and nails just right.
Step 4: Stack and Frost the Cake Layers
My animal cakes usually end up being pretty heavy, so I like to build them on 10-inch wide, 1/2-inch thick cake drums. This also gives us lots of space for the arms and legs!
Stack and frost cake layers on a 10-inch greaseproof cake board or cake drum using a dab of frosting to help stick the first cake layer to the board.
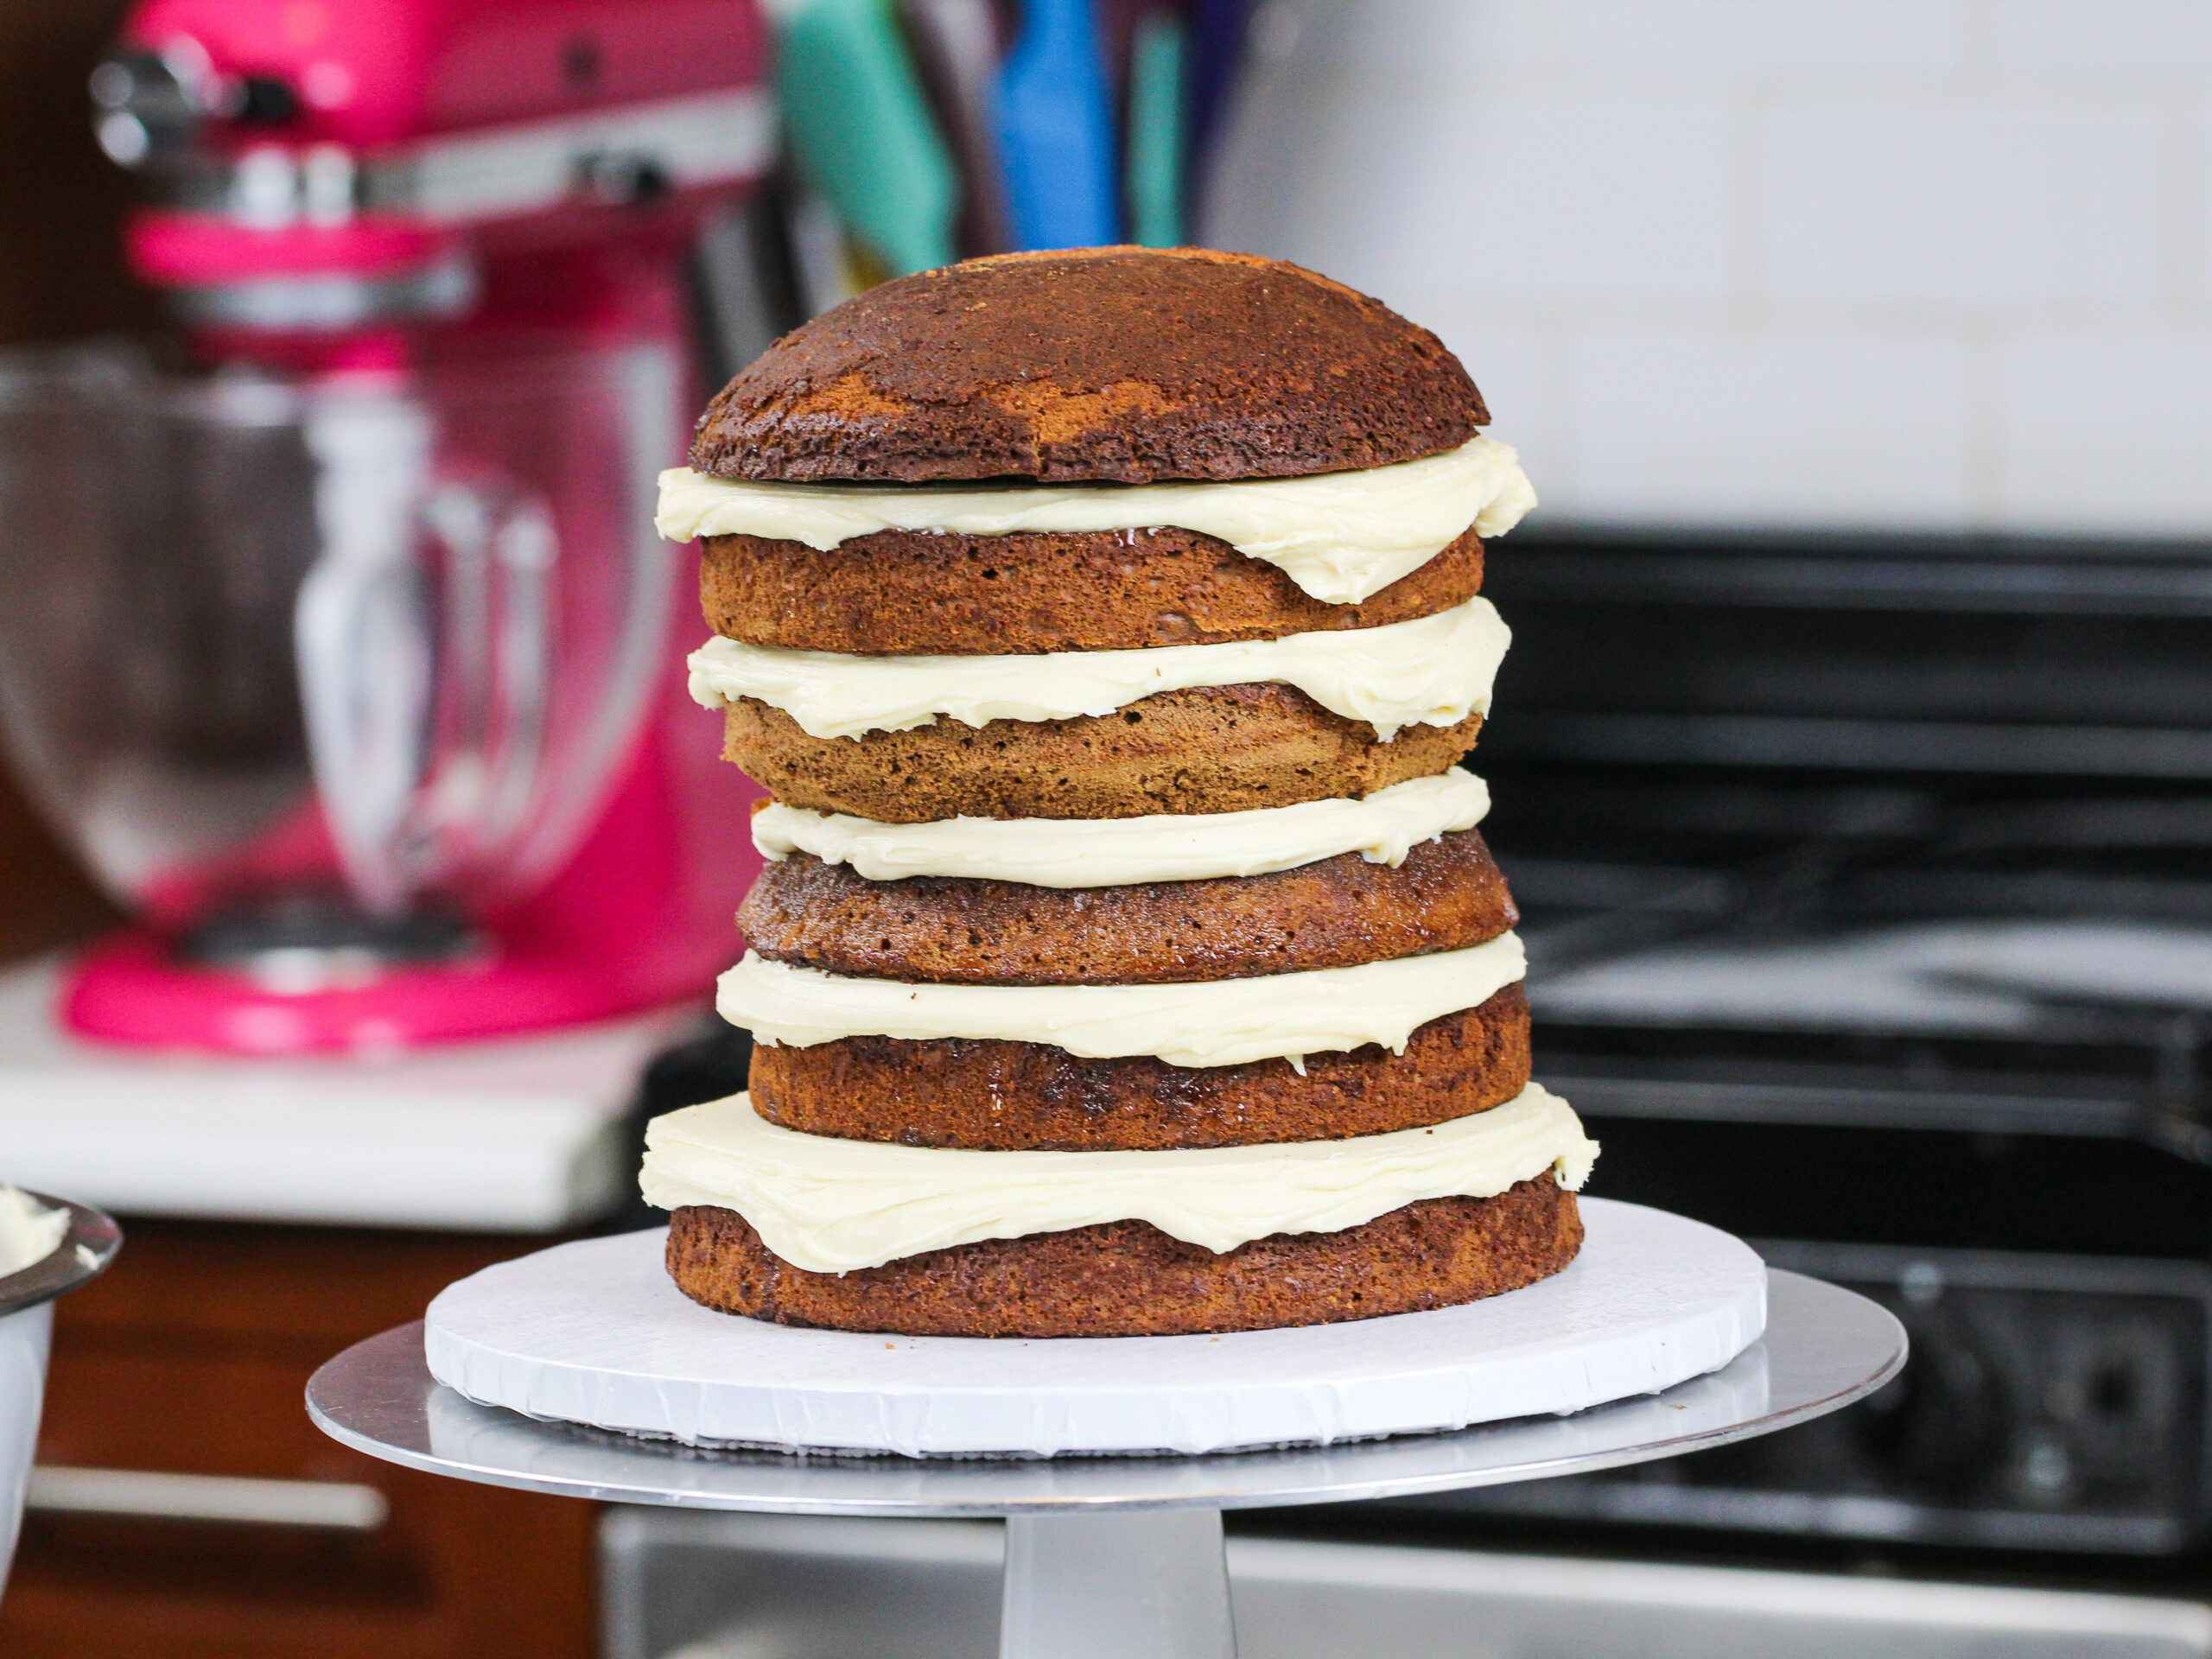
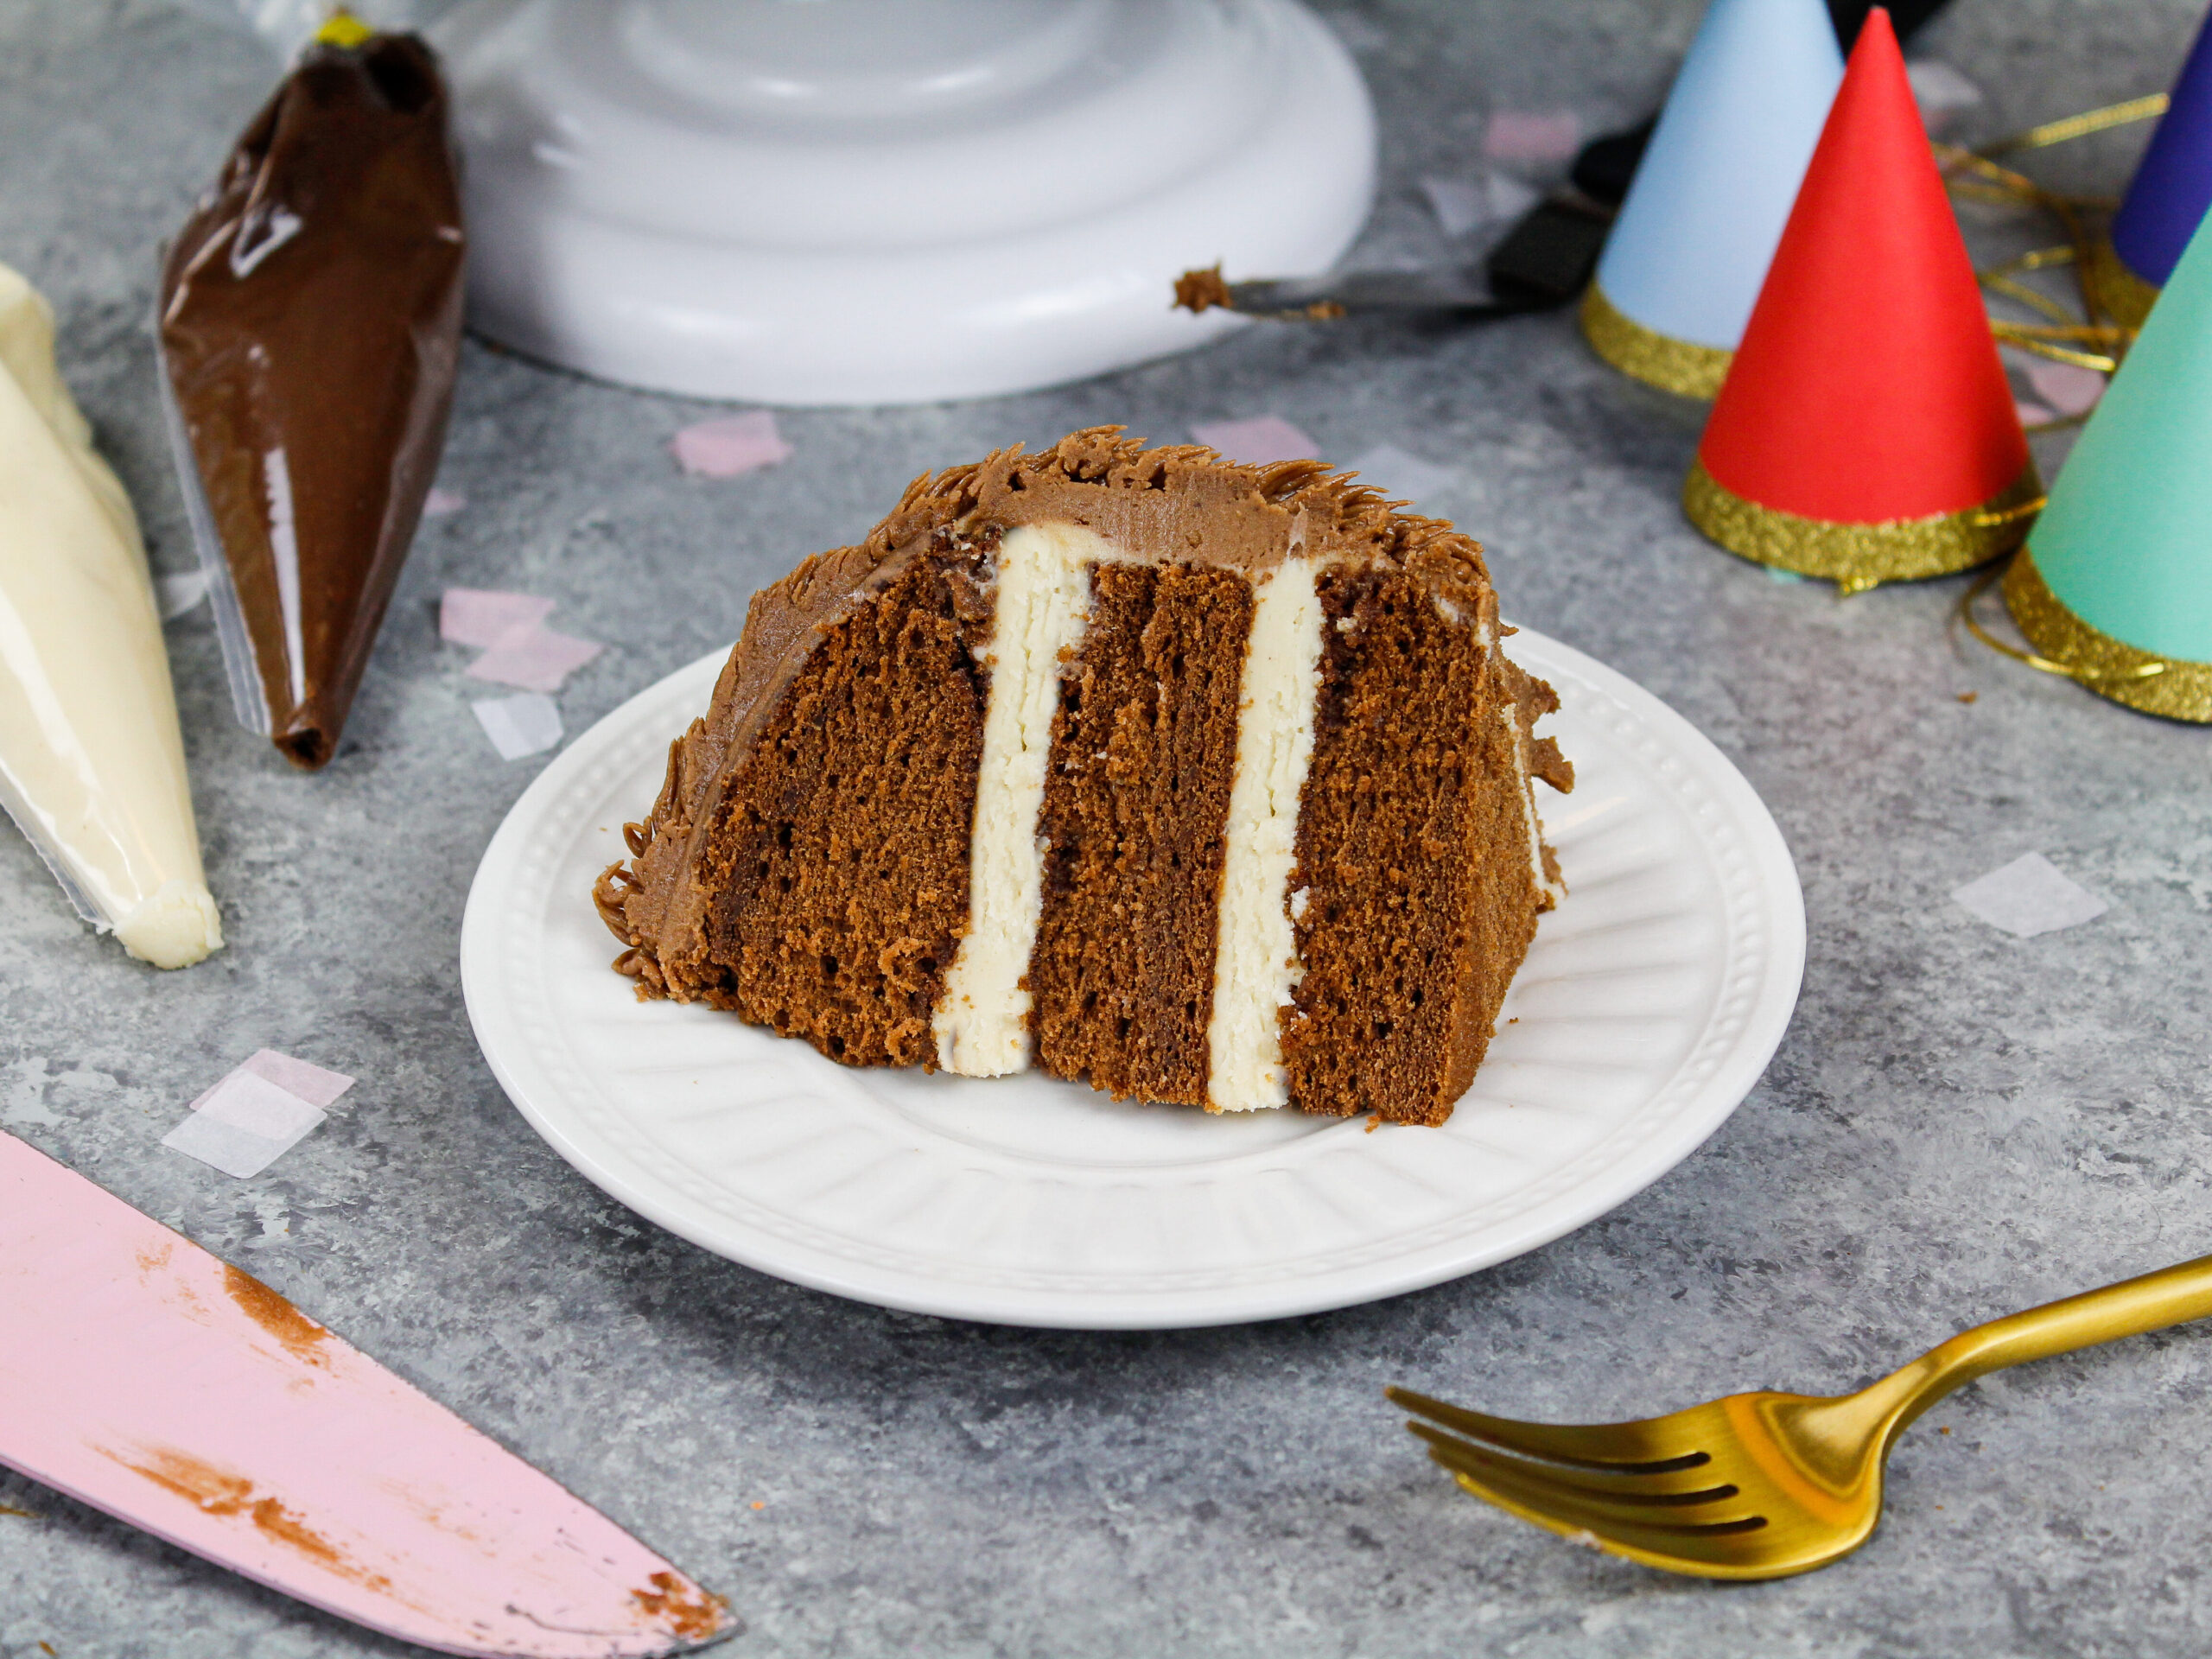
Add an even layer of peanut butter buttercream between each cake layer with a large offset spatula.
Insert either a thick plastic straw (like a bubble tea straw) or a wooden dowel through the center of the cake layers to help stabilize them.
Spread a thin coat of chocolate peanut butter frosting around the cake to fully cover the cake layers. It’s important to use the same color of frosting for the crumb coat and the piped buttercream fur!
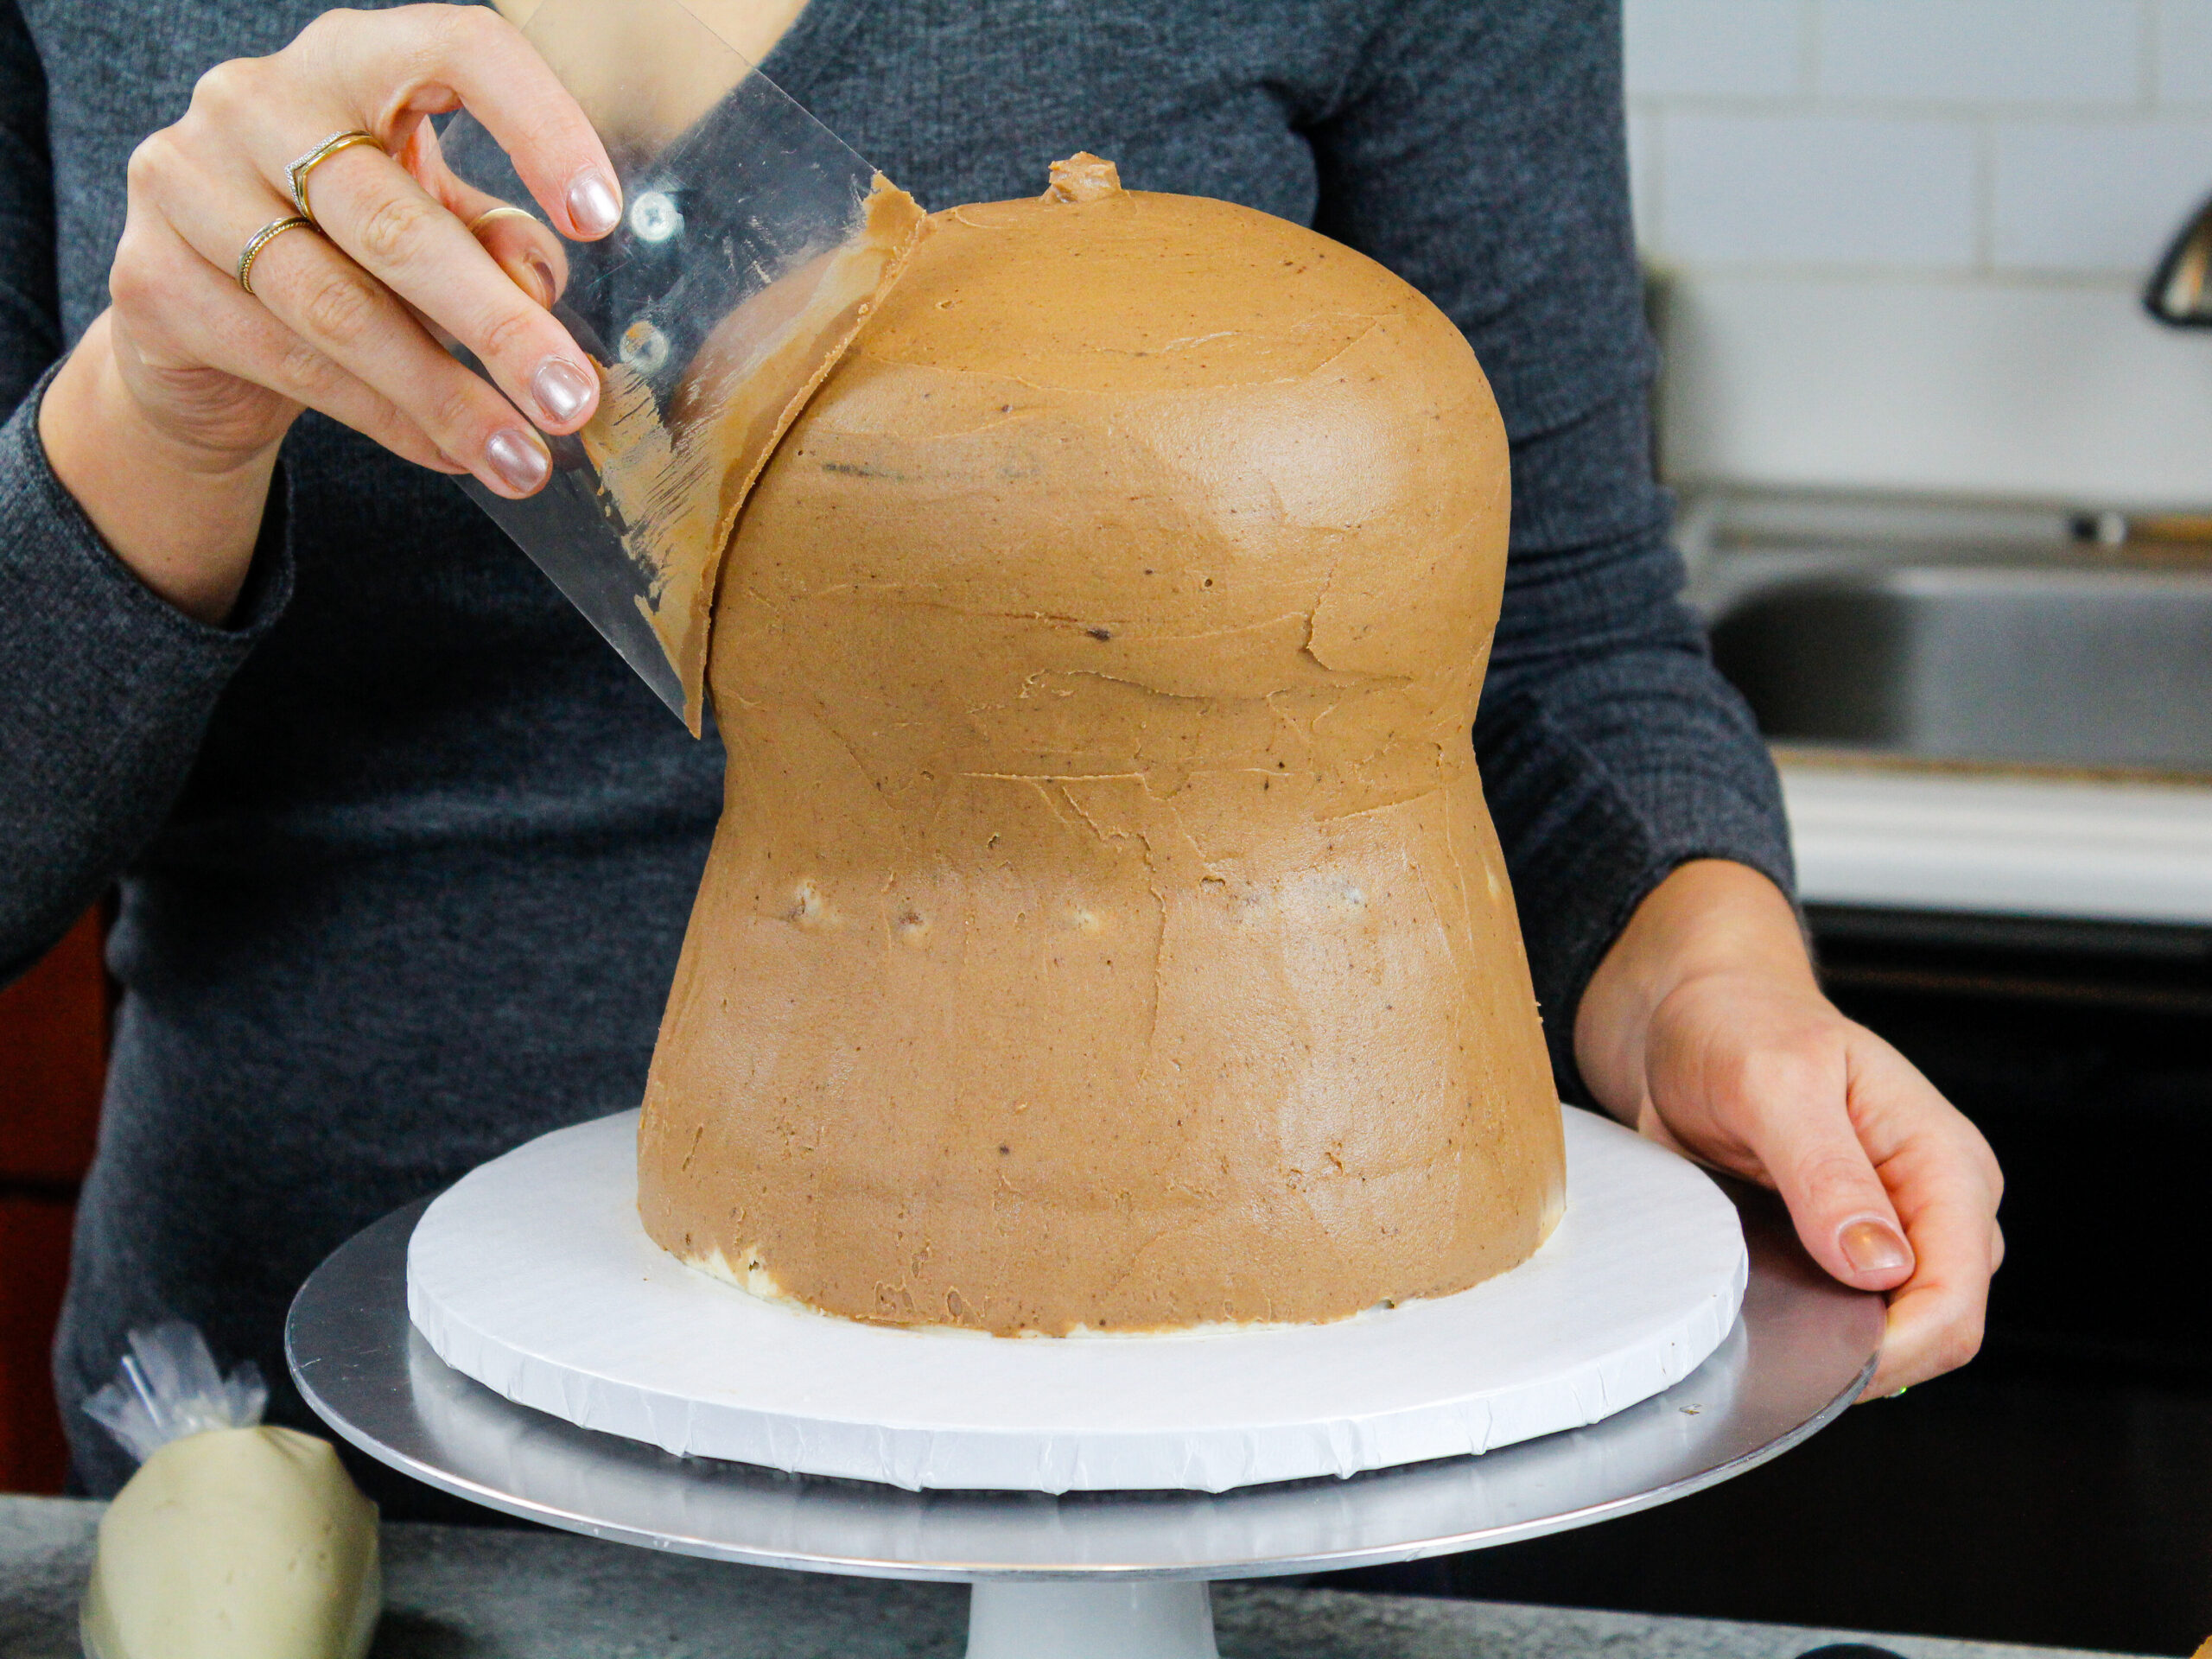
It gives the cake a cohesive look and allows you pipe less buttercream fur.
Step 5: Make the Arms & Legs with Rice Krispie Treats
A batch of cake decorating-friendly rice krispies makes this challenging cake shape so much more manageable.
By omitting the butter that is in most rice krispie treats, these rice krispies set quite firmly once they’ve cooled.
I suggest greasing your hands with cooking spray before handling and shaping the warm rice krispie mixture. It makes them so much easier to handle!
Shape two thin front legs, two thick hind legs, and a small tail with the rice krispie mixture.
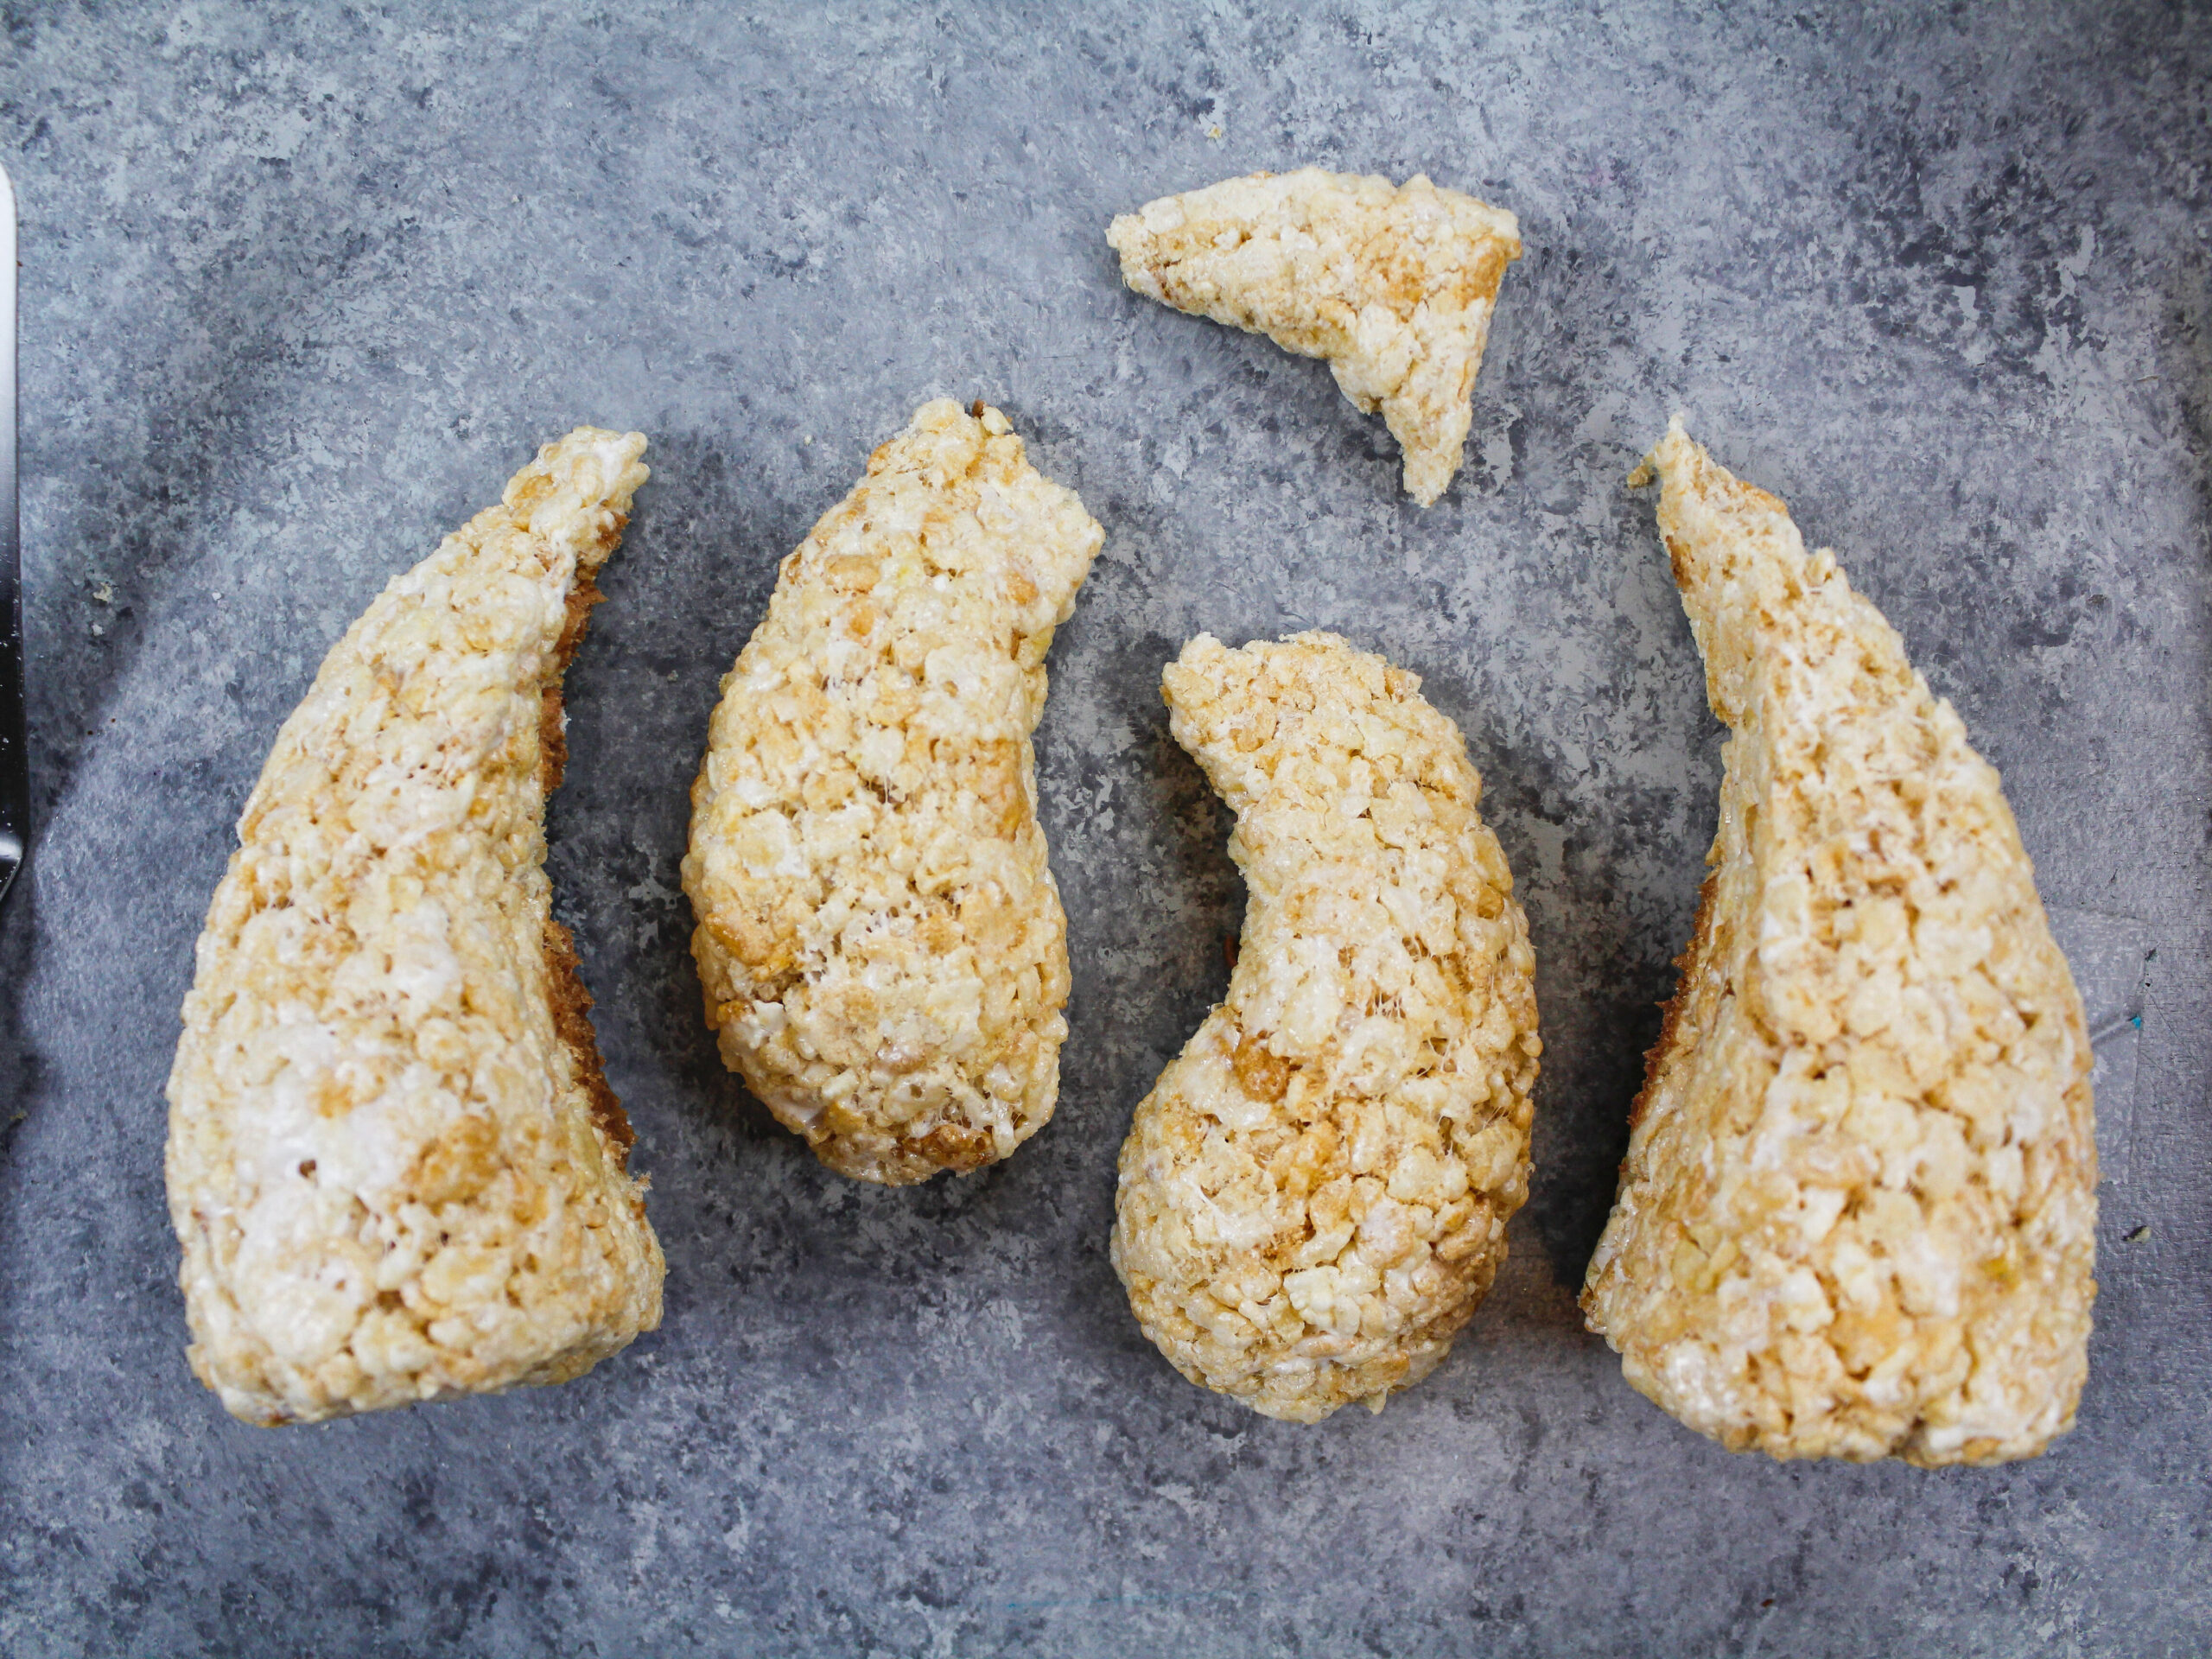
Hold the arms, legs, and tail next to the cake as you make them to ensure they are proportionate and shaped properly.
As you shape your legs and arms, hold them up next to your cake to make sure they are proportionate and shaped properly.
Step 6: Decorate this Sloth Cake
Press the rice krispie treat arms, legs and tail into place on the chilled cake.
Spread an even layer of the chocolate peanut buttercream over the rice krispies.
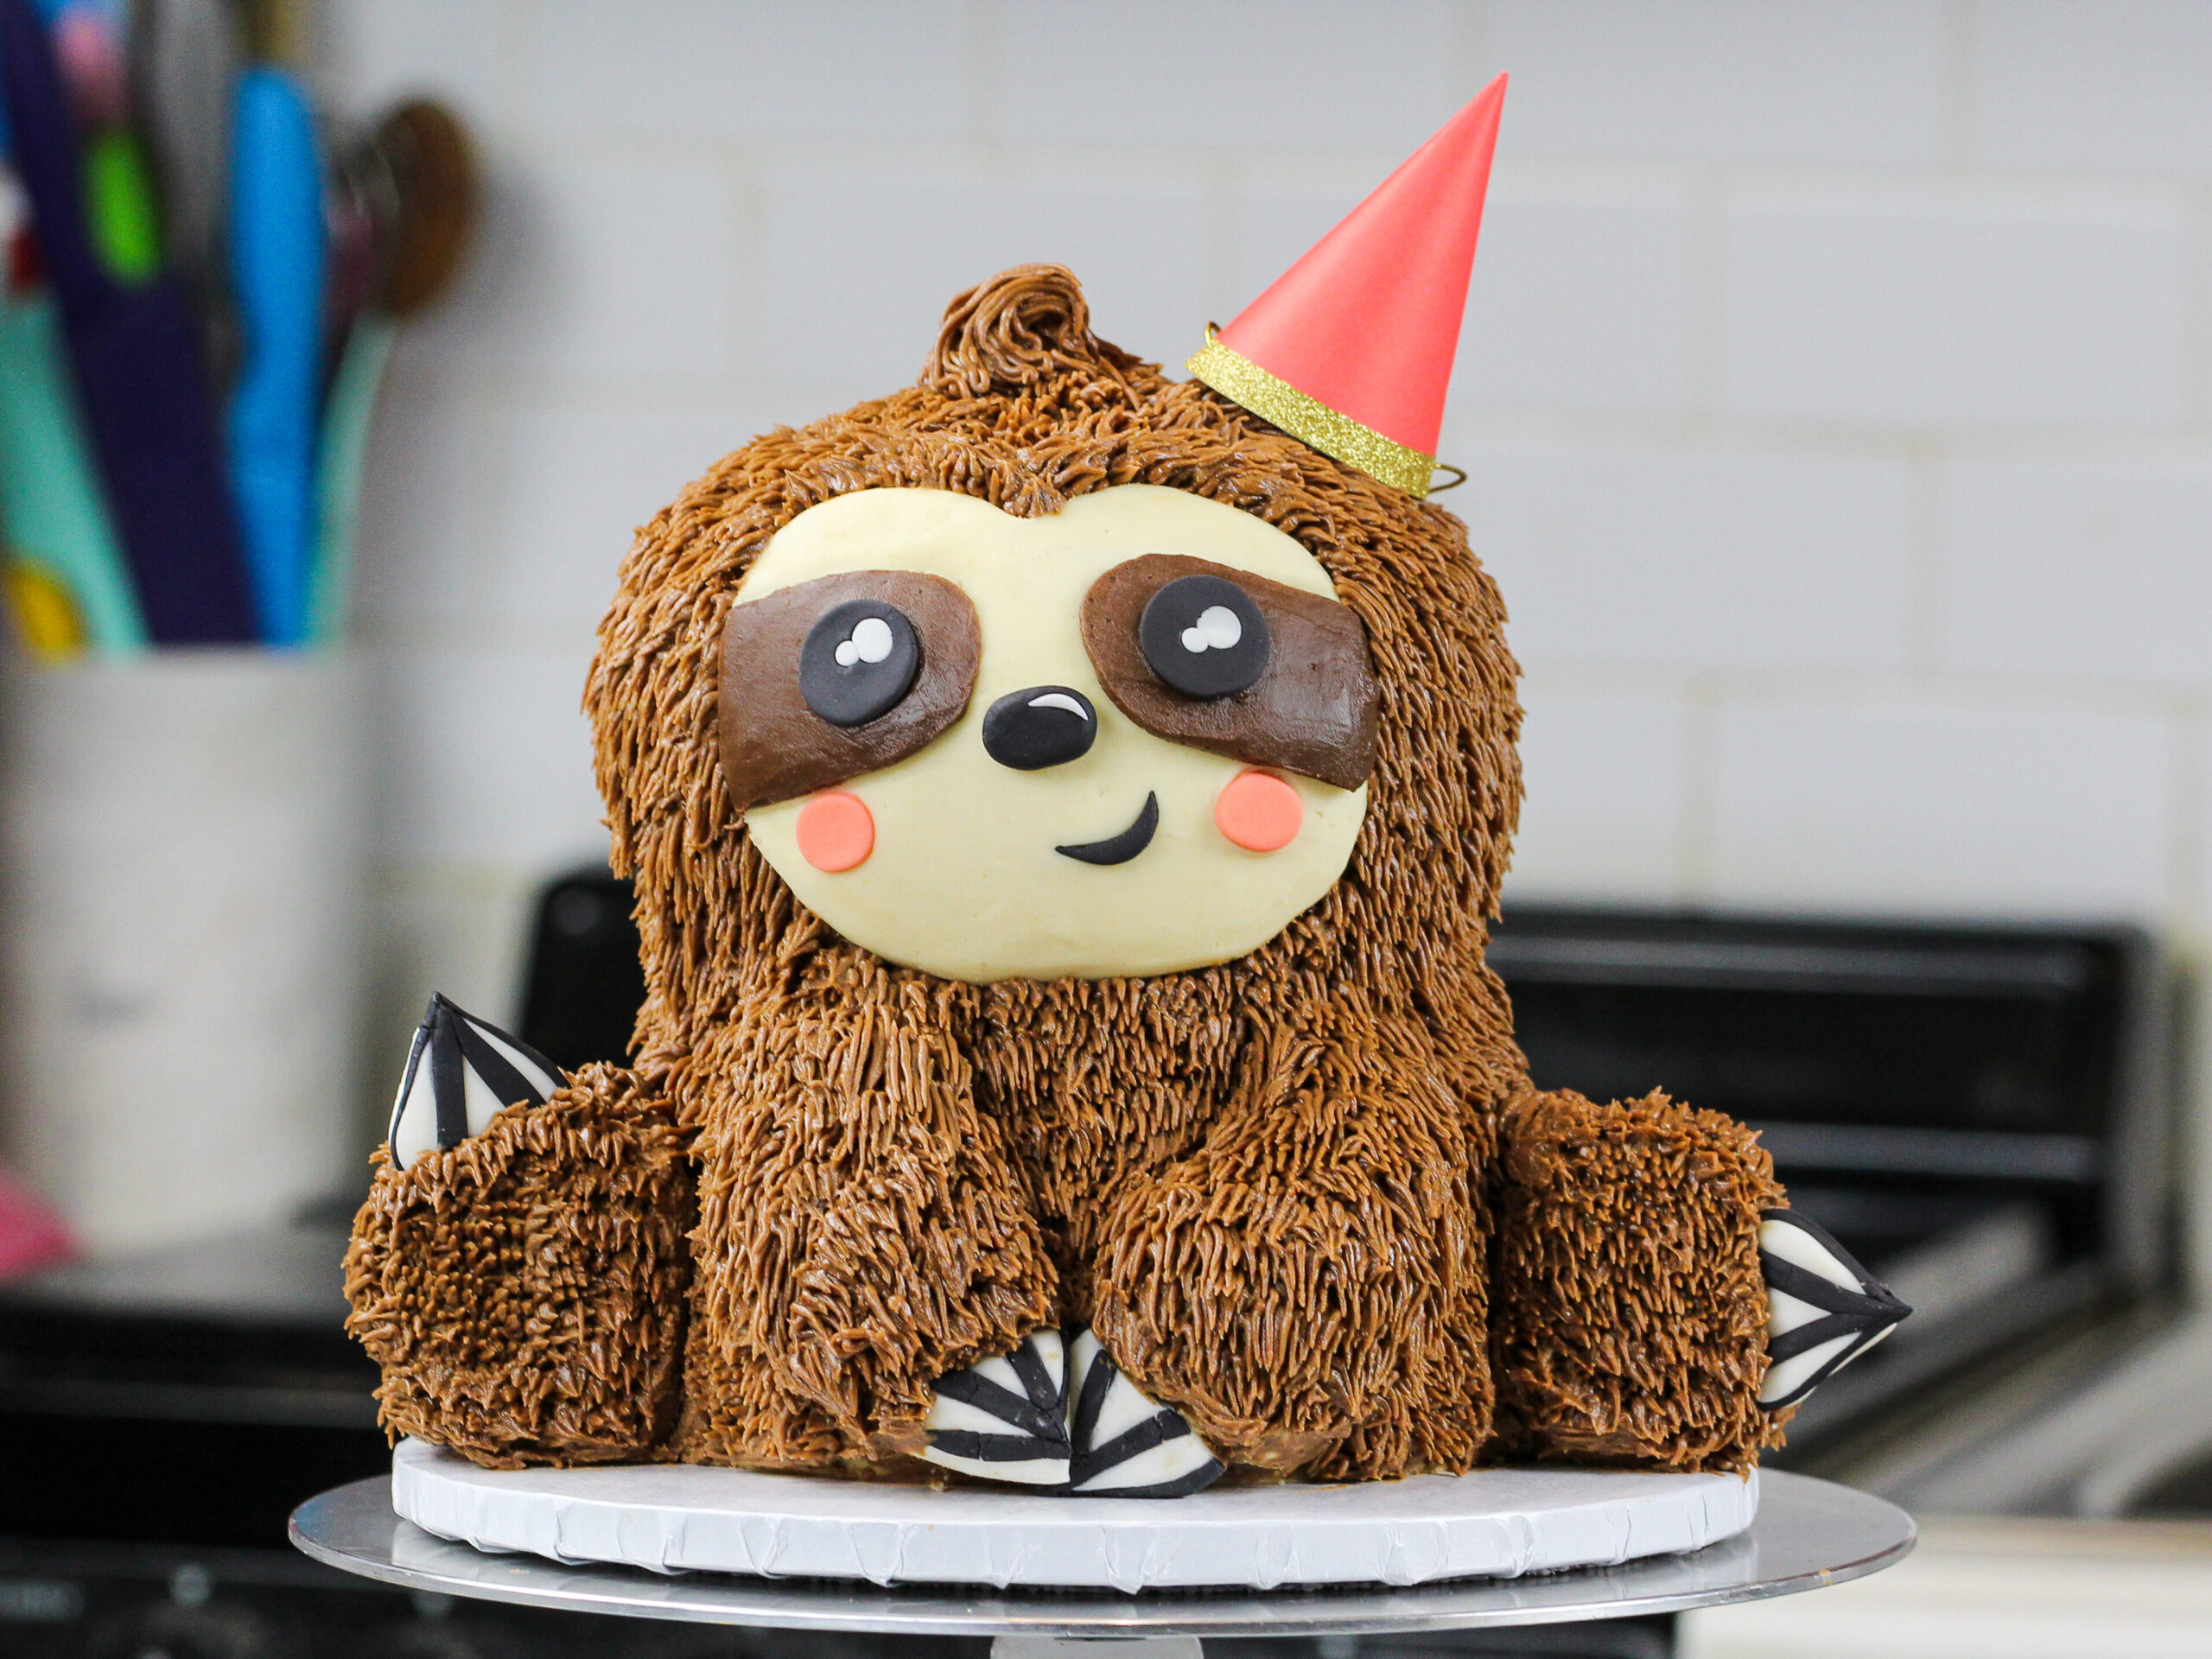
Spread the reserved peanut butter frosting in a circle on the front of the sloth’s head to create its face. Pipe two eye patches using the double chocolate peanut butter frosting (the darkest frosting). Then carefully press the eyes, nose, and mouth into place.
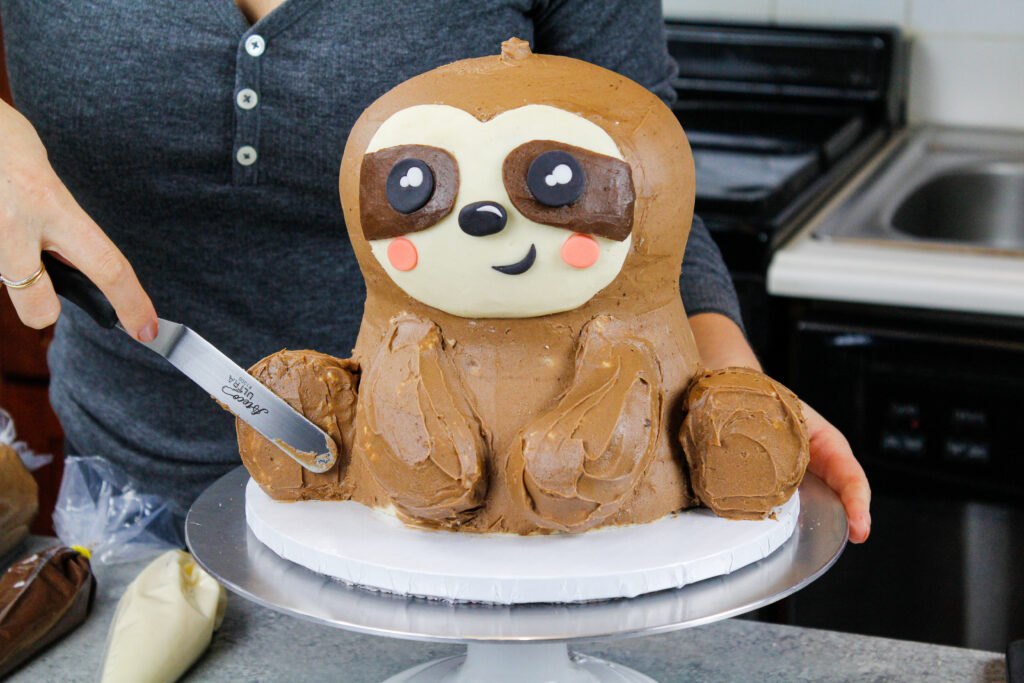
Place the remaining chocolate peanut butter buttercream in a large piping bag fit with a small grass piping tip and pipe buttercream fur all over the cake and around the face.
Take breaks as needed, this is the most time-consuming part of decorating this cake!
The final step is to press the fondant nails/claws into place.
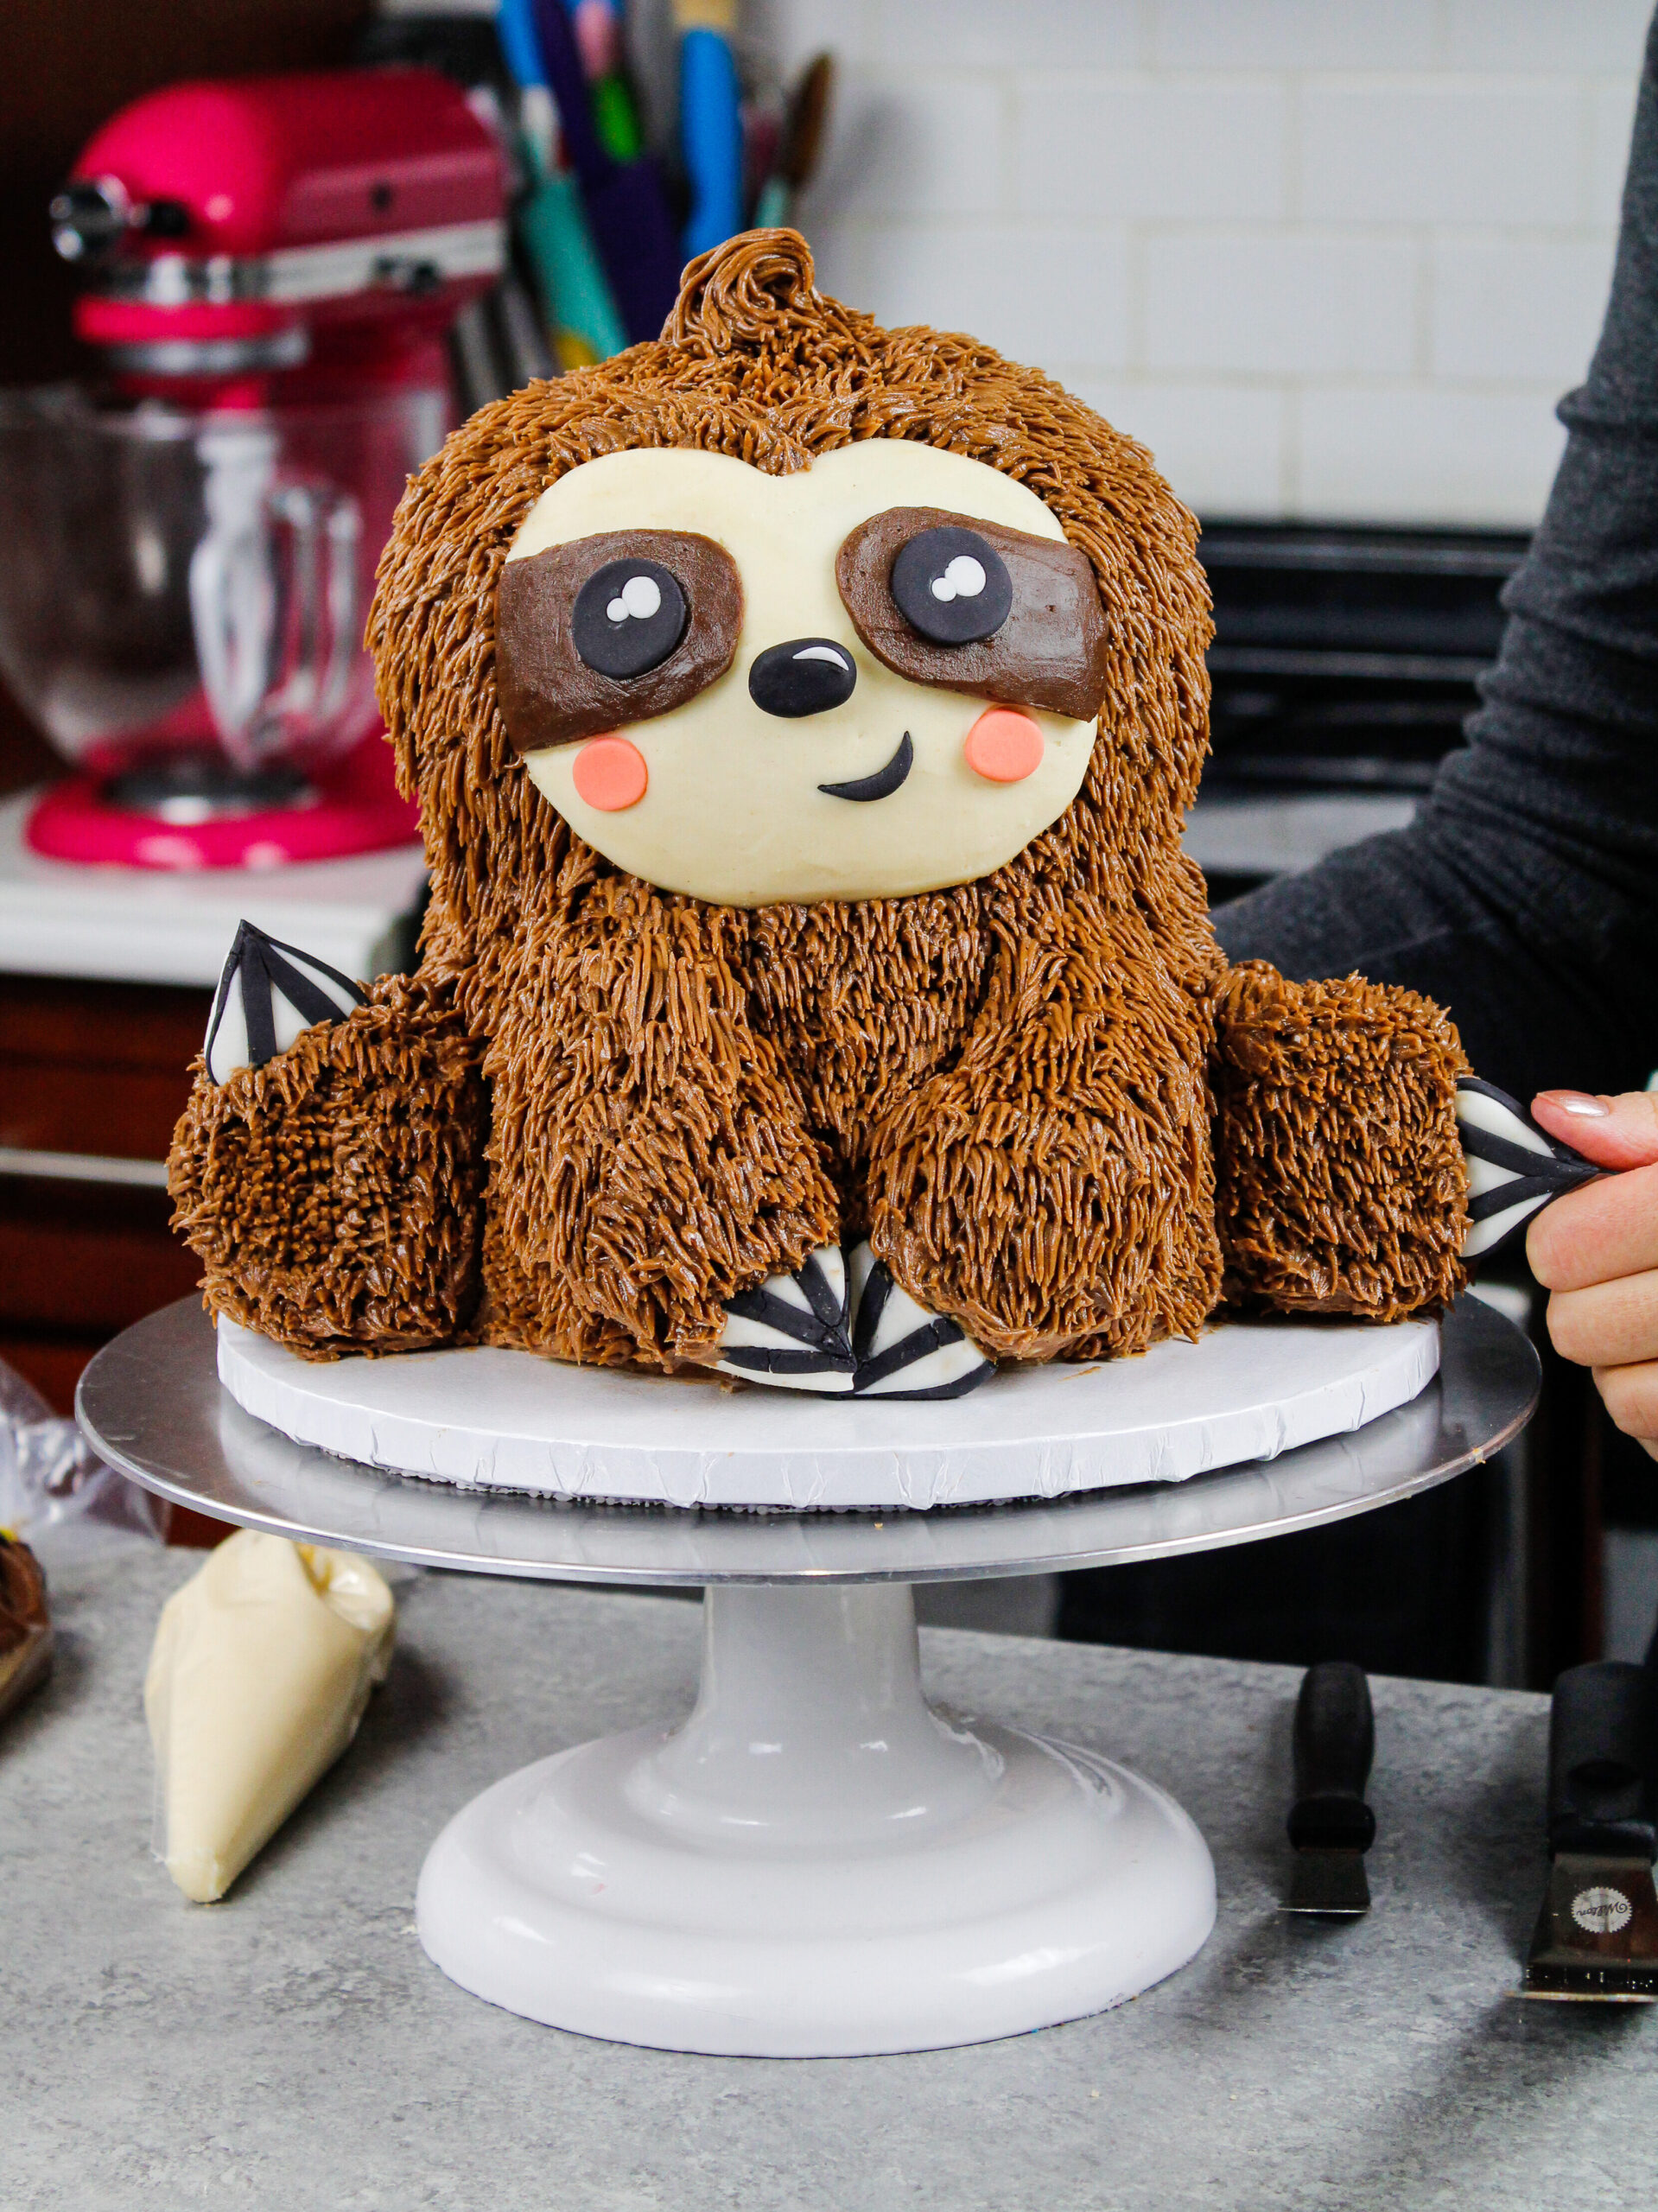
Chill the cake again in the fridge (20 minutes) or freezer (10 minutes) until the second coat of frosting firms up.
Let the cake sit at room temperature for 1-2 hours before serving to make it easier to cut.
Substitutions and Swaps – Chocolate Cake Layers
This sloth birthday cake uses quite a few ingredients and I know you might not have them all on hand. Or if you have food allergies or restrictions, I’ve got you covered.
Below are some swaps and substitutions that can be made in this sloth cake recipe.
- Unsalted Butter – If you only have salted butter on hand, you can use it in place of the unsalted butter. Just be sure to omit the salt! You can also use vegan butter in its place.
- Eggs – If you have an egg allergy you can use an egg replacer like this.
- Unsweetened Cocoa Powder – Dutch processed or dark cocoa powder will work in this recipe too!
- Buttermilk – You can use full fat yogurt, sour cream, whole milk, or an alternative yogurt or milk (almond, soy, oat) if you’re dairy free.
- Self-Rising Cake Flour – To make your own self-rising cake flour, measure out 3 cups of cake flour, then add 3/4 teaspoon salt and 1 Tbsp baking powder. You can also use all-purpose flour or a gluten free flour blend in this formula if needed.
Substitutions and Swaps – Peanut Butter Chocolate Frosting
- Unsalted Butter – If you only have salted butter on hand, you can use it in place of the unsalted butter. Just be sure to omit the salt that this frosting recipe calls for. You can also use vegan butter in its place!
- Creamy Peanut Butter – Smooth and creamy peanut butters like JIF or Skippy work best in this frosting! Natural frostings have a tendency to separate and this can cause the frosting to break. If you have a nut allergy, just use additional butter in place of the peanut butter in this recipe.
- Heavy Cream – Whole milk or alternative milk (soy, almond, oat) will work fine in this frosting recipe if that’s what you have on hand.
- Unsweetened Cocoa Powder – Dutch processed or dark cocoa powder will work in this recipe too! The frosting color might end looking darker though.
- Dark Chocolate – Milk or semi-sweet chocolate will work too! This is just added at the very end to make the darkest frosting color for the sloth’s face.
Tips for Making the Best Sloth Cake:
- Properly measure your flour (spoon into the cup measure, then level) or use a kitchen scale to measure your dry ingredients.
- Ingredients at room temp mix together better, so be sure you set out any cold ingredients ahead of time.
- If you don’t have 6, 6-inch pans, bake as many layers as you can at a time and leave the remaining batter out at room temperature, covered with a towel. After the first batch of layers has baked and cooled a bit, bake the next round of layers.
- Trim your cake layers before stacking and frosting them! It makes it so much easier to get the shape of this sloth just right.
- Use a small grass piping tip to give this sloth a perfectly fuzzy looking layer of “fur.”
- Chill your cake layers in the freezer for about 20 minutes before assembling the cake. This makes it easier to stack and frost.
- Be patient and give yourself lots of time! Sculpted cakes like this can be challenging. Take your time piping the frosting and adding on the details to this cake.
- If your hands run hot, wrap a paper towel or thin kitchen towel around your piping bag to prevent the transfer of heat from your hands into the frosting.
- Take breaks as you pipe on the buttercream fur to prevent hand cramps and keep your sanity!
Making this Sloth Cake in Advance & Storage Tips:
- Make your cake layers in advance and freeze them. It breaks the process up and makes it more approachable.
- Make your frosting ahead of time too or save any leftover frosting. It can be stored in an airtight container in the fridge for up to a month. Or store it in the freezer for up to 3 months! Be sure to give it a good stir once it thaws to get the consistency smooth again.
- A frosted cake can last in the fridge for up to a week. The buttercream locks in all the moisture, keeping the cake fresh and delicious.
- If you cut into the cake and have leftovers, use any remaining frosting to cover the cut section to keep it moist. It can be stored in the fridge like this for up to a week.
Let Me Know What You Think!
If you try making this sloth cake, I’d love to hear what you think of it! Let me know by leaving a rating and comment below.
If you plan to share on social media, you can tag me @chelsweets and use #chelsweets so that I can see your amazing creations.
Other Recipes You Might Like:
Sloth Cake
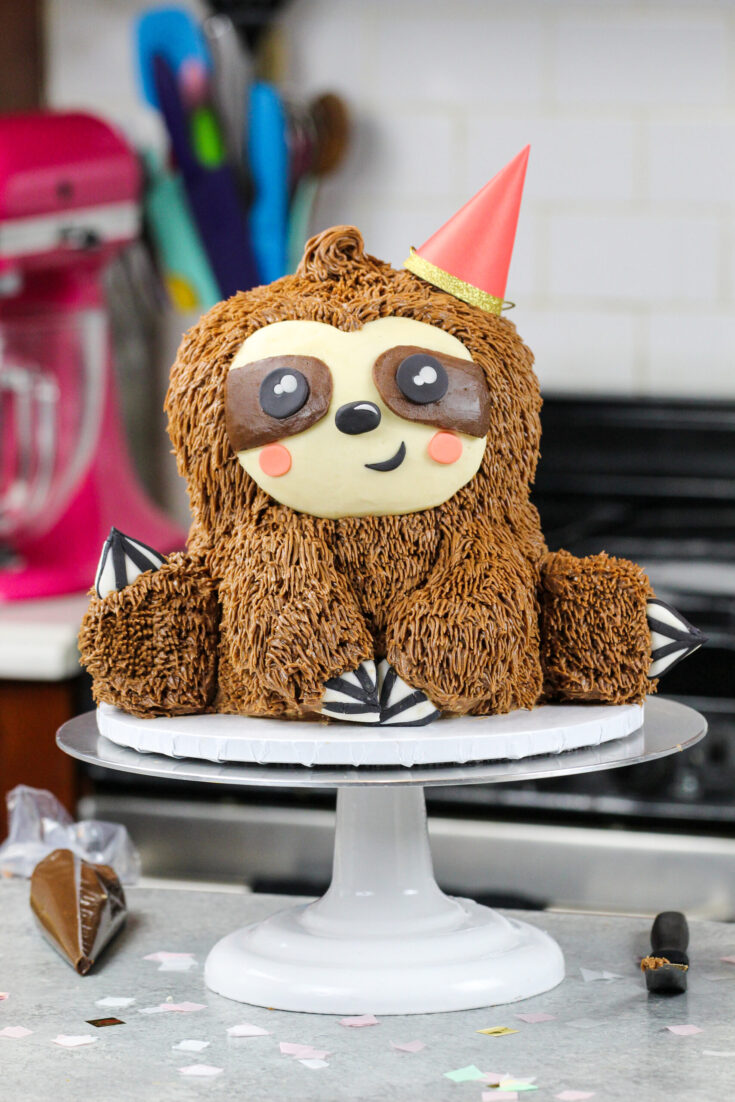
This sloth cake cake is just as adorable as it is delicious! It's made with tender chocolate cake layers and frosted with chocolate and peanut butter buttercream frosting.
Ingredients
Chocolate Cake Layers
- 1 cup or 2 sticks unsalted butter, room temp (226g)
- 2 1/2 cups granulated sugar (500g)
- 4 large eggs, room temp (224g)
- 1 cup hot coffee or water (240ml)
- 1 cup buttermilk, room temp (240ml)
- 1 cup unsweetened cocoa (80g)
- 3 cups self-rising cake flour (360g)
Chocolate Buttercream Frosting
- 3 cups unsalted butter, room temperature (678g)
- 1/2 cup creamy peanut butter (120g)
- 1 Tbsp vanilla extract (12ml)
- 1 tsp salt (6g)
- 10 cups powdered sugar (1250g)
- 1/3 cup heavy cream or whipping cream (80g)
- 1/2 cup unsweetened cocoa powder (40g)
- 1/4 cup chopped dark chocolate or chips, melted and cooled (45g)
Rice Krispie Treats - Sloth Arms and Legs
- 2 cups mini marshmallows (100g)
- 3 cups puffed rice cereal (75g)
Sloth Cake Decoration
Instructions
Step 1: Make the Chocolate Cake Layers
- Begin by preheating the oven to 350 F / 175 C.
- Line six 6-inch round cake pans with parchment rounds and spray with non-stick baking spray.
- Add 1 cup butter and 2 1/2 cups sugar into the bowl of a stand mixer. Mix on high for 1 minute with a whisk attachment or with a hand mixer until the mixture becomes light in color.
- Add in 4 large eggs, two at a time. Mix on a medium high speed until they're fully incorporated.
- In a separate bowl, combine 1 cup of hot coffee, 1 cup of buttermilk, and 1 cup of cocoa powder. Whisk until smooth.
- Next, mix 1 cup of self-rising cake flour into the butter/egg mixture on a low speed. Scrape the sides of the bowl with a rubber spatula to ensure the flour is fully incorporated.
- Pour in half of the buttermilk/cocoa mixture and mix on a low speed.
- Repeat with the remaining cake flour and cocoa mixture.
- After adding in the last cup of self-rising cake flour, mix on low until the flour is just incorporated.
- Pour the batter evenly between the prepared pans. I like to use a kitchen scale to ensure each pan has the same amount of batter.
- Bake for 30-33 minutes or until a toothpick comes out with a few moist crumbs. Rotate pans halfway through to help them bake evenly.
- Allow the layers to cool in the pan for about 15 minutes, then flip them onto a wire rack to finish cooling.
- Once the cake layers have finished cooling use a serrated knife to level the tops and trim the layers to make them easier to shape into the sloth's body and head (see photos above). Set the cake layers aside.
- If making your cake layers in advance, wrap and freeze them like this. When you're ready to assemble the cake, unwrap the frozen layers and allow them to thaw for about 20 minutes before you plan to frost the cake.
Step 2: Make the Chocolate Peanut Buttercream Frosting
- While the cake layers bake and cool, make the chocolate peanut butter frosting.
- Beat 3 cups of butter and 1/2 cup of peanut butter on a medium speed for 30 seconds with a paddle attachment or hand mixer until smooth.
- Add in 1 Tbsp of vanilla extract and 1 tsp of salt and mix on a low speed.
- Slowly mix in 10 cups of powdered sugar on a low speed. Add 1/3 cup of heavy cream halfway through to make it easier to mix. Scrape the sides of the bowl as needed.
- Once the frosting is smooth and has reached the desired consistency, beat on low until for a couple extra minutes to make the frosting super smooth and to push any extra air out of the frosting.
- If the frosting is too thick, add in additional cream (1 Tablespoon at a time). If the frosting is too thin, add in more powdered sugar (1/4 cup at a time).
- Place 1/3 of the peanut butter frosting in a separate bowl, and cover with plastic wrap then set aside.
- Mix 1/2 cup of cocoa powder into the remaining buttercream and mix on a low speed until it's fully incorporated. Add an additional 2 Tbsp of heavy cream to thin the frosting, then scoop 1/2 cup of buttercream into a separate bowl. Cover the remaining chocolate peanut butter buttercream with plastic wrap then set aside.
- Add 1/4 cup of melted and cooled dark chocolate to the remaining 1/2 cup of chocolate peanut butter buttercream. Stir until smooth, then place in a small piping bag. Seal the top of the bag with a rubber band and set aside.
Step 3: Assemble this Sloth Cake
- Before you start to make the cake, use the black and white fondant to create the sloth's eyes, nose, mouth, and nails / claws.
- Place the fondant pieces on a wire rack to allow them to dry and firm up while you assemble the cake.
- Stack and frost the cake layers on a 10-inch greaseproof cake board or cake drum using a dab of frosting to help stick the first cake layer to the board.
- Spread an even layer of peanut butter buttercream between each cake layer with a large offset spatula. Make sure to save 1/2 cup of peanut butter frosting to make the sloth's face.
- Insert either a thick plastic straw (like a bubble tea straw) or a wooden dowel through the center of the cake layers to help stabilize them.
- Spread a thin coat of chocolate peanut butter frosting around the cake to fully cover the cake layers. Smooth using an acetate sheet then chill the cake in the fridge (30 minutes) or freezer (10 minutes) until the frosting is firm to the touch.
Step 4: Make the Arms & Legs with Rice Krispie Treats
- Place 2 cups of mini marshmallows in a heatproof bowl and heat in the microwave for 45-60 seconds at full power. They should be melted at this point and easy to stir. If not, heat in additional 15 second intervals until melted.
- Pour in 3 cups of rice krispies or puffed rice cereal and stir until the cereal is fully coated in melted marshmallows.
- Grease your hands with cooking spray then shape two thin front legs, two thick hind legs and a small tail with the rice krispie mixture. Place the arms, legs and tail next to the cake as you make them to ensure they are proportionate and shaped properly.
Step 5: Decorate this Sloth Cake
- Press the rice krispie treat arms, legs and tail into place on the chilled cake.
- Spread an even layer of the chocolate peanut buttercream over the rice krispies.
- Use the reserved peanut butter frosting to make circle on the front of the sloth's head to create its face. Pipe two eye patches using the double chocolate peanut butter frosting (the darkest frosting). Then carefully press the eyes, nose and mouth into place.
- Place the remaining chocolate peanut butter buttercream in a large piping bag fit with a small grass piping tip and pipe buttercream fur all over the cake and around the face. Take breaks as needed, this is the most time-consuming part of decorating this cake!
- The final step is to press the fondant nails/claws into place.
- Chill the cake again in the fridge (20 minutes) or freezer (10 minutes) until the second coat of frosting firms up.
- If making this cake in advance, let the cake sit at room temperature for 1-2 hours to thaw before serving to make it easier to cut.
Notes
Tips for Making The Best Sloth Cake:
- Properly measure your flour (spoon into the cup measure, then level) or use a kitchen scale to measure your dry ingredients.
- Ingredients at room temp mix together better. Set out any cold ingredients ahead of time.
- If you don't have 6, 6-inch pans, bake as many layers as you can at a time and leave the remaining batter out at room temperature, covered with a towel. After the first batch of layers has baked and cooled a bit, bake the next round of layers.
- Mix your cake batter just until the ingredients are incorporated. This will ensure your cake layers are tender and fluffy.
- Chill your cake layers in the freezer for about 20 minutes before assembling the cake. This makes it easier to stack and frost.
- Make this sloth cake vegan or dairy free if needed! Use your favorite type of dairy free milk to replace the buttermilk and heavy cream, and use vegan butter sticks in place of the butter. For the eggs I recommend using an egg replacer like this.
- Insert a thick bubble tea straw or wooden dowel through the layers once they're stacked to help keep the cake stable as you decorate it.
- Shape the fondant nails before you start assembling the cake. This will give them a chance to firm up before you have to add them to your cake.
- If your hands run hot, wrap a paper towel or thin kitchen towel around your piping bag to prevent the transfer of heat from your hands into the frosting.
- Take breaks as you pipe on the buttercream fur to prevent hand cramps and keep your sanity!
Making this Cake in Advance
Make your cake layers in advance and freeze them. It breaks the process up and makes it more approachable.
Make your frosting ahead of time too or save any leftover frosting! It can be stored in an airtight container in the fridge for up to a month or in the freezer for up to 3 months. Be sure to give it a good stir once it thaws to get the consistency nice and smooth again.
A frosted cake can last in the fridge for up to a week, or in the freezer for up to a month. The buttercream locks in all the moisture, keeping the cake fresh and delicious!
If you cut into the cake and have leftovers, use any remaining frosting to cover the cut section to keep it moist and store in the fridge for up to a week.
Nutrition Information
Yield
24Serving Size
1Amount Per Serving Calories 732Total Fat 38gSaturated Fat 21gTrans Fat 0gUnsaturated Fat 13gCholesterol 118mgSodium 178mgCarbohydrates 96gFiber 2gSugar 71gProtein 6g

Kristi Tugwell
Saturday 30th of July 2022
I used your cake for inspiration and for some helpful tips and tricks along the way. I usually only make 2 or 3 cakes a year for my kids birthday parties. My cake turned out great and even better my daughter absolutely loved it. Thank you for sharing your talent!!
Chelsweets
Sunday 31st of July 2022
I am so happy to hear that Kristi!! You're too sweet :)
Tara
Wednesday 9th of March 2022
Please provide a link for the dome cake pan that you used. Also the bottom layer looks bigger than the 6 inch layers, is it an 8 inch pan?
Marisa
Monday 24th of January 2022
The bottom layer looks bigger. Are you using an 8 inch for the base layer or are you trimming up the other layers?
Narwhal Cake: Easy & Adorable Cake Recipe and Tutorial
Saturday 15th of January 2022
[…] Sloth Cake […]
Koala Cake: Simple Recipe & Step-by-Step Tutorial
Friday 3rd of December 2021
[…] Sloth Cake […]