
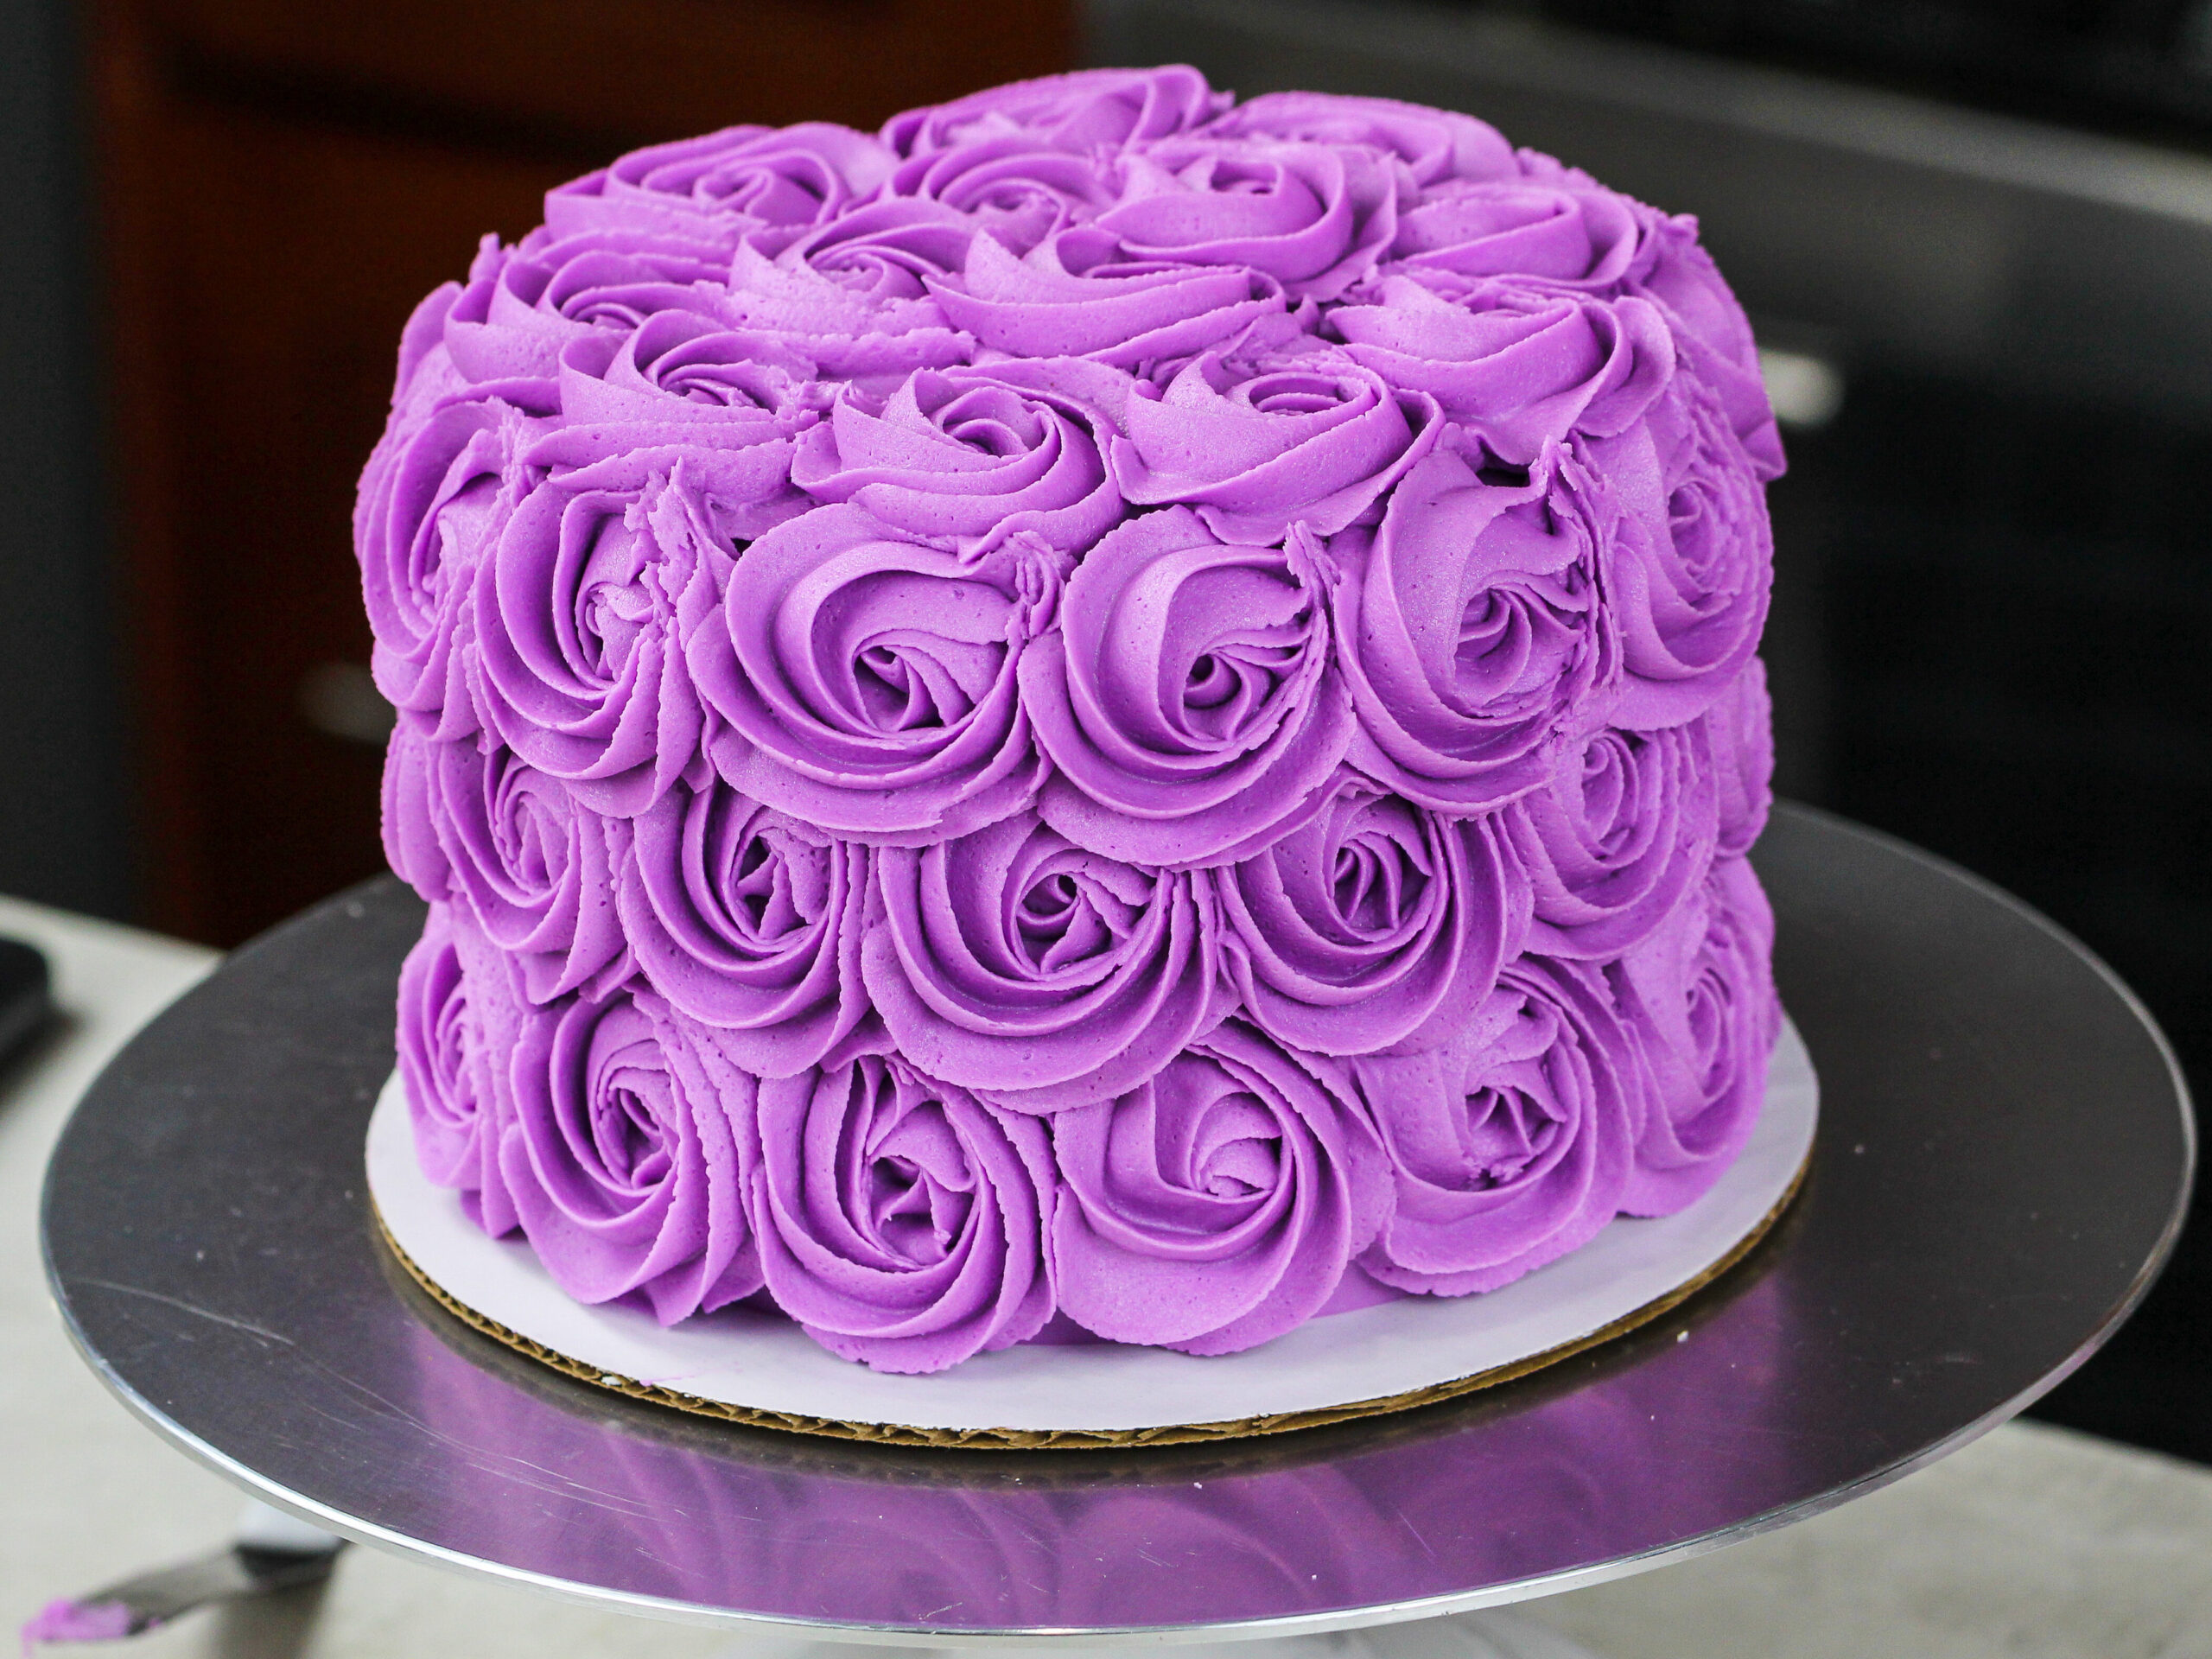
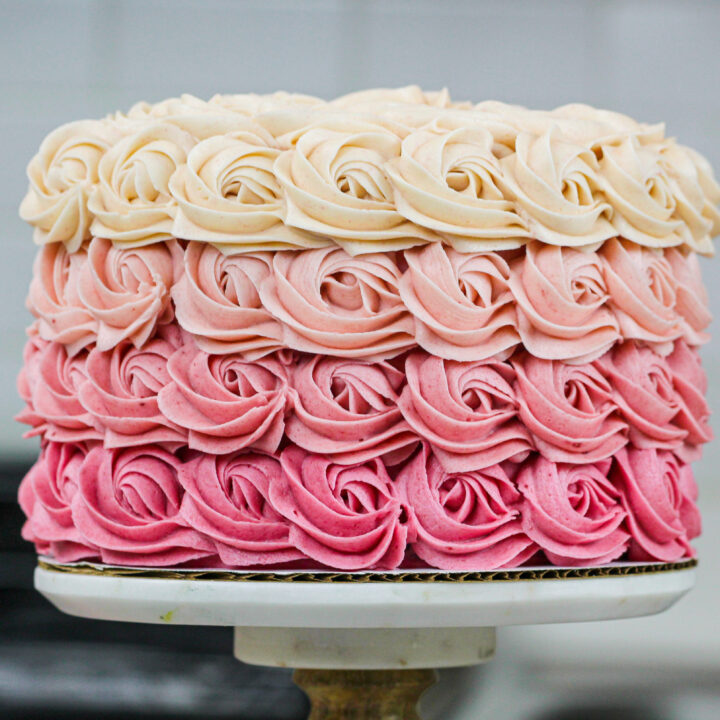
Buttercream rosettes are such an easy and gorgeous way to decorate a cake.
With the help of an open star tip like a Wilton 1M, these swirls of frosting make your cake look like a total masterpiece with minimum effort.

If this technique is new to you, don’t worry! I walk through everything you need to know below to make the perfect rosette cake.
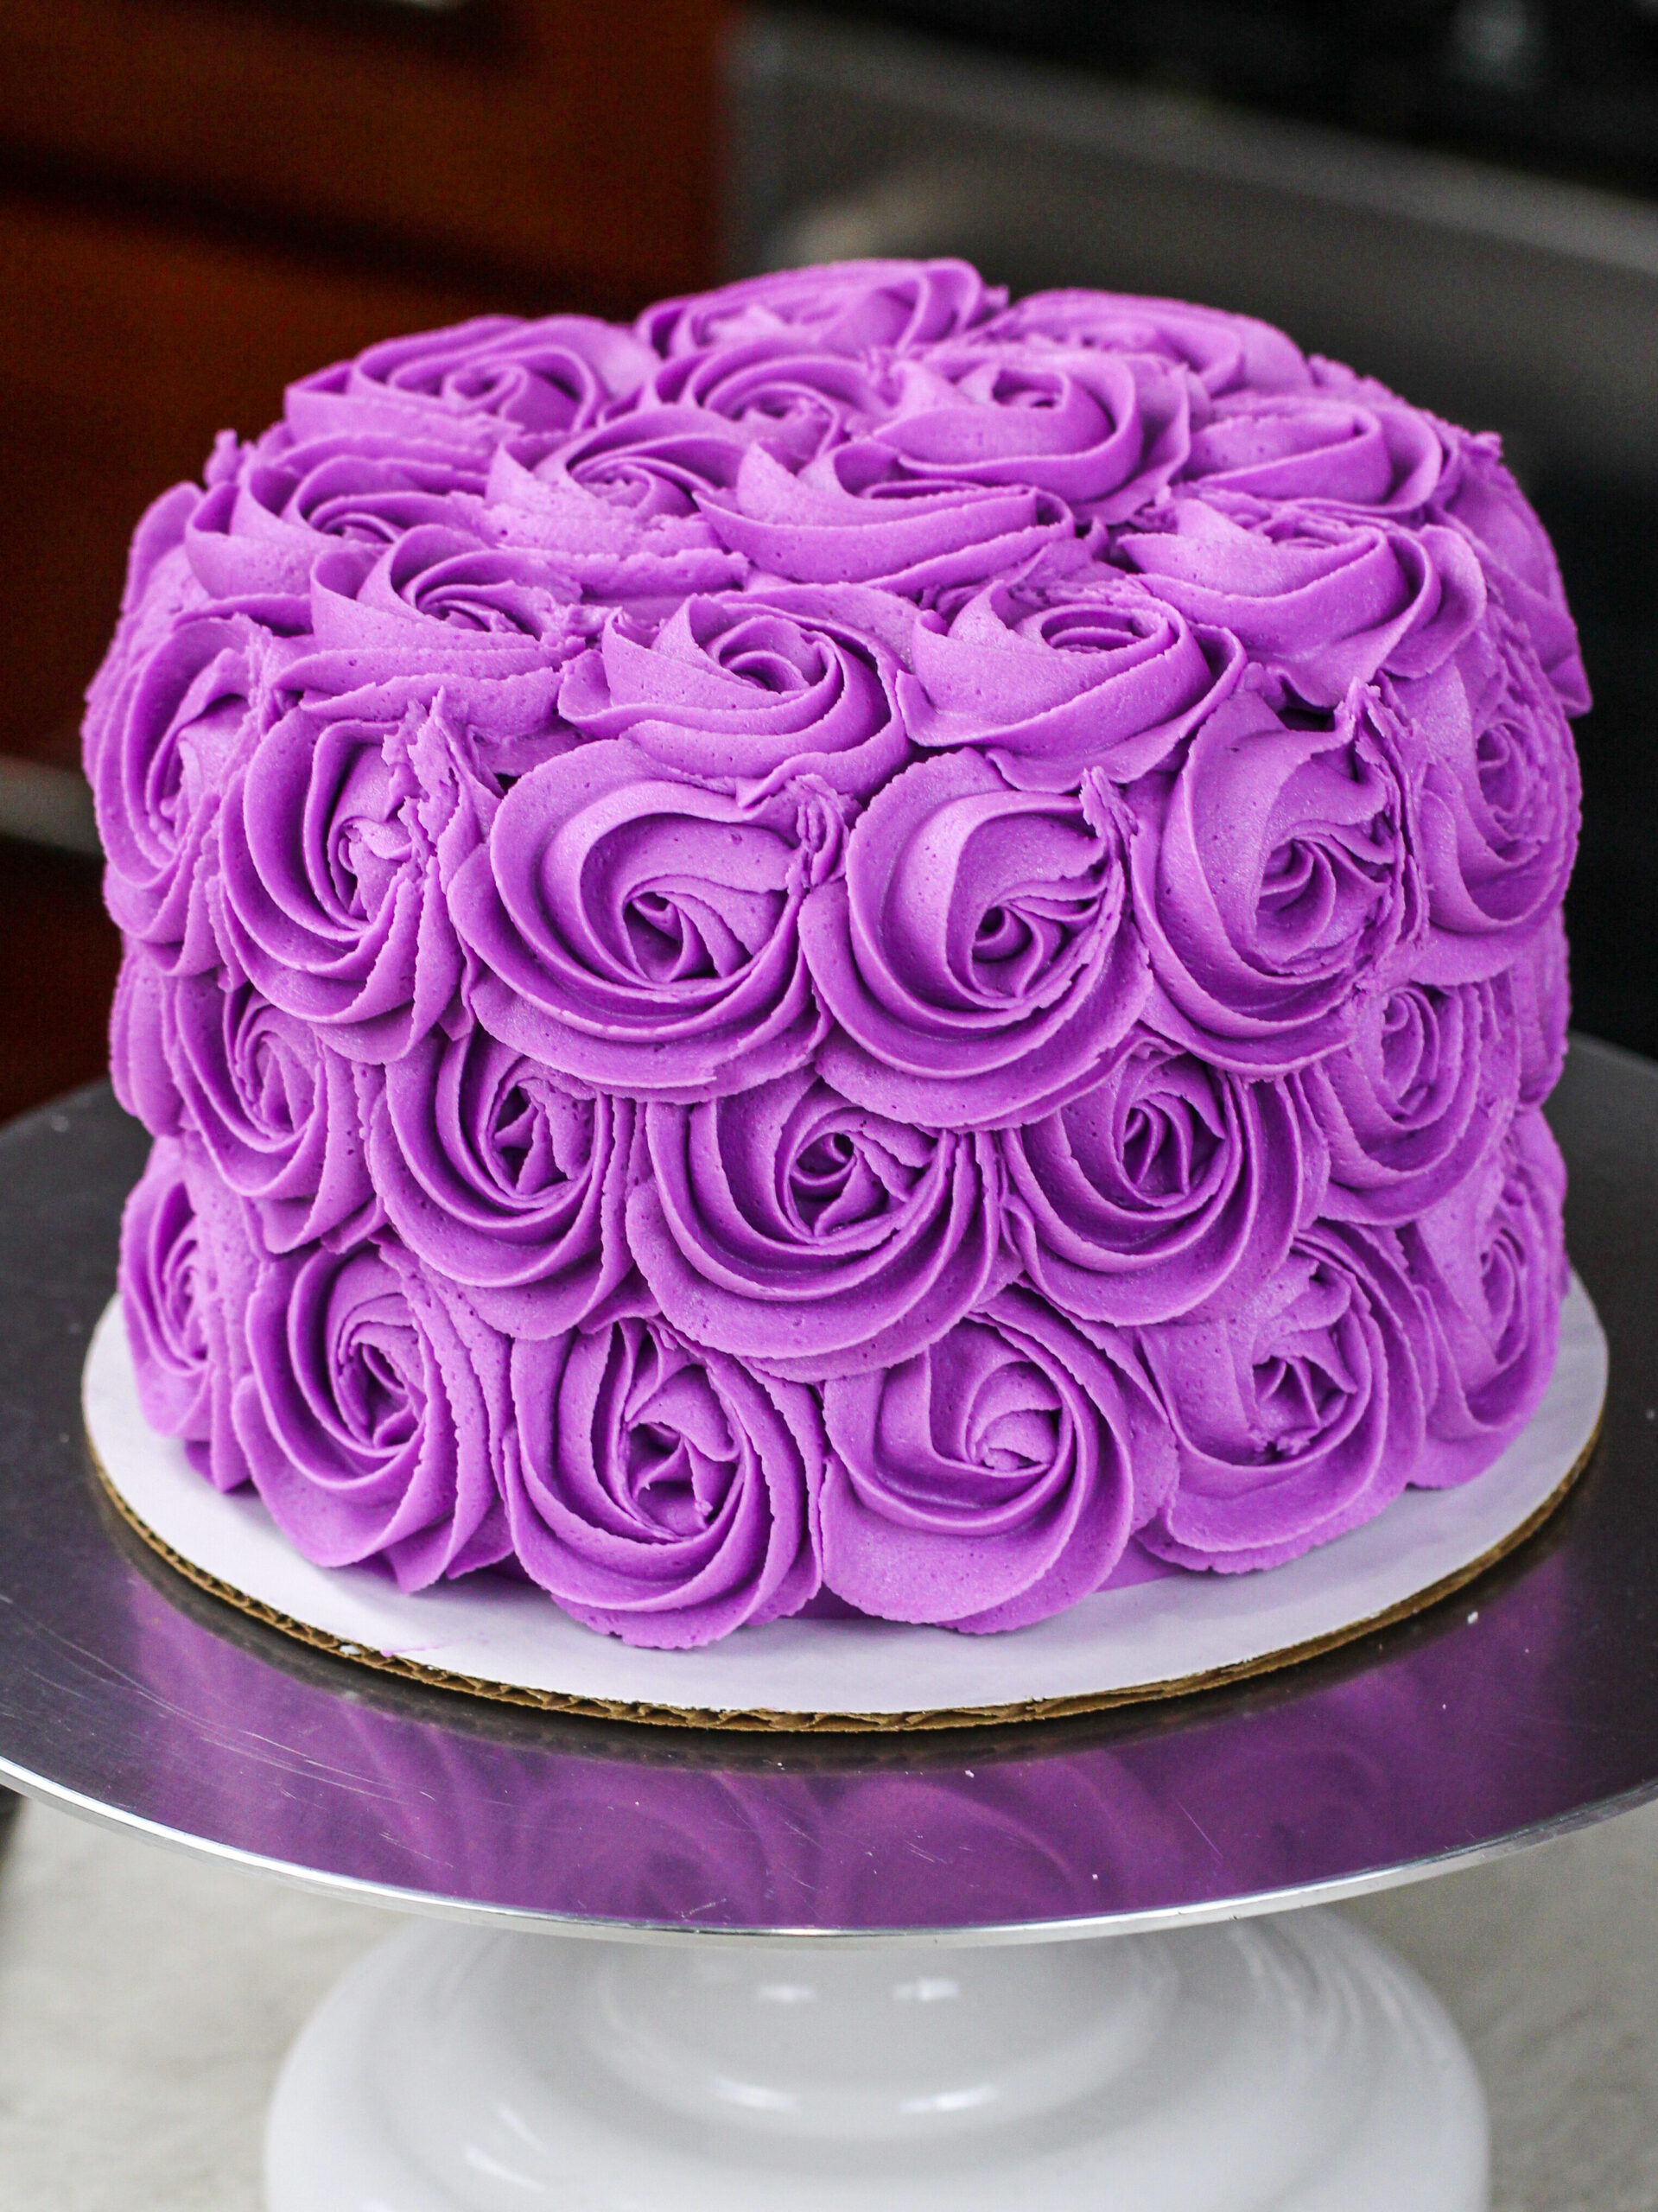
I chose to make a purple rosette cake, but you can color your buttercream any color you want and you can even try an ombre effect by using 3 different shades of the same color!
What Frosting Tip Works Best for Piping Rosettes?
My go-to piping tip (and in my opinion the best piping tip) to use to make buttercream rosettes is an open star tip.
Different brands make different versions of this, but the most common are a Wilton 1M or an Ateco 824.
I used a Wilton 1M to pipe the rosettes on this cake and I love the way they look.
You can also use a closed star piping tip like a Wilton 2D or an Ateco 34 but the ridges on the rosettes may not be as defined.

What You Need to Make a Rosette Cake
One of the best parts about this cake design is that you really don’t need a ton of tools or fancy equipment.
In fact, you don’t even need a spinning cake stand.
The things you will need are:
- Open or closed star frosting tip (like a Wilton 1M or Wilton 2D)
- 1 large frosting bag
- Food coloring – You can use liquid, gel, powder, or natural coloring like raspberry powder!
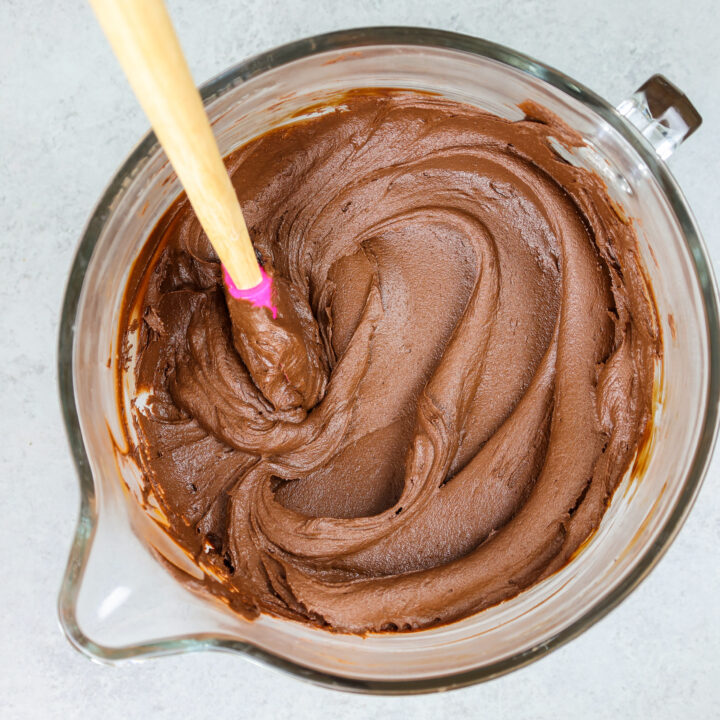
How to Make Vibrant Buttercream Frosting
Now that we’ve covered what tools you need, let’s talk about making beautifully colored buttercream frosting.
You can do this with gel food coloring or with natural food coloring (like this powder).
Liquid food coloring can work too, but it can throw off the consistency of your frosting and give it a bitter taste if you add too much.
I recommend using gel food coloring. Gel food coloring is concentrated so it allows you to use less. A couple squirts will create a beautiful shade of purple!
Gel food coloring is also thicker so it won’t change the consistency of your frosting.
Americolor and Chef Master are my go-to brands of gel food coloring and I order them on Amazon.

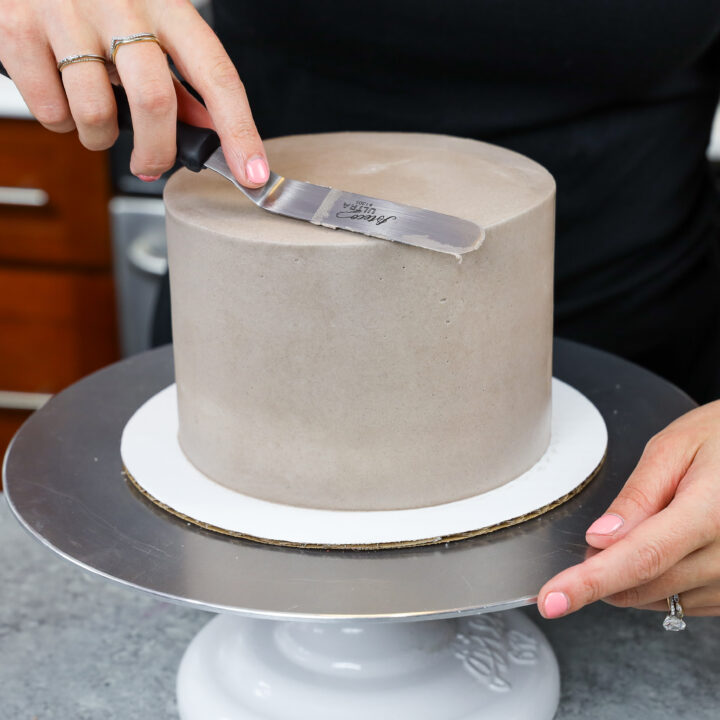
Properly Crumb Coating a Buttercream Rosette Cake
The next thing to consider is the crumb coat, which is the thin layer of buttercream you cover a cake with to trap in any rogue crumbs.
I’m sure you’re thinking a crumb coat is a crumb coat, but there is actually a bit of strategy to it when it comes to making a rosette cake.
If you want to use colorful buttercream to pipe your rosettes, I highly recommend using the same color of buttercream to crumb coat your cake. This will help camouflage any little gaps between your rosettes.


Practice Makes Perfect
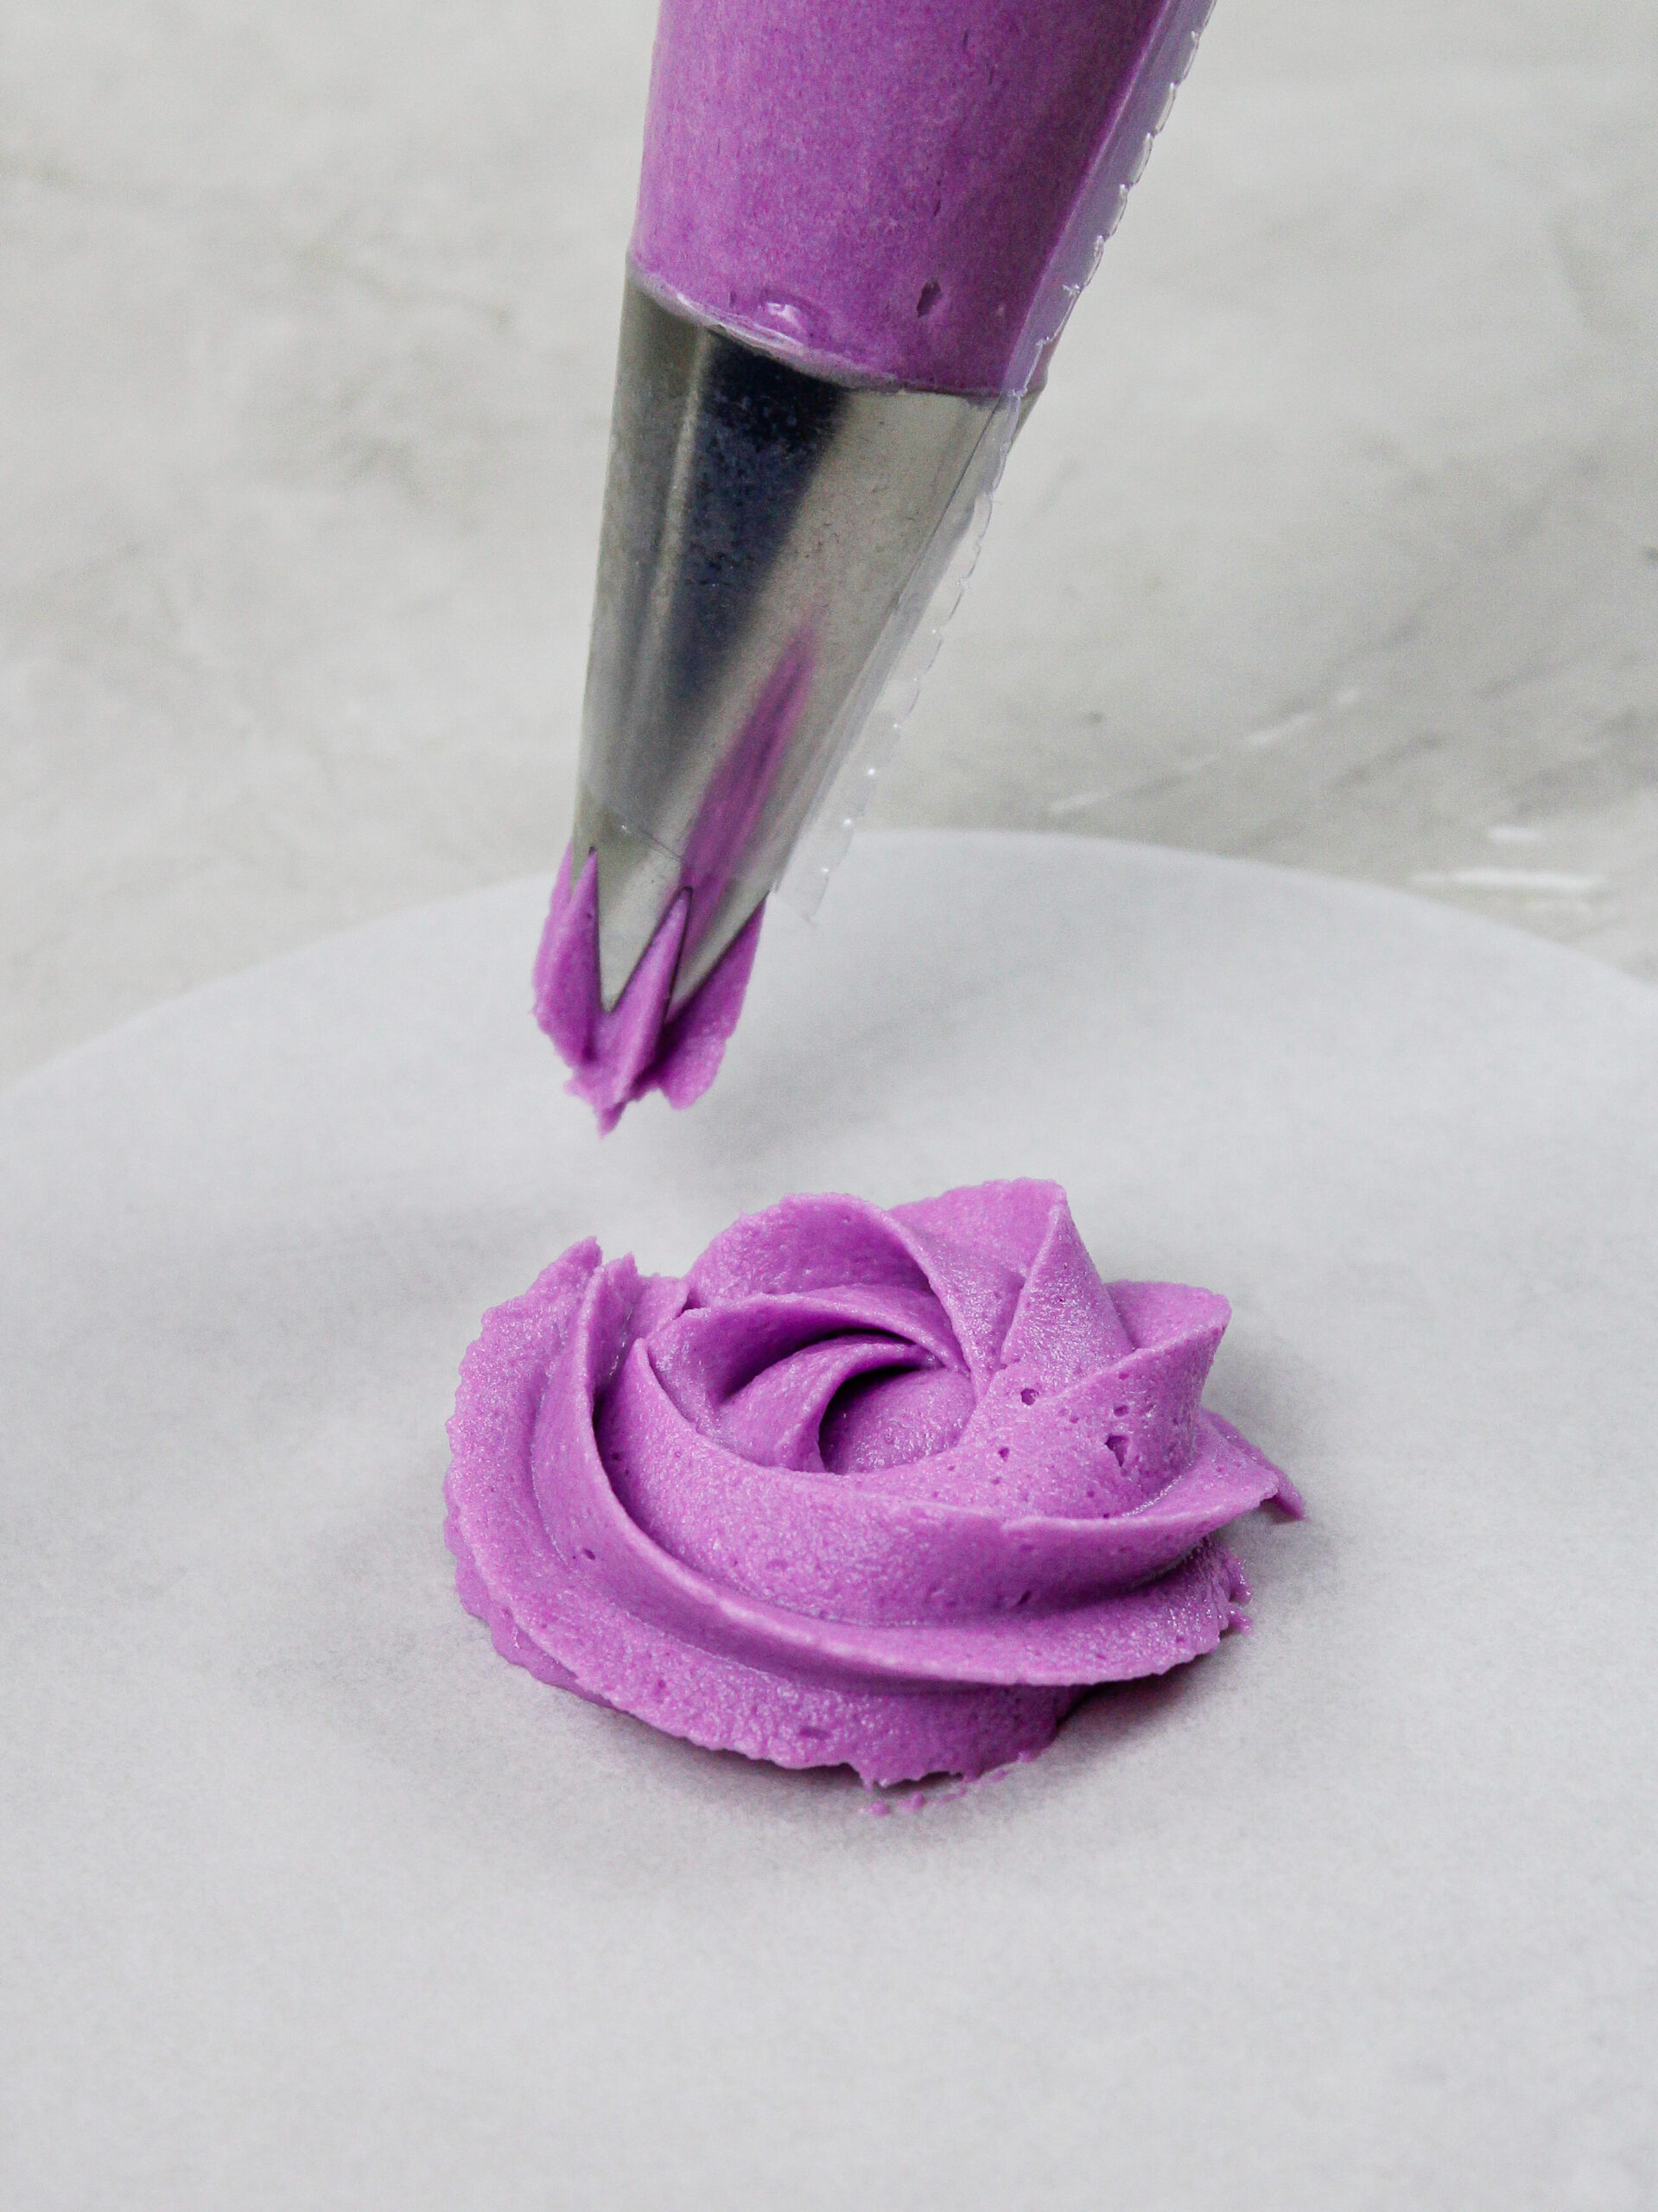
If you aren’t super comfortable with a piping bag or you haven’t piped a buttercream rosette before, I recommend practicing on a piece of parchment or wax paper before you tackle your cake.
Tape down a small piece of parchment paper on your counter and practice the motion.
Hold the piping bag perpendicular to the counter and slowly pipe a spiral starting in the center and working your way out.
Once you get to the end of the rosette, stop squeezing and continue moving your hands in the same direction you were piping until the buttercream separates from the piping tip.
Try to focus on piping your rosettes in the same direction and making them roughly the same size.

Repeat and continue to practice until you feel comfortable with the motion.
Scrape the frosting off the parchment paper and place it back into your piping bag to avoid waste.

How to Pipe Buttercream Rosettes on a Cake
When you’re ready to pipe rosettes onto your cake, I recommend making two, evenly spaced lines around the cake with an offset spatula.
This will allow you to pipe three even rows of rosettes that are all evenly sized and spaced.
To give your rosettes a super clean, cohesive look I recommend ending each rosette in a place where you can hide the tail under another rosette.
On this cake I ended each rosette at the top of the swirl and hid the tails under the rosette above it.
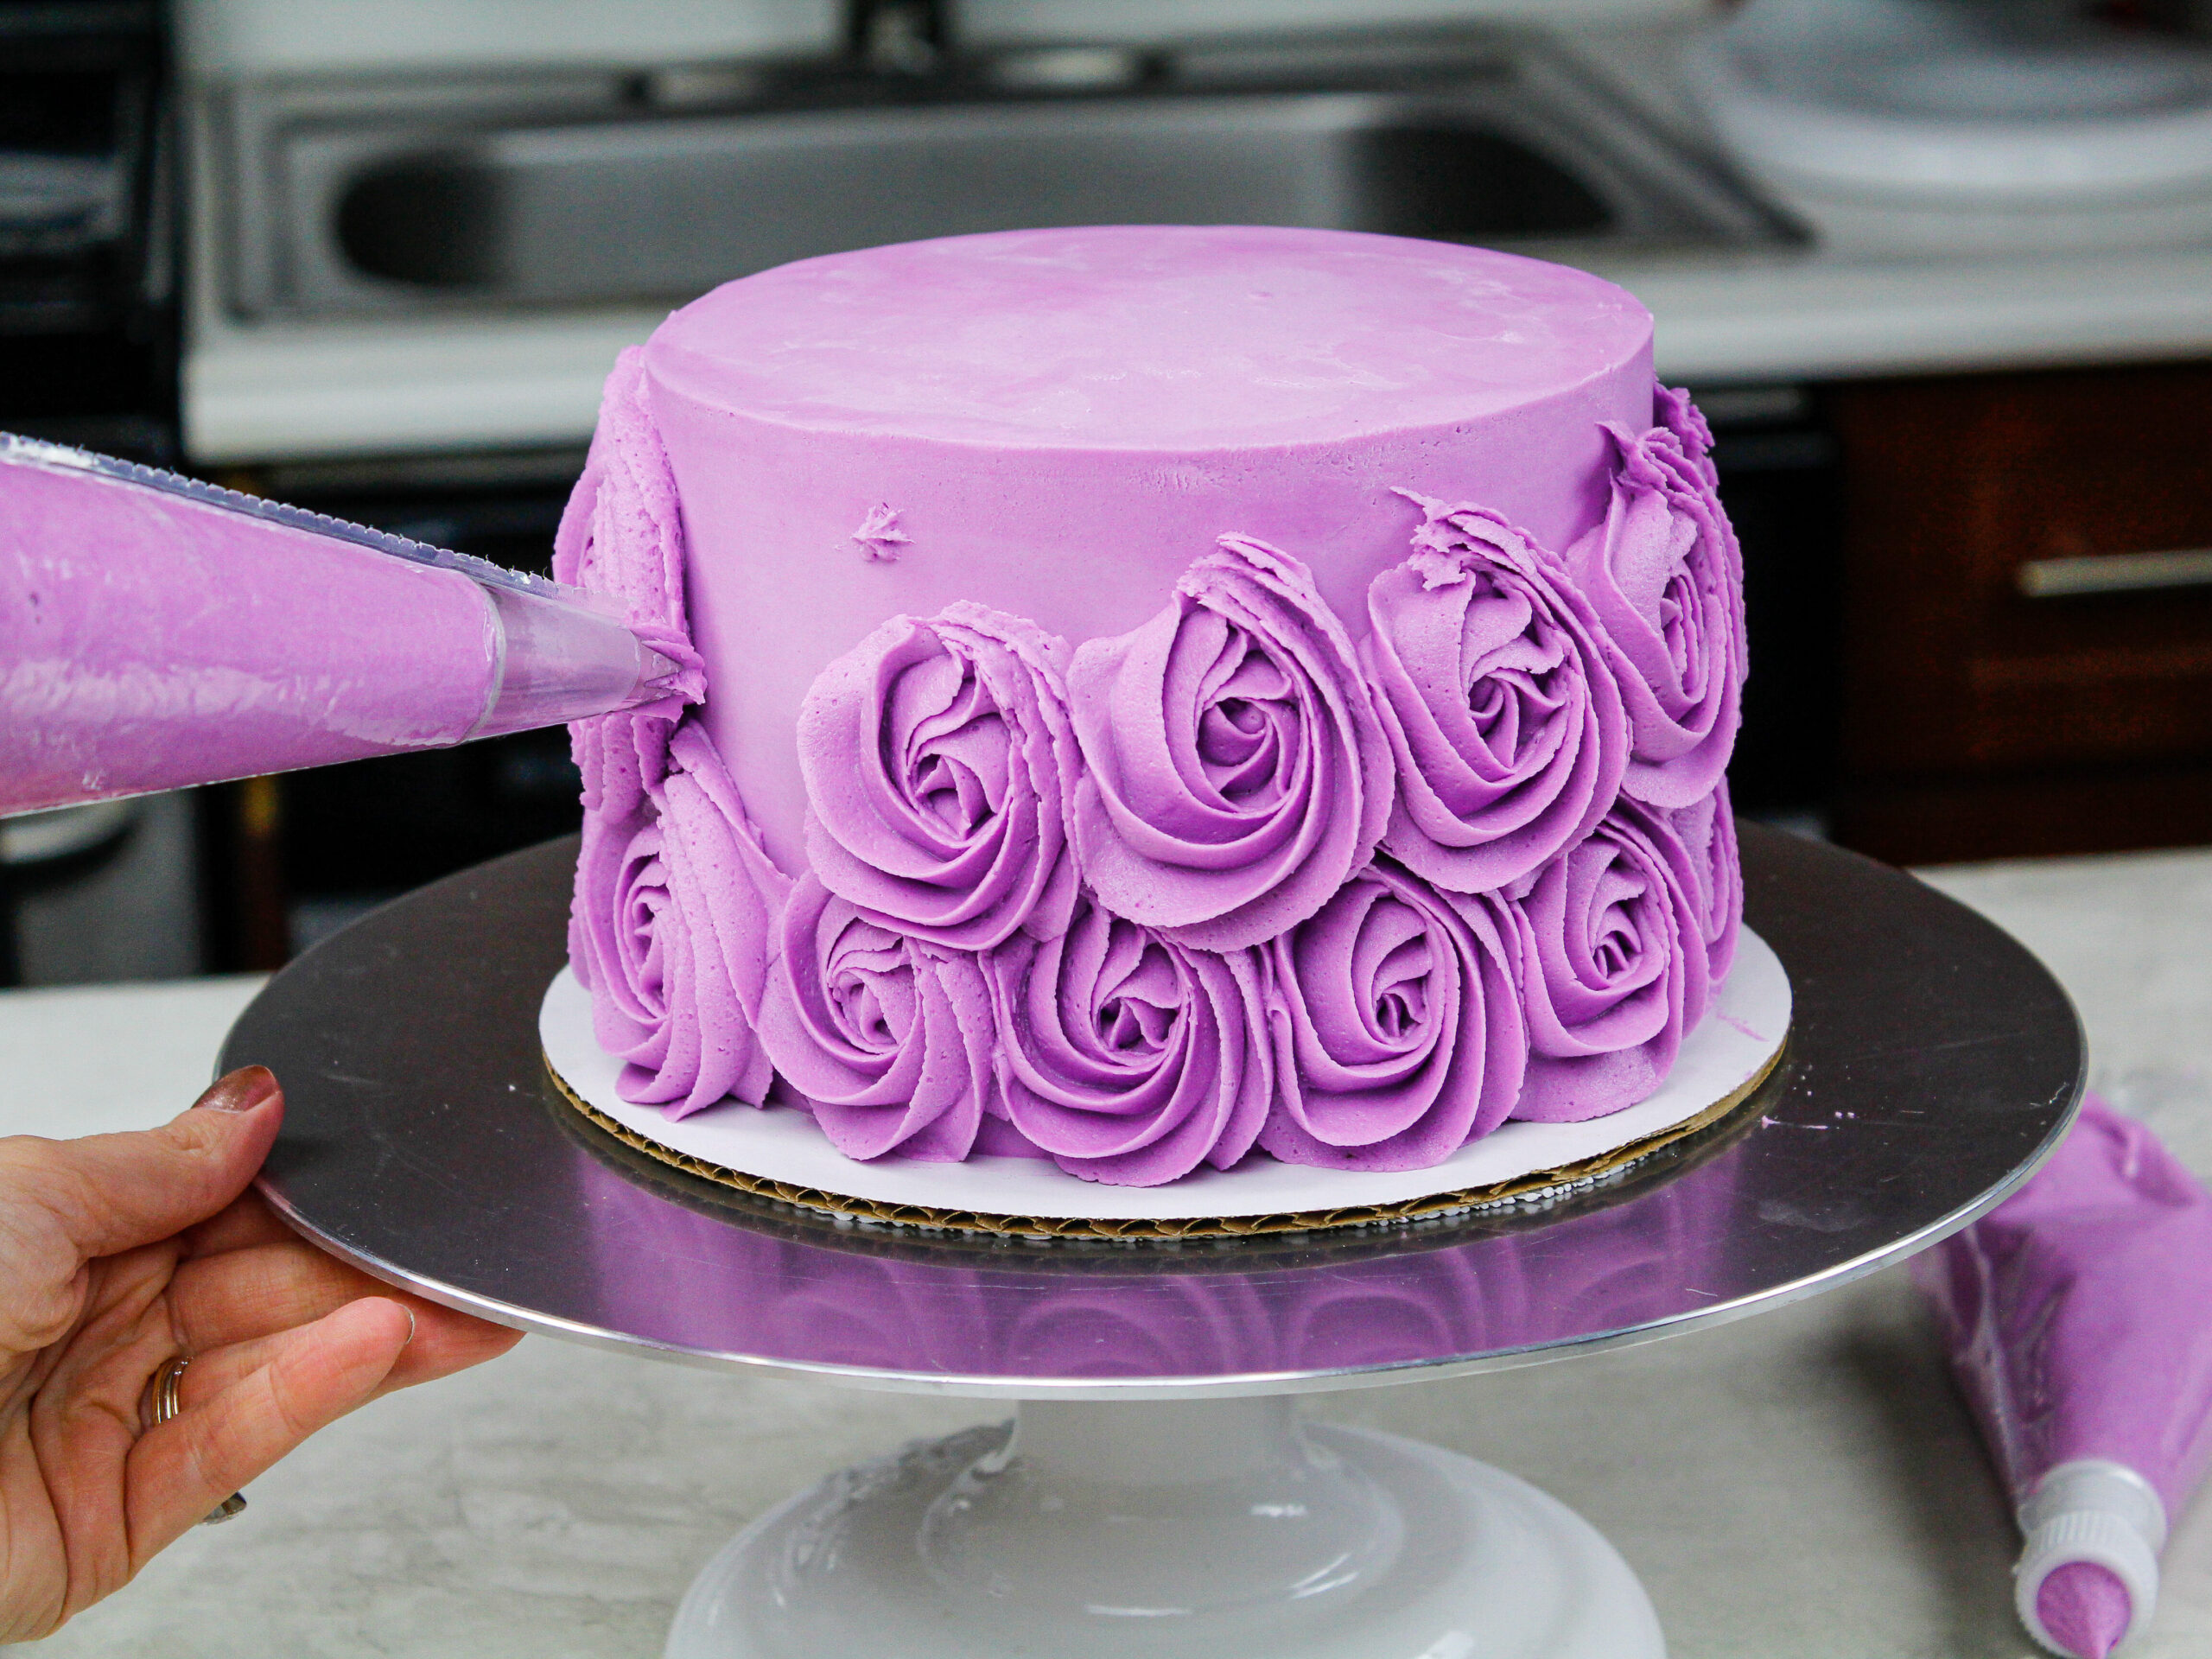

However, you can stop the motion wherever you feel comfortable. Just be sure to be consistent with your pattern!
Tips for Making the Best Rosette Cake
- Chill your cake layers in the freezer for about 20 minutes before assembling the cake. This makes them easier to stack and frost.
- Level your room temperature or thawed cake layers with a serrated knife to make them easier to stack.
- Make sure your buttercream is the right consistency. It allows you to easily pipe your rosettes and have them keep their shape.
- Crumb coat your cake in the same color(s) you plan to pipe your rosettes! This will help camouflage and gaps between your rosettes.
- Chill your crumb-coated cake to help the rosettes stay in place as you pipe them.
- Make three, evenly spaced lines around the cake with an offset spatula before piping the rosettes. This will allow you to pipe four even rows of rosettes that are all evenly sized and spaced.
- End each rosette where you can cover the tail with another rosette! This will allow you to hide the tail of each rosette under the rosette next to it.

Making This Rosette Cake in Advance and Storage Tips
- Make your cake layers in advance and freeze them. It breaks the process up and makes it more approachable.
- Make your frosting ahead of time or save any leftover frosting! It can be stored in an airtight container in the fridge for up to a month.
- This frosting can also be stored in the freezer for up to 3 months! Just be sure to give it a good stir once it thaws to make it nice and smooth again.
- A frosted cake can last in the fridge for a week, or in the freezer for a month. The buttercream locks in the moisture and keeps the cake fresh and delicious!
Let Me Know What You Think
If you try this rosette cake recipe, I’d love to hear what you think! Please leave a rating below and a comment to let me know your thoughts.
Other Recipes You Might Like:


Rosette Cake Recipe


This rosette cake recipe is absolutely stunning & surprisingly easy to make! It's made with tender chocolate cake layers & homemade buttercream frosting.
Ingredients
Chocolate Cake Layers:
- 2 cups all-purpose flour (260 grams)
- 2 cups granulated sugar (400 grams)
- 3/4 cup sifted unsweetened cocoa powder (75 grams)
- 2 tsp baking powder (8 grams)
- 1 1/2 tsp baking soda (9 grams)
- 1 tsp salt (6 grams)
- 1 cup very hot water (237 grams)
- 2 tsp. instant espresso of coffee (6 grams)
- 1 cup buttermilk (240 grams)
- 1/2 cup vegetable oil (120 grams)
- 2 tsp vanilla extract (8 grams)
- 1 tsp vinegar (4 grams)
- 2 eggs, room temperature (112 grams)
Purple Buttercream Frosting
- 3 cups unsalted butter, room temperature (678 grams)
- 1 Tbsp vanilla extract (12 grams)
- 1 tsp salt (6 grams)
- 10 cups powdered sugar (1250 grams)
- 1/3 cup heavy cream (or whipping cream) (75 grams)
- purple food coloring
Tools / Equipment Needed
Instructions
Moist Chocolate Cake Layers:
- Preheat oven to 350°F. Line three 8" or four 7" pans with parchment rounds, and grease with non-stick baking spray. If you don't have enough pans, you can bake these layers in batches! The batter will be fine if it sits out at room temperature for an hour or two.
- Combine 2 cups all-purpose flour, 2 cups sugar, 3/4 cup baking cocoa, 2 tsp baking powder, 1 1/2 tsp baking soda, and 1 tsp of salt in a large bowl. Whisk together until combined.
- In a separate, medium-sized bowl, add 2 tsp instant espresso or coffee into 1 cup of hot water, and stir until dissolved.
- Add in 1 cup buttermilk, 1/2 cup oil, 2 tsp vanilla extract and 1 tsp vinegar into the instant espresso mixture. Give the mixture a quick stir to combine the ingredients.
- Pour the wet ingredients into the dry ingredients. Mix by hand until fully incorporated.
- Stir in 2 eggs, one at a time. The batter will be on the thin side, but that’s the consistency you're after!
- Divide the batter evenly between the cake pans, and bake for about 24-27 minutes.
- Remove from the oven, and let the cakes sit for about 5 minutes. Gently run an offset spatula around the rim of the cake pans to loosen them.
- Place cake layers into the freezer for 30 minutes to accelerate the cooling process. Once the layers are fully cooled, carefully flip the pans and remove the layers.
- Use a serrated knife to level the tops of the layers. If you're making them in advance you can wrap and freeze them.
Purple Buttercream Frosting:
- Beat 3 cups of unsalted butter on a medium speed with a stand mixer and paddle attachment or a hand mixer until smooth (1-2 minutes).
- Mix in 1 Tbsp of vanilla extract and 1 tsp salt on a low speed.
- Slowly add in 10 cups of powdered sugar. Half way through add in 1/3 cup of heavy cream to make the frosting easier to mix.
- Continue to mix on low speed for a few minutes, until the desired consistency is reached.
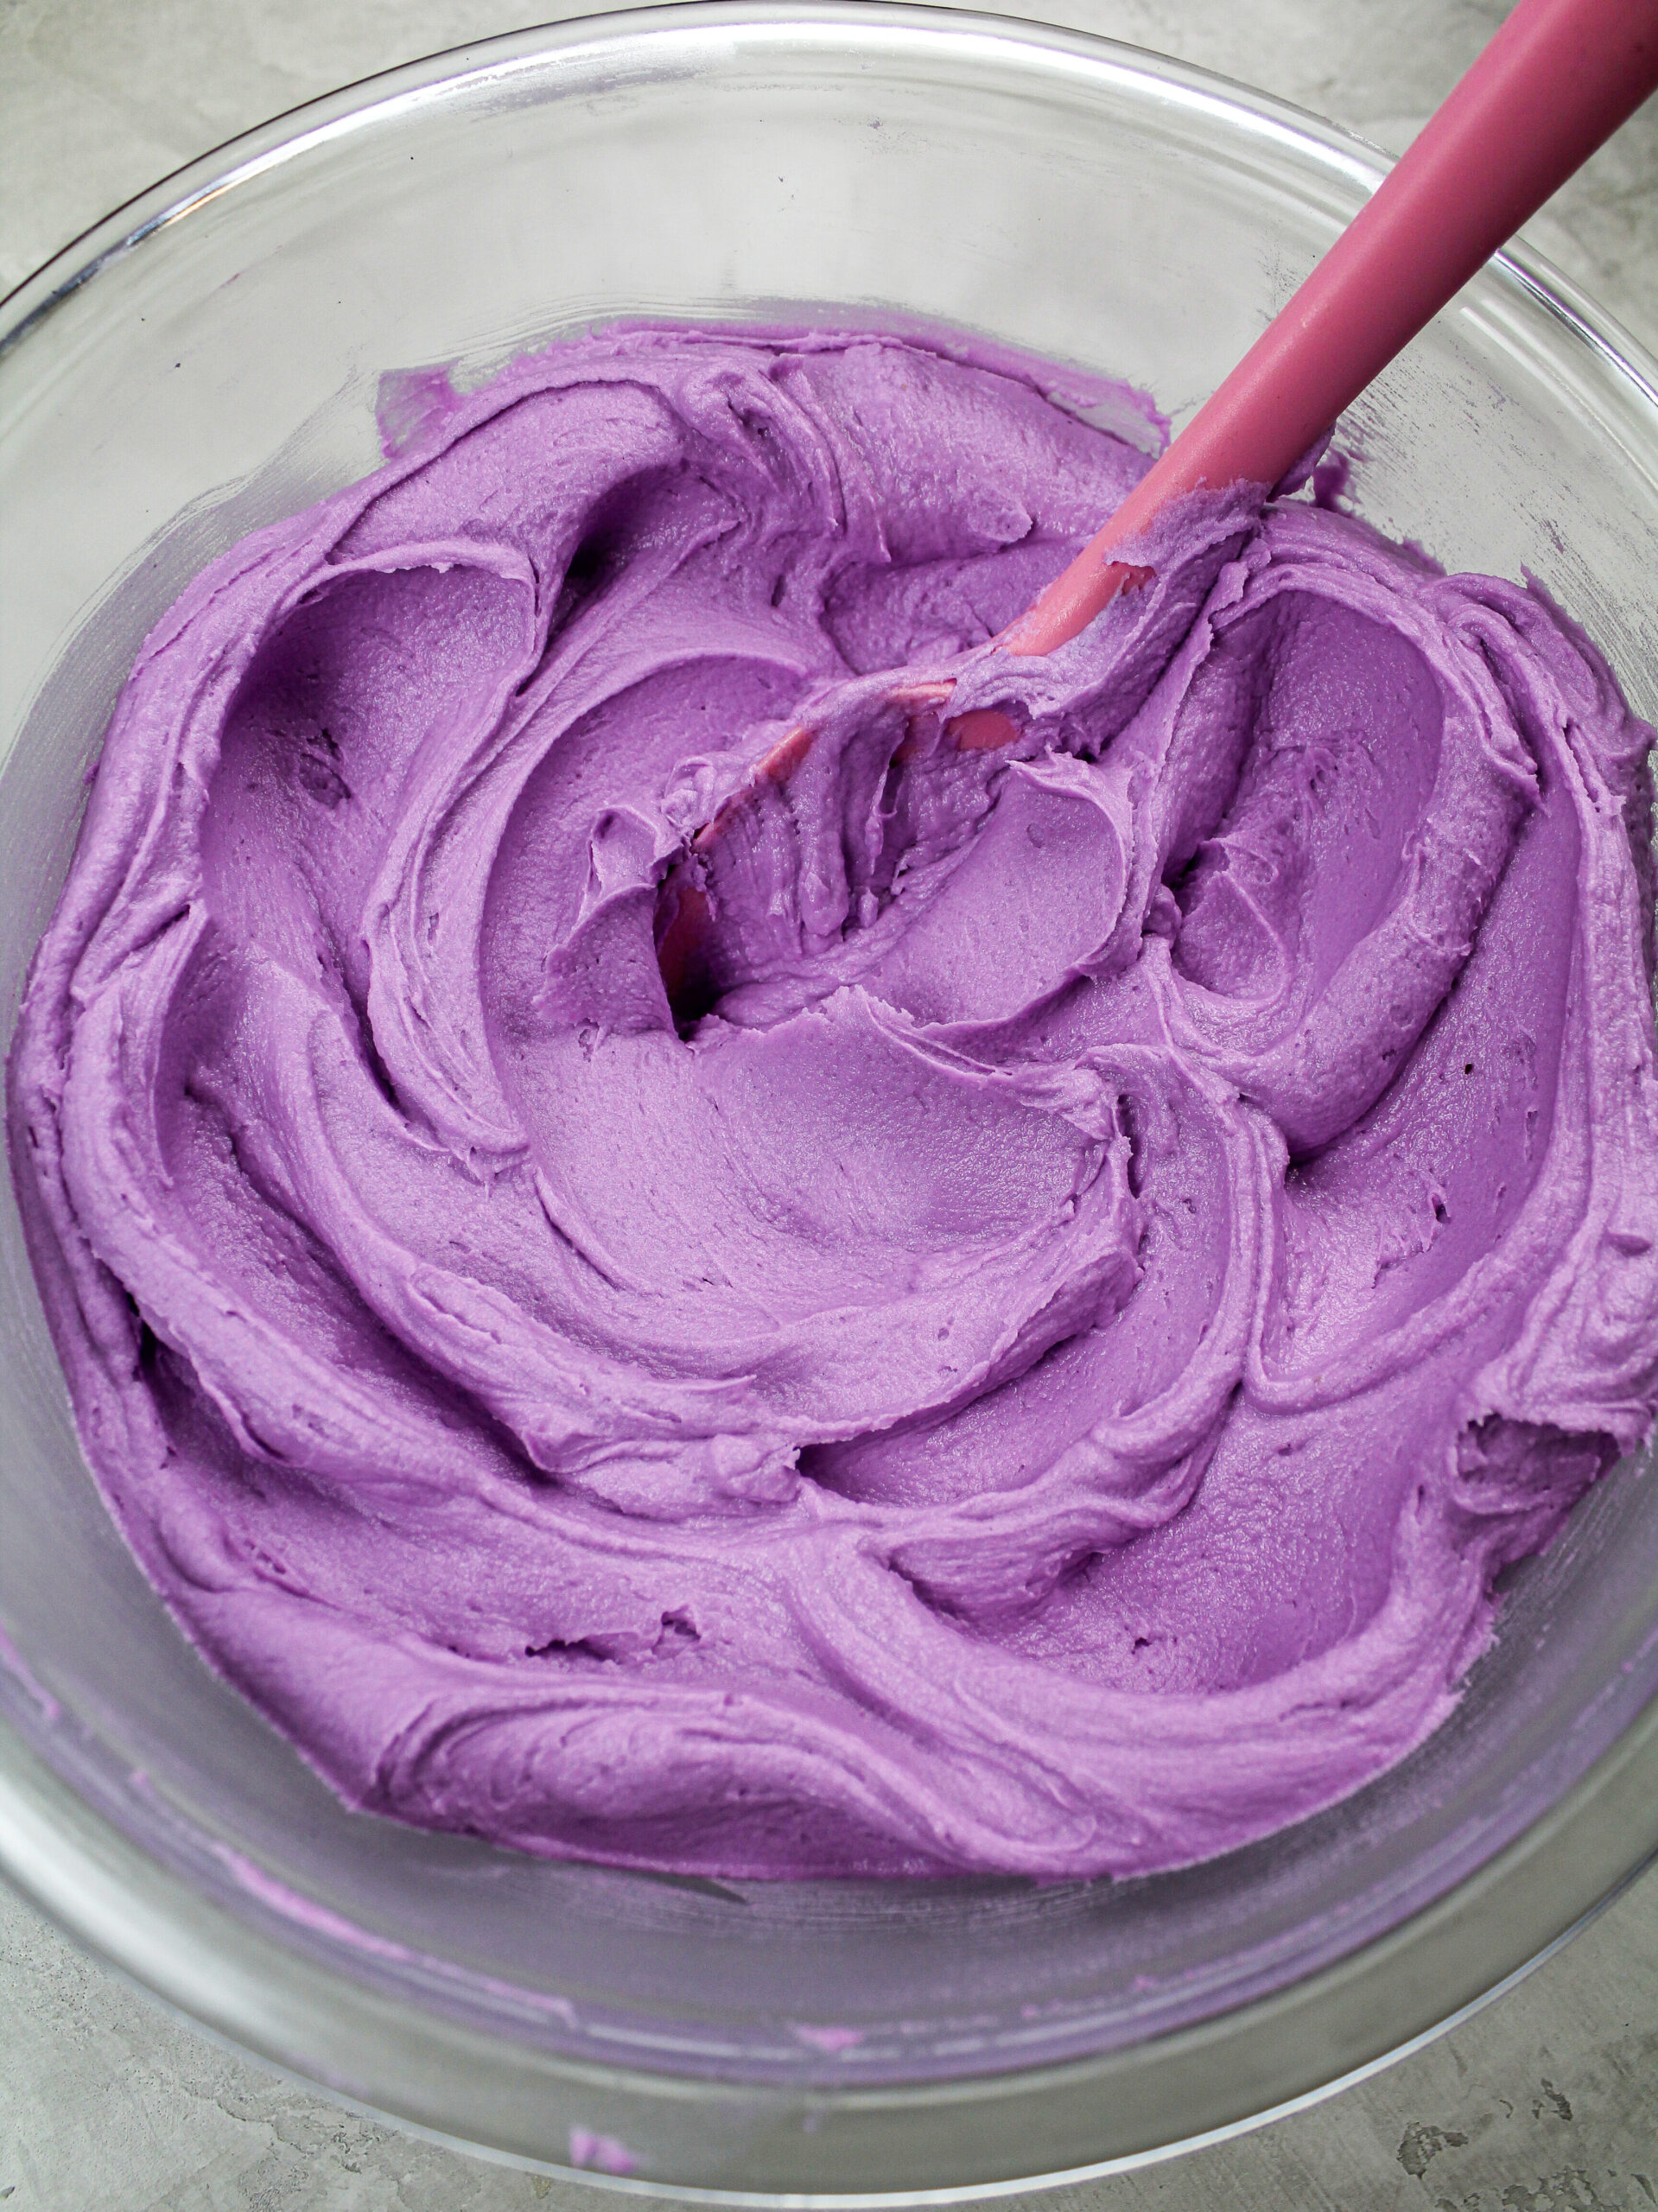
- Color the buttercream with a couple generous squirts of purple food coloring. Be sure to scrape the sides and bottom of the bowl to make sure all the frosting gets evenly colored.
- Cover the frosting with plastic wrap to prevent it from crusting and set aside.
To Assemble and Decorate This Rosette Cake:
- Stack and frost the cake layers on a greaseproof cake board or plate. Use a dab of frosting to help stick the first cake layer to the board.
- Cover each cake layer with an even layer of purple buttercream as you assemble the cake.
- Spread a thin coat of frosting around the cake using the overhanging frosting to fully cover the cake layers.
- Smooth using a bench scraper, then chill the cake in the fridge (30 minutes) or freezer (10 minutes) until the frosting is firm to the touch.
- Place the remaining frosting into a large piping bag fit with a star piping tip. Seal the top of the bag with a rubber band.
- Make two, evenly spaced horizontal lines around the cake with an offset spatula or butter knife. This will allow you to pipe three even rows of rosettes that are all the same size and properly spaced out.
- Then use the bottom line as a guide for the top of each rosette and pipe a row of rosettes around the base of the cake. Make sure you pipe your rosettes in the same direction as you go, and feel free to take breaks if your hand gets tired.
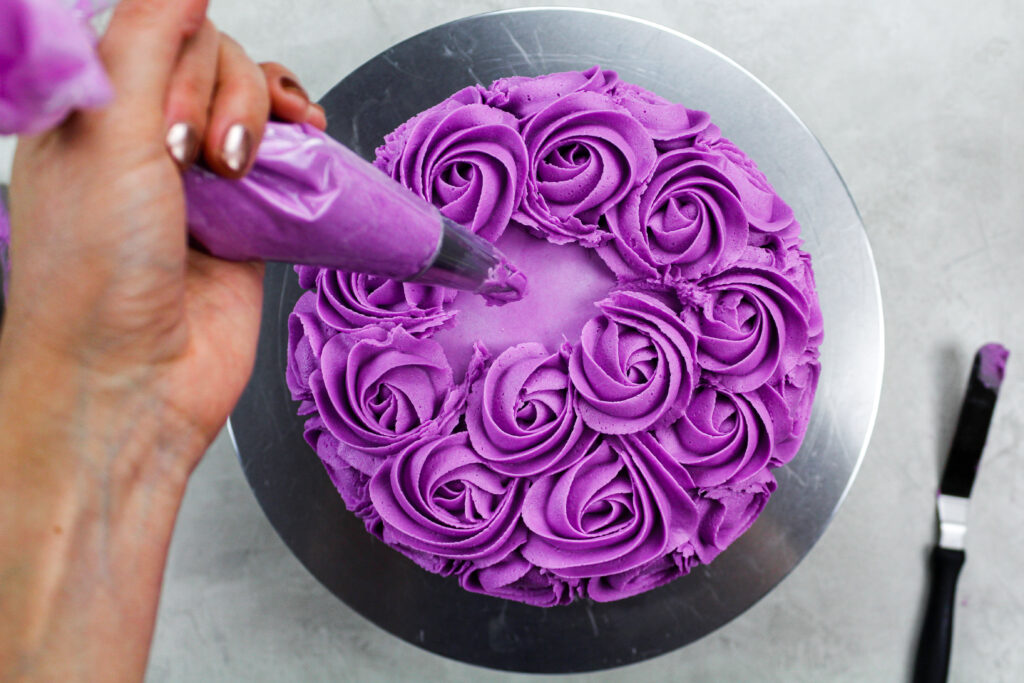
- Repeat this piping process and add two more rows of rosettes around the cake. Cover the top of the cake in rosettes, working from the edge of the cake into the center.
- To give your rosettes a super clean, cohesive look I recommend ending each rosette where you plan to pipe the center of the next rosette. This will allow you to hide the tail of each rosette under the rosette next to it.
- Chill the cake in the fridge for at least 30 minutes once it's decorated to help the rosettes set into place before you cut in.
Notes
Tips for Making the Best Rosette Cake
- Chill your cake layers in the freezer for about 20 minutes before assembling the cake, to make it easier to stack and frost.
- Level your room temperature or thawed cake layers with a serrated knife to make them easier to stack.
- Make sure your buttercream is the right consistency so that you can easily pipe your rosettes and have them keep their shape.
- Crumb coat your cake in the same color you plan to pipe your rosettes! This will help camouflage and gaps between your rosettes.
- Chill your crumb-coated cake to help the rosettes stay in place as you pipe them.
- Make two, evenly spaced lines around the cake with an offset spatula before piping the rosettes. This will allow you to pipe four even rows of rosettes that are all evenly sized and spaced.
- End each rosette where you plan to pipe the center of the next rosette. This will allow you to hide the tail of each rosette under the rosette next to it.
Making This Rosette Cake in Advance and Storage Tips
- Make your cake layers in advance and freeze them. It breaks the process up and make it more approachable.
- Make your frosting ahead of time or save any leftover frosting! It can be stored in an airtight container in the fridge for up to a month.
- This frosting can also be stored in the freezer for up to 3 months! Just be sure to give it a good stir once it thaws to make it nice and smooth again.
- A frosted cake can last in the fridge for a week, or in the freezer for a month. The buttercream locks in the moisture and keeps the cake fresh and delicious!
Nutrition Information
Yield
24Serving Size
1Amount Per Serving Calories 559Total Fat 30gSaturated Fat 16gTrans Fat 0gUnsaturated Fat 12gCholesterol 81mgSodium 344mgCarbohydrates 73gFiber 1gSugar 62gProtein 3g
Jackie
Wednesday 28th of September 2022
When you say the frosted cake can be stored in the fridge for a week and in the freezer for a month, how are you storing it? Uncovered? Any plastic over will stick to the cream will it not? Do you have to buy those fancy, airtight cake holders?
Chelsweets
Thursday 6th of October 2022
Hi Jackie,
I usually store my cakes uncovered in my fridge / freezer, but I also don't really have much real food in my fridge (we hardly ever cook in my house). If you want to cover the cake to prevent it from absorbing other smells in your fridge/ freezer, I'd recommend chilling the cake until the frosting is firm to the touch, then covering it loosely with plastic wrap. Hope that helps, happy baking! Then when you want to thaw it, unwrap it while it's still chilled so that you don't damage the frosting and you should be good to go :)
What Equipment Do You Need to Make YouTube Videos?
Monday 27th of June 2022
[…] Buttercream Rosette Cake Tutorial Chocolate Drip Cake DIY Wedding Cake How to Frost a Cake Smoothly […]
Trans Flag Cake - Delicious Recipe & Step-By-Step Tutorial
Thursday 23rd of June 2022
[…] Pride Cake Lunch Box Cake Sunflower Cupcakes Buttercream Rosette Tutorial {"@context":"http://schema.org","@type":"Recipe","name":"Trans Flag […]
Carmen
Thursday 9th of June 2022
I am going to make my rosette cake soon. I love the way you explain everything in detail, easy to follow, that videos and pictures are perfectly Don. I can’t thank you enough for sharing everything ?
Chelsweets
Monday 13th of June 2022
Hi Carmen! You're too sweet :) Thank you! I hope your cake turns out amazing!
Connie
Saturday 14th of May 2022
Your piping tips were very helpful!