
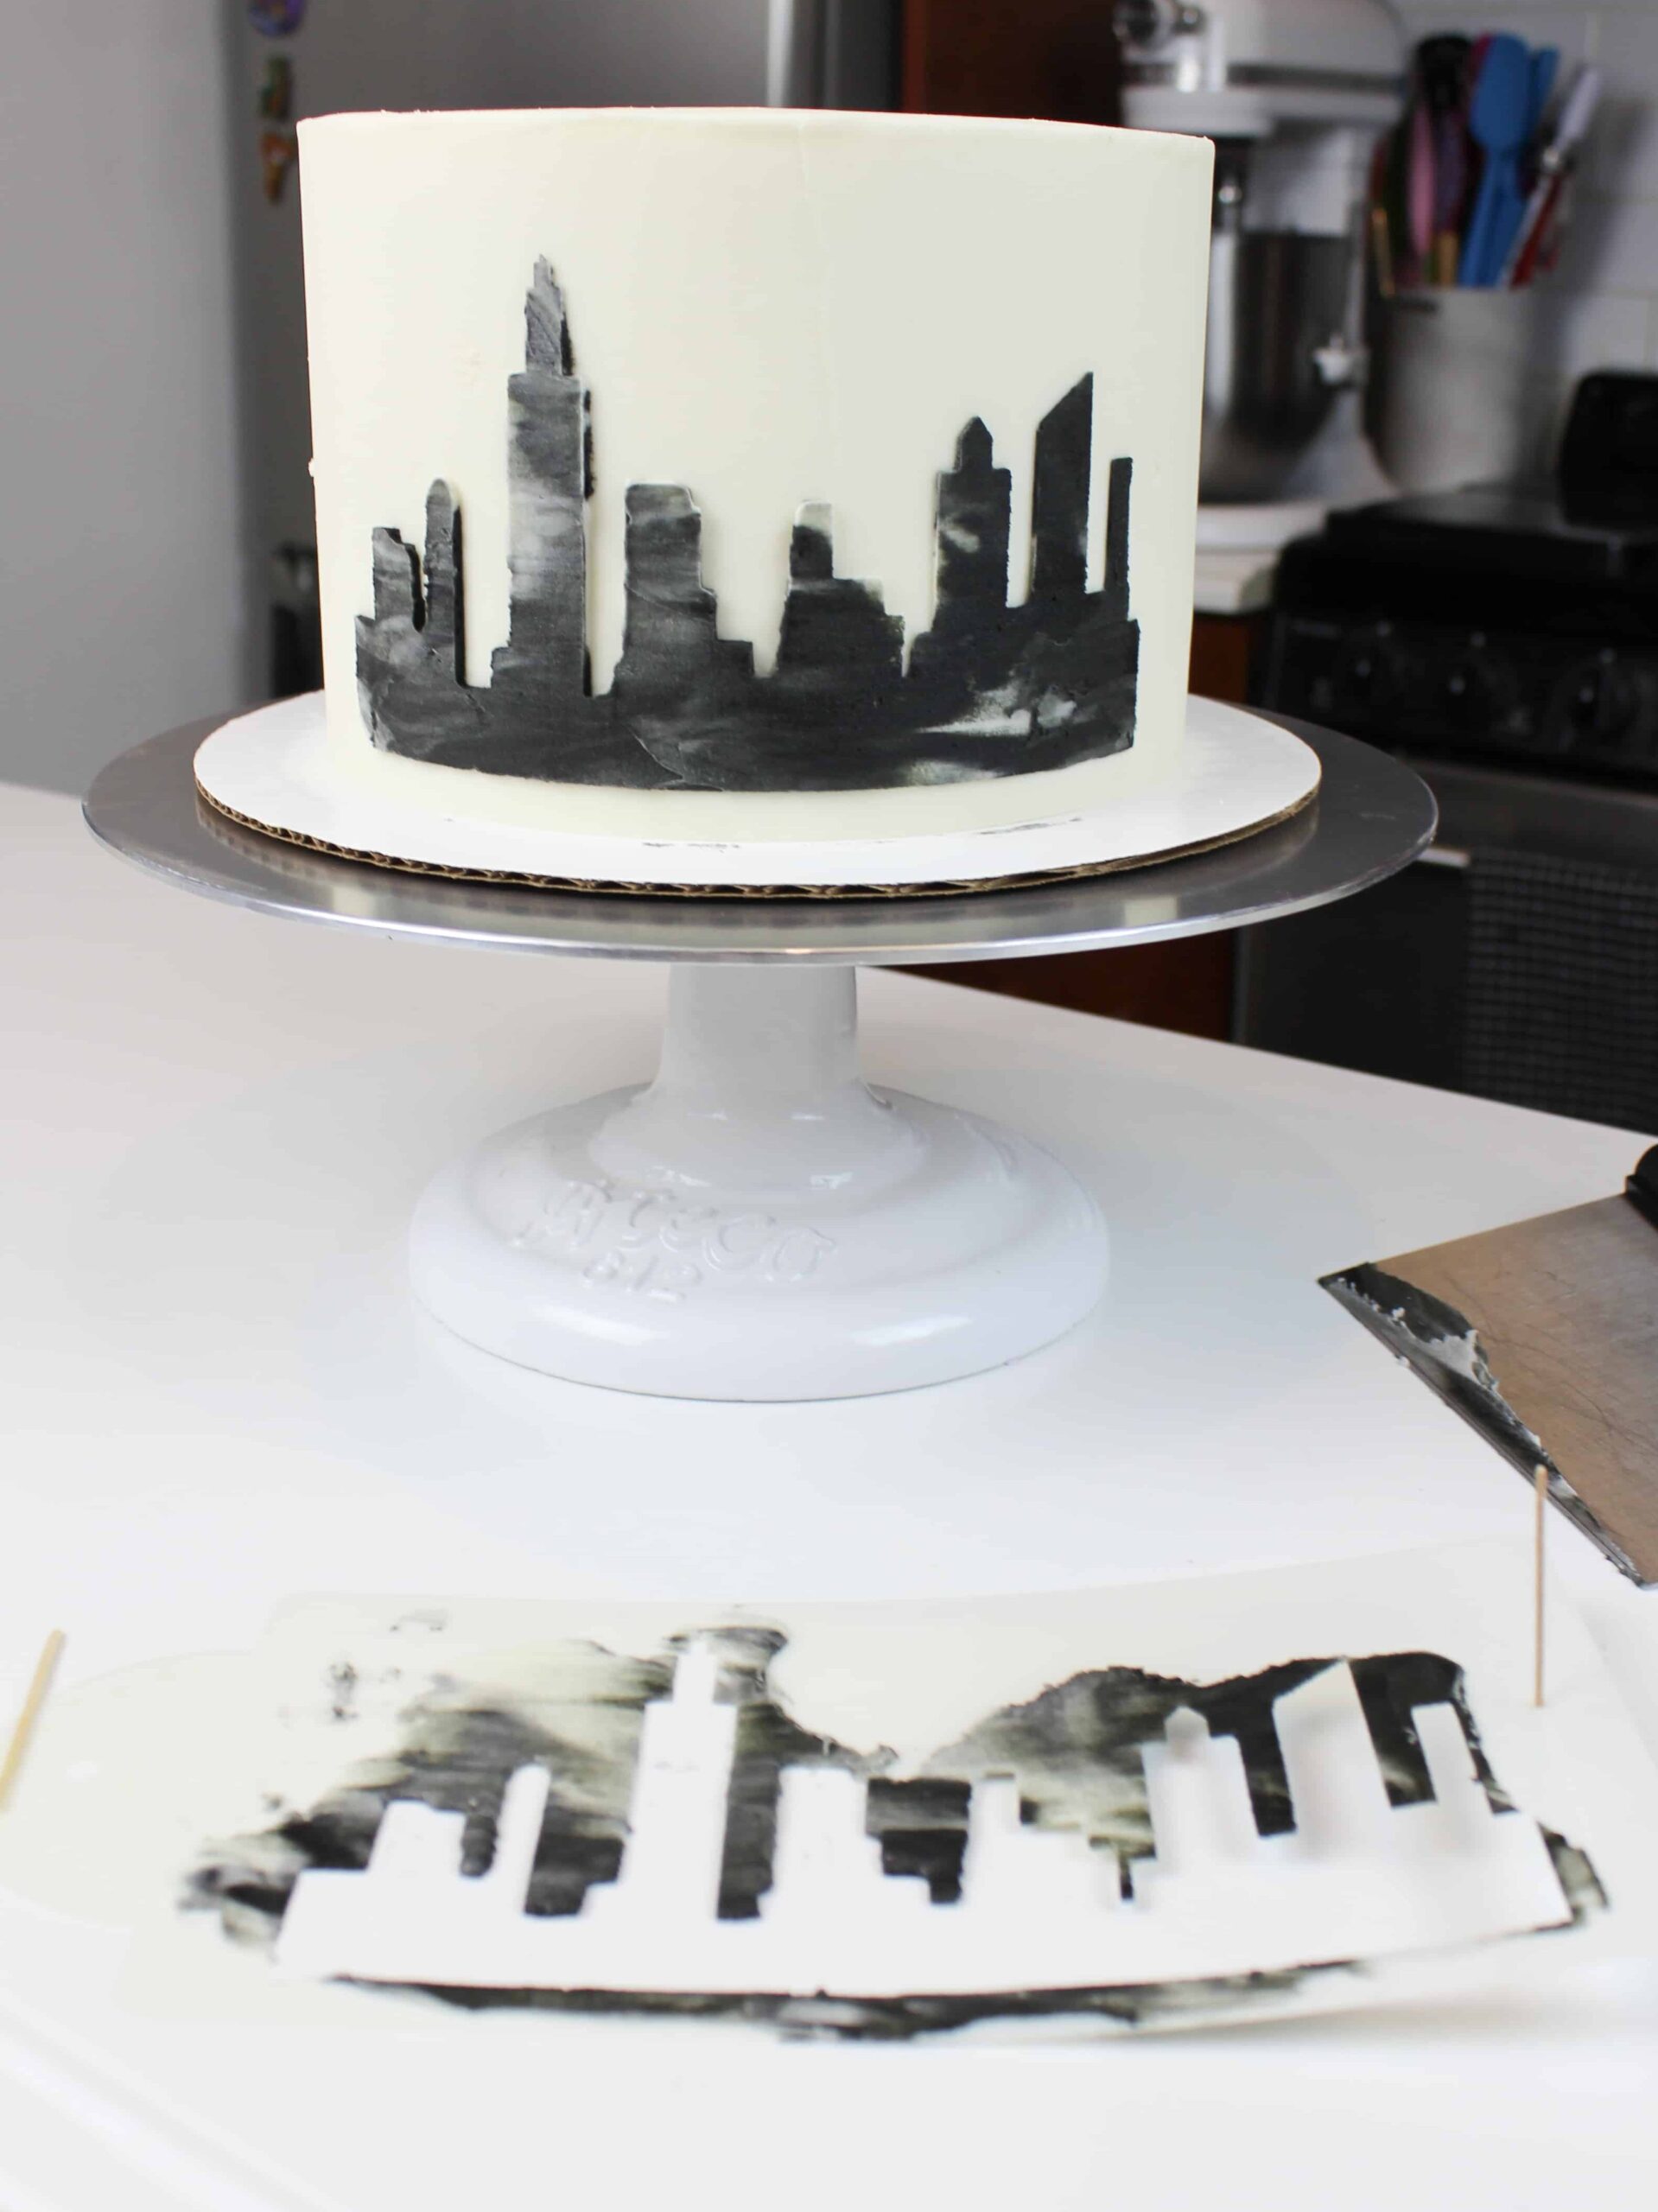
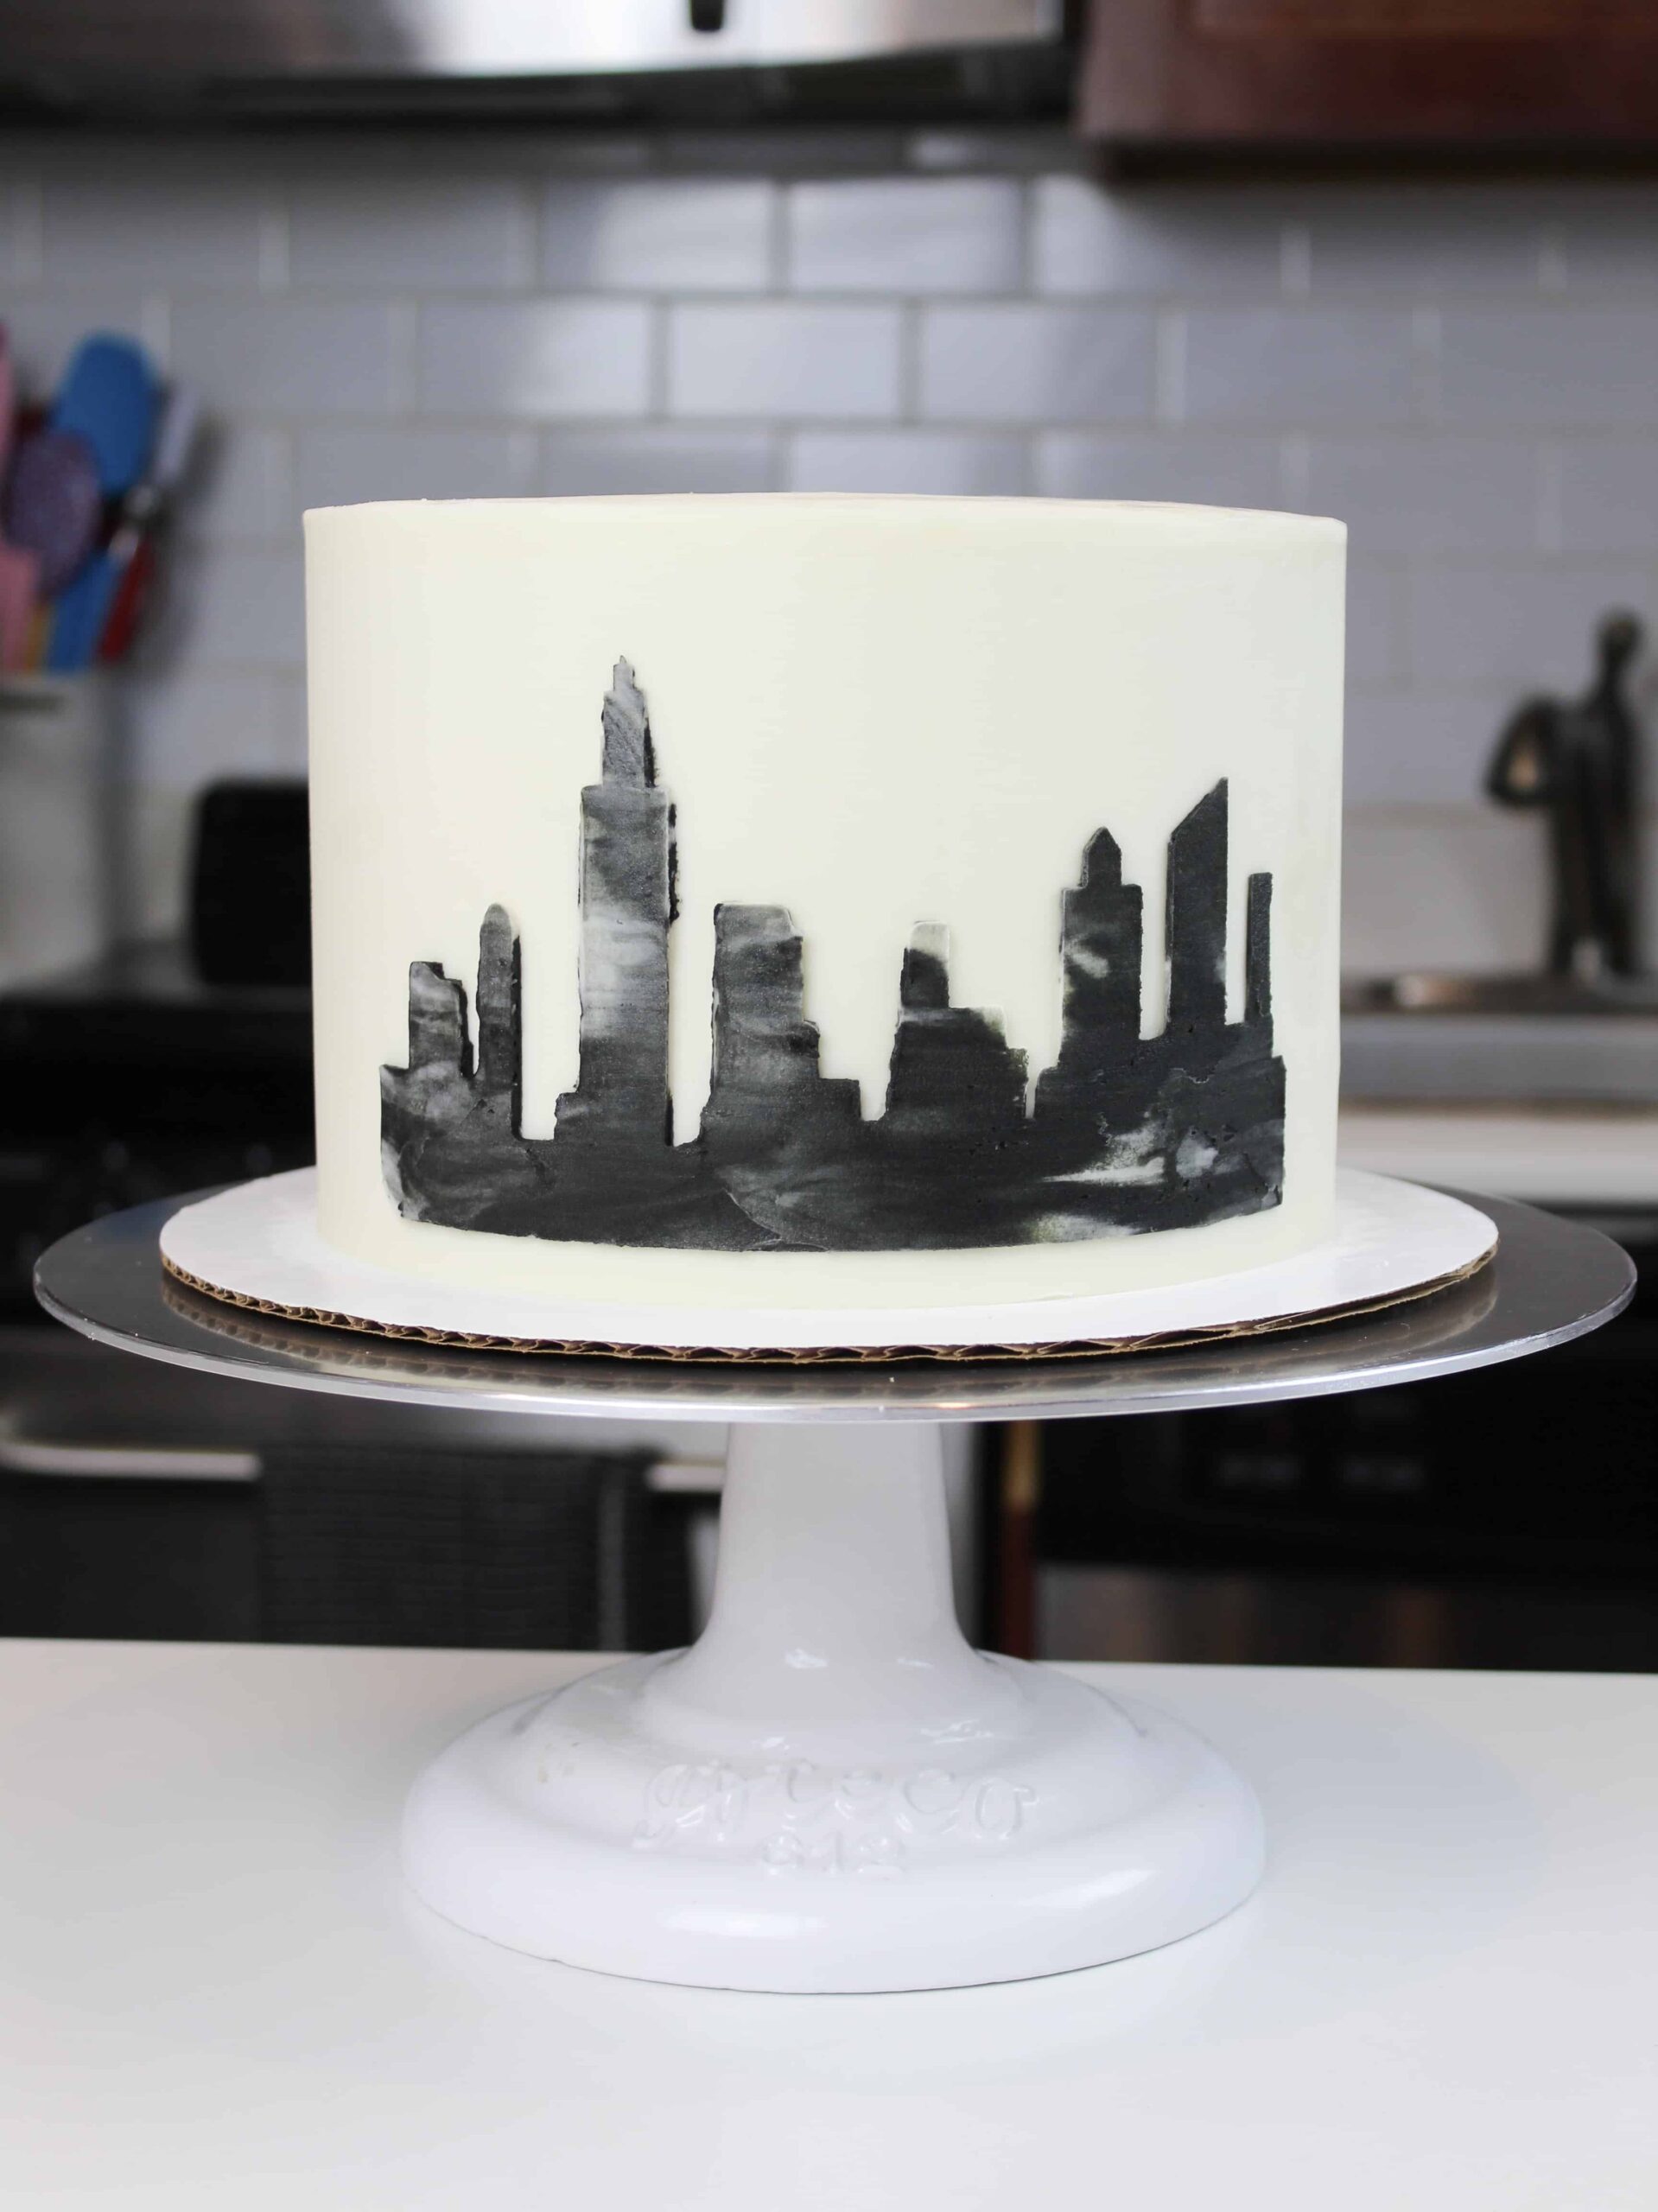
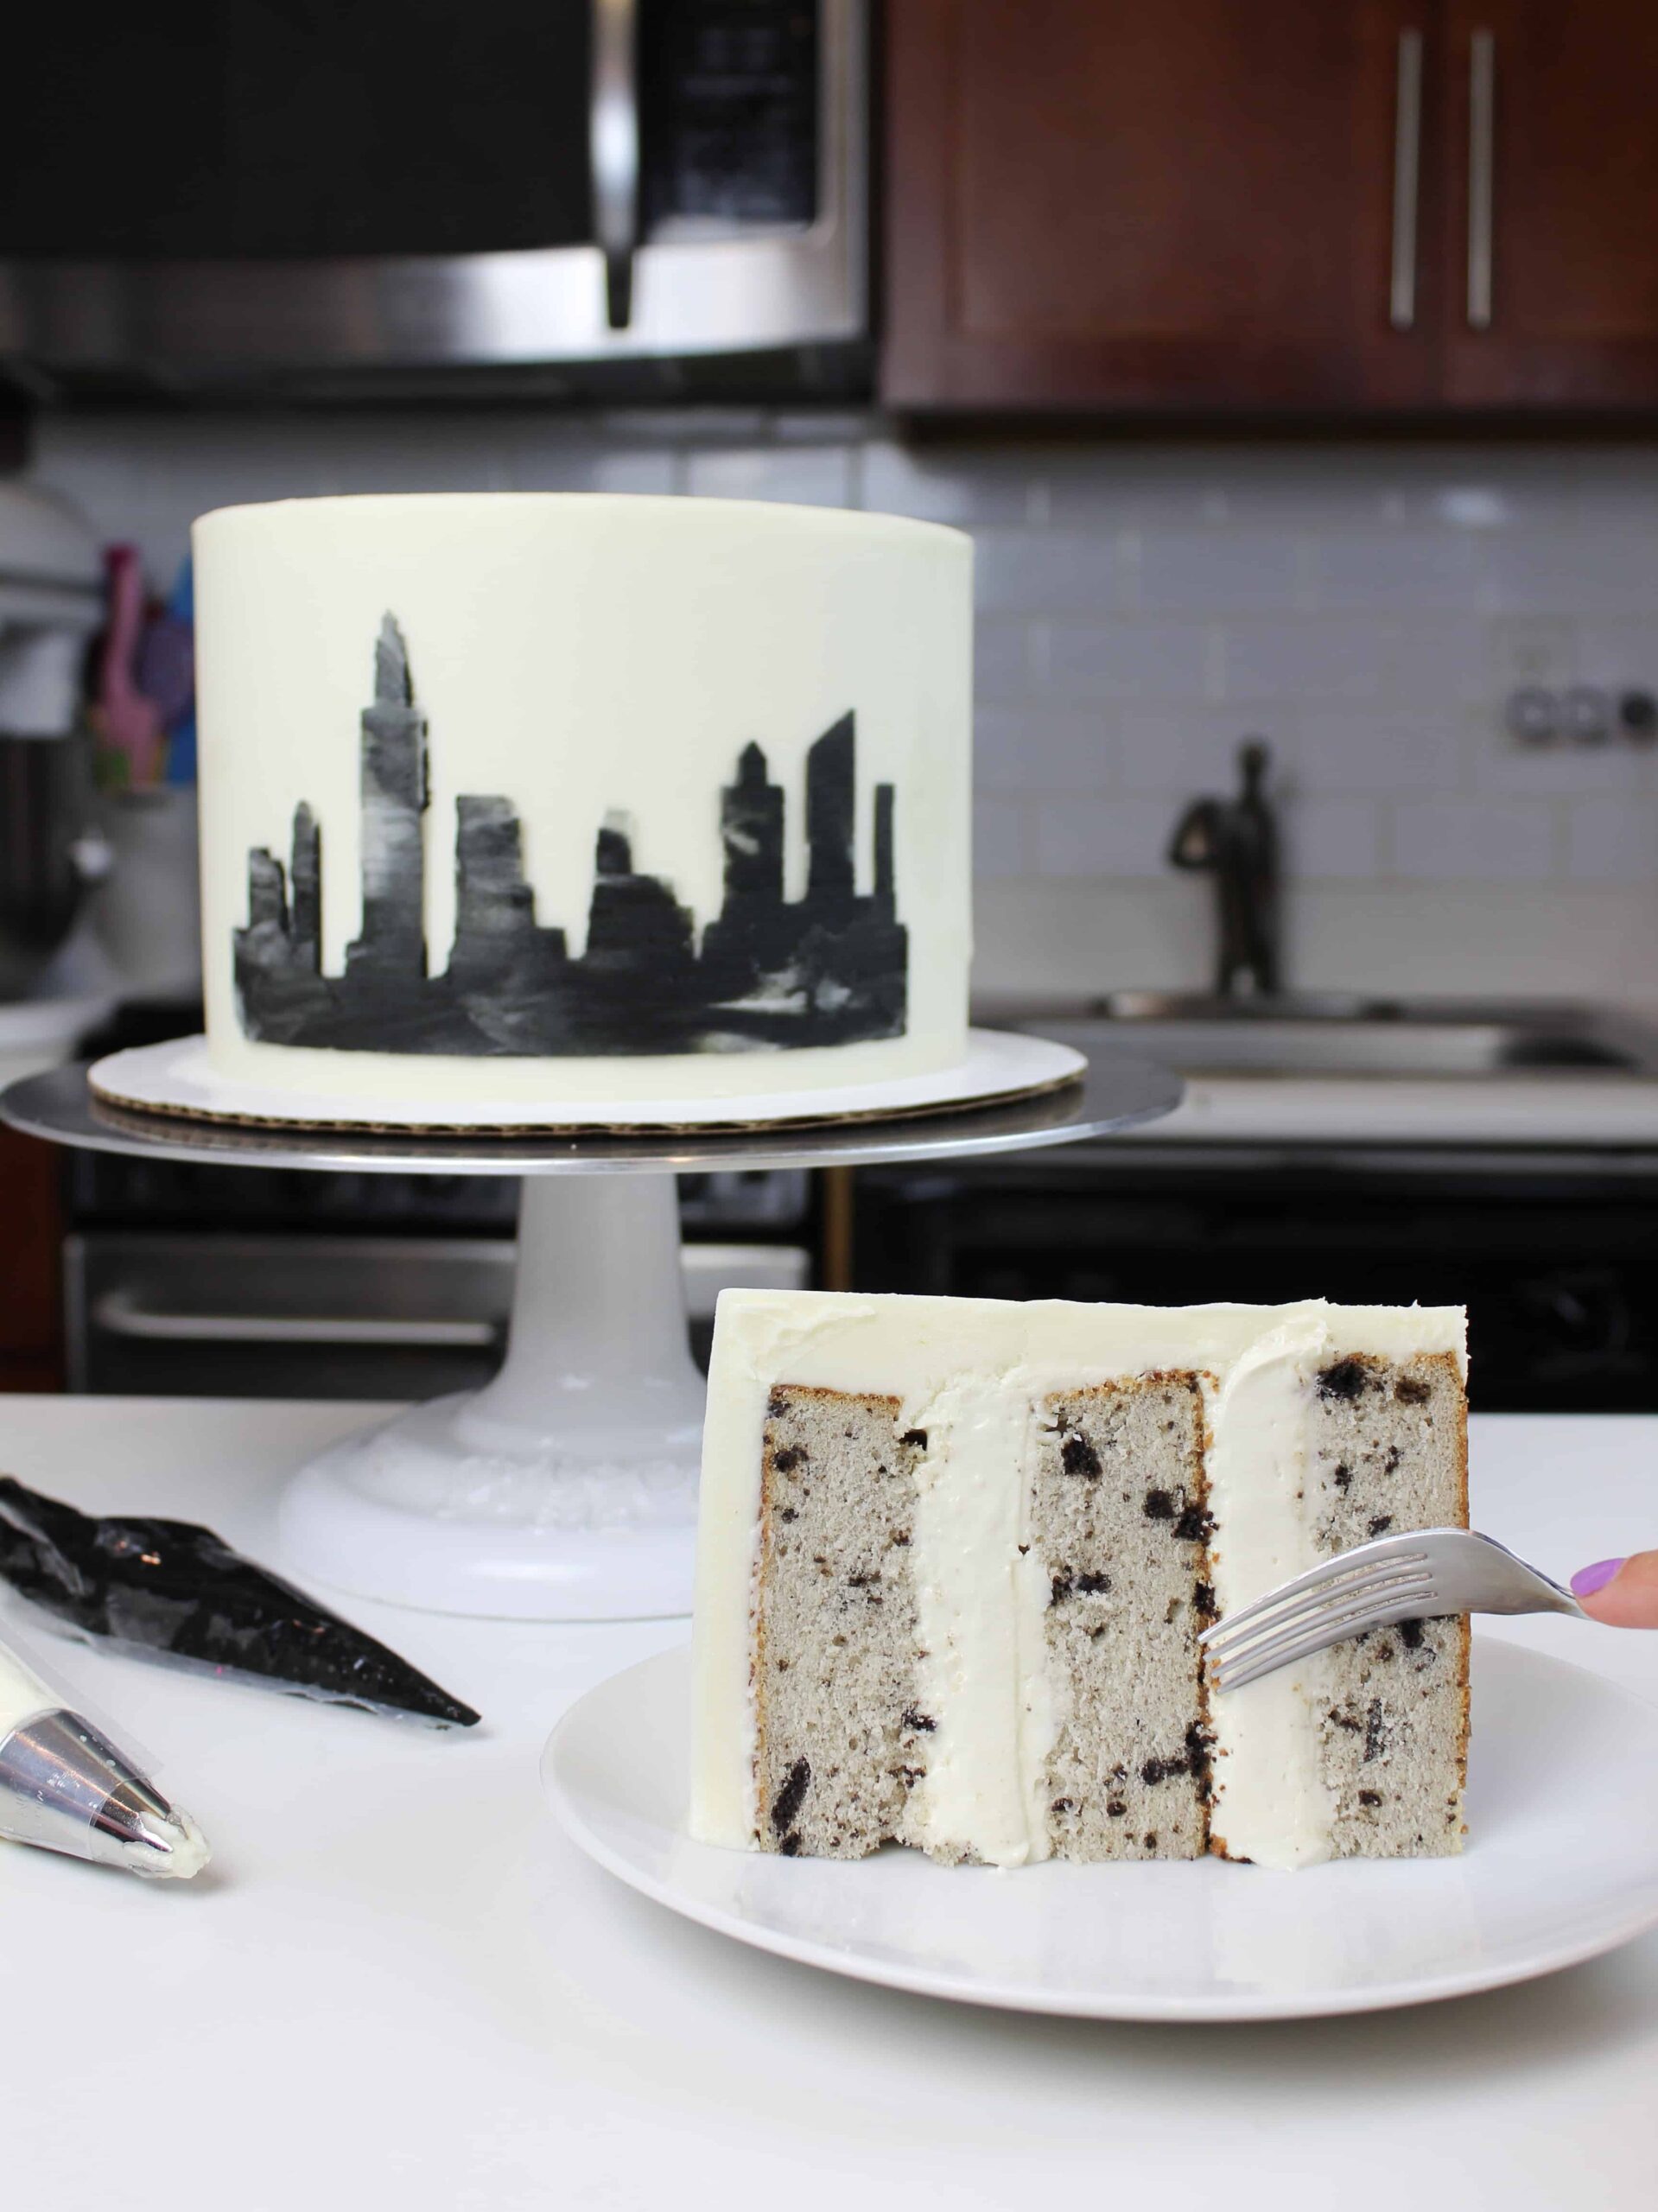
I was brainstorming ideas for a NYC-themed cake (I used this amazing stencil to create this look) and was struggling to pick a flavor.
I even took a poll on Instagram, and got suggestions for everything from black and white cookies to an apple cake!
When I sat back and thought about what flavors I associated with NYC, cheesecake seemed like a clear winner.
But rather than make a cheesecake and sandwich it between two cake layers, I wanted to make a cheesecake filling for a cake!
While this might seem like a small difference, it makes a huge difference in the process of making and assembling this cake. Sometimes it’s nice to keep things simple.
Cheesecake Cake Filling vs. Making an Entire Cheesecake
If you’ve ever made (or attempted to make) a cheesecake before, you know it’s no easy feat.
There are all kinds of tricks out there to prevent cracking and different people swear by different methods.
Recipes will say things like, “turn off the oven and leave the cheesecake inside to cool.” The recipes will recommend turning the temperature down part way through, or even cooling the cheesecake on the counter with a bowl over it.
It’s a lot to process and always seems like a hassle to me.
Maybe I’m just lazy, but if I’m already baking cake layers and making frosting from scratch, I just don’t want to bake a cheesecake too.
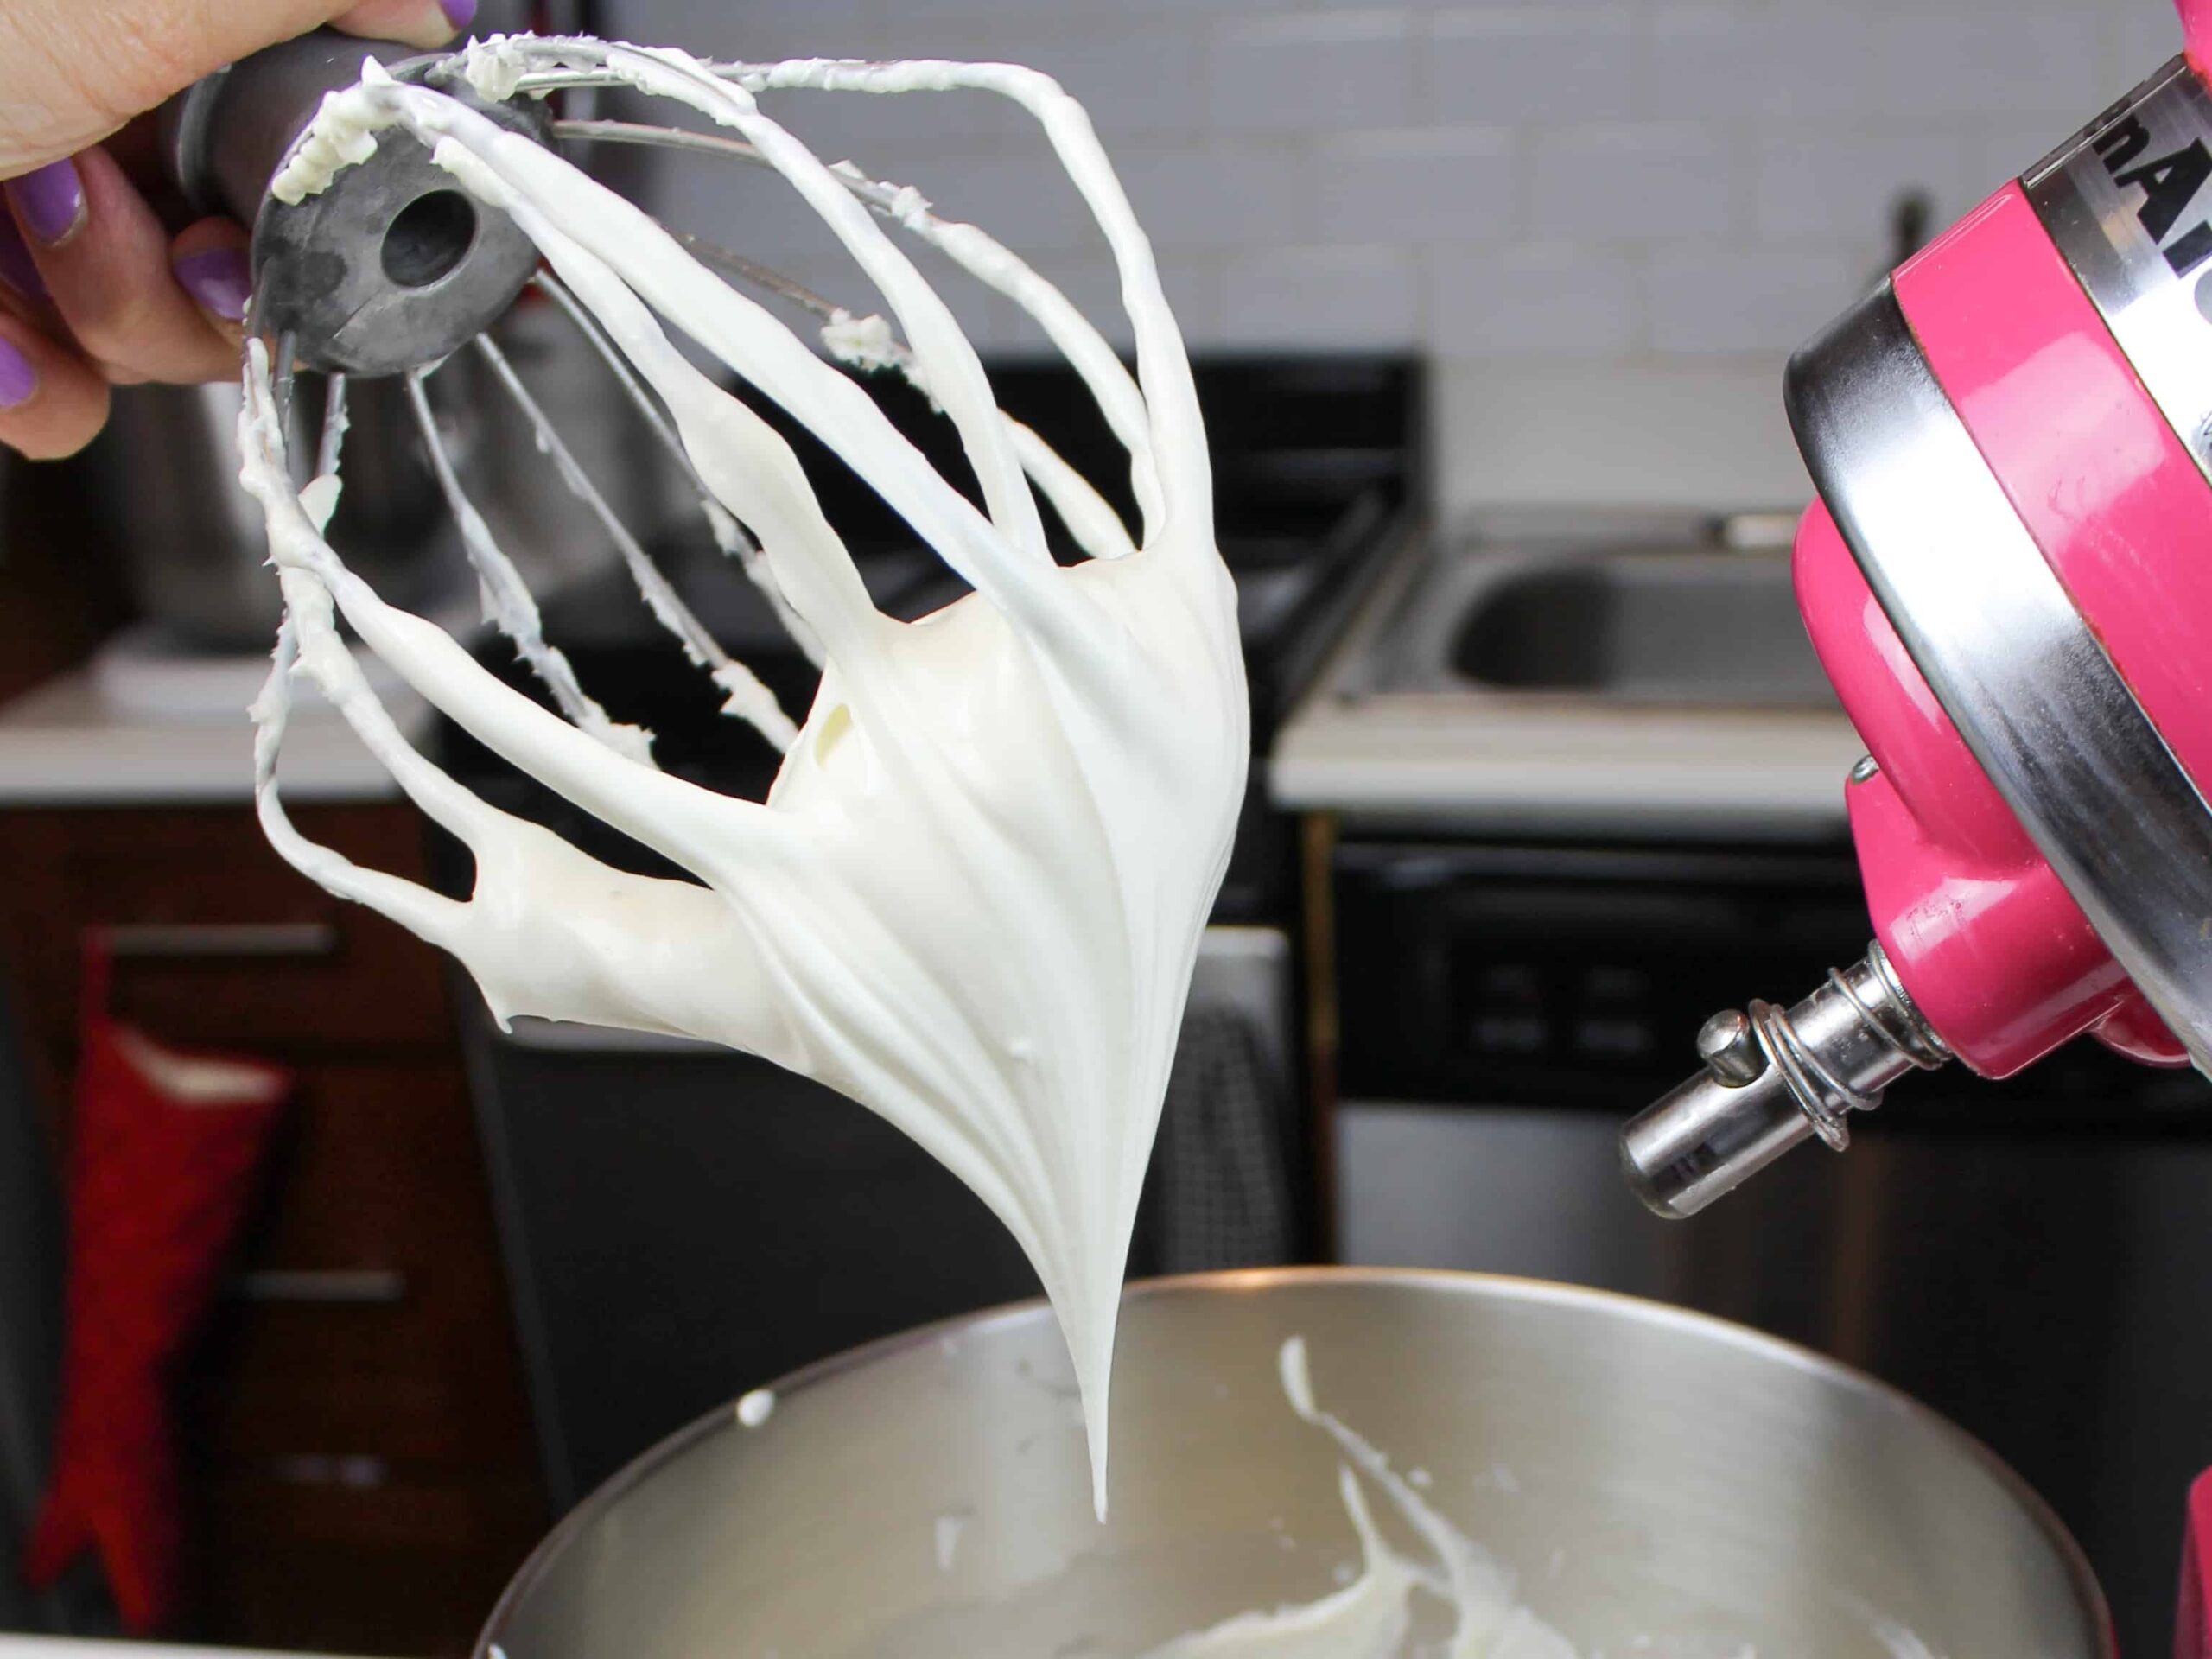
By using a simple, no-bake cheesecake filling for a cake, you get that delicious cheesecake flavor without a ton of additional effort or worry.
For me, not having to worry about this part of the cake process failing gives me so much peace of mind.
How This Cheesecake Cake Filling Differs from No-Bake Cheesecake
This cheesecake filling is similar to most no-bake cheesecake recipes, with one exception.
My recipe uses a lot less sweetened condensed milk. This does two things- it makes the filling a bit less sweet and gives the filling a thicker consistency.

Normally I use American buttercream to fill my cakes, which is rather sweet.
It’s a nice change of pace to have a filling that’s less sweet. This recipe allows the delicious tang of the cream cheese to really shine, which I love.
Using less sweetened condensed milk is also necessary for the consistency to be thick enough to fill a cake.
This amount allows the mixture to stay relatively stiff, and makes it easier to use between cake layers.
How To NOT Add This Filling to a Cake
Like I mentioned above, I added this filling to a New York-Themed Cake.
On my first attempt at assembling this cake, I tried to make cheesecake disks using this recipe, and it was a total bust!
I froze them in regular cake pans. I have no clue why I thought this would work, but I learned my lesson the hard way.
Even though I lined and sprayed the pans, I couldn’t get the disks of cheesecake out. I dipped the bottom of the pans under hot water to help them release, which gave me goopy, melty cheesecake discs that were hard to handle.
Long story short, don’t make disks with this recipe (unless you have springform pans…but even though, I’m not 100% sure it would work).
How to Properly Add This Filling to a Cake
I recommend piping a frosting ring or frosting dam when using this cheesecake filling.
I use this technique whenever I want to fill a cake with something that is soft or less thick than buttercream.
Below is a picture of my raspberry coconut cake from last summer. I filled this layer cake with raspberry preserves and needed to pipe a thick ring of stiff buttercream around them to keep the filling in place.
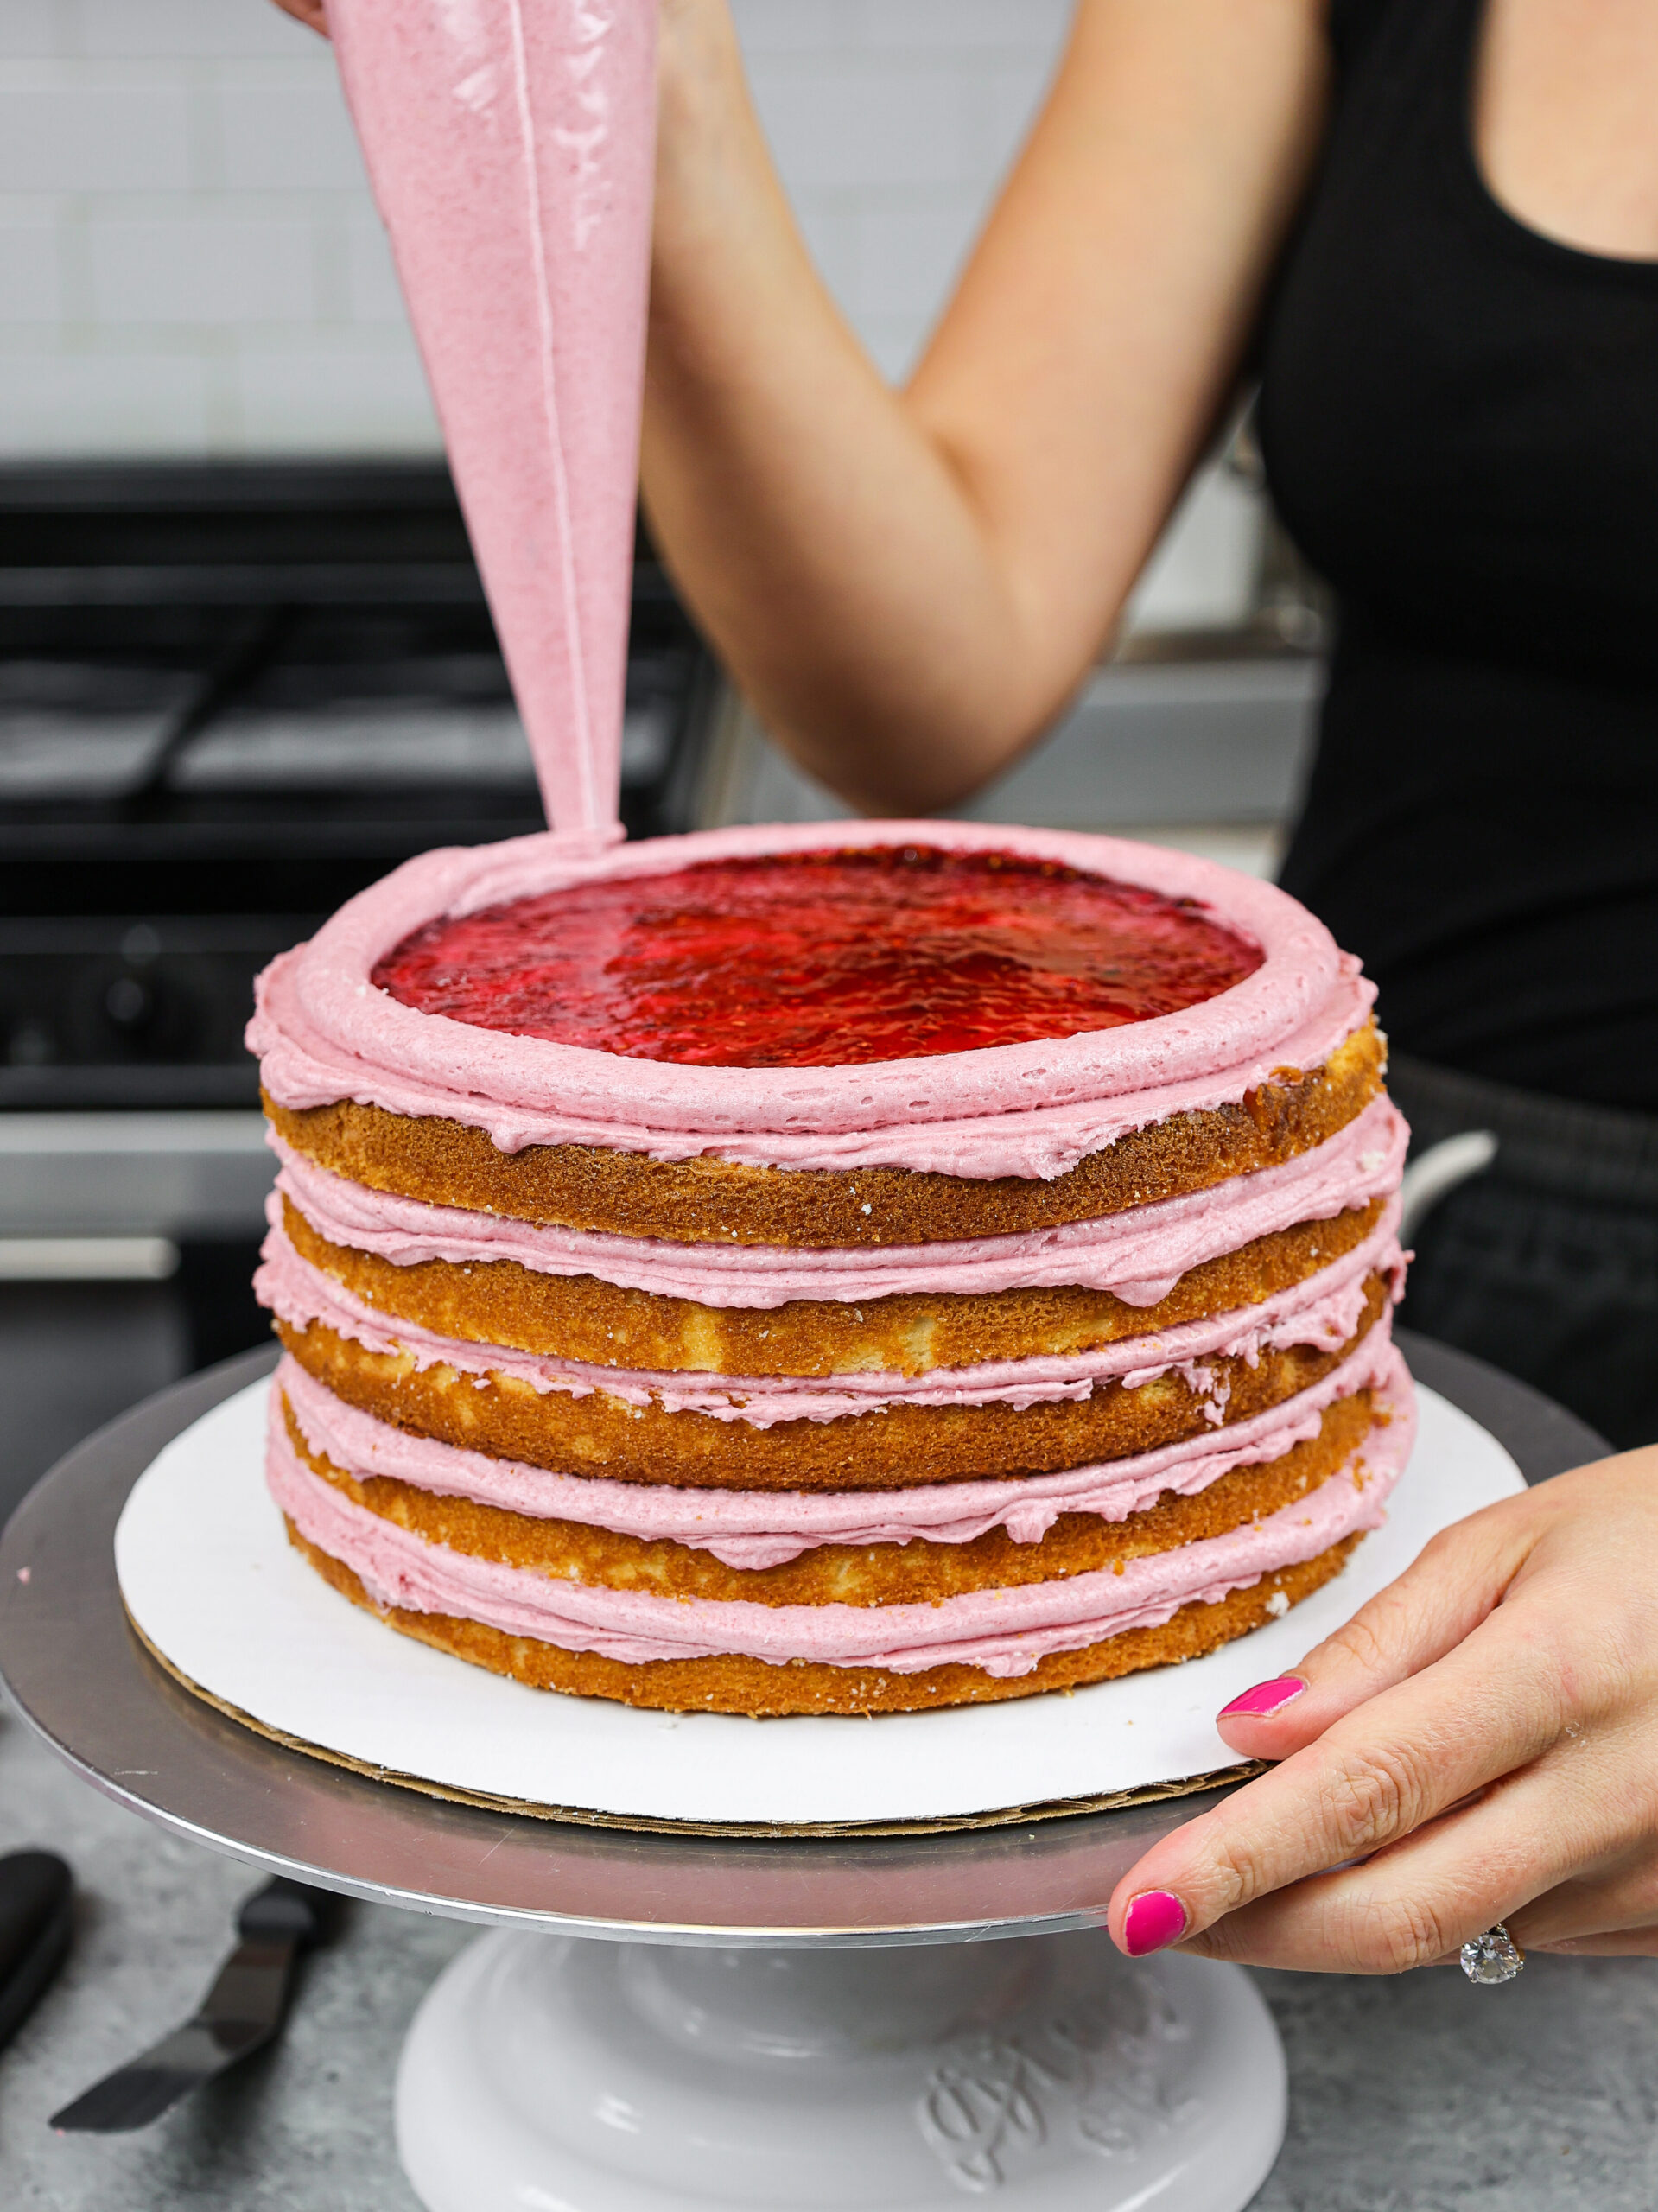
To use this technique, pipe a ring of buttercream around the edge of your cake layer, then spoon a generous amount of this cheesecake filling on the inside. Smooth with an offset spatula, then repeat.
Frost the outside of the cake with the frosting you used to pipe the frosting ring, and you’re all done!
Tips for Making This Cheesecake Cake Filling
- Make sure your cream cheese is at room temperature. It helps the filling mix together so much better.
- Use fresh lemon juice. It really helps balance the richness of the cream cheese.
- Place plastic wrap directly over the filling once it’s made to prevent a skin from forming
- When filling a cake with this cheesecake filling, pipe a ring of stiff frosting around the edge of the cake before adding it to help the filling stay in place.
- If you make this in advance, it keeps in the fridge for up to 5 days. Give it a good stir to smooth it out again before adding it to your cake.
Let Me Know What You Think!
If you try this cheesecake cake filling, I’d love to hear what you think of it! Please leave a rating and comment below.
And don’t forget to tag me @chelsweets and use #chelsweets so that I can see your delicious creations!
Other Recipes You Might Like:
Cheesecake Cake Filling
This no-bake cheesecake cake filling is the best! It comes together in minutes and is incredibly creamy and decadent!!
Ingredients
Cheesecake Cake Filling
- 2 8 oz. packages of full fat cream cheese, room temp (452g)
- 2/3 cup sweetened condensed milk (7 oz. or 210g)
- 1 Tbsp fresh lemon juice (15g)
- 1 tsp vanilla extract (4g)
Instructions
- Place room temperature cream cheese in the bowl of a stand mixer. Mix on medium-high speed with the whisk attachment or a hand mixer for a minute until creamy and smooth.
- Gradually add in the sweetened condensed milk while mixing on a medium speed. Scrape down the sides and bottom of the bowl as needed to make sure the ingredients are fully incorporated.
- Mix in the vanilla extract and lemon juice, on medium speed.
- Cover with plastic wrap and refrigerate until you are ready to fill your cake.
- Pipe a ring of stiff buttercream around the perimeter of the cake layer, then fill the center with a generous amount of this no-bake, cheesecake filling.
Notes
This recipe makes about 3 cups of cheesecake cake filling.
While this cheesecake filling is relatively thick, it's not sturdy enough to add between cake layers by itself. Be sure to pipe a ring of stiff buttercream around the perimeter of the cake layer, then fill the center with a generous amount of this no-bake, cheesecake filling. This will keep the filling in place and prevent it from oozing out once the cake is stacked.
This no-bake cheesecake filling can be made in advance! Simply cover the bowl tightly with plastic wrap, and place in the fridge. It lasts in the fridge for up to 5 days. Give it a good stir before you add it to your cake to ensure it's creamy and smooth!
Recommended Products
As an Amazon Associate and member of other affiliate programs, I earn from qualifying purchases.
Nutrition Information
Yield
6Serving Size
1Amount Per Serving Calories 377Total Fat 29gSaturated Fat 17gTrans Fat 0gUnsaturated Fat 9gCholesterol 88mgSodium 281mgCarbohydrates 23gFiber 0gSugar 22gProtein 7g
Jodi Sitkowski
Thursday 13th of October 2022
I know it's been a while sense you're posted this filling but could I add crushed Oreos to the filling as well ?? I'm making my sisters baby shower cake and she loves Oreos. Thought it would work ?????
Thanks !
Chelsweets
Friday 14th of October 2022
Hi Jodi,
You totally could, that would be delicious! Now I want to try that!!
shelley
Sunday 3rd of July 2022
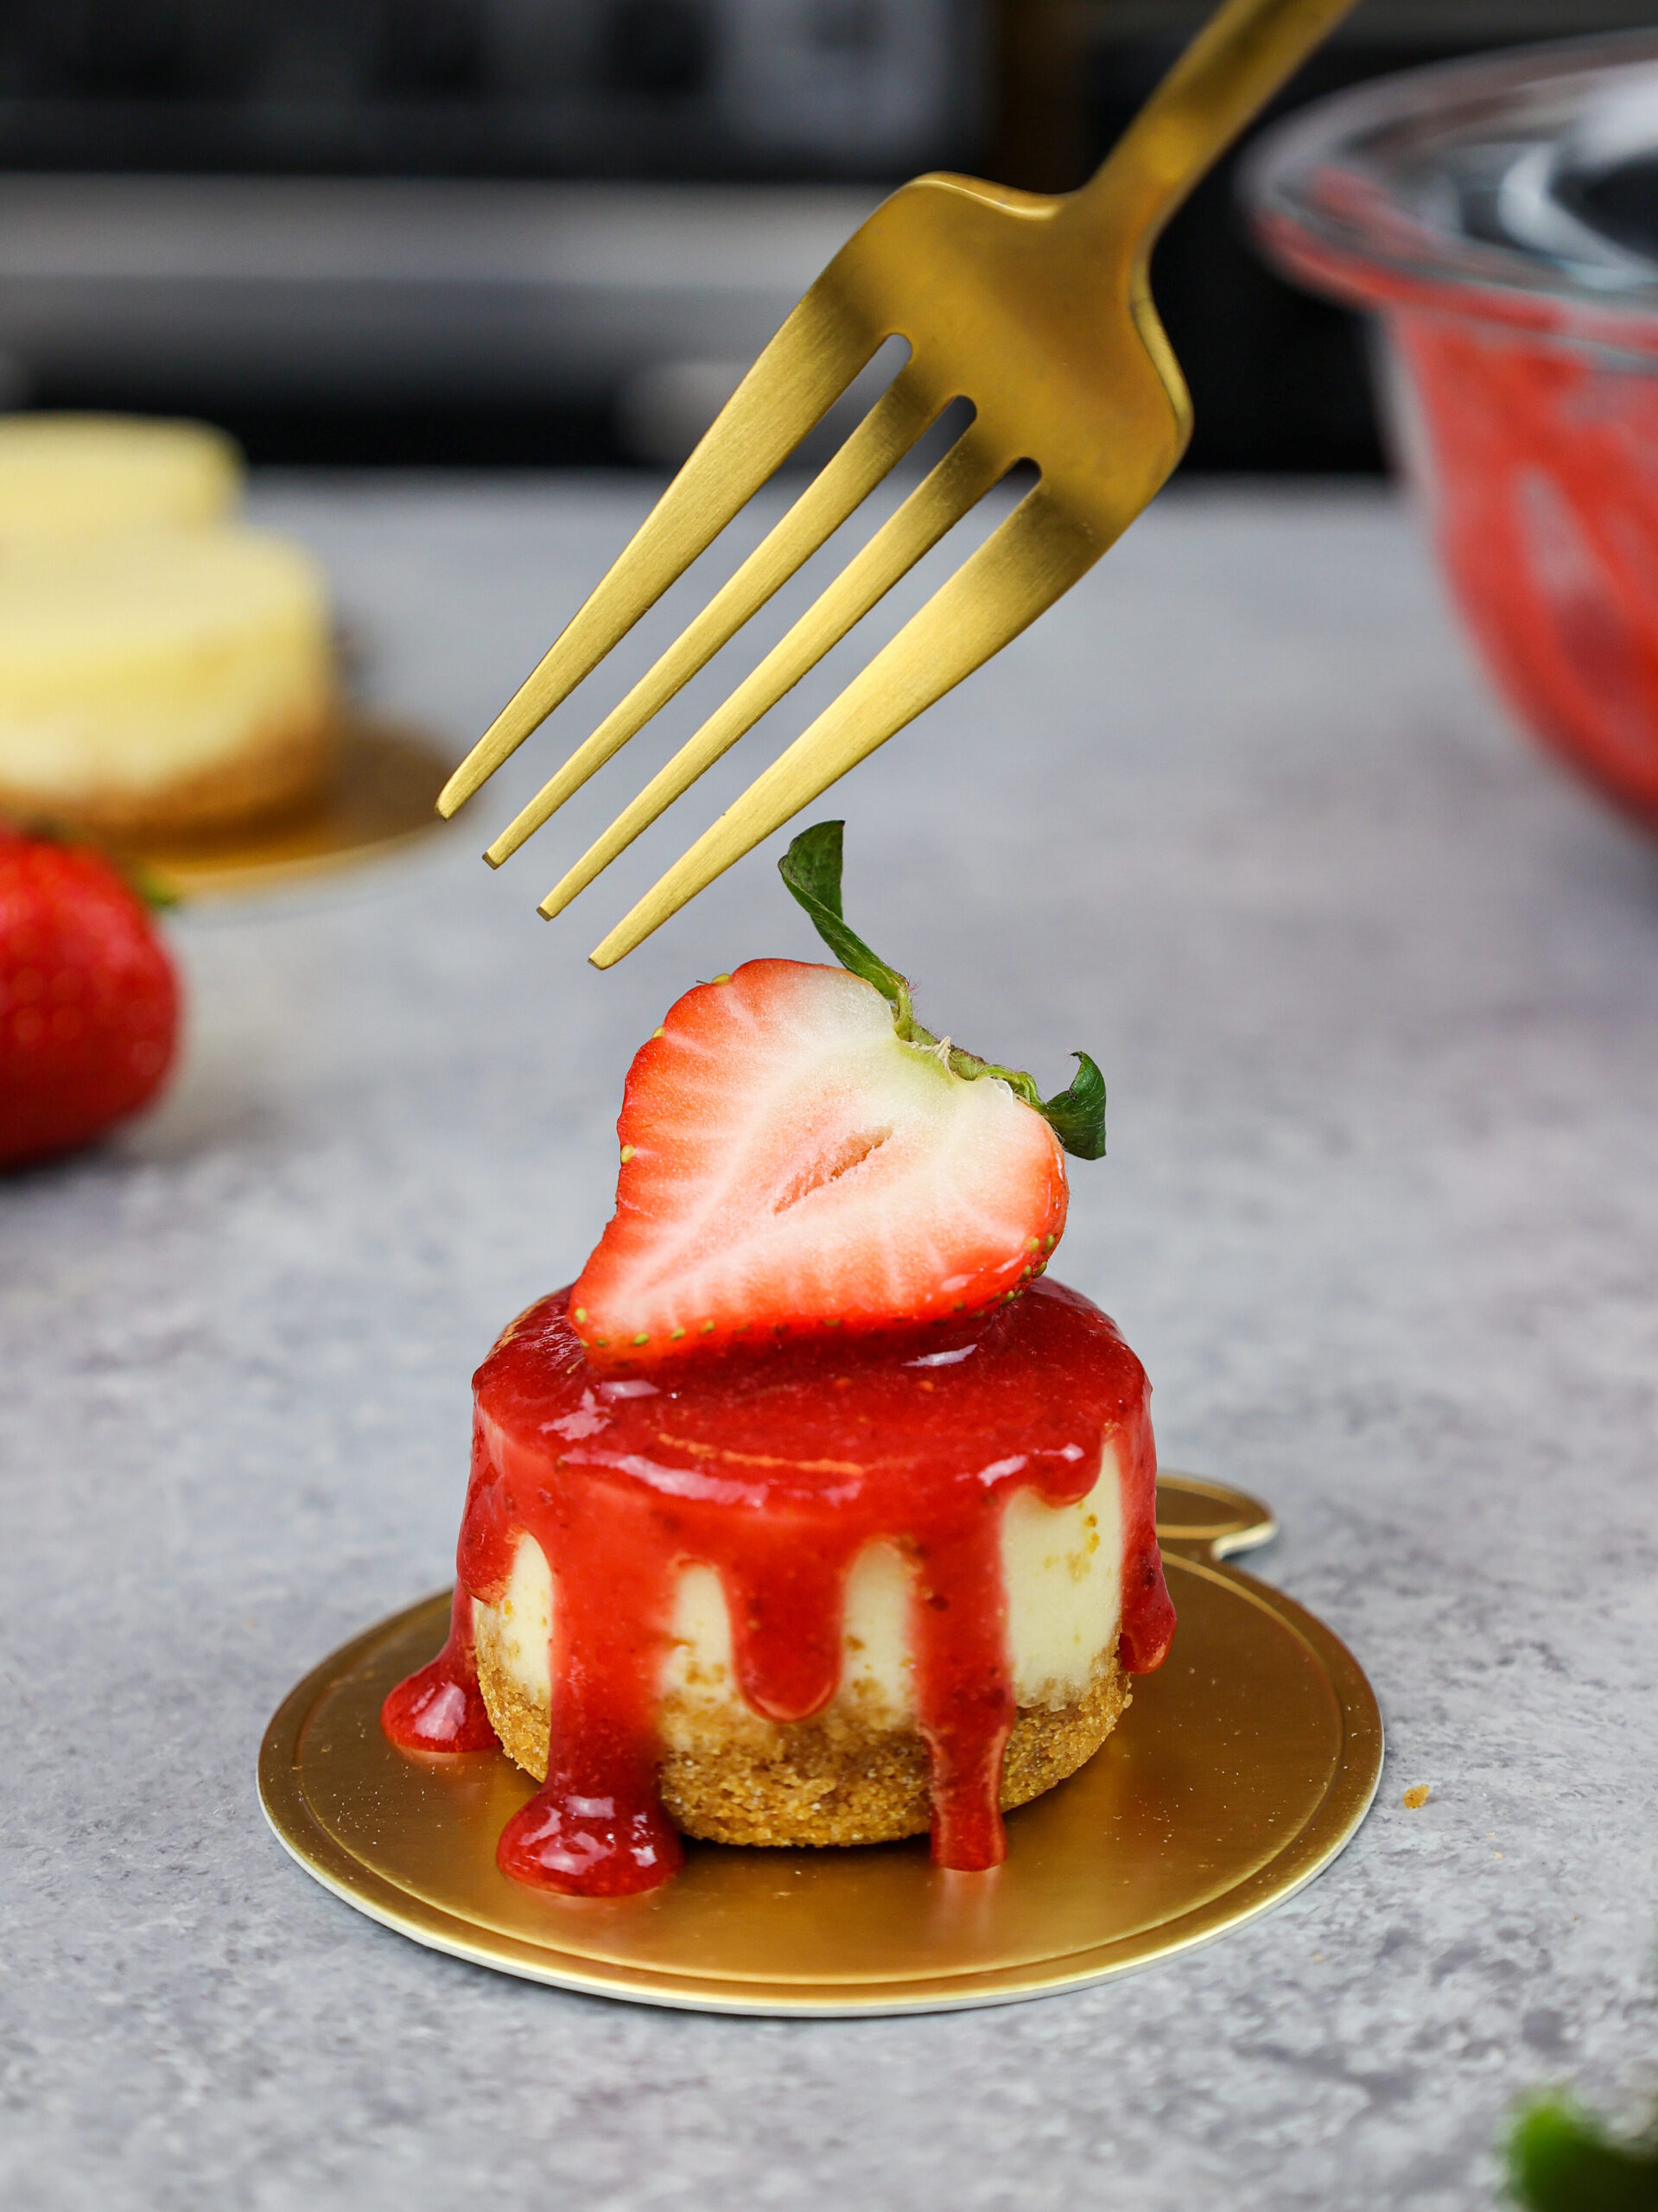
I made this filling for a 'no bake' cheesecake (rather than a sponge cake filling) and put it in a Nilla vanilla wafer crust since I didn't have graham crackers. I will top with fresh blueberries and strawberries for our 4th of July lunch. SOOO GOOD!! Thanks for this quick and delicious recipe.
shelley
Friday 8th of July 2022
@shelley, Ok! I put another twist on this filling and it is out of this world. Hubs likes strawberries with cheesecake; I like chocolate. So, I made a batch of this filling without the lemon juice and divided it in half. Half of it got the lemon juice (half the amount for the full recipe) and I folded in some fresh strawberries I had cut up in the fridge. To the other half I added about two tablespoons of cocoa powder...WOW! I had prepared 6 crystal dessert cups with Nilla wafer crust pressed into the bottom. 3 got the strawberry filling and 3 got the chocolate. I sprinkled some of the leftover crust mixture over all of them, then mini semisweet chocolate chips on the chocolate ones and white chocolate chips on the strawberry ones. Such a 'fancy' dessert from such an insanely easy and delicious recipe! THANK YOU AGAIN!!!
shelley
Tuesday 5th of July 2022
@Chelsweets, It was amazing! This is now my go-to no-bake cheesecake filling. I love that it is not too sweet and has that nice tang from the cream cheese. :)
Chelsweets
Sunday 3rd of July 2022
Absolutely love that Shelley, it sounds like the perfect combination :) Thank you for sharing!!
Walnut Brittle Topping - Crunchy, Nutty & Perfectly Sweet
Thursday 5th of May 2022
[…] Cheesecake Cake Filling Salted Caramel Drip Cake Caramel Chocolate Poke Cake Caramel Cupcakes Yield: 1/2 cup […]
Biscoff Cheesecake with Cookie Crust and Cookie Butter Drizzle
Wednesday 20th of April 2022
[…] Cheesecake Cake Filling Raspberry Cheesecake Bars Biscoff Brownies Biscoff Cinnamon Rolls Yield: 12 […]
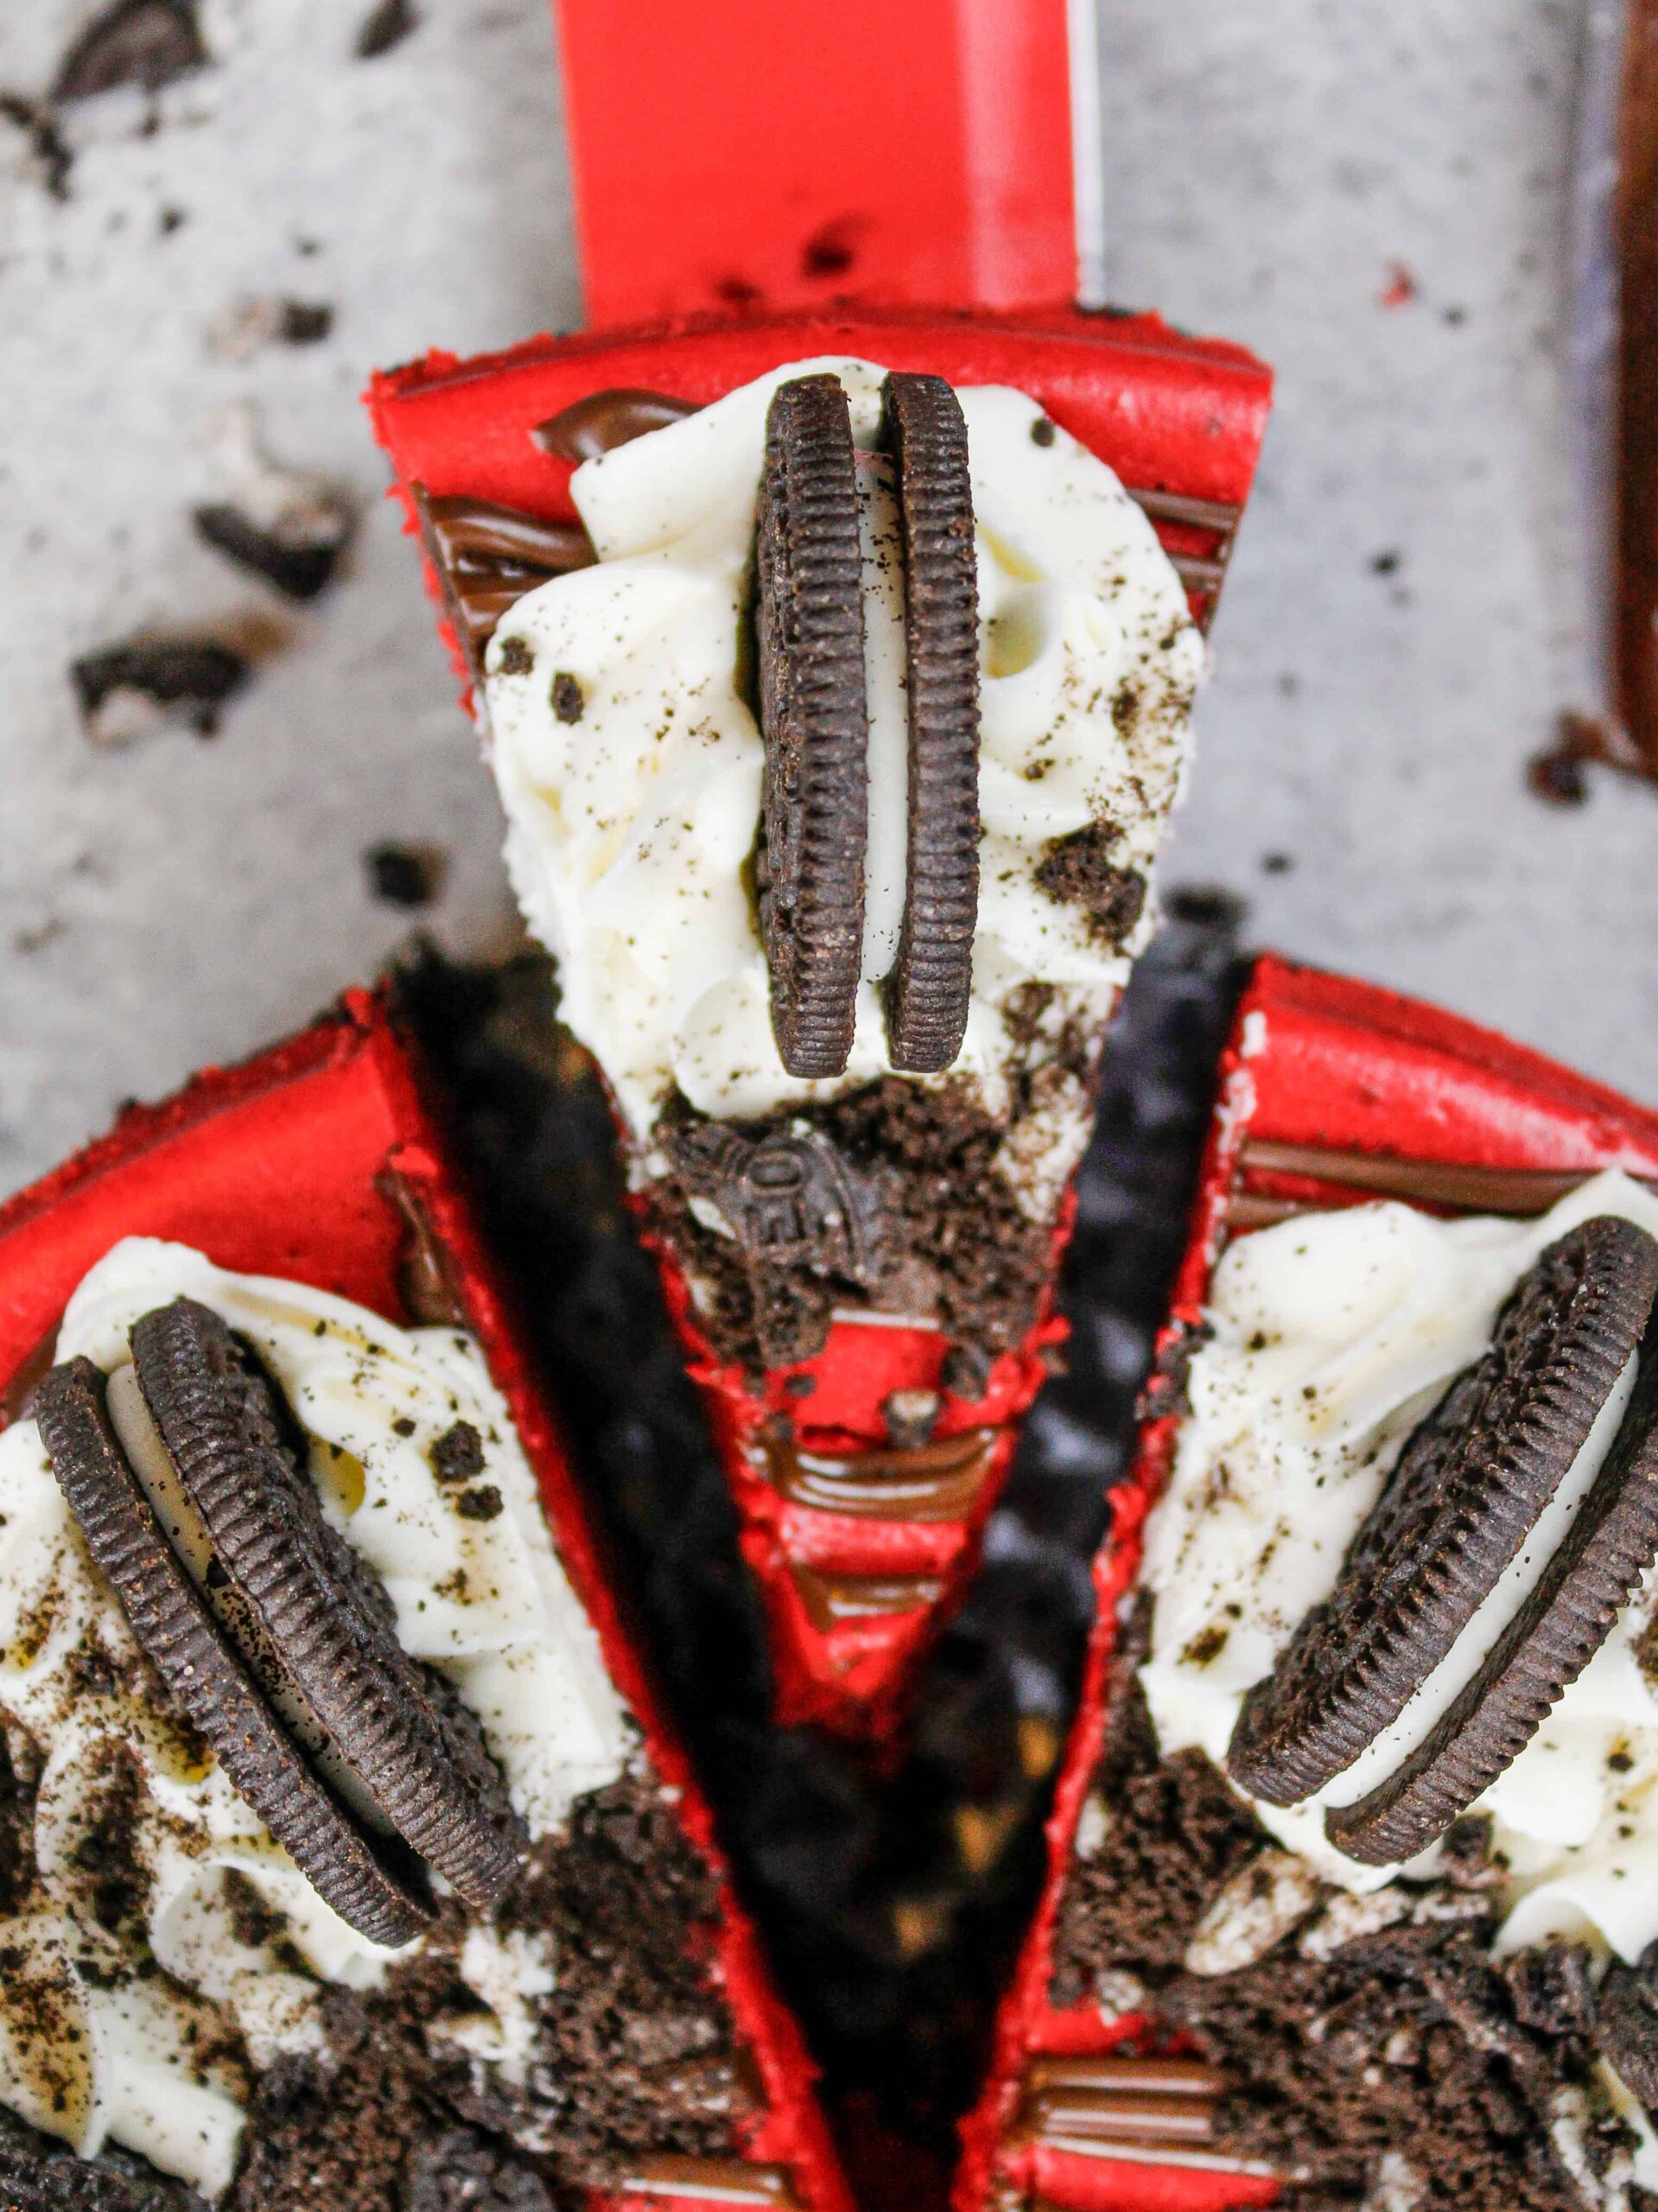
Red Velvet Oreo Cheesecake -Decadent Recipe from Scratch
Tuesday 19th of April 2022
[…] Cheesecake Cake Filling Raspberry Cheesecake Bars Red Velvet Crinkle Cookies Red Velvet Macarons {"@context":"http://schema.org","@type":"Recipe","name":"Red Velvet Oreo Cheesecake","author":{"@type":"Person","name":"Chelsey White"},"datePublished":"2021-01-24","recipeYield":12,"description":"From its oreo cookie crust to its red velvet oreo cheesecake filling, this red velvet oreo cheesecake is a match made in heaven!!","image":["https://chelsweets.com/wp-content/uploads/2021/02/pulling-out-slice-vert-scaled-720x720.jpg","https://chelsweets.com/wp-content/uploads/2021/02/pulling-out-slice-vert-scaled-720x540.jpg","https://chelsweets.com/wp-content/uploads/2021/02/pulling-out-slice-vert-scaled.jpg","https://chelsweets.com/wp-content/uploads/2021/02/pulling-out-slice-vert-scaled-720x405.jpg","https://chelsweets.com/wp-content/uploads/2021/02/pulling-out-slice-vert-scaled-735x1102.jpg"],"recipeCategory":"Cakes","recipeCuisine":"American","prepTime":"PT15M","cookTime":"PT1H22M","performTime":"PT5H22M","totalTime":"PT5H37M","recipeIngredient":["2 cups oreo cookie crumbs - about 25 cookies with centers (200 grams)","1/4 cup granulated sugar (50 grams)","1/4 cup or 4 Tbsp salted butter, melted (56 grams)","3 cups or 3-8 oz. packages full-fat cream cheese, room temperature (678 grams)","1 cup granulated sugar (200 grams)","1/2 cup full-fat sour cream, room temperature (128 grams)","1 1/2 Tbsp vanilla extract or vanilla bean paste (18 grams)","1 1/2 Tbsp heavy cream or heavy whipping cream (22 grams)","3 Tbsp cornstarch (24 grams)","2 tsp red gel food coloring","3 large eggs, room temperature (168 grams)","1/2 cup chopped upu00a0oreos - about 8 cookies (45 grams)","1/2 cup dark chocolate chips or chopped chocolate, melted (80 grams)","Whipped cream","1/4 cup chopped upu00a0oreos (30 grams)","Electric Mixer","8-inch springform pan","Rubber spatula"],"recipeInstructions":[{"@type":"HowToStep","text":"Preheat oven to 350 F or 175 C. Spray an 8-inch springform pan or cheesecake pan with non-stick baking spray, then place a parchment round on the bottom of the pan and spray the top of it.","position":1,"name":"Preheat oven to 350 F or 175 C....","url":"https://chelsweets.com/red-velvet-oreo-cheesecake/#mv_create_326_1"},{"@type":"HowToStep","text":"Using a food processor, crush 25 oreo cookies until they have a fine crumb. Pour in 1/4 cup granulated sugar and 4 Tbsp melted butter and pulse until the cookie crumbs look moist.","position":2,"name":"Using a food processor, crush 25 oreo cookies...","url":"https://chelsweets.com/red-velvet-oreo-cheesecake/#mv_create_326_2"},{"@type":"HowToStep","text":"Pour the cookie mixture into the prepared pan. Use the back of a spoon or the bottom of a measuring cup to press down firmly and create a compact, even crust covering the bottom of the pan and reaching about 2/3 way up the sides of the pan.","position":3,"name":"Pour the cookie mixture into the prepared pan....","url":"https://chelsweets.com/red-velvet-oreo-cheesecake/#mv_create_326_3"},{"@type":"HowToStep","text":"Bake for 9-10 minutes then remove from the oven. Place the pan on a wire rack to cool, and keep your oven on but lower the temperature to 300 F / 150 C.","position":4,"name":"Bake for 9-10 minutes then remove from the...","url":"https://chelsweets.com/red-velvet-oreo-cheesecake/#mv_create_326_4"},{"@type":"HowToStep","text":"While the cookie crust bakes and cools make the cheesecake filling.","position":5,"name":"While the cookie crust bakes and cools make...","url":"https://chelsweets.com/red-velvet-oreo-cheesecake/#mv_create_326_5"},{"@type":"HowToStep","text":"Place 3 cups of room temperature cream cheese in a large bowl. Beat with a hand mixer or stand mixer fitted with a whisk attachment on a medium to medium-high speed for 4-5 minutes until creamy and smooth. Scrape the sides and bottom of the bowl a few times throughout the process.","position":6,"name":"Place 3 cups of room temperature cream cheese...","url":"https://chelsweets.com/red-velvet-oreo-cheesecake/#mv_create_326_6"},{"@type":"HowToStep","text":"Add in 1 cup of sugar, 1/2 cup room temperature sour cream, 1 1/2 Tbsp vanilla extract, 1 1/2 Tbsp heavy cream, 3 Tbsp cornstarch and 2 tsp red gel food coloring. Mix on a low speed until combined, scraping the sides of the bowl with a rubber spatula as needed.","position":7,"name":"Add in 1 cup of sugar, 1/2 cup...","url":"https://chelsweets.com/red-velvet-oreo-cheesecake/#mv_create_326_7"},{"@type":"HowToStep","text":"Crack 3 large eggs into a separate bowl and mix together with a fork until scrambled. Slowly mix the eggs into the cream cheese mixture on a low speed. Mix just until the eggs are incorporated, then finish mixing the batter by hand with a rubber spatula. The batter should be smooth and completely free of any lumps!","position":8,"name":"Crack 3 large eggs into a separate bowl...","url":"https://chelsweets.com/red-velvet-oreo-cheesecake/#mv_create_326_8"},{"@type":"HowToStep","text":"Gently bang your mixing bowl on your counter a few times to help release any trapped air bubbles (these can cause your cheesecake to crack).","position":9,"name":"Gently bang your mixing bowl on your counter...","url":"https://chelsweets.com/red-velvet-oreo-cheesecake/#mv_create_326_9"},{"@type":"HowToStep","text":"Pour 1/2 of the cheesecake filling on top of the cooled cookie crust, then sprinkle 1/2 cup of chopped oreos over the batter. Pour the remaining batter on top of the oreos.","position":10,"name":"Pour 1/2 of the cheesecake filling on top...","url":"https://chelsweets.com/red-velvet-oreo-cheesecake/#mv_create_326_10"},{"@type":"HowToStep","text":"Place the cheesecake pan on a large cookie sheet to catch any potential leaks, then bake the cheesecake at 300 F for 12 minutes.","position":11,"name":"Place the cheesecake pan on a large cookie...","url":"https://chelsweets.com/red-velvet-oreo-cheesecake/#mv_create_326_11"},{"@type":"HowToStep","text":"Without opening the oven door, reduce the oven temperature to 225 F or 110 C and bake for an additional 110 - 115 minutes. It sounds crazy, but low and slow is the best way to bake up a perfect, crack-free cheesecake.","position":12,"name":"Without opening the oven door, reduce the oven...","url":"https://chelsweets.com/red-velvet-oreo-cheesecake/#mv_create_326_12"},{"@type":"HowToStep","text":"Once the cheesecake is fully baked, turn off your oven and let the cheesecake sit in the oven for 1 hour without opening the door.","position":13,"name":"Once the cheesecake is fully baked, turn off...","url":"https://chelsweets.com/red-velvet-oreo-cheesecake/#mv_create_326_13"},{"@type":"HowToStep","text":"After 1 hour of cooling in the oven, crack your oven door open with a wooden spoon and let the cheesecake continue to cool in the oven for another hour.","position":14,"name":"After 1 hour of cooling in the oven,...","url":"https://chelsweets.com/red-velvet-oreo-cheesecake/#mv_create_326_14"},{"@type":"HowToStep","text":"Next, remove the cheesecake from the oven and let it continue to cool at room temperature for 2 hours. Once it's reach room temperature, cover the top of the cheesecake with foil and refrigerate the cheesecake for an additional 3-4 hours or overnight.","position":15,"name":"Next, remove the cheesecake from the oven and...","url":"https://chelsweets.com/red-velvet-oreo-cheesecake/#mv_create_326_15"},{"@type":"HowToStep","text":"When you're ready to enjoy this red velvet Oreo cheesecake, remove it from the fridge and carefully release it from the pan.","position":16,"name":"When you're ready to enjoy this red velvet...","url":"https://chelsweets.com/red-velvet-oreo-cheesecake/#mv_create_326_16"},{"@type":"HowToStep","text":"Drizzle melted chocolate over the top of cheesecake and top with whipped cream swirls and chopped Oreos. Use a sharp, warm knife to cut into the chilled cheesecake. Clean the knife after each cut to get perfect slices.","position":17,"name":"Drizzle melted chocolate over the top of cheesecake...","url":"https://chelsweets.com/red-velvet-oreo-cheesecake/#mv_create_326_17"},{"@type":"HowToStep","text":"Leftover cheesecake can be kept in the fridge for up to 5 days in an airtight container.","position":18,"name":"Leftover cheesecake can be kept in the fridge...","url":"https://chelsweets.com/red-velvet-oreo-cheesecake/#mv_create_326_18"}],"video":{"@type":"VideoObject","name":"Red Velvet Oreo Cheesecake","description":"From its oreo cookie crust to its red velvet oreo cheesecake filling, this red velvet oreo cheesecake is a match made in heaven!!","thumbnailUrl":["https://mediavine-res.cloudinary.com/image/upload/s--fMz8gK-V--/ar_16:9,c_fill,f_auto,fl_lossy,q_auto/v1612803619/aqdtjvlthhevucoyoq6z.jpg","https://mediavine-res.cloudinary.com/image/upload/s--ikevj3Im--/ar_4:3,c_fill,f_auto,fl_lossy,q_auto/v1612803619/aqdtjvlthhevucoyoq6z.jpg","https://mediavine-res.cloudinary.com/image/upload/s--WU7eBozz--/ar_1:1,c_fill,f_auto,fl_lossy,q_auto/v1612803619/aqdtjvlthhevucoyoq6z.jpg"],"contentUrl":"https://mediavine-res.cloudinary.com/video/upload/ssmixwqond2w3sylv9bq.mp4","duration":"PT53S","uploadDate":"2022-02-25T13:54:55+00:00"},"keywords":"red velvet oreo cheesecake, red velvet oreo cheesecake recipe, chelsweets, chelsweets cheesecake, chelsweets red velvet oreo cheesecake, red velvet cheesecake, red velvet oreo cheesecake filling, oreo cheesecake crust, ","nutrition":{"@type":"NutritionInformation","calories":"423 calories","carbohydrateContent":"56 grams carbohydrates","cholesterolContent":"103 milligrams cholesterol","fatContent":"20 grams fat","fiberContent":"1 grams fiber","proteinContent":"5 grams protein","saturatedFatContent":"10 grams saturated fat","servingSize":"1","sodiumContent":"227 milligrams sodium","sugarContent":"47 grams sugar","transFatContent":"0 grams trans fat","unsaturatedFatContent":"8 grams unsaturated fat"} […]