
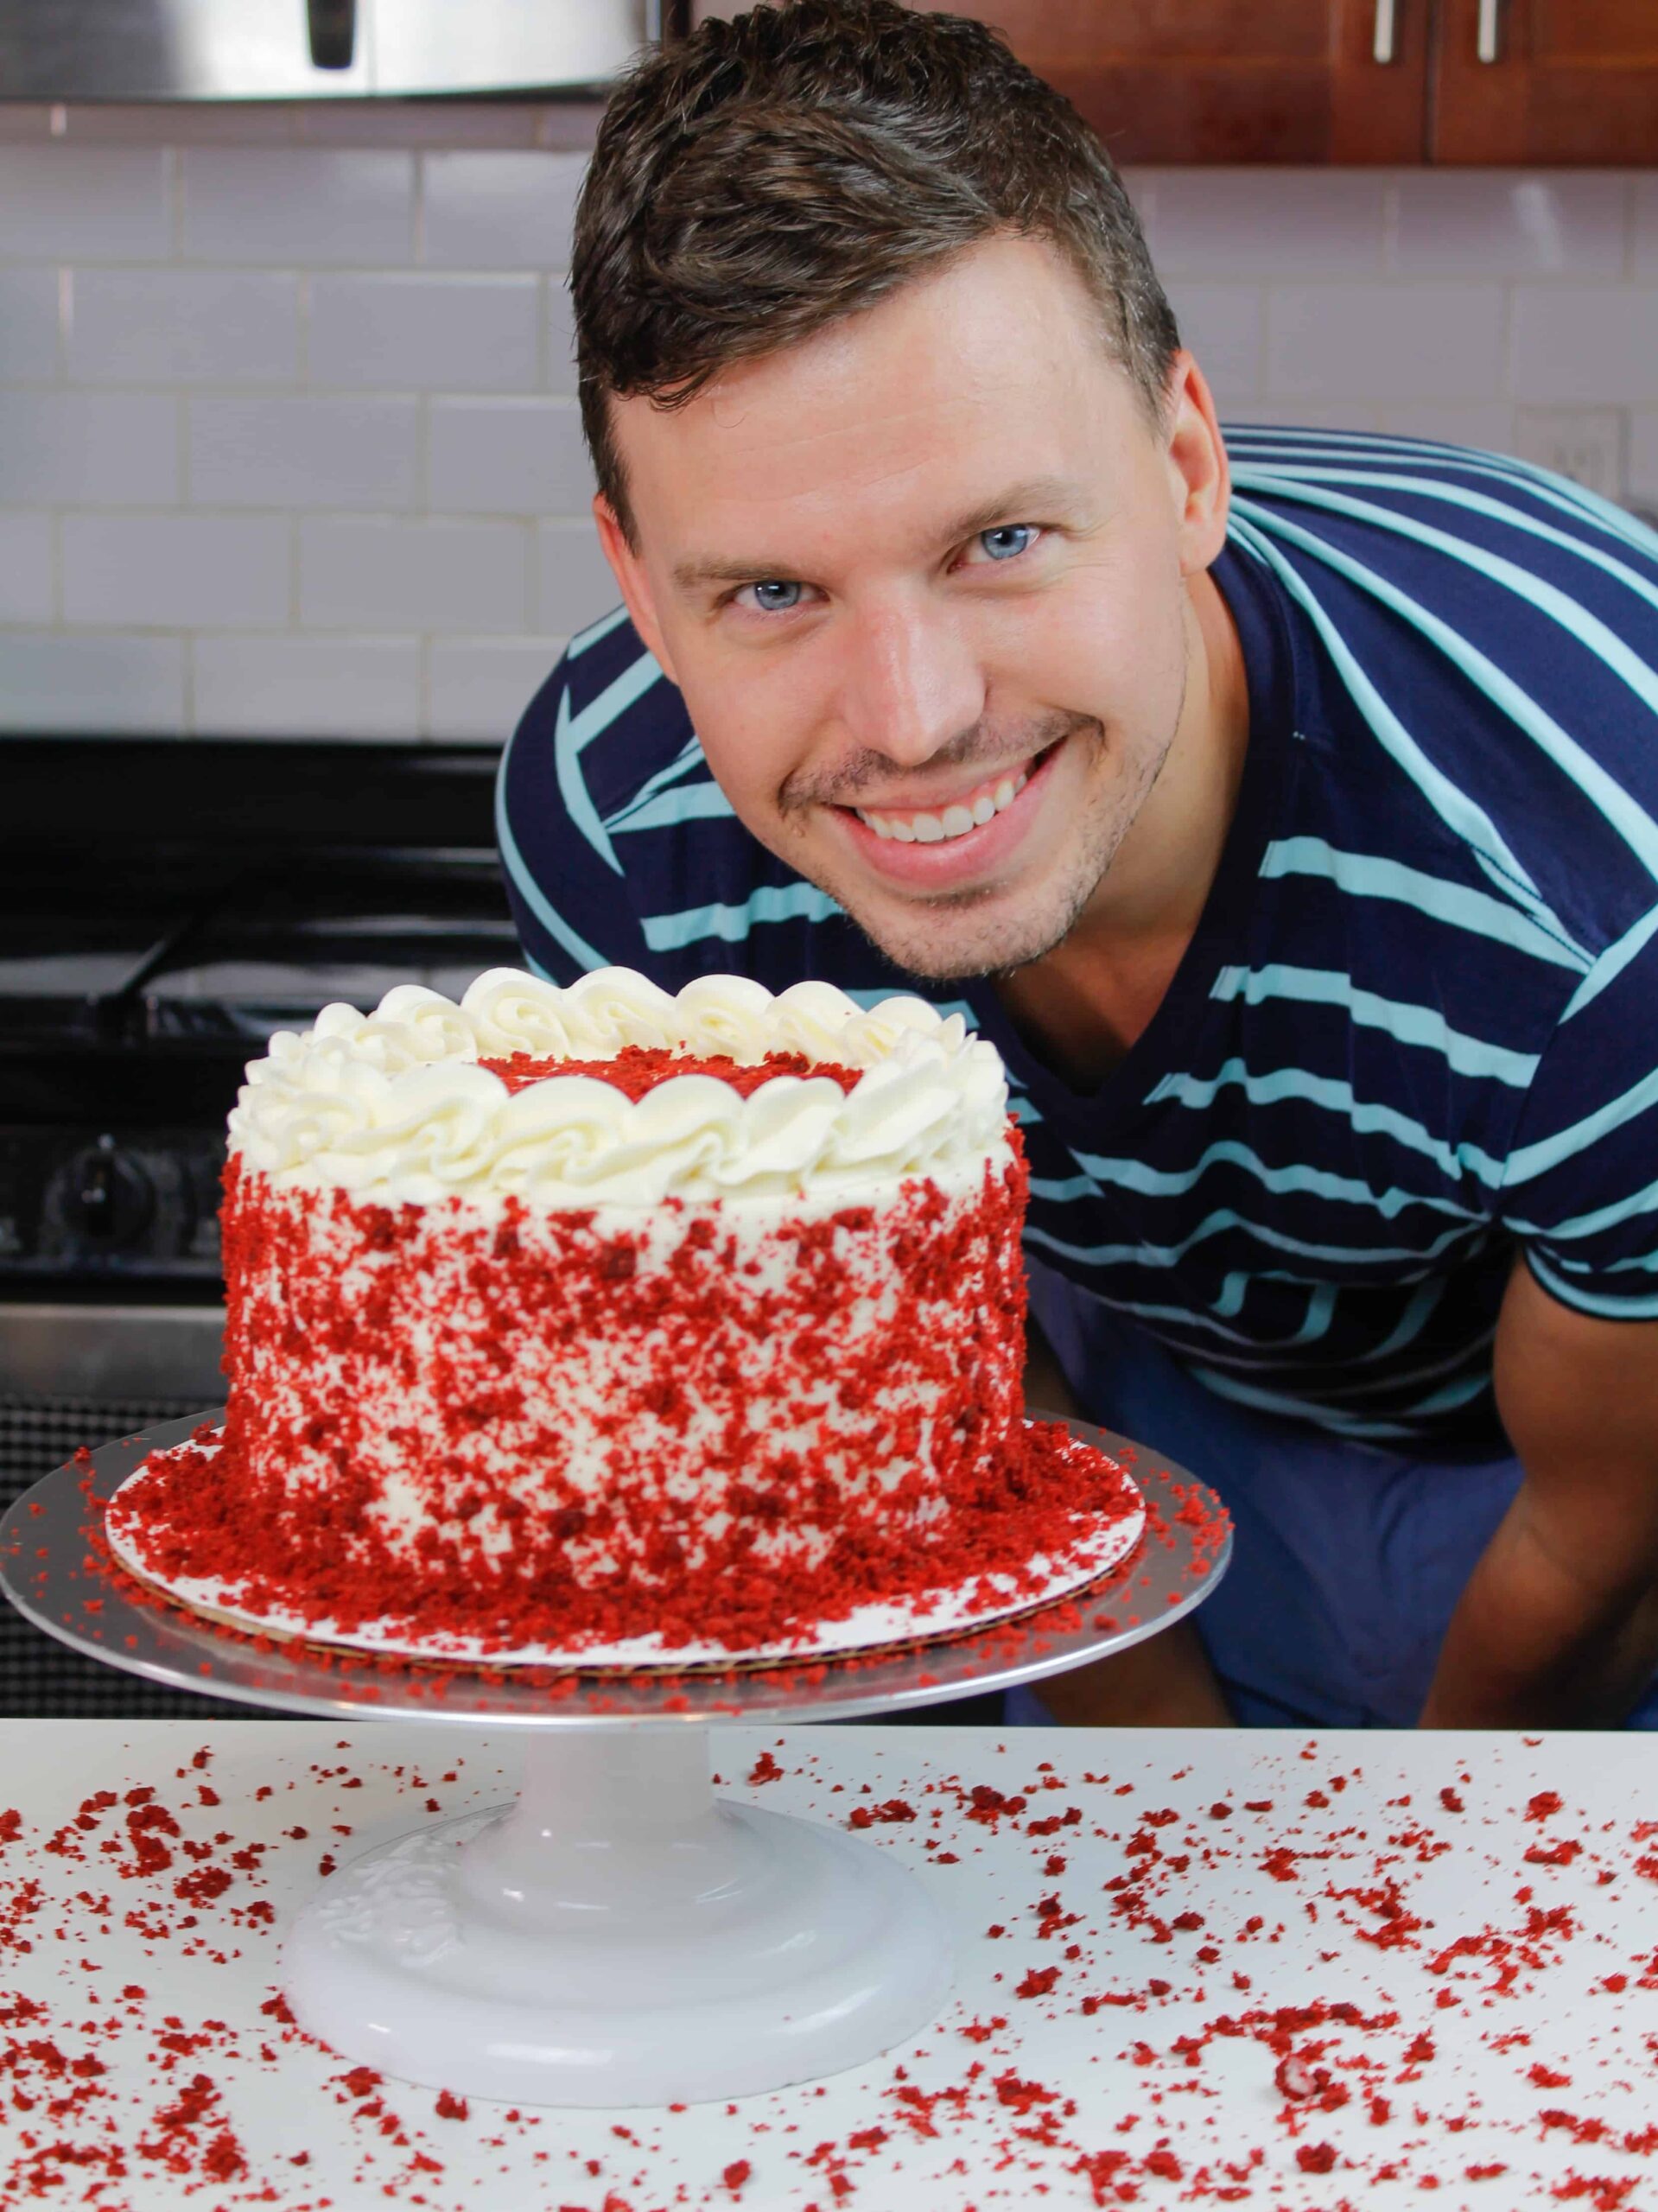
Red velvet cake…it has eluded me for so long!! You’ve been asking me to share my favorite red velvet layer cake recipe, and I’ve wanted to. I wasn’t procrastinating, I just hadn’t made a red velvet cake I was truly happy with.
I wanted moist, spongy, tender cake layers, sandwiched between generous layers of cream cheese frosting. So, I continued my red velvet experiments.
I tried tons of different recipes to see what ratios I preferred, played around with the amount of leavening agents, and went through 4 iterations of recipe testing.
And here we have it. A delicious red velvet cake recipe that is super moist and has a delicate, tender crumb.

Oil Vs. Butter, or Oil & Butter?
While most of my cake recipes use butter as the fat, this recipe uses oil.
Butter adds a lot of flavor to a cake, but oil adds a lot of moisture. Not to say that a butter cake is dry, but the texture is denser than a cake recipe made with oil.
Oil gives the cake a fluffier texture. While I love a good butter cake, that’s not the texture I associate with a red velvet cake. That’s why this cake recipe uses only oil.
Red Food Coloring
When you make a red velvet cake, you expect it to have that gorgeous, deep red color when you cut in. I’ve found that it’s a lot easier to achieve that result using gel food coloring.
I prefer Americolor or Chefmaster but any gel food coloring should work! If you don’t have gel food coloring on hand, you can also use liquid food coloring.
I’ve found that you need to use an entire bottle of liquid food coloring to get the deep red color, so be sure you have a full bottle if you go this route.
The Cream Cheese Frosting
This red velvet cake recipe would taste great with just about any frosting, but I wanted to stick with the classic combination of cream cheese frosting and red velvet cake.
My cream cheese buttercream is a dream to frost with. It’s thick, has great structure, and pipes like a dream. It’s wonderful on layer cakes because it is stiff enough to support the weight of the cake layers.
This cream cheese frosting recipe is also stiff enough to pipe a beautiful border around the top of the cake, which is exactly what I did for this cake!
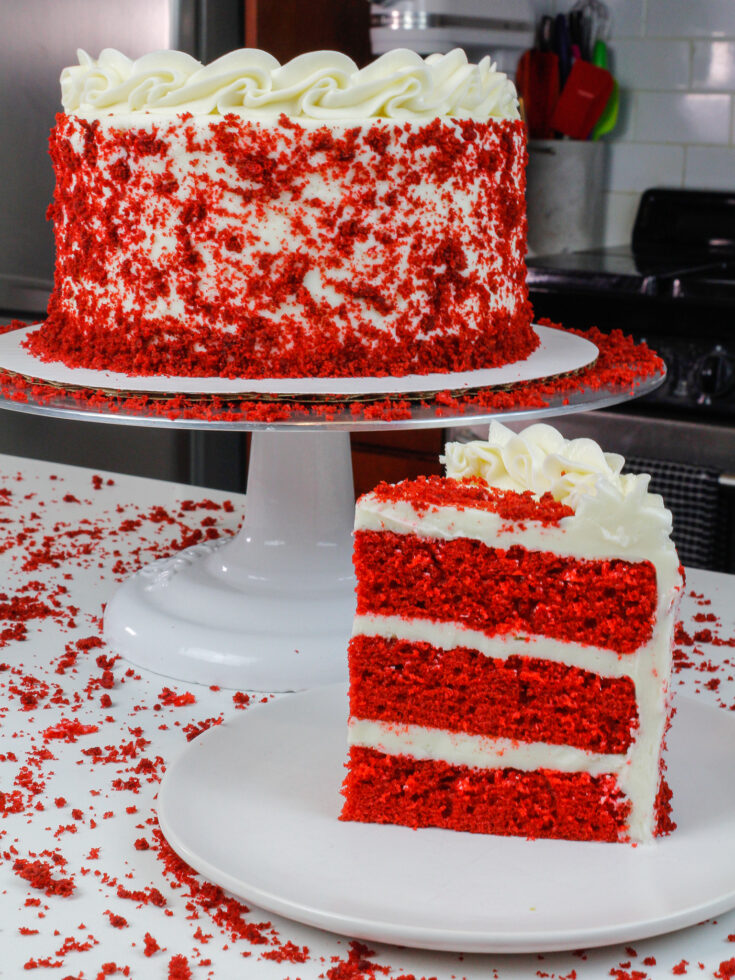
Decorating This Red Velvet Layer Cake
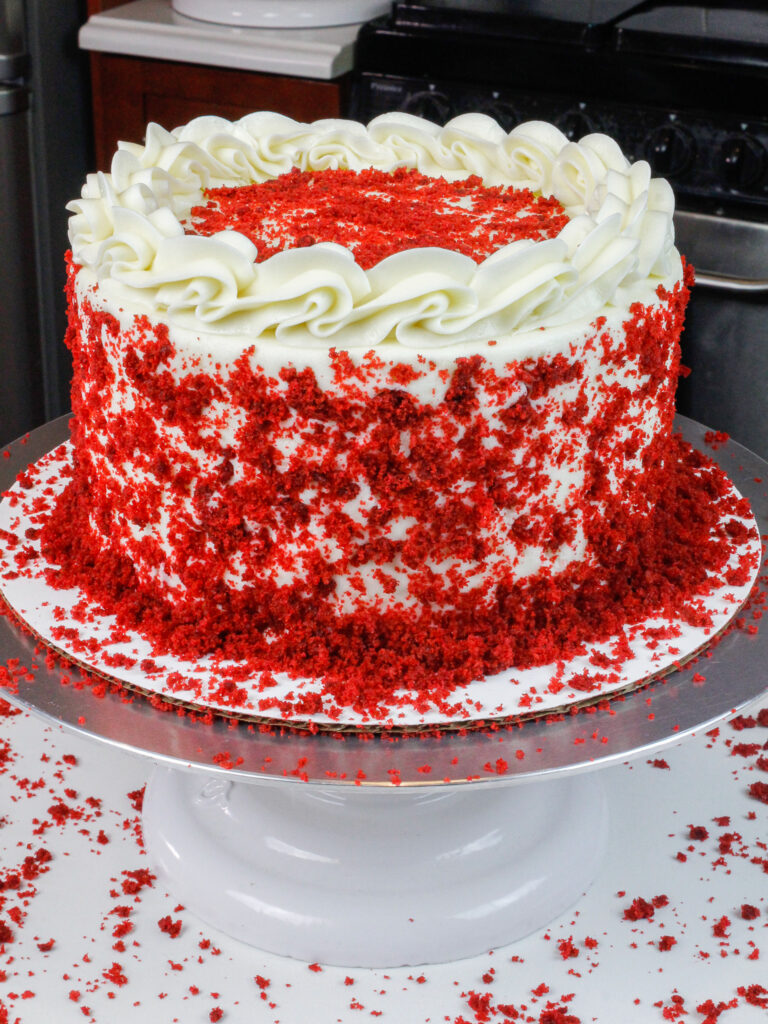
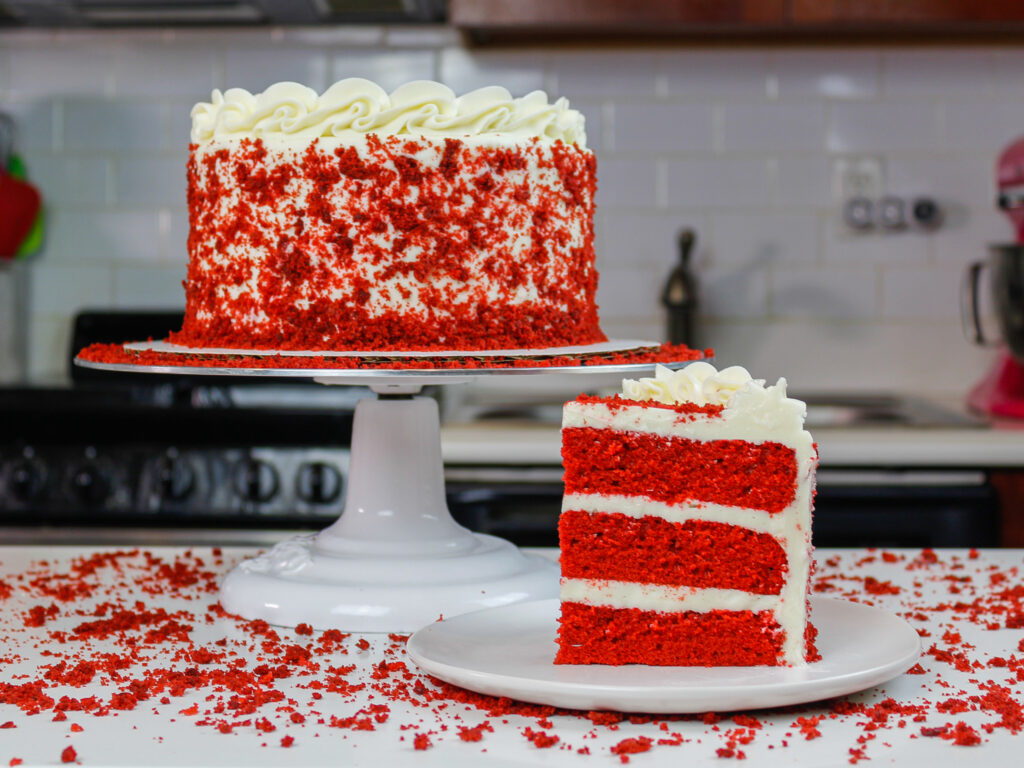
While I love making challenging cake designs, sometimes it’s nice to just make a classic layer cake. I kept things simple with this cake and used crumbled cake tops to decorate the sides of the cake.
This cake decoration screams red velvet! It’s also super easy to make and gives the cake such a classic look.
Tips for Making the Best Red Velvet Layer Cake:
- Ingredients at room temp mix together better! Set out any cold ingredients ahead of time.
- Properly measure your flour (spoon into the cup measure, then level). Or better yet, use a kitchen scale to measure your dry ingredients.
- Mix the cake batter just until the ingredients are incorporated once you add in the flour. This will ensure your cake layers are tender and fluffy.
- Use a scale to weigh your cake pans as you fill them. It will make your cake layers bake to the same height and bake more evenly.
- Bang your cake pans on the counter before putting them in the oven. This brings any big air bubbles that are trapped in the batter to the surface.
- Use full fat cream cheese that comes in a brick. It will give the frosting the best consistency.
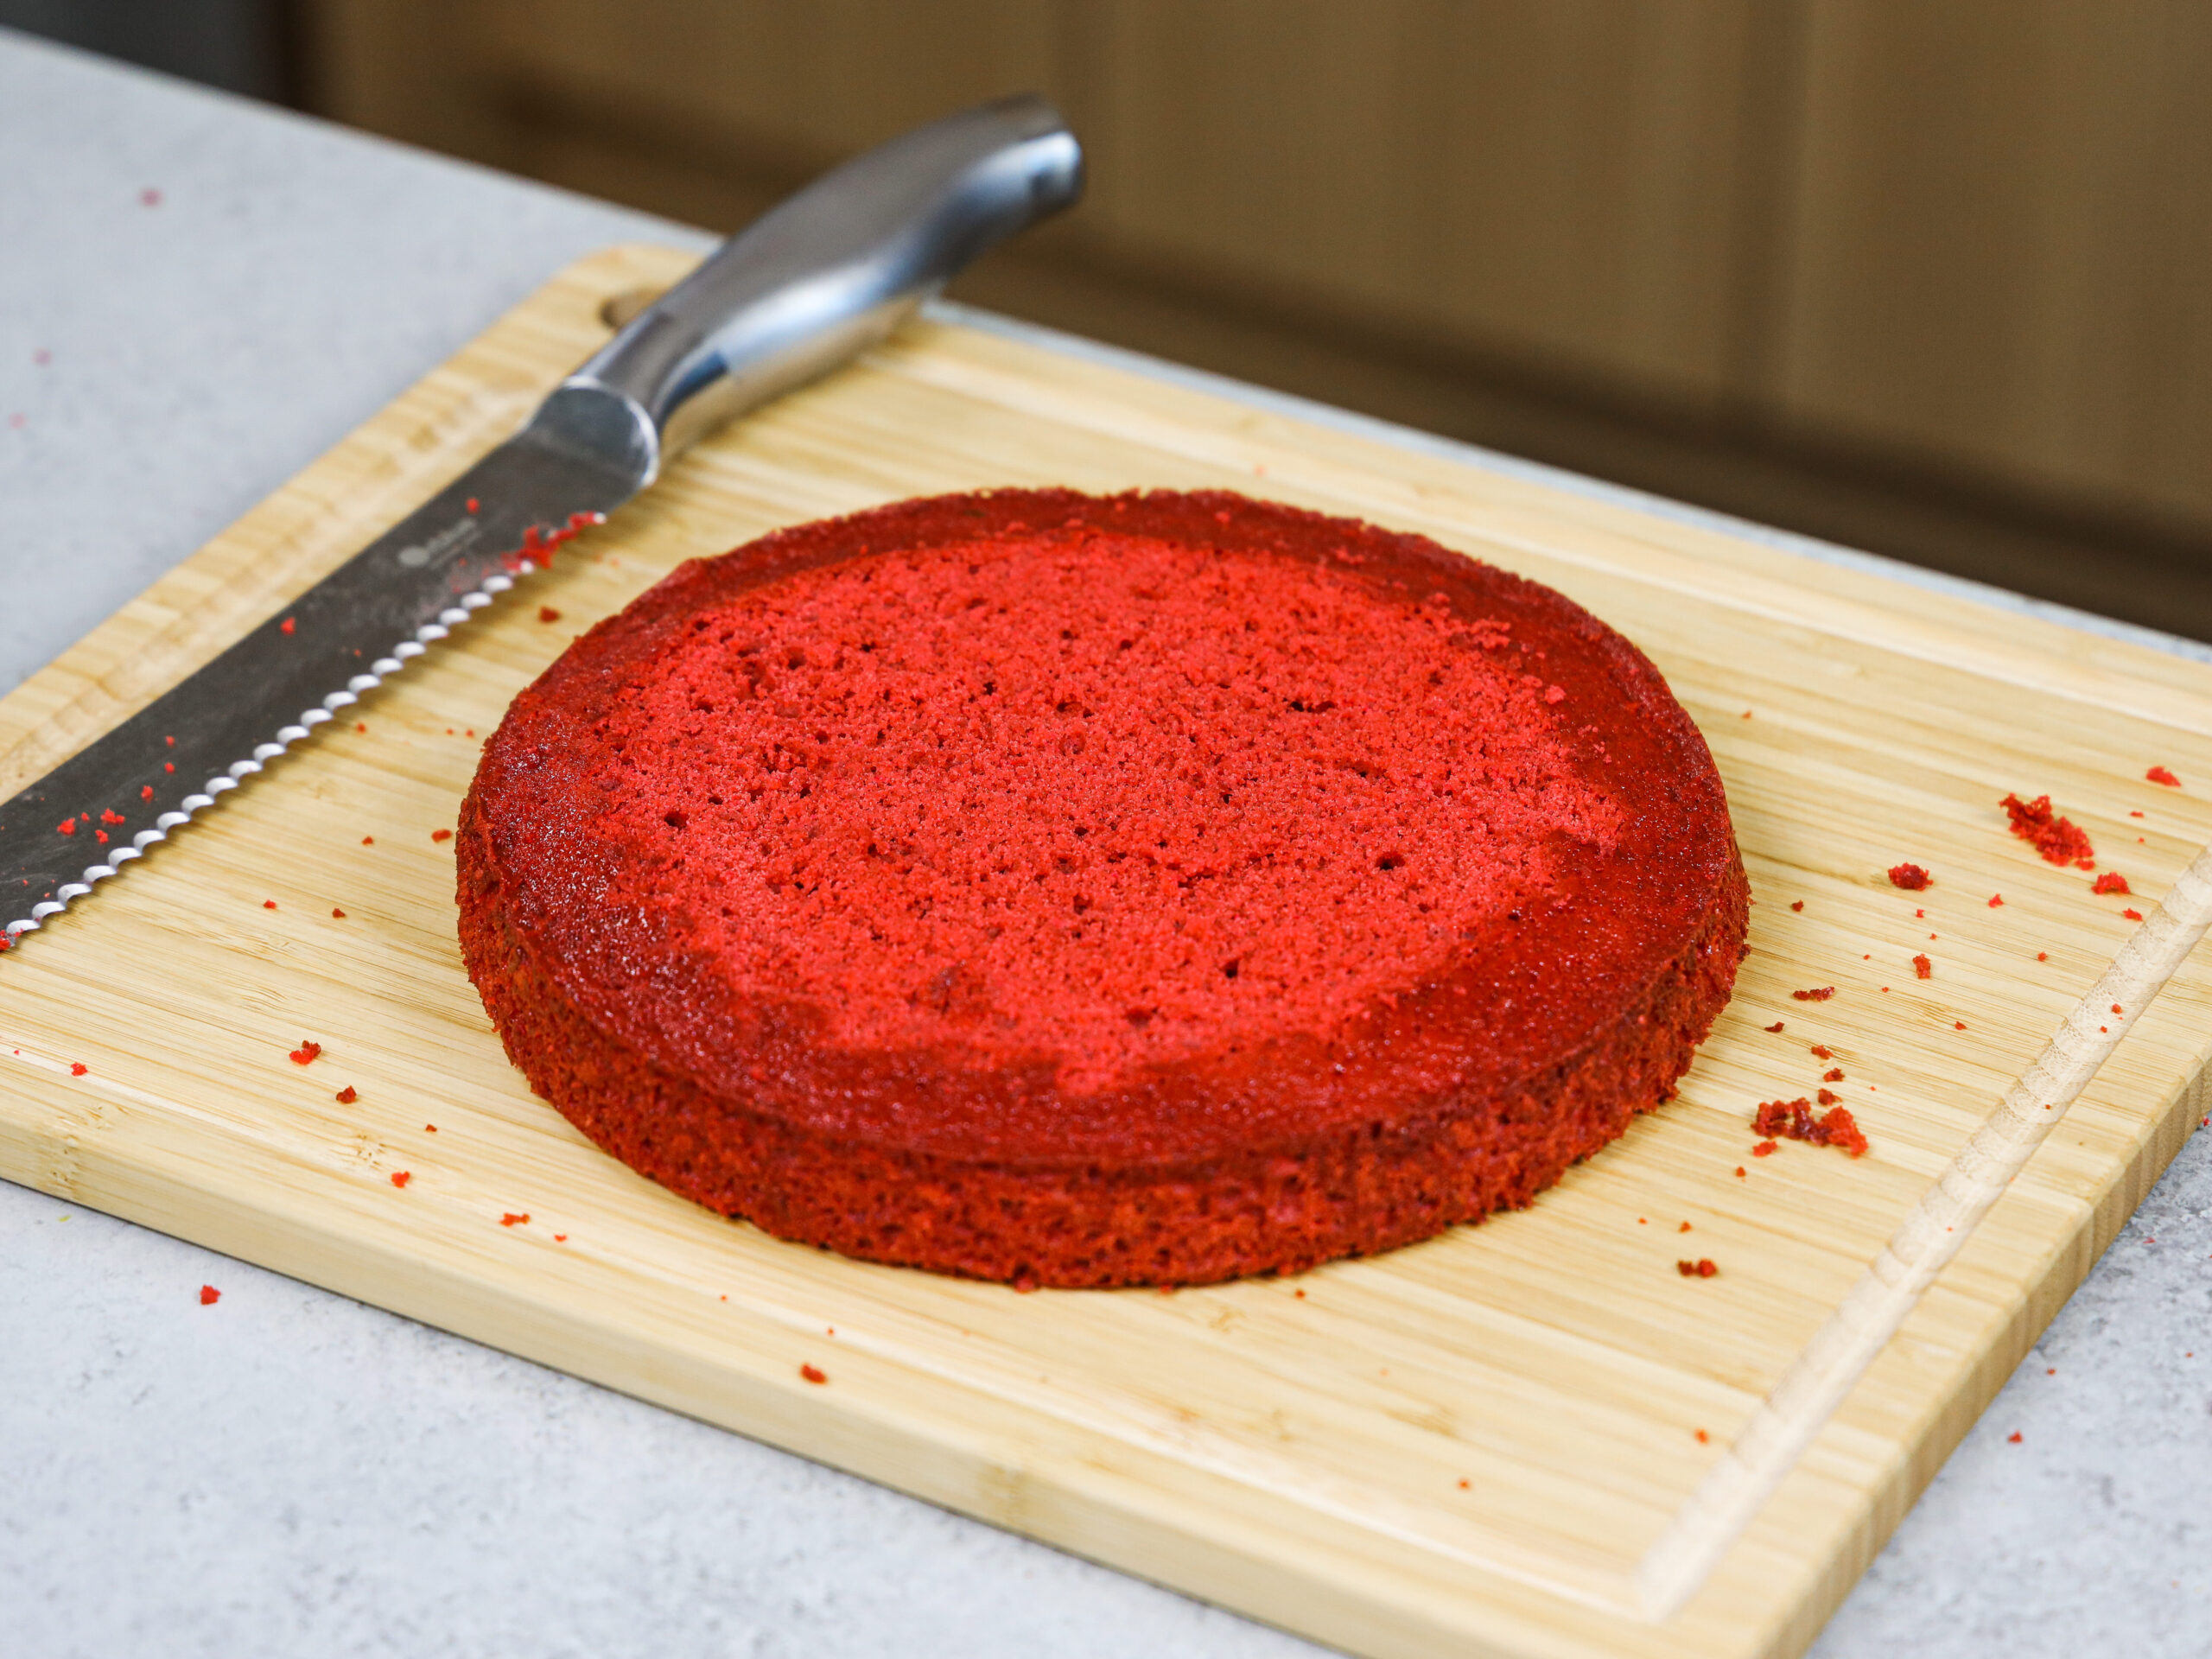
- Level your room temperature or thawed cake layers with a serrated knife to make them easier to stack.
- Chill your cake layers in the freezer for about 20 minutes before assembling the cake. It makes it so much easier to stack and frost them!
- Use gel food coloring to create brightly colored cake layers. It works best because it doesn’t throw off the consistency of the batter or give it a bitter taste.
Making This Layered Red Velvet Cake in Advance and Storage Tips
Make your cake layers in advance and freeze them. It breaks the process up and makes it more approachable.
Make your frosting ahead of time too or save any leftover frosting! It can be stored in an airtight container in the fridge for up to 2 weeks, or in the freezer for up to a month. Be sure to give it a good stir once it thaws to get the consistency nice and smooth again.
A frosted cake can last in the fridge for up to a week, or in the freezer for up to a month. The buttercream locks in all the moisture, keeping the cake fresh and delicious!
If you cut into the cake and have leftovers, use any remaining frosting to cover the cut section to keep it moist and store in the fridge for up to a week.
Let Me Know What You Think
If you try my layered red velvet cake recipe, I’d love to hear what you think! Please leave a rating and comment below with your thoughts.
Don’t forget to tag me @chelsweets and use #chelsweets on social media so I can see your amazing creations!
Surprisingly, my husband actually ate this cake! Ironically, he’s not really a dessert person, but he loved this one!!
Other Recipes You Might Like:


Red Velvet Layer Cake
This classic red velvet layer cake recipe is moist, tender & delicious! It's frosted with the best cream cheese frosting & is irresistible!
Ingredients
Red Velvet Cake
- 1 cup vegetable oil (225g)
- 1 cup buttermilk, room temperature (240ml)
- 2 large eggs, room temperature (112g)
- 1 Tbsp white vinegar (9ml)
- 2 tsp vanilla extract (8ml)
- 2 squirts of red gel food coloring or 1 Tbsp liquid food coloring
- 2 cups granulated sugar (400g)
- 2 tsp unsweetened cocoa powder (8g)
- 1 tsp fine salt (6g)
- 1 tsp baking soda (6g)
- 2 1/2 cups all-purpose flour (310g)
Cream Cheese Buttercream Frosting
- 1 1/2 cups or 3 sticks unsalted butter, room temperature (339g)
- 1/2 cup full-fat cream cheese, room temperature (113g or 4 oz.)
- 1 Tbsp vanilla extract (12ml)
- 1 tsp fine salt (6g)
- 7 cups powdered sugar (904g or a 2 lb. bag)
- 1 Tbsp heavy cream or whipping cream (15ml)
Additional Tools
Instructions
Red Velvet Cake
- Preheat the oven to 350°F / 175°C. Line and grease and line 3, 6-inch pans. Set aside.
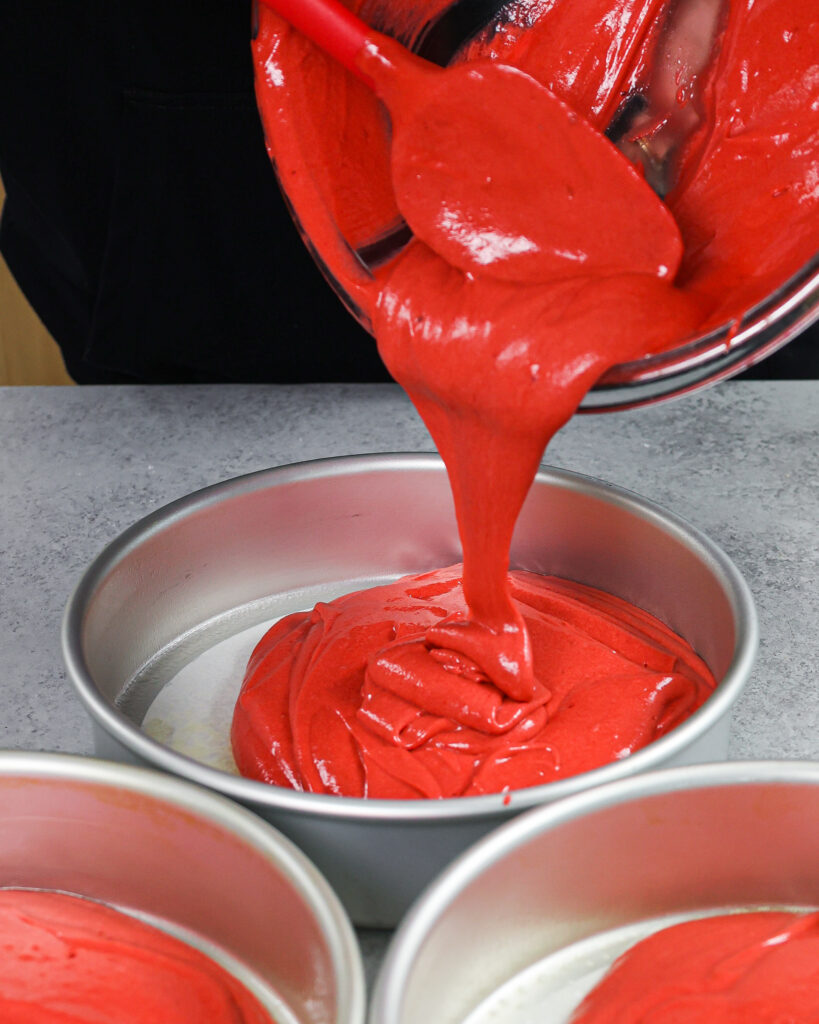
- In a large bowl, whisk together 1 cup vegetable oil, 1 cup buttermilk, 2 large eggs, 1 Tbsp white vinegar and 2 tsp vanilla extract, and 2 squirts of red gel food coloring. Mix until combined and the batter is evenly colored.
- Add 2 cups of granulated sugar and whisk for 30 seconds to help dissolve the sugar.
- Add in 2 tsp cocoa powder, 1 tsp salt and 1 tsp baking soda. Whisk until no clumps remain.
- Mix 2 1/2 cups of flour into the wet ingredients. Mix until just combined.
- Divide the batter evenly between the prepared pans and bake for 27-30 minutes.
- Remove pans from oven and let them cool in the pans for 15 minutes.
- Carefully flip the layers out of the pans, and place on a wire rack to finish cooling.
- Level the cake tops with a serrated knife once they're fully cooled. Use a fork to crumble the cake tops, and cover and set aside. If you're making these in advance, wrap and freeze them at this point.
Cream Cheese Buttercream Frosting
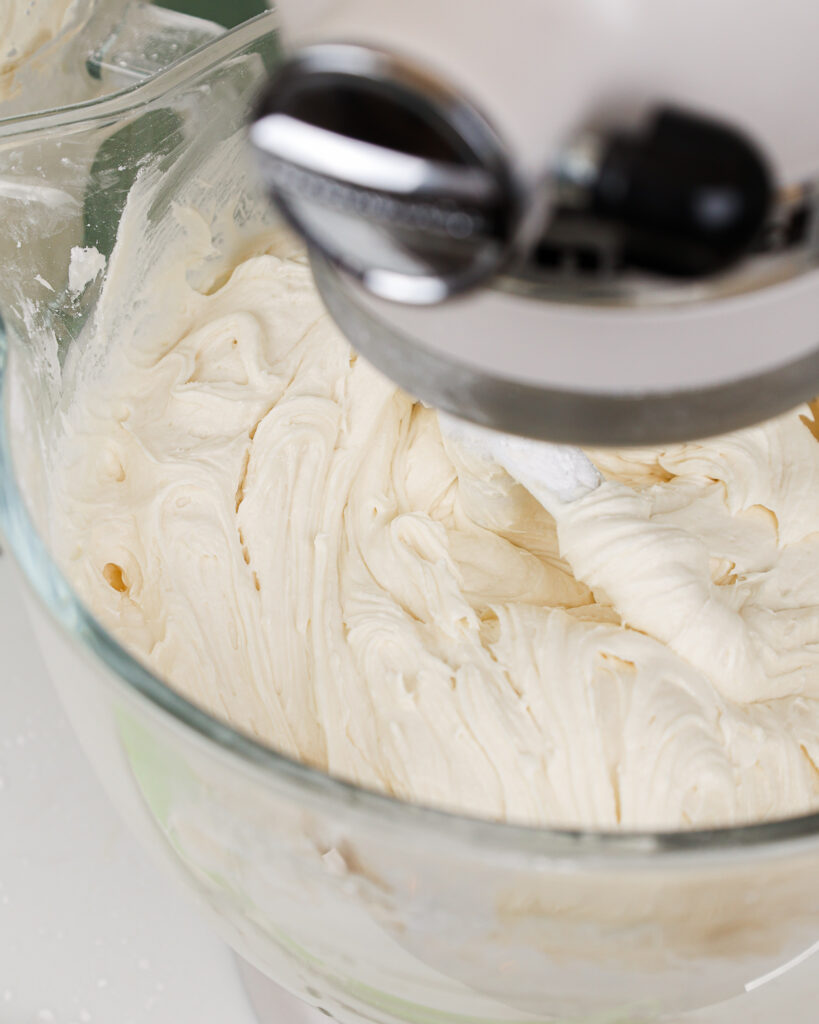
- Beat 1 1/2 cups of butter and 1/2 cup of cream cheese on a medium speed for 30 seconds with a paddle attachment until smooth.
- Mix in 1 Tbsp vanilla and 1 tsp salt on a low speed until the ingredients are combined.
- Gradually mix in 7 cups of powdered sugar on a low speed. Add 1 Tbsp of heavy cream halfway through to make the frosting easier to mix.
- If the frosting is too thick, add in additional cream (1 Tbsp at a time). If the frosting is too thin, add in more powdered sugar (1/4 cup at a time).
- Cover the cream cheese frosting with a piece of plastic wrap to prevent a crust from forming and set aside.
Red Velvet Cake Assembly
- Stack and frost cake layers on a greaseproof cake board using a dab of frosting to help stick the first cake layer to the board.
- Add an even layer of cream cheese buttercream between each cake layer.
- Spread a thin coat of frosting around the cake to fully cover the cake layers. Smooth using a bench scraper, then chill the cake in the fridge (30 minutes) or freezer (10 minutes) until the frosting is firm to the touch.
- Cover the cake in a second, thicker layer of frosting and smooth using a bench scraper.
- Gently press the reserved red velvet crumbs along the side of the cake with your hand.
- Place the remaining cream cheese buttercream into a frosting bag fit with a Wilton 1M frosting tip and pipe a border around the top of the cake. Then enjoy!
Notes
Tips for Making the Best Red Velvet Layer Cake:
- Ingredients at room temp mix together better! Set out any cold ingredients ahead of time.
- Properly measure your flour (spoon into the cup measure, then level). Or better yet, use a kitchen scale to measure your dry ingredients.
- Mix the cake batter just until the ingredients are incorporated once you add in the flour. This will ensure your cake layers are tender and fluffy.
- Use a scale to weigh your cake pans as you fill them. It will make your cake layers bake to the same height and bake more evenly.
- Bang your cake pans on the counter before putting them in the oven. This brings any big air bubbles that are trapped in the batter to the surface.
- Level your room temperature or thawed cake layers with a serrated knife to make them easier to stack.
- Chill your cake layers in the freezer for about 20 minutes before assembling the cake. It makes it so much easier to stack and frost them!
- Use gel food coloring to create brightly colored cake layers. It works best because it doesn't throw off the consistency of the batter or give it a bitter taste.
Making This Layered Red Velvet Cake in Advance and Storage Tips:
- Make your cake layers in advance and freeze them. It breaks the process up and makes it more approachable.
- Make your frosting ahead of time too or save any leftover frosting! It can be stored in an airtight container in the fridge for up to 2 weeks, or in the freezer for up to a month. Be sure to give it a good stir once it thaws to get the consistency nice and smooth again.
- A frosted cake can last in the fridge for up to a week, or in the freezer for up to a month. The buttercream locks in all the moisture, keeping the cake fresh and delicious!
- If you cut into the cake and have leftovers, use any remaining frosting to cover the cut section to keep it moist and store in the fridge for up to a week.
Nutrition Information
Yield
16Serving Size
1Amount Per Serving Calories 745Total Fat 38gSaturated Fat 16gTrans Fat 0gUnsaturated Fat 20gCholesterol 87mgSodium 463mgCarbohydrates 98gFiber 1gSugar 82gProtein 5g
Miranda
Saturday 11th of June 2022
EVERY time I make this recipe the centers cave in...I have no idea what I am doing wrong
Carla
Friday 3rd of June 2022
Hi Chelsweets! In the instructions you mentioned adding the colouring both in step 2 and step 5. Does this means it’s double the colour that it’s listed in the ingredients or do you just add more to achieve the colour you want?? Thank you so much for sharing your recipes with all of us ?
Chelsweets
Sunday 5th of June 2022
Hi Carla,
So sorry about that, that was a typo! I always add in the gel food coloring with the wet ingredients. Hope that helps, happy baking!
Cecile
Sunday 29th of May 2022
Hi! I'm trying to figure out how long and how many degrees I should bake the red velvet layers if I'm going for 10". Same for your vanilla recipe! Making my first wedding cake this week!!
Jess
Sunday 8th of May 2022
I’d like to use this recipe for a tier in a wedding cake I’m making. I would need it to be in a ten inch pan so do you think I should double the recipe or do 1.5?
Red Velvet Cupcakes with Buttermilk: Easy and Delicious Recipe
Tuesday 5th of April 2022
[…] shared my favorite red velvet cake recipe earlier this year and it led to lots of questions about red velvet cupcakes. After a bit of recipe […]