
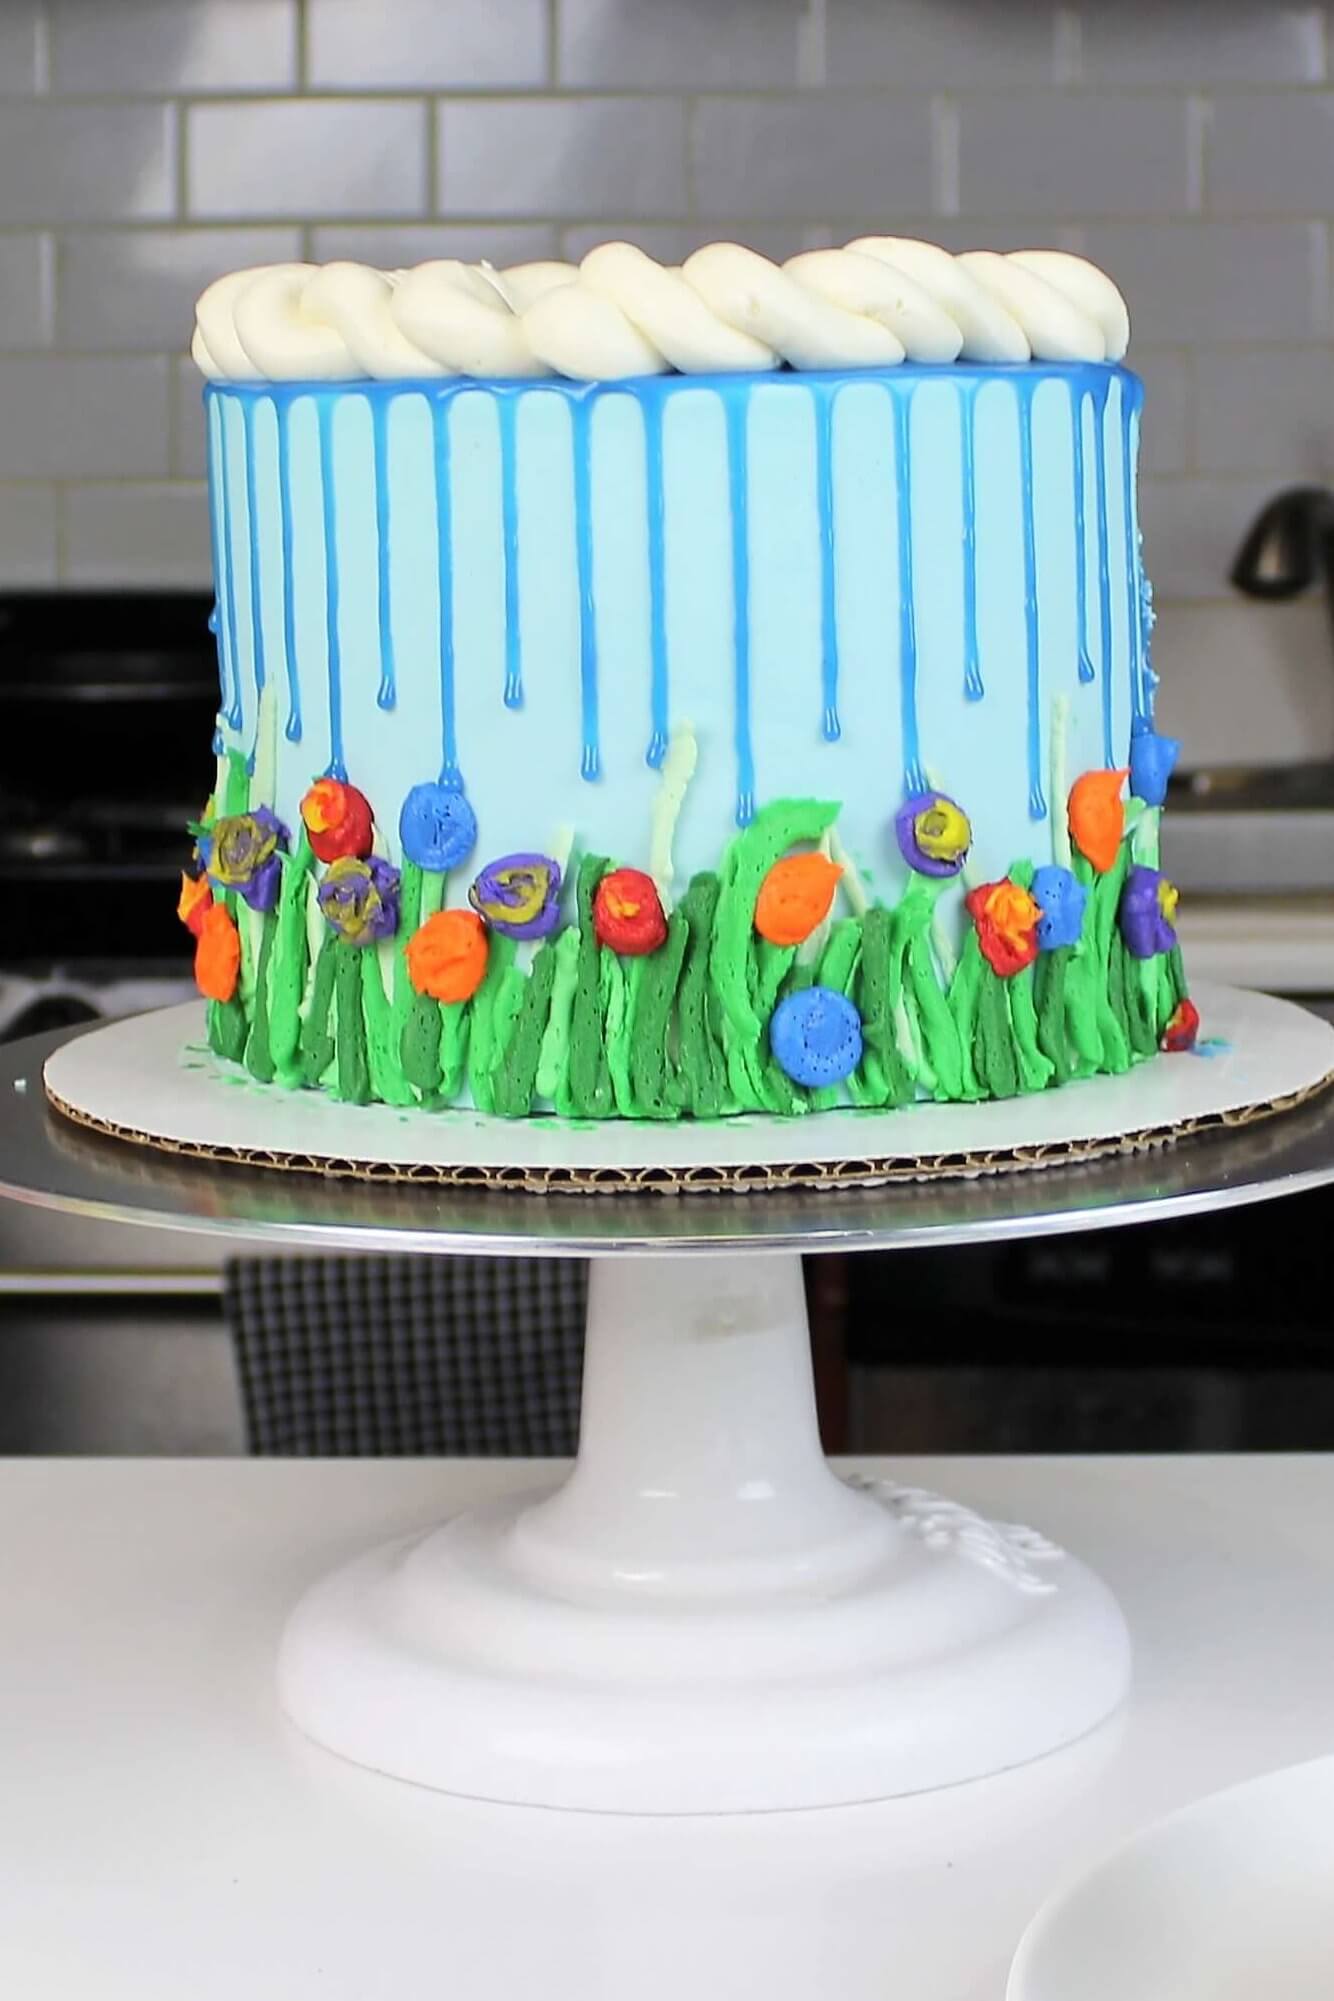
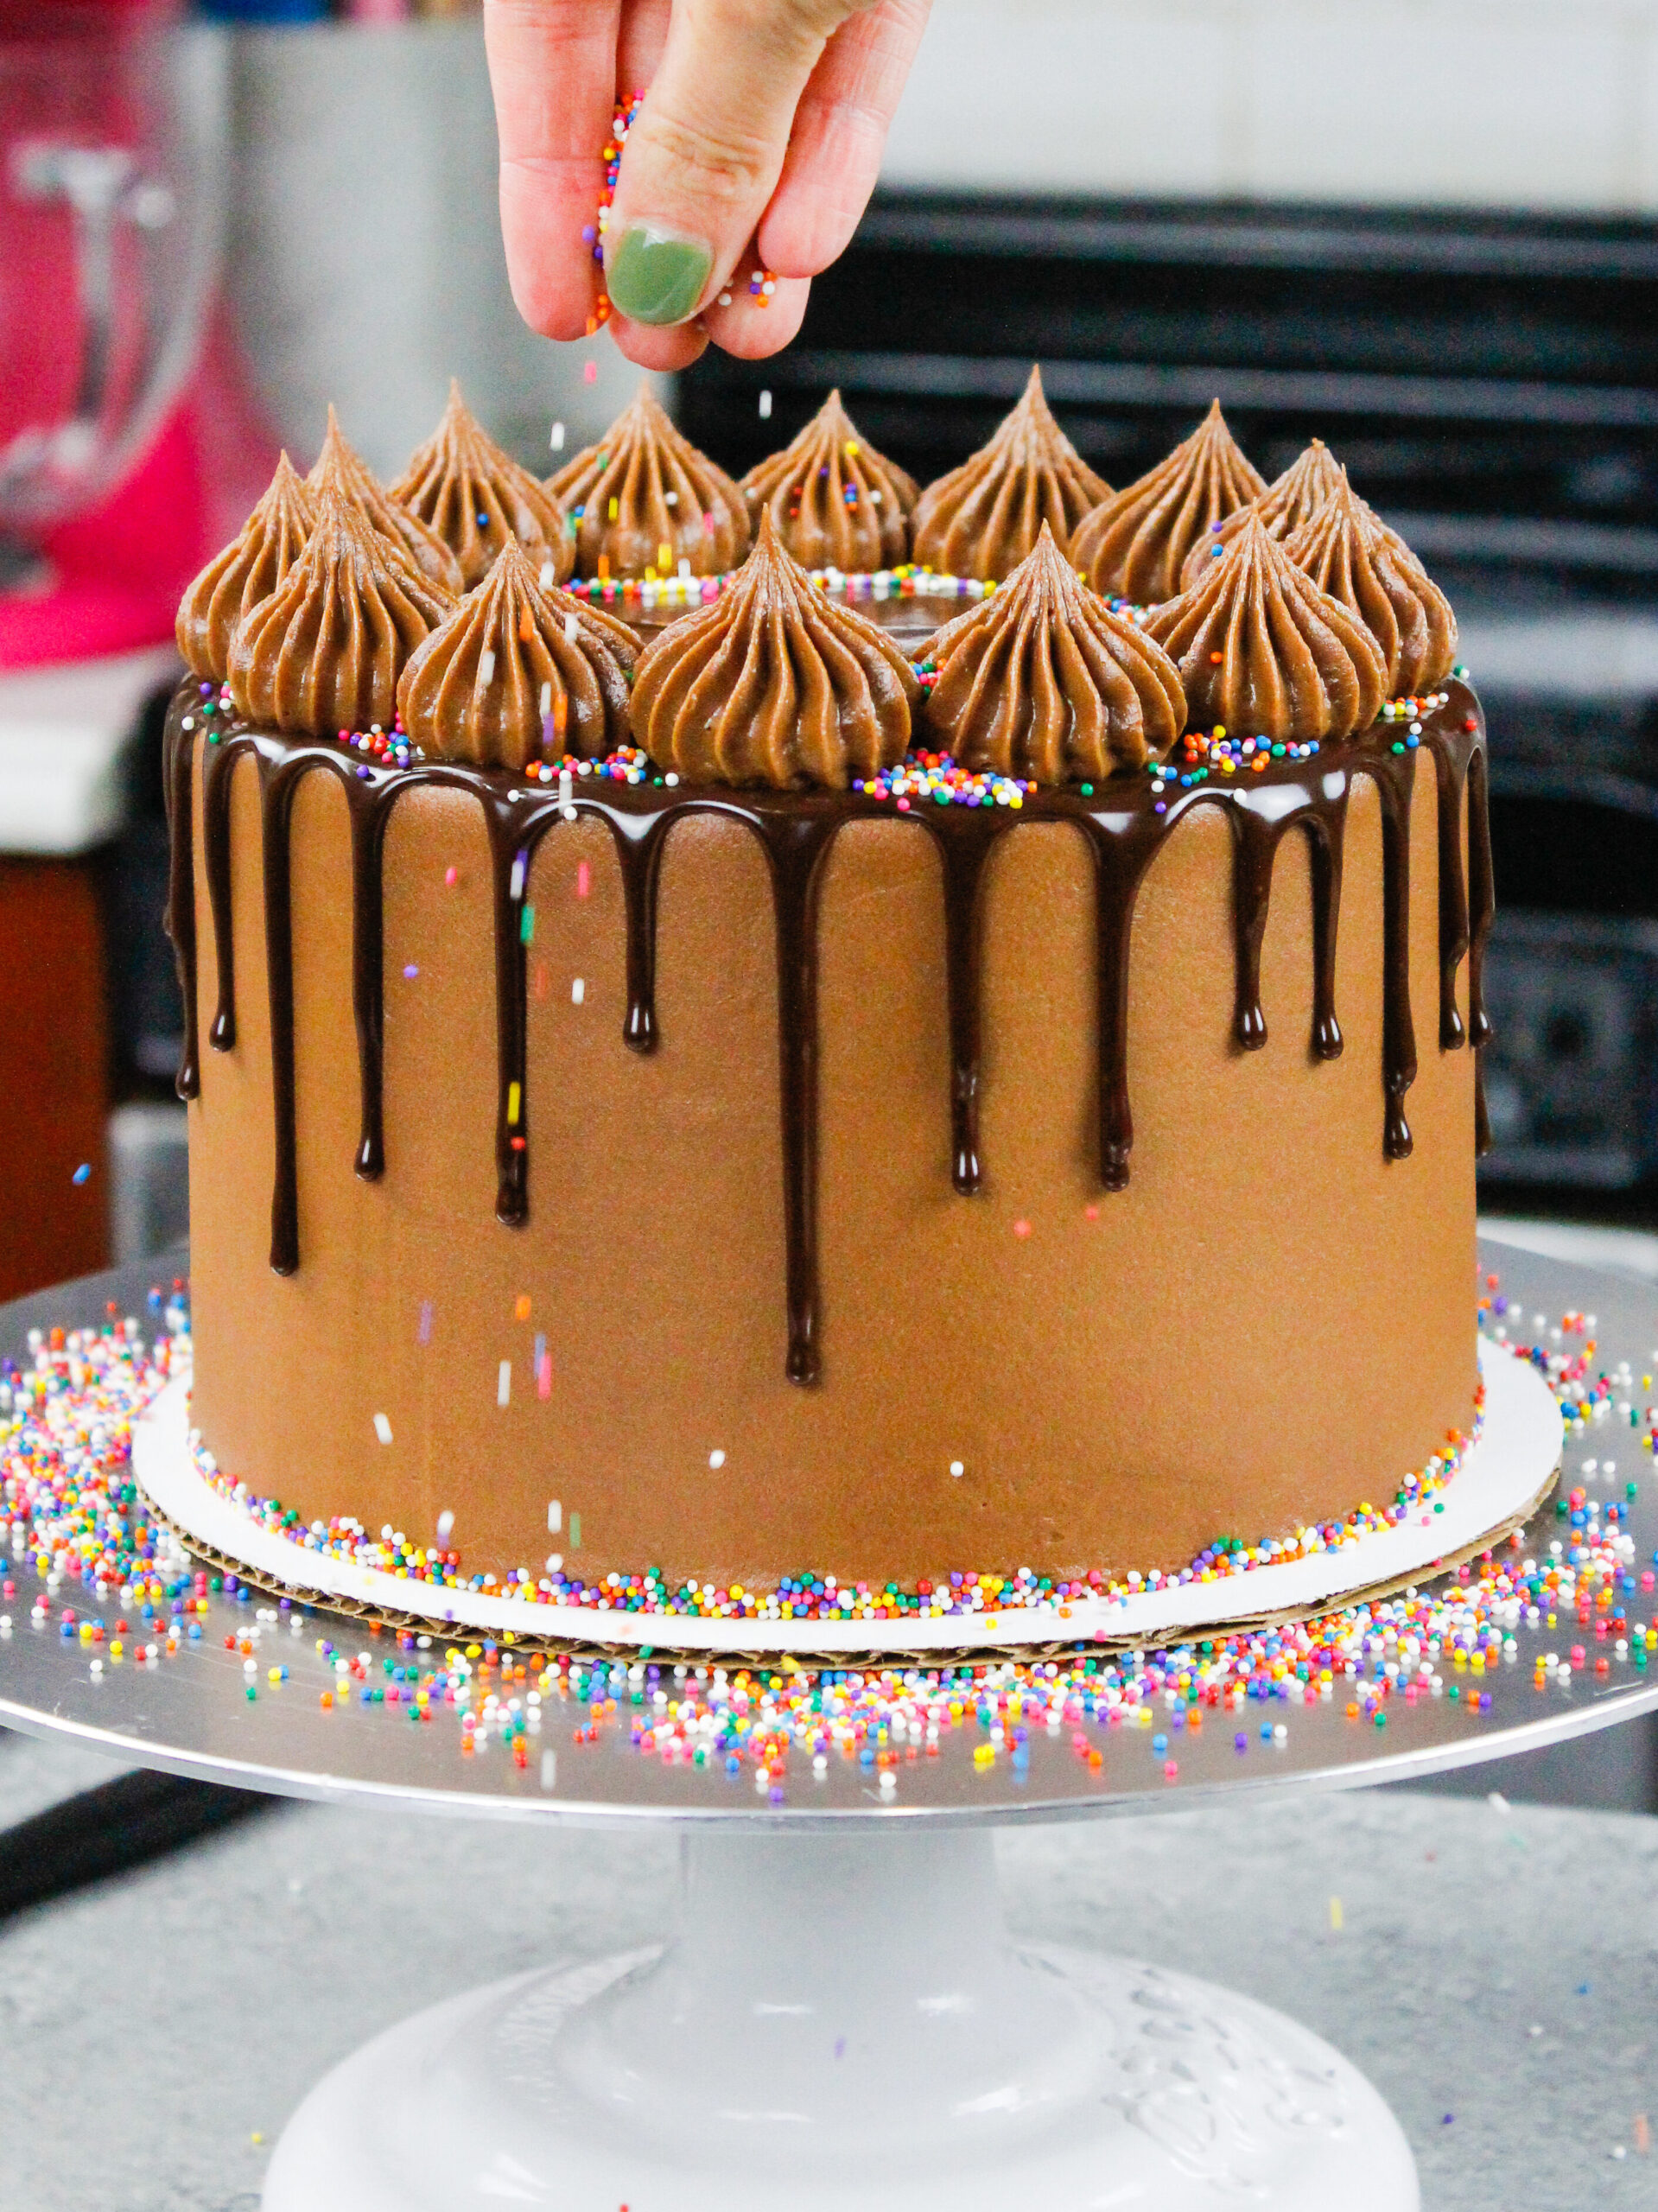
Adding colored drips to a cake is the perfect way to take your cake decorating skills to the next level! It’s such an elegant, yet playful cake design.
If you’ve never made a drip cake before, fear not! I’m going to share everything you need to know to make a colorful drip cake, and more.
What Do You Call Those Colorful Drips On Your Cake??
A lot of people ask what colorful stuff on the sides of my cake are! Some people call it drip cake icing, others call it drip cake ganache. I’ve struggled with what to call it too!
After a lot of back and forth, I’ve finally settled on calling this my colored drip recipe. But you can call it whatever you’d like 🙂
Colored Drip Video Tutorial vs. Recipe
**One thing to note!! The video for this recipe calls for 1/2 cup of heavy cream. I made it a couple years back, and used to make it with more heavy cream.
After lots of testing, I found that using 1/4 cup + 1 Tbsp of heavy cream is a more foolproof recipe, and I have updated this recipe to reflect that. Sorry for any confusion!!
The Secret To My Colored Drips: 2 Ingredients
Just because colorful drip cakes are beautiful, doesn’t mean they need to be complicated.
We’ll start by discussing the most basic part of colored drips, the ingredients they’re made with! The beauty of my recipe is that it’s made with only two ingredients.
All you need is a cup of white chocolate chips, and some heavy cream. If you have a kitchen scale you can also weigh your white chocolate chips. You will need 175g for this recipe.
I like to use mini white chocolate chips, because they melt better. However, because they’re smaller, I’m able to fit more of them in 1 cup than if I were to use regular white chocolate chips (175g vs. 160 g).
With this in mind, if you use regular white chocolate chips, you may want to slightly overfill your cup measure to account for this difference.
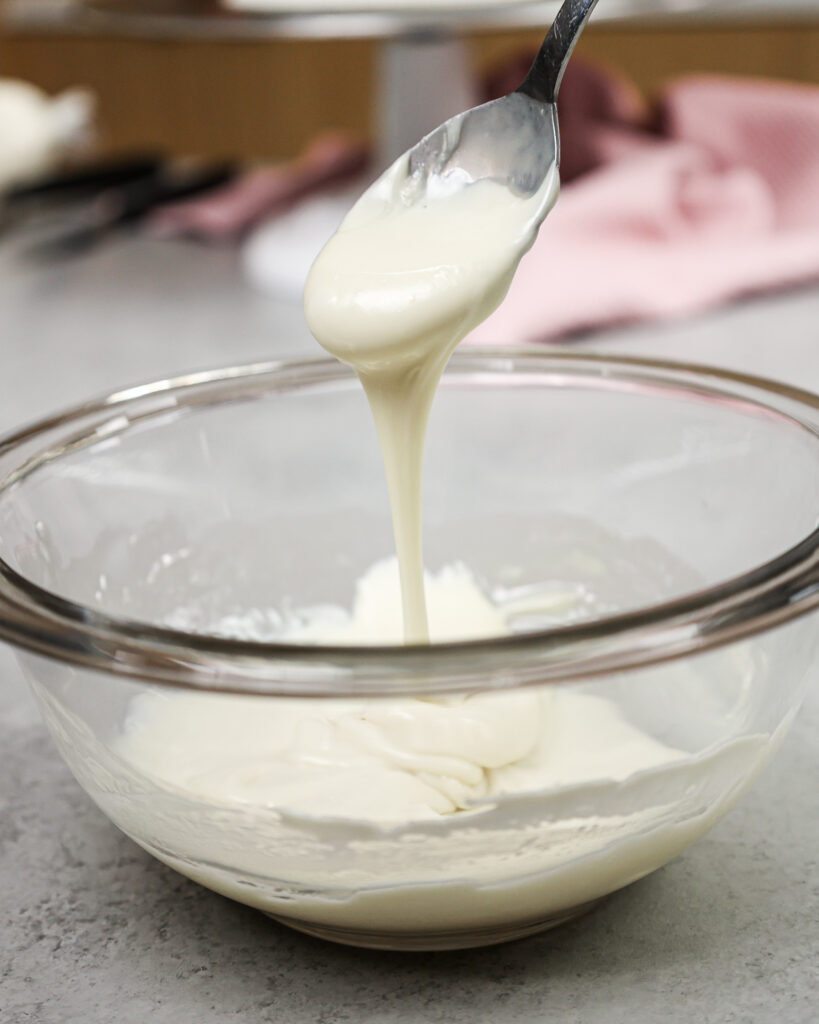
You simply heat up the cream, and pour in the white chocolate chips. Let them melt, give them a quick stir, and you have silky smooth ganache.
The ratio of white chocolate to heavy cream is super important in this recipe. By using so much white chocolate, the mixture will thicken as it cools.
This allows you to create those beautiful, perfect drips! Since this recipe uses white chocolate and cream, it is technically a white chocolate ganache.

How To Color White Chocolate Ganache
This white chocolate ganache base can be colored any shade, using food coloring. A lot of people worry that adding food coloring will cause the ganache to seize up.
While adding food coloring would cause melted white chocolate to seize (and create the chunkiest mess!!), it won’t cause the white chocolate ganache to seize.
Why, you ask?? It all comes down to the heavy cream that is incorporated into the mixture.
Heavy cream does have a ton of fat in it, but it also has water in it! By melting the chocolate into the heavy cream, you prevent any seizing from the moisture in the food coloring.
The cream will keep the mixture nice and smooth, even with the addition of food coloring.
If you want your colorful drips to be a super vibrant color, I highly recommend using gel food coloring.
A small amount of liquid food coloring can work too, but you won’t be able to get as strong of a color.
You can also throw off the consistency of the mixture if you add too much liquid food coloring.
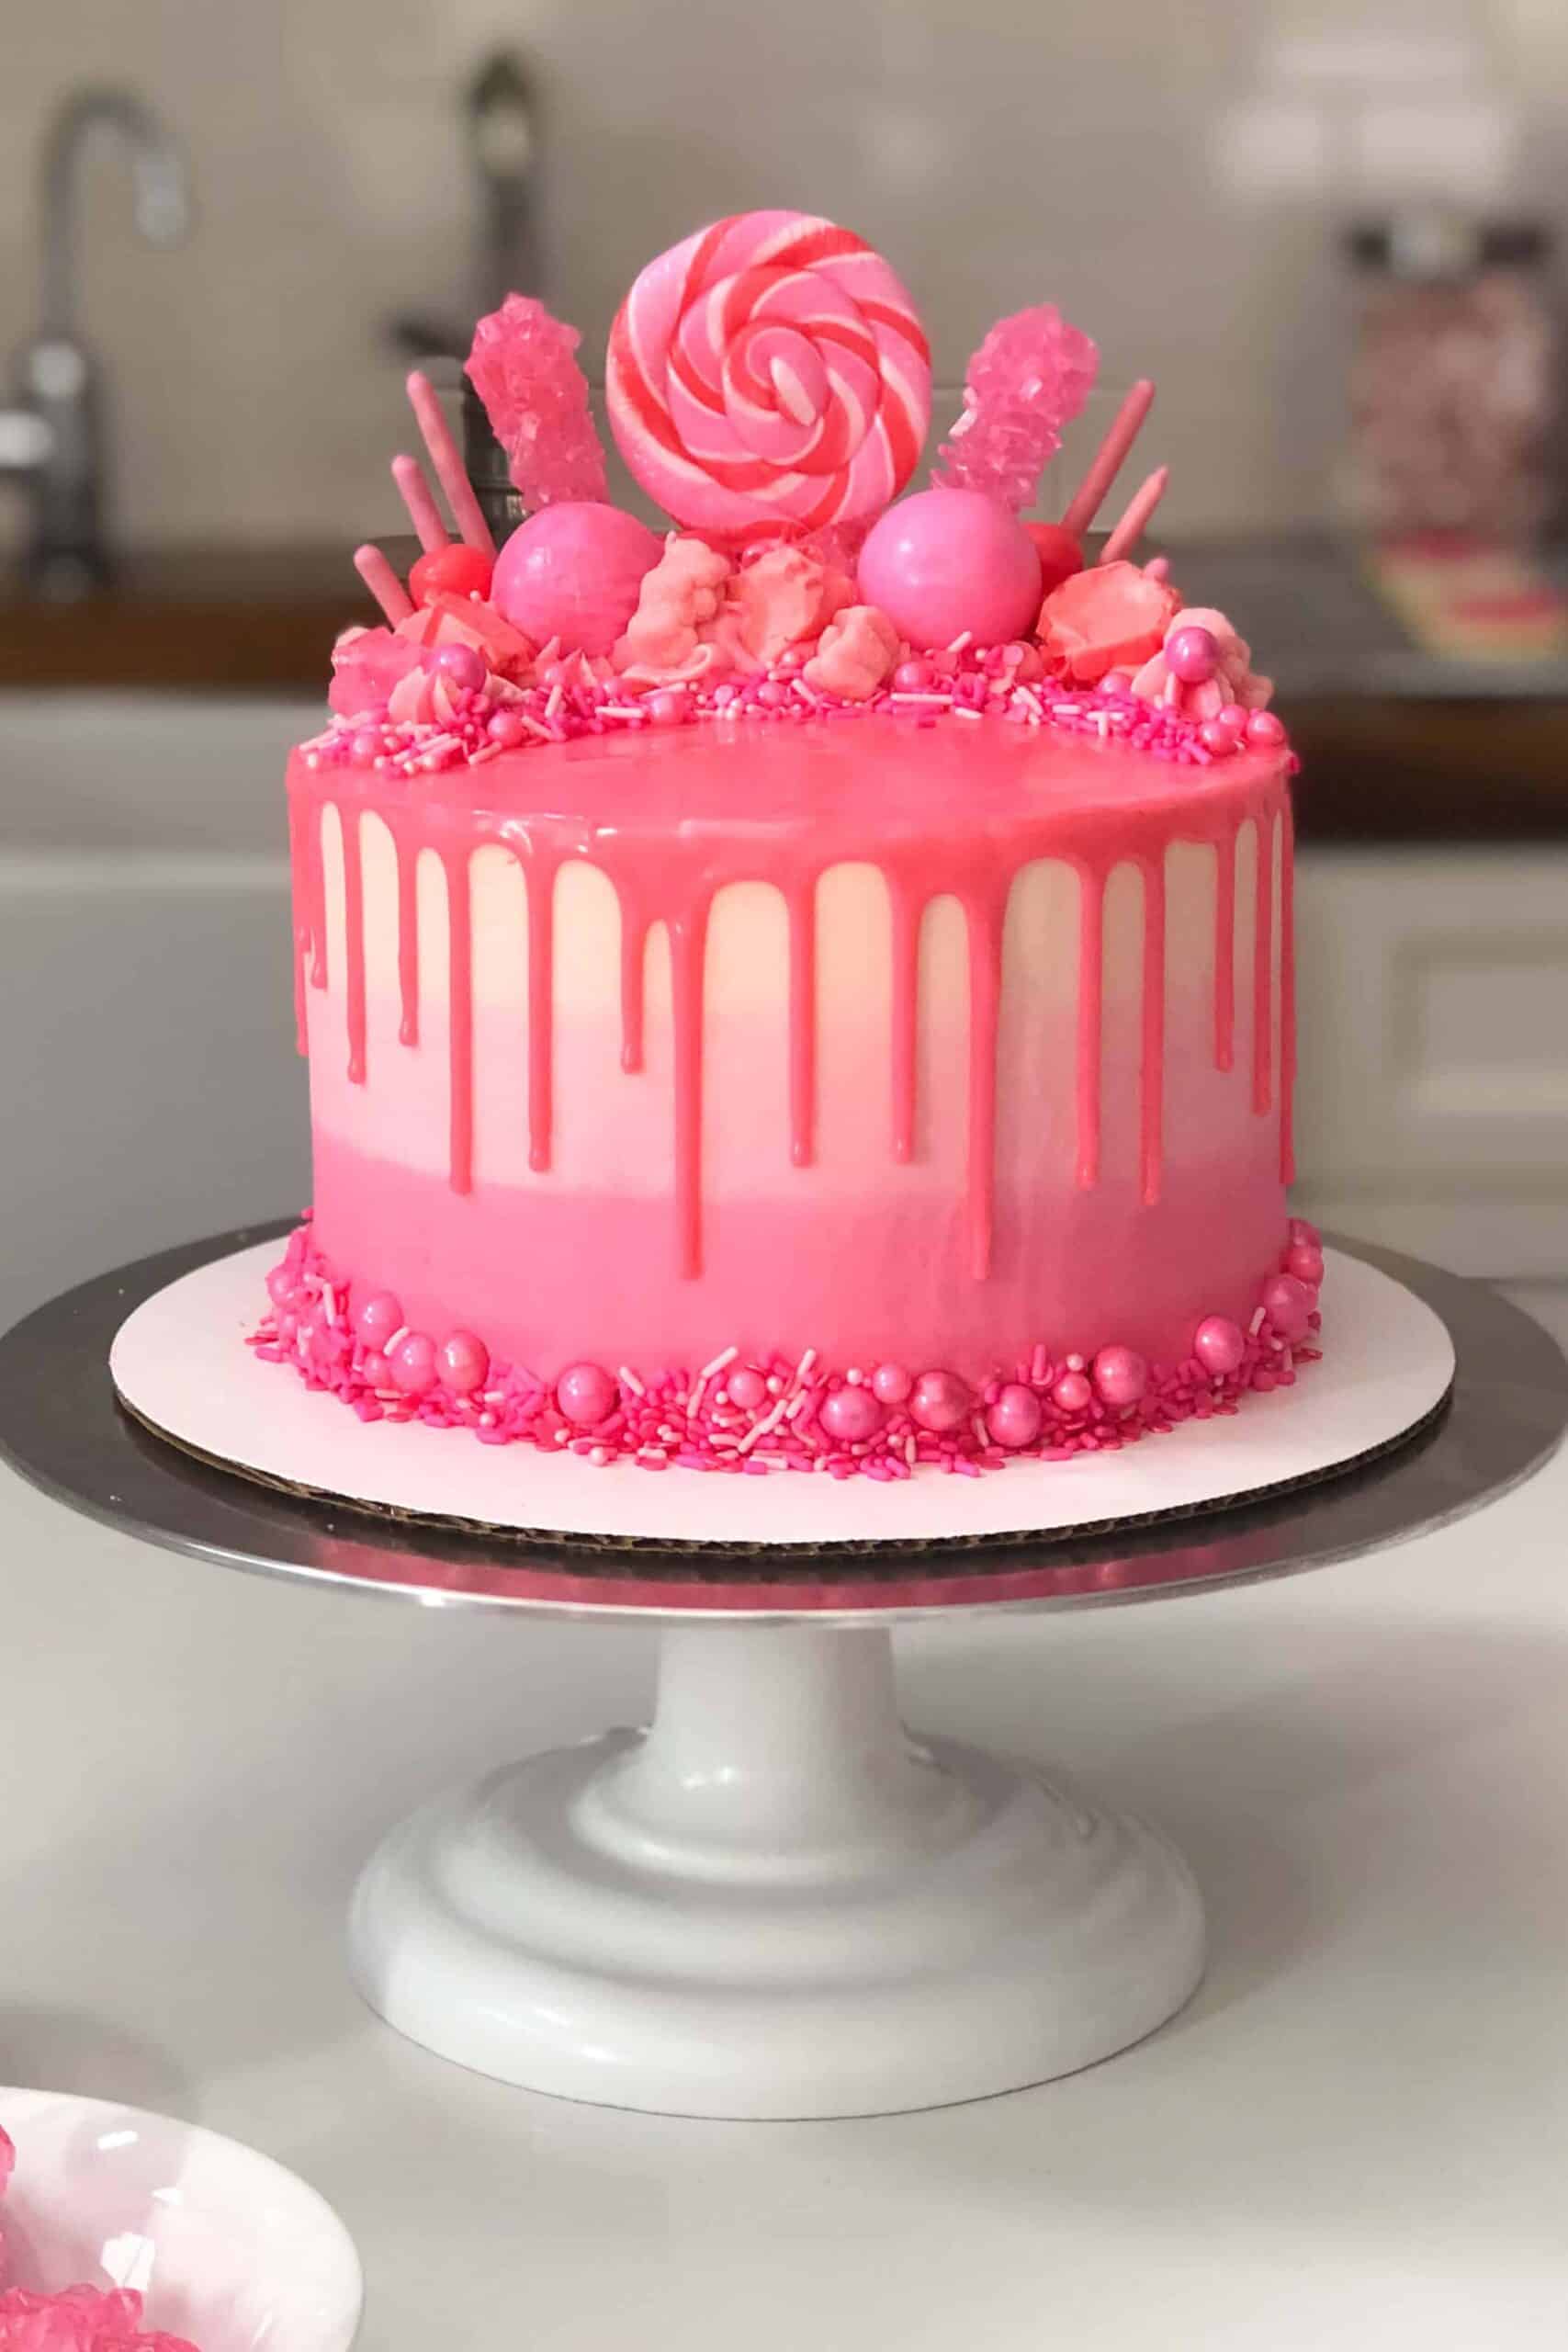
Gel food coloring is incredibly concentrated, so it allows you to use less. A tiny drop will create beautiful, bright colors like my pink drip cake!
It also is thicker, and will not change the consistency of the white chocolate ganache. My favorite brand of gel food coloring is Americolor, but any brand will work.
How To Make The Perfect Colored Drip Cake
Drip cakes don’t have to be scary, but there are a few things to keep in mind to make sure you get that perfect drip look! The most common issues people run into when making drip cakes include:
- Runaway drips – drips that run all the way down the cake and right off the cake board
- Watery, thin drips, that looks more like colorful streaks than drips
- Ganache that seems to melt the buttercream
- Short, stubby drips that resemble candle wax
Most of these problems are caused by adding the ganache to a cake when it isn’t the right temperature.
You can also have issues if the cake hasn’t been properly chilled. If you follow my tips below, I promise you can avoid all of these issues!!
Step #1 : Chill Your Cake
My first tip is to make sure your cake is properly chilled. Once frosted, you should allow it sit in your fridge for at least 20 minutes, or in your freezer for 10 minutes. This makes sure the frosting is cold and firm to the touch.
Chilling the cake helps the buttercream keep its shape, and stand up to the slightly warmed ganache.
It will also help slow down the speed at which the drips run down the cake, which will help them from running all the way down the cake.
Step #2 : Temperature Of Your Ganache
The second tip is to make sure your ganache is the right temperature!! It should be just slightly warmer than room temperature.
When I say that, I mean it should be barely warm to the touch.
If your ganache is too warm, it will be thinner than you want, and will run straight down the cake and pool at the bottom of your cake board.
On the other hand, if it’s not warm enough, you will end up with short, stubby little drips. Neither of these will create those beautiful, long drips.
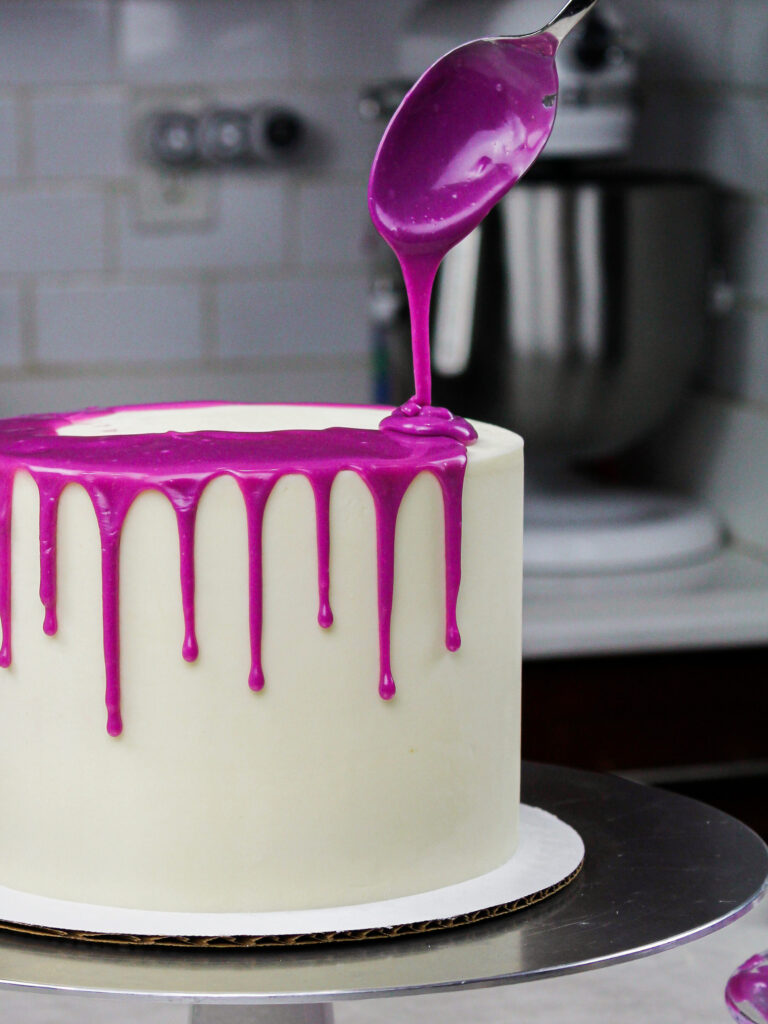
Step #3: The Test Drip
The best way to ensure your ganache is the right temperature is to do a test drip. THIS IS SUCH A CRUCIAL STEP!!! Make one drip on the side of your cake, and let it flow. Allow it to slowly run down the side of the cake for a couple minutes.
If it’s the length and look you’re after, then go ahead and add drips to the rest of the cake. If not, adjust as needed.
Either pop the ganache into the fridge for a couple minutes to allow it to cool off a bit more, or pop the bottle (or bowl) in the microwave and heat for 5-10 seconds.
Then test out one more drip, just to be safe! While these extra steps may lengthen the process, it’s worth it to make sure your drips are perfect.
When you spend hours making a cake from scratch, it’s worth taking the extra 10 minutes to ensure your ganache drips will turn out beautifully 🙂
If you’re more of a visual learner, here is a video tutorial showing how to add drips to a cakes.
Techniques For Adding Drips To The Cake
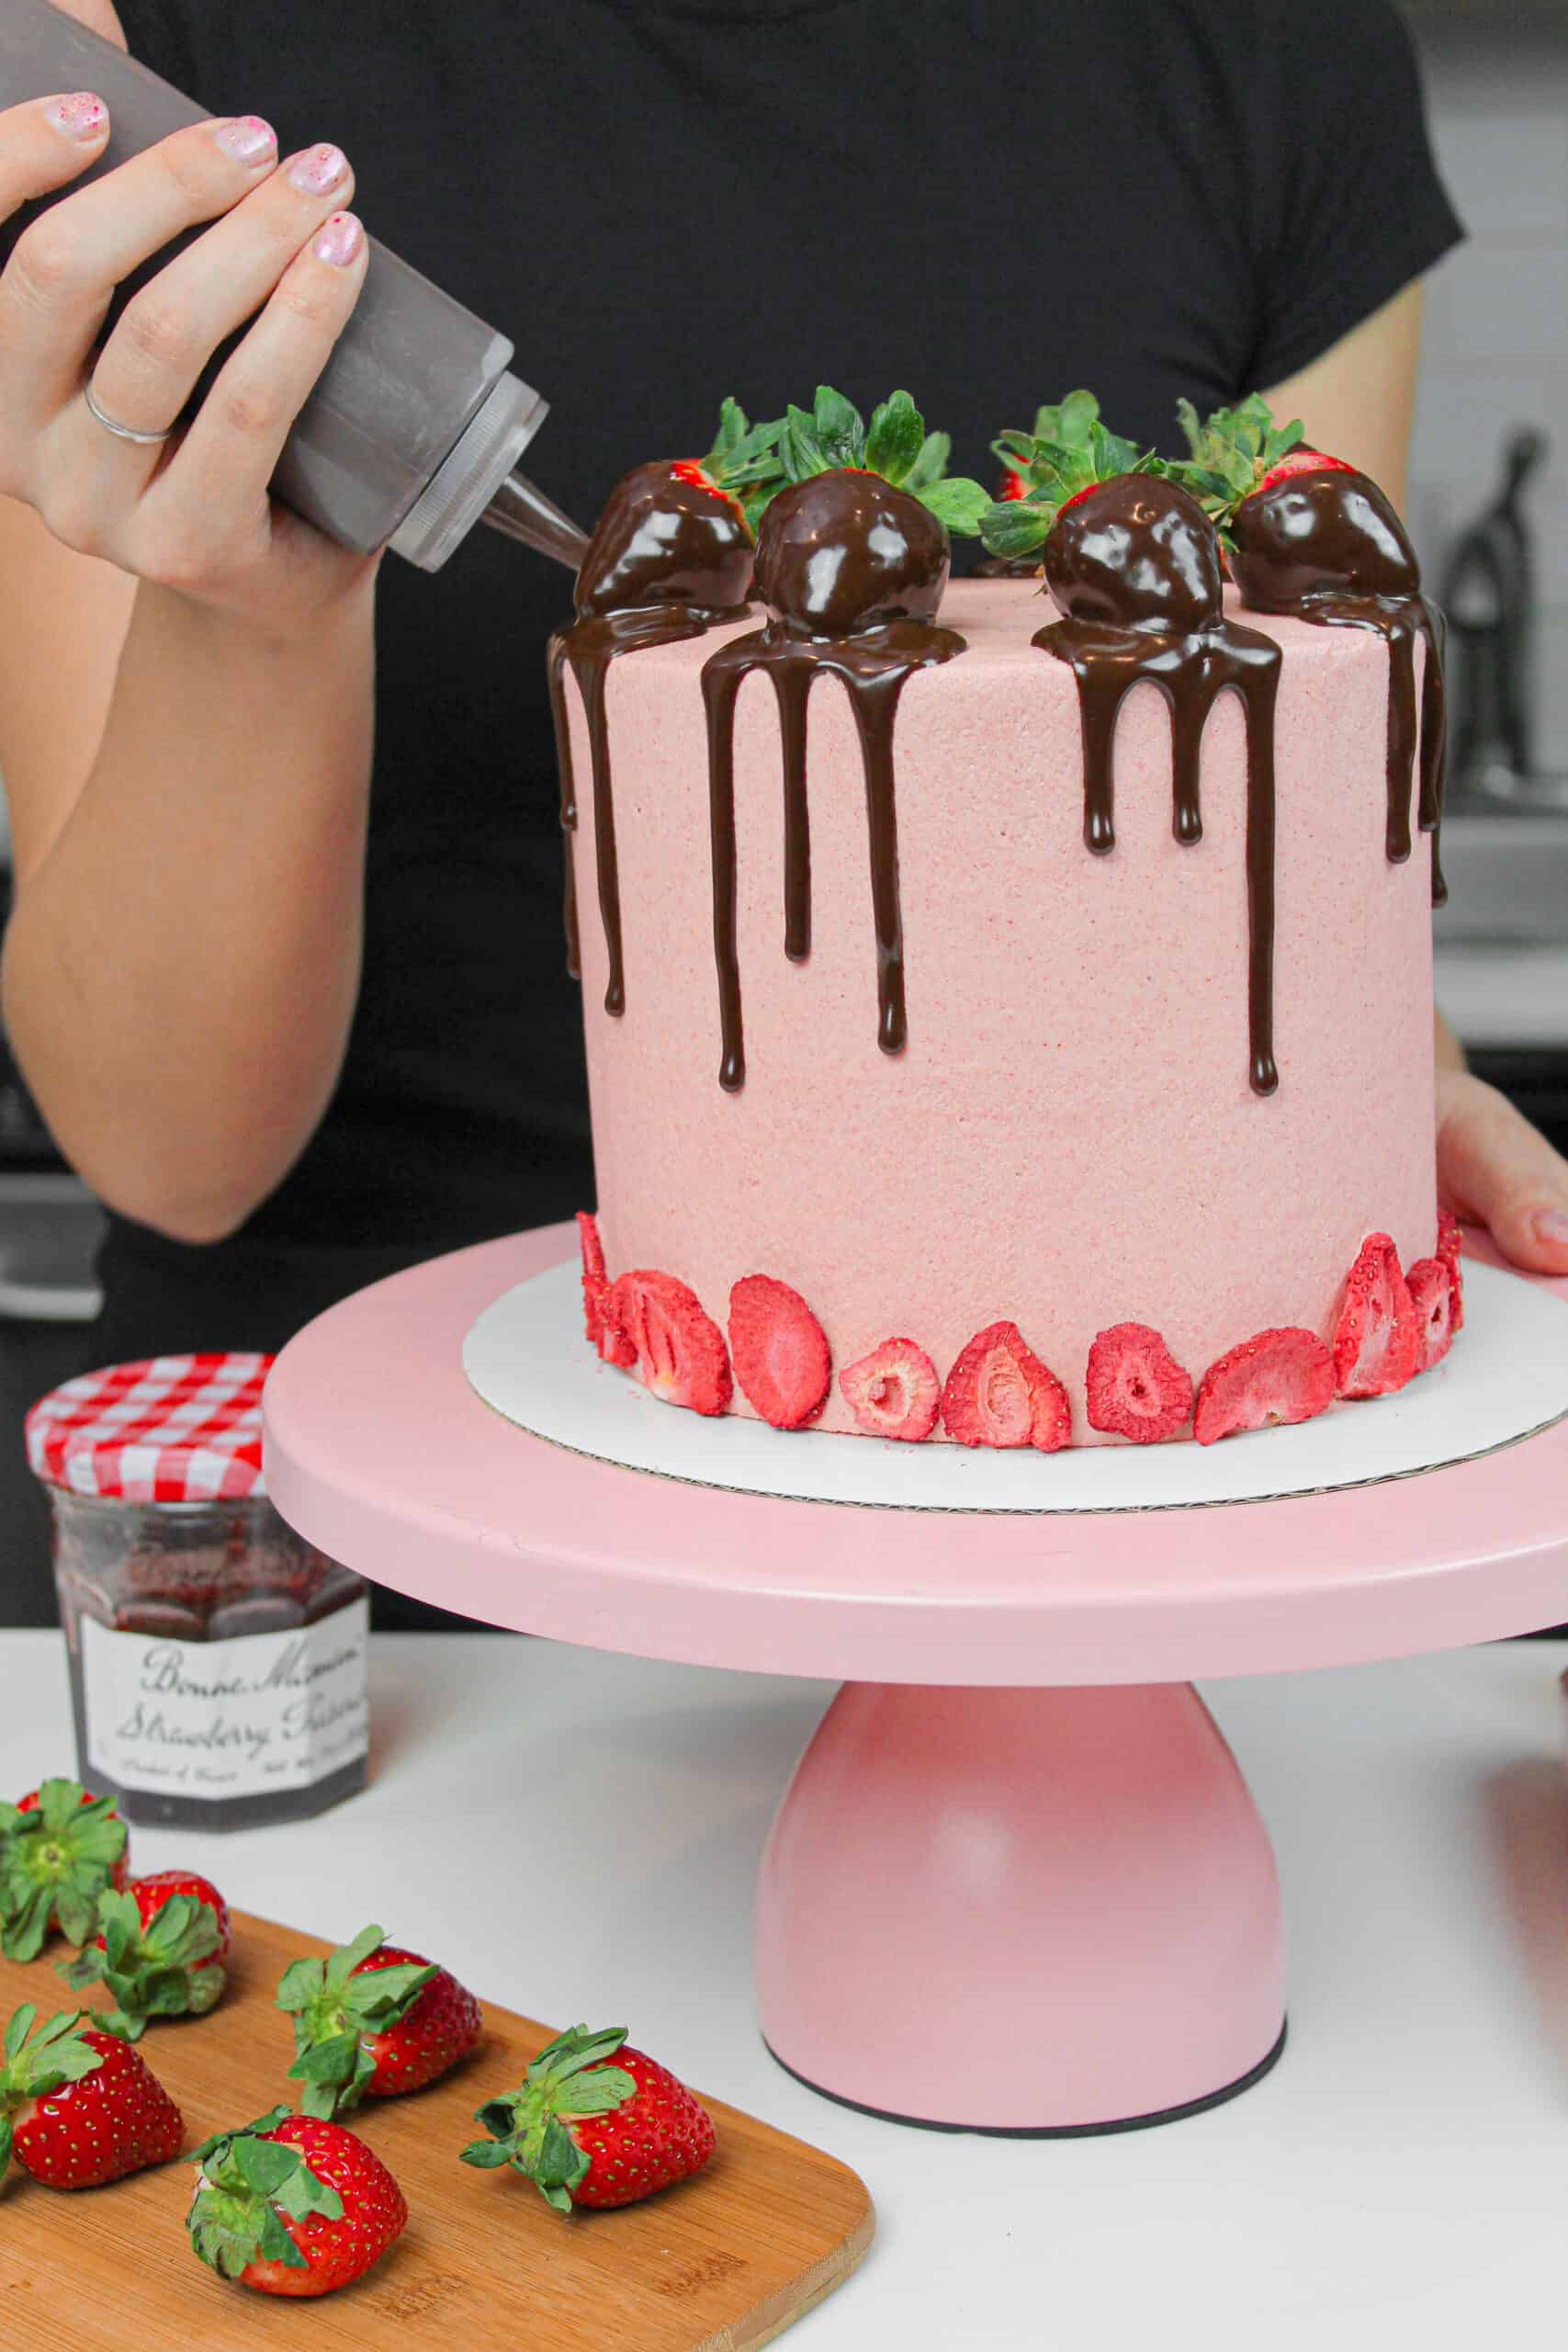
There are two ways to easily add colored drips to a cake. One way is to use plastic bottles.
I prefer this method, since it makes the process so much easier. The ganache is contained in your hand, and can also easily be heated or chilled.

If you don’t have any plastic bottles on hand, you can also use a spoon or an offset spatula to carefully push the ganache over the edge of your cakes, creating each drip.
I used this method to make the pink ganache drips on my circus animal cake.
Whenever I use a spoon, I feel like I’m going to dribble ganache all over my counter, or on the cake where I don’t want it.
I actually prefer the way drips look when they’re added to a cake using the spoon method, but I rarely do it because it’s harder to film!
Additional Tips For Colorful Drip Cakes
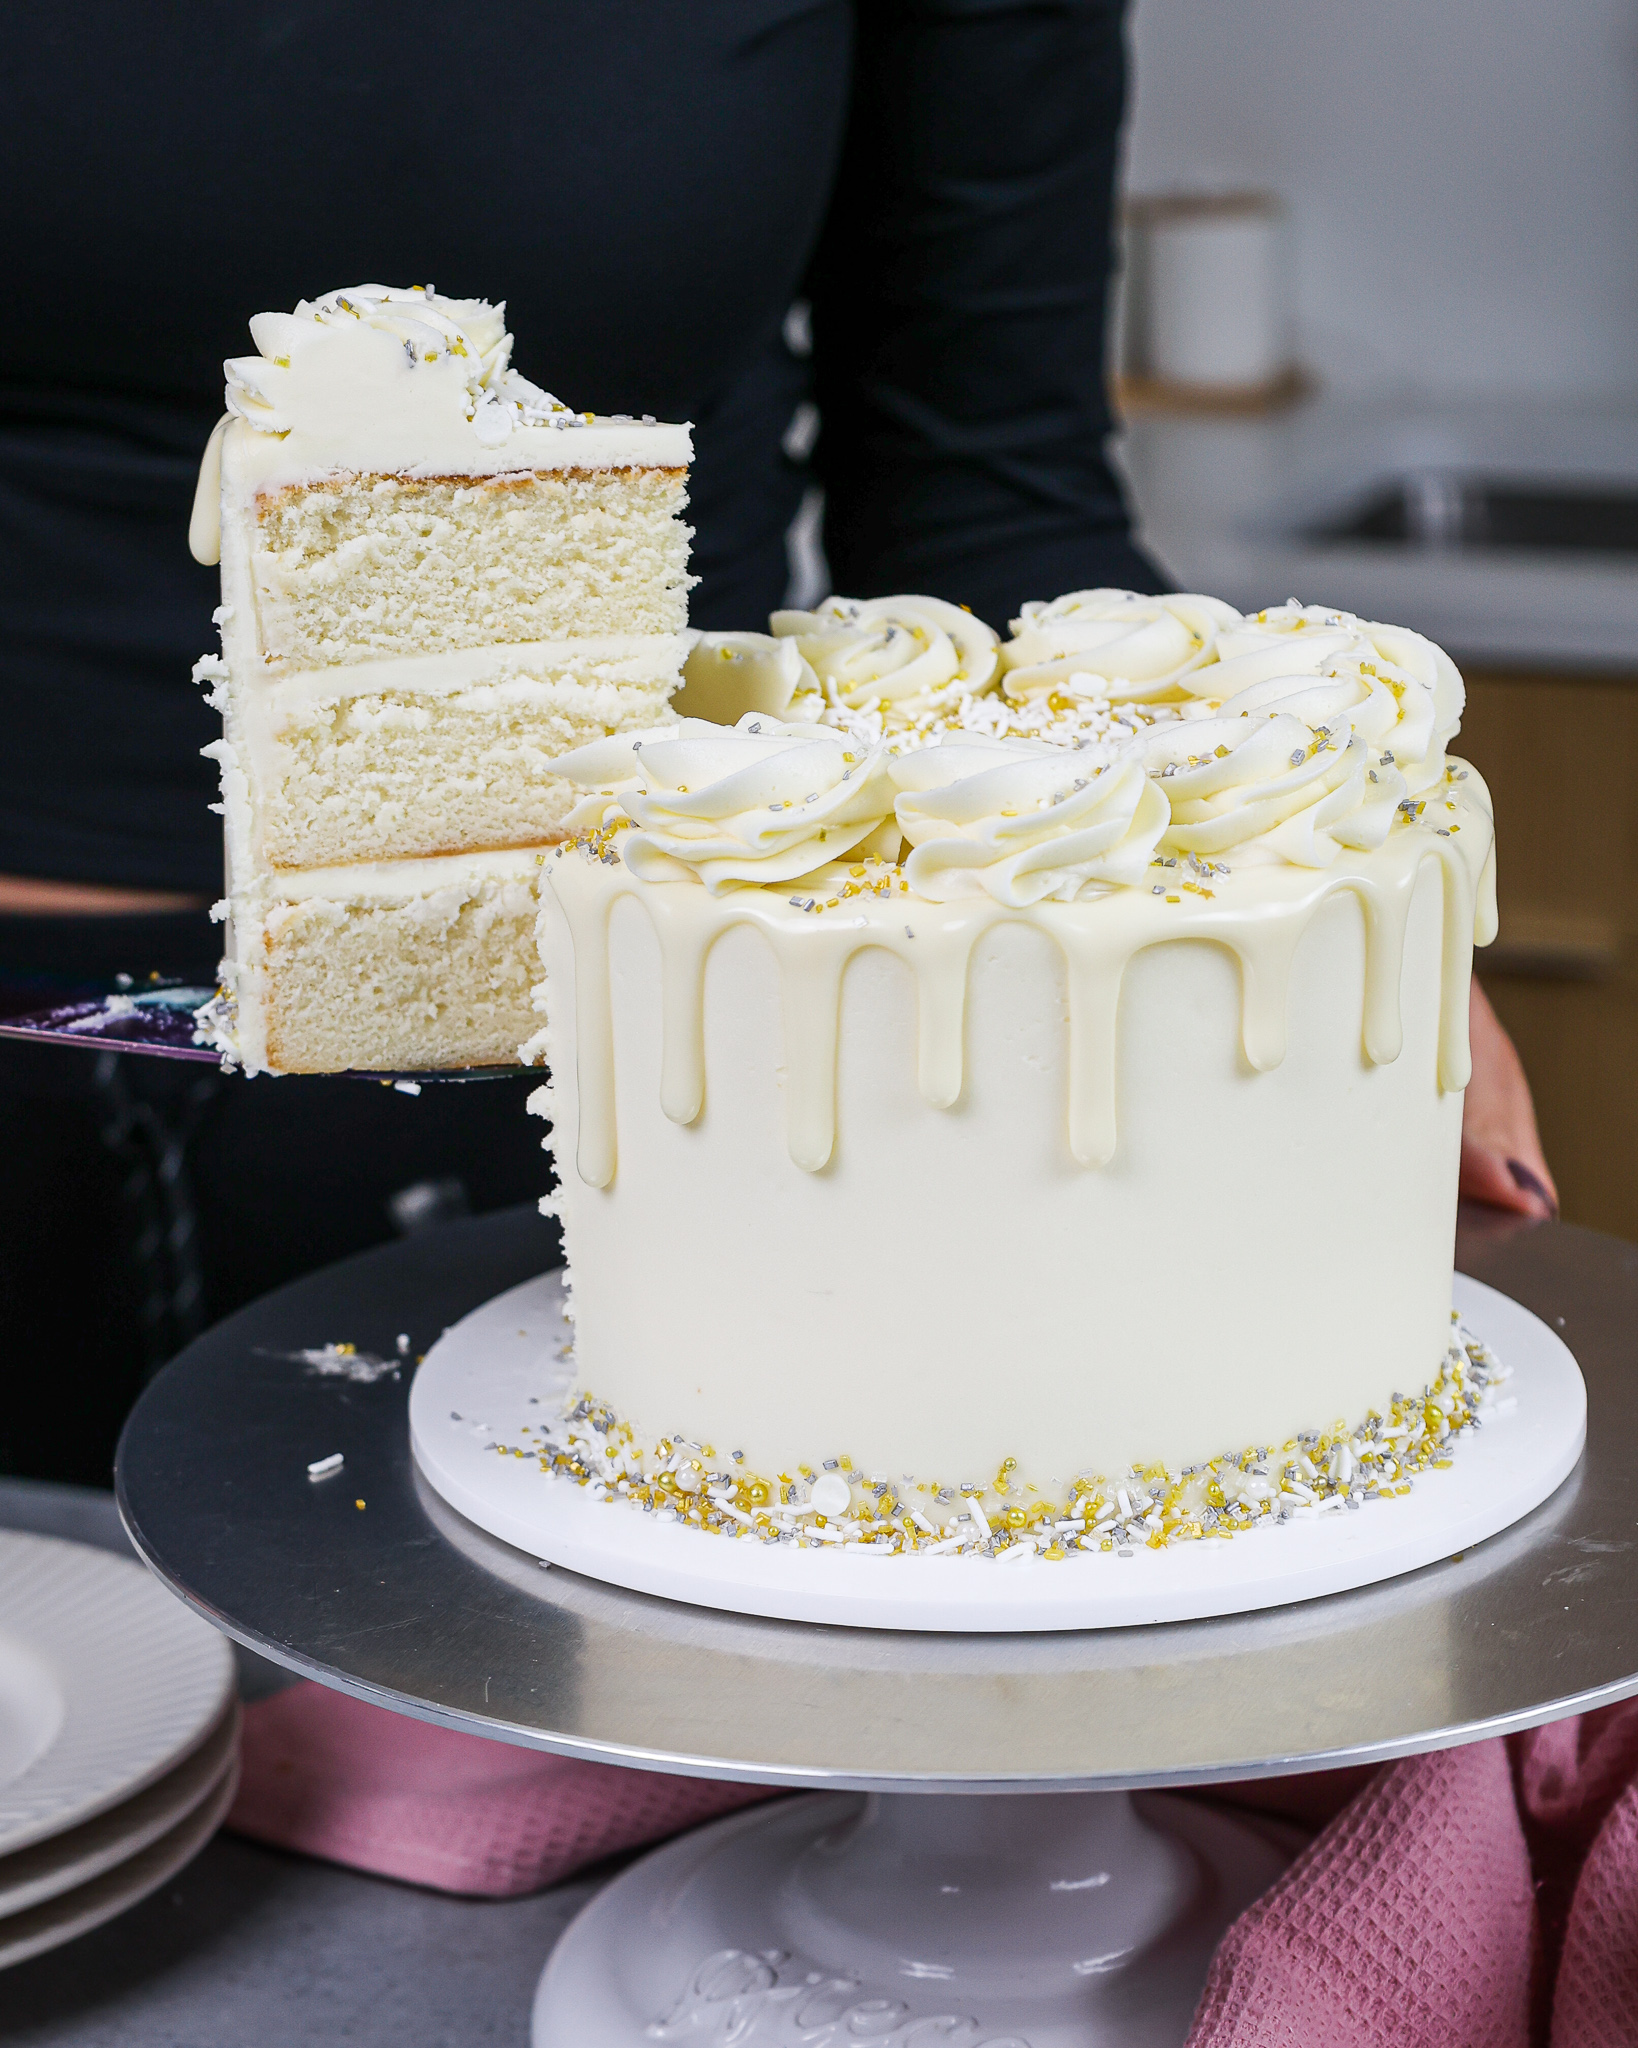
- Use this drip recipe on any type of buttercream cake, as long as it’s chilled
- Don’t use this colored drip recipe on fondant – it can do weird things to the fondant, and create a goopy mess
- For the white chocolate, I love using the Whole Foods mini white chocolate chips, because they melt so easily!
- You can also use normal white chocolate chips, white chocolate wafers, or even a chopped up white chocolate bar, but please see the note at the bottom of the recipe if you don’t use mini white chocolate chips
- The ratio of heavy cream is different if you use white candy melts. Candy melts cannot be swapped for the white chocolate in this recipe! They are not interchangeable
- Be sure you use heavy cream or heavy whipping cream! You need the high fat content to create the right consistency in this recipe. Milk cannot be used in place of the cream.
Making This Colored Drip Recipe in Advance & Storage Tips
- Make this colored drip recipe ahead of time or save leftovers! Once it’s made, wrap the bowl with plastic wrap or cover the top of the plastic bottle and store in the fridge for up to 3 weeks.
- To use chilled ganache, heat the bottle or bowl in to the microwave for 10 second intervals until it reaches the right consistency
- Use leftover ganache to top cupcakes, cookies, or even ice cream!
Let Me Know What You Think!
If you try this colored drip recipe, I’d love to hear what you think of it! Please leave a rating, and let me know your thoughts by sharing a comment 🙂
Also be sure to tag me @chelsweets and use the hashtag #chelsweets, so I can see your beautiful creations on social media!
Other Recipes You Might Like:
Colored Drip Recipe

This colorful drip recipe is perfect for any drip cake! It's made using only two ingredients, and comes together in less than five minutes! It can be made in any color, using gel food coloring.
Ingredients
Instructions
- Heat 1/4 cup + 1 Tbsp heavy cream in a heat proof bowl in the microwave for 45 seconds, until it's just beginning to bubble.
- Gently pour 1 cup of white chocolate chips into the heavy cream. Make sure they are fully covered with cream. Allow the mixture to sit for 1 -2 minutes.
- Stir until the cream and white chocolate are combined and the mixture is smooth.
- If some bits of chocolate aren't fully melted, heat the mixture again for 20 seconds, and stir.
- Repeat as necessary until all the chocolate bits are fully melted and incorporated.
- Mix in gel food coloring, if desired. Let the mixture cool until the desired viscosity is reached (barely warm to the touch).
- If it seems too thin or thick, you can add a touch more chocolate chips or heavy cream! The type of cream and white chocolate that you use can affect the consistency, so feel free to adjust as needed.
Notes
This recipe makes about 1 cup of ganache, which is plenty to add drips around an 8-inch layer cake.
I like to use mini white chocolate chips, because they melt better. However, because they're smaller, I'm able to fit more of them in 1 cup than if I were to use regular white chocolate chips (170g vs. 160 g).
With this in mind, if you use regular white chocolate chips, you may want to slightly overfill your cup measure to account for this difference or use a kitchen scale to weigh your white chocolate chips.
If you can’t find heavy cream at your grocery store, heavy whipping cream will work too.
Extra ganache can be covered with plastic wrap or kept in an airtight container for up to 3 weeks!
Nutrition Information
Yield
1Serving Size
1Amount Per Serving Calories 1173Total Fat 82gSaturated Fat 51gTrans Fat 1gUnsaturated Fat 25gCholesterol 124mgSodium 172mgCarbohydrates 102gFiber 0gSugar 101gProtein 12g
Yes You Can Use Chocolate Syrup For Drip Cake! – Little Upside Down Cake
Tuesday 15th of November 2022
[…] What are some of the best ways to make drip cakes? To make my drip recipe, I use white chocolate ganache and heavy cream, as well as white chocolate and gel food coloring. All you need to do is heat your heavy cream until it is steaming before pouring it over white chocolate in these colorful ganache drips. […]
Linda
Monday 14th of November 2022
Can I use powered raspberry to color this drip recipe?
Chelsweets
Saturday 19th of November 2022
Hi Linda,
You can use freeze-dried raspberry powder to color this recipe recipe, but you might need to a add a tiny bit more heavy cream because it will make the mixture slightly thicker. It also won't color the drip totally pink, it will be more of a speckled pink color. Hope that helps, happy baking!
Ashley
Tuesday 4th of October 2022
What color did you use for the purple-pink colored drip? That’s absolutely perfect for the My Little Pony cake I’m planning on making but I’m not sure which color to search for.
Chelsweets
Tuesday 4th of October 2022
Hi Ashley,
I used Americolor's neon/electric purple! It creates a really nice, warm purple color when combined with white chocolate. Happy baking!!
Amanda
Saturday 1st of October 2022
Will this drip work with Italian meringue buttercream?
Chelsweets
Tuesday 4th of October 2022
Hi Amanda,
It will as long as the cake is thoroughly chilled and the frosting is firm to the touch :) Happy baking!
Jewelz
Saturday 17th of September 2022
Hi Chelsea! How much gel food coloring should I use? Do you have the buttercream frosting recipe? TIA Jewelz
Chelsweets
Tuesday 20th of September 2022
Hi Jewelz,
It all depends on how bright of a color you want! I usually add a squirt or two, depending on how light or dark I want the color to be. I have a few recipes for different types of buttercream frosting, but my personal favorite and most popular is my American buttercream frosting. Here's the recipe: https://chelsweets.com/the-best-american-buttercream-recipe/
Hope that helps, happy baking!