
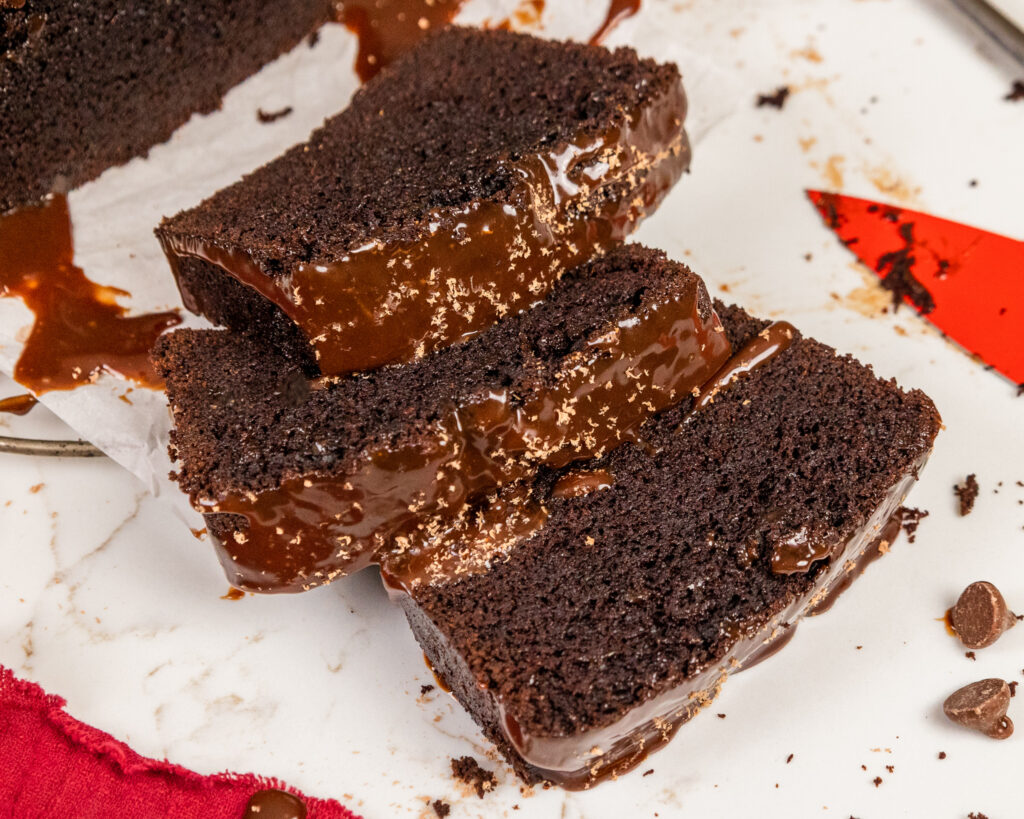
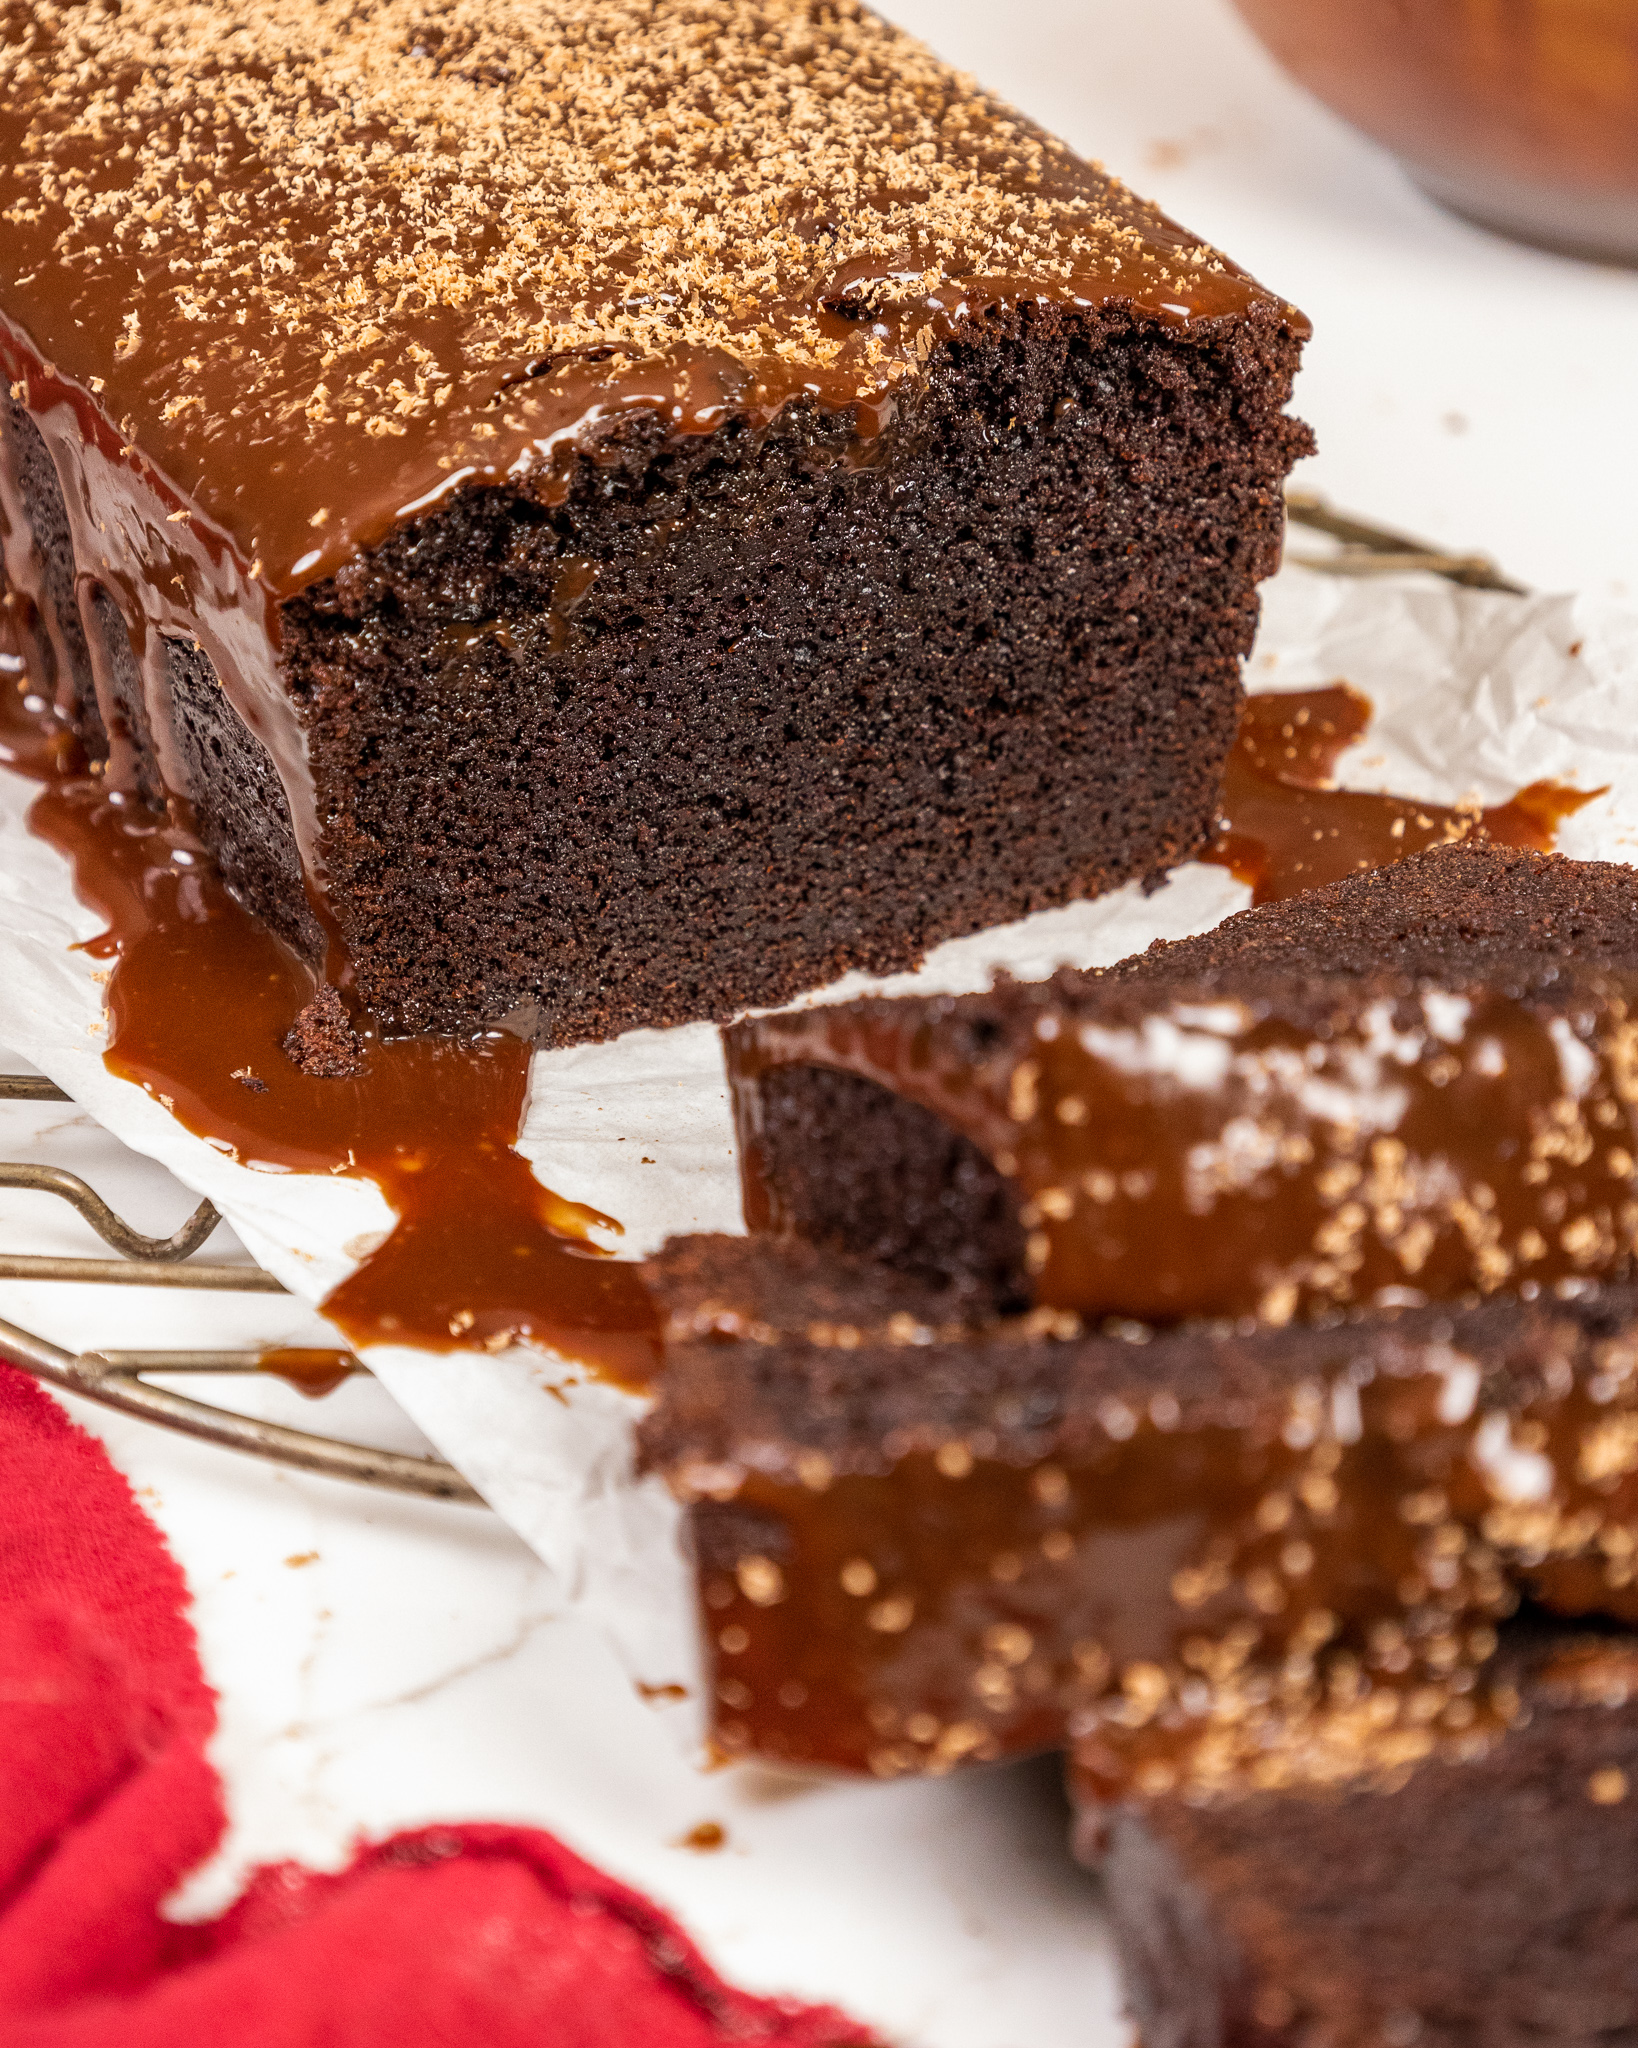
I had so much fun making my German chocolate Bundt cake that it inspired me to make this chocolate sour cream pound cake.
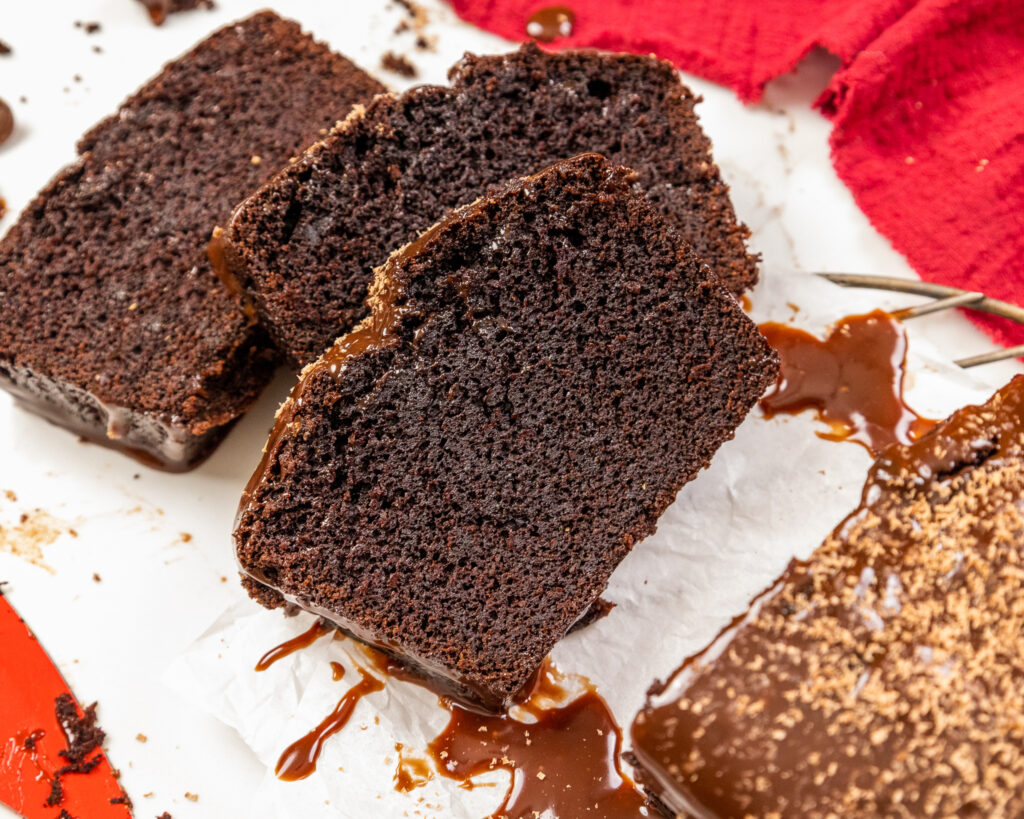
I love this recipe because it can be made by hand (seriously, all you need is a whisk!), bakes up super moist, and is topped with the most delicious chocolate glaze.
The texture is slightly lighter than a traditional pound cake. This is thanks to the sour cream in this recipe, but that’s also what makes it so amazingly tender!

What Type of Pan Should I Use?
Picking the right pan for this recipe can make all the different in how this cake bakes up.
I like to use two loaf pans like these. However, this recipe can also be made in a Bundt cake pan!
If you want to use a loaf pan, I recommend splitting one batch of batter between 2 loaf pans. Bake them for 45-55 minutes.
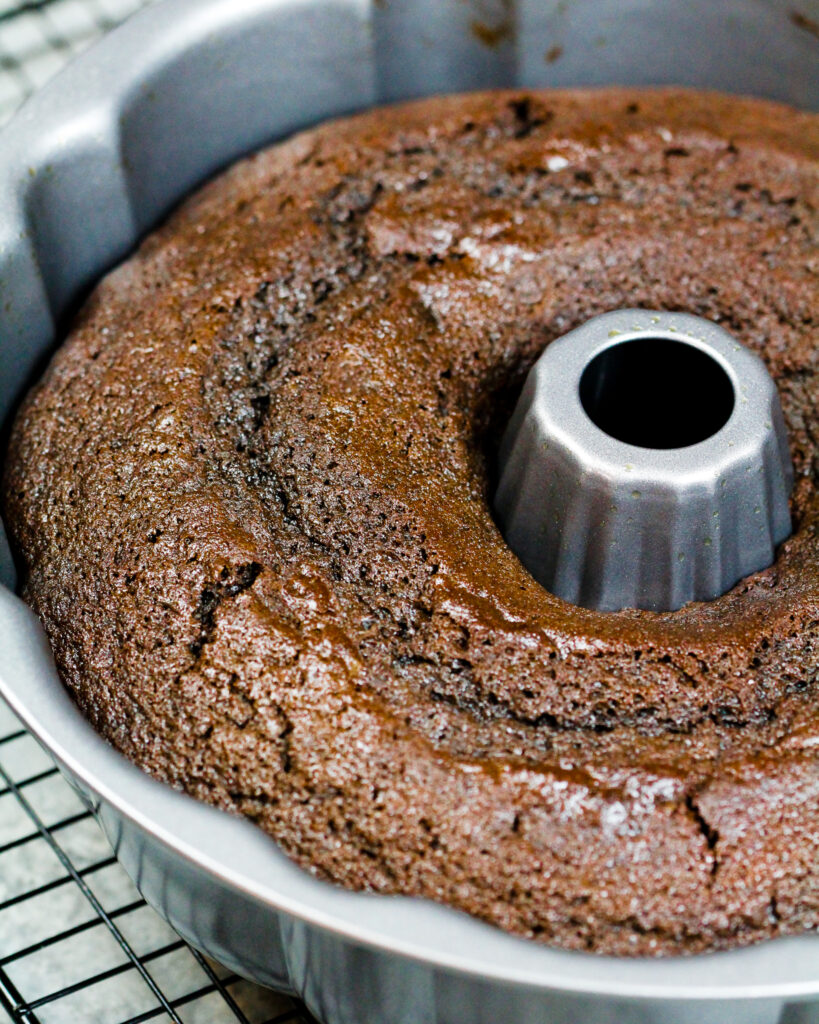
If you bake this recipe in a Bundt pan, bake for 50-65 minutes or until a toothpick inserted into the center of the cake comes out with a few moist crumbs.
Just about any Bundt pan should work, as long as it has a capacity of at least 8 cups. Any large Bundt pan should be able to hold this much batter.
Bake time can vary a lot based on the shape of the pan you use, the type of metal the pan is made from, and how accurately your oven bakes.
Keep an eye on the cake and check on it every 5 minutes after it’s been in the oven for 45 minutes. I also recommend rotating the pan halfway through to help this pound cake bake evenly.

How to Properly Grease Your Pan
We’re not going to all the trouble of making a chocolate sour cream pound cake from scratch to have to it stick to the pan.
To save yourself a headache down the road, be sure to properly prepare your pan!
There are two common ways to do this, and I’ve found that both work well.
Option #1: Butter and Flour
If you prefer the butter / flour method, use a pastry brush (or your fingers) to spread softened butter into every nook and cranny of your Bundt pan.
Once it’s fully coated, add in a couple tablespoons of all-purpose flour, and shake the pan around to cover the butter with a thin layer of flour.
Pour out any excess or leftover flour, and your pan is ready to go!
One extra step you can take to ensure the butter coating stays in place is to pop you prepared pan into the fridge while you make the batter!
It sounds crazy but it helps the butter stay in place as the pan is filled, which ensures a clean release once the cake is baked.
Option #2: Spray with Non-Stick Baking Spray
The second option is to spray your pan thoroughly with a non-stick baking spray.
You can also use non-stick cooking spray, but non-stick baking spray works best. It contains flour, which is why it has a whitish color when sprayed.
In my experience, baking spray works just as well as buttering and flouring the pan.
I prefer spraying because it’s a bit quicker, but you can prepare your pan however you prefer.
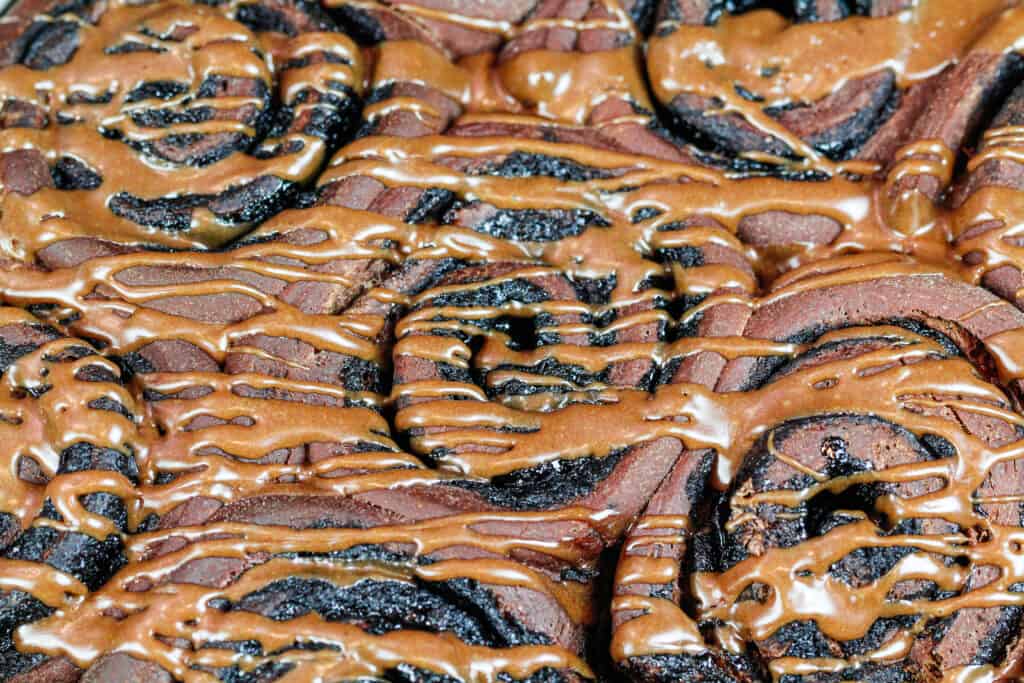
Topping This Chocolate Pound Cake
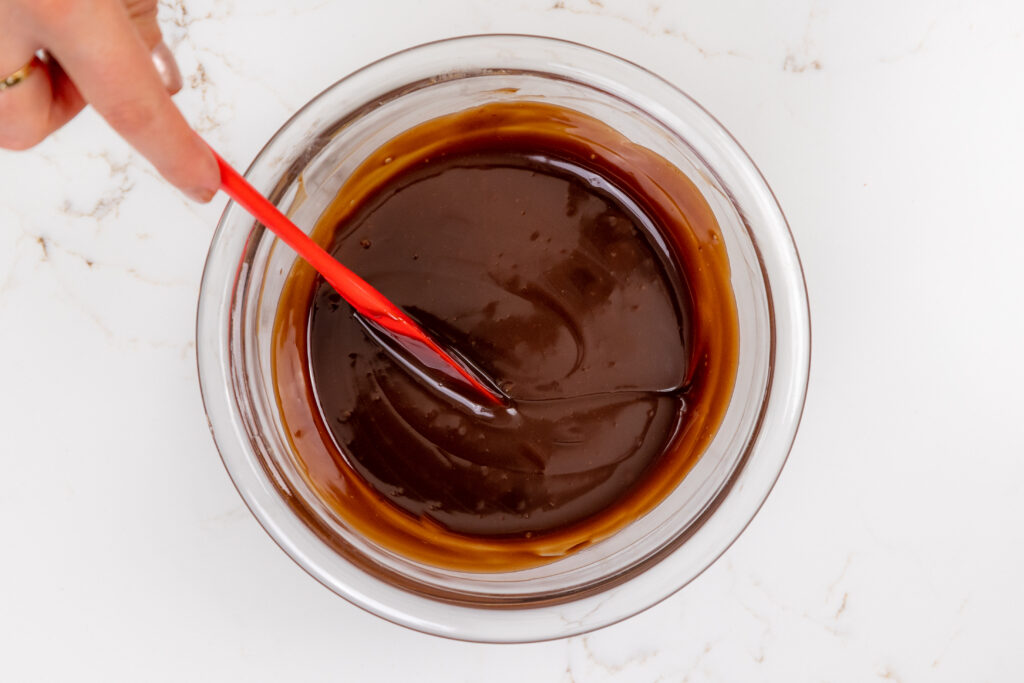
While the chocolate cake base is all good and dandy, I’m really here for the chocolate glaze.
It’s what gives this chocolate pound cake its wow factor!!
After a few rounds of recipe testing, I found that adding a tiny bit of light corn syrup to the glaze makes all the difference.
It gives the glaze a beautiful shine and makes it the perfect consistency.
Swaps & Substitutions
- All-Purpose Flour – This recipe turns out best with all-purpose flour. However, you can swap in a good gluten free flour blend (like this) if needed. Just be sure to stir the batter longer than normal to help give the cake proper structure, and let the batter sit for about 20 minutes before baking it if you opt to make a gluten free version.
- Granulated Sugar – I do not recommend reducing the amount of sugar or changing the type of sugar, as it will change the texture of the cake layers.
- Dark Cocoa Powder – I prefer using dark baking cocoa, but you can also use regular baking cocoa or black cocoa powder.
- Unsalted Butter – If you only have salted butter on hand, you can use it in place of the unsalted butter. You can also use vegan butter in its place!
- Eggs – This recipe uses large eggs. If you have an egg allergy you can try using a vegan egg replacer.
- Milk Chocolate Chips – I used milk chocolate chips to make the glaze but you can use baking chocolate, or good-quality chocolate bars. Alternatively, you can also use dark or semi-sweet chocolate if you have a strong preference.
- Heavy Cream – Whole milk or alternative milk (soy, almond, oat) can also be used in place of the heavy cream to make the glaze. However, I recommend using about half the amount the recipe calls for.
Tips to Make the Best Chocolate Sour Cream Pound Cake
- Mix your cake batter until the ingredients are just incorporated. This will ensure your cake has a tender crumb.
- Bake time can vary a lot based on the type of pan you use and your oven. Check in every 5 minutes once it’s been in the oven for 45 minutes.
- Be sure to butter and flour or heavily spray your pan. It will help the cake easily release from the pan once it’s baked.
- If you make a Bundt cake with this recipe, use a serrated knife to level the bottom of your Bundt cake once it’s fully cooled. This helps it sit flat on your cake stand or plate.

How to Store This Chocolate Pound Cake
Store any leftover cake at room temperature in an airtight container for up to 3 days.
If you make this cake in advance, the same rules apply.
The cake portion can also be frozen for up to 1 month if stored in an airtight container.

Let Me Know What You Think!
If you try this chocolate sour cream pound cake recipe, I’d love to hear what you think of it!
Please leave a rating and let me know your thoughts by sharing a comment below.
Other Recipes You Might Like:
Chocolate Sour Cream Pound Cake
This chocolate sour cream pound cake is incredible moist and packed with flavor!
Ingredients
Chocolate Bundt Cake Recipe
- 2 cups all-purpose flour (250g)
- 2 cups granulated sugar (400g)
- 3/4 cup unsweetened dark cocoa powder (60g)
- 1 1/2 tsp baking soda (9g)
- 1 tsp salt (6g)
- 1 cup warm water (240ml)
- 1 tsp instant espresso of coffee - optional (2g)
- 1 cup unsalted butter, melted (226g)
- 1 cup sour cream, room temperature (255g)
- 3 large eggs, room temperature (112g)
- 1 tsp vanilla extract (4ml)
Chocolate Glaze
- 2/3 cup milk chocolate chips (120g)
- 1/3 cup heavy cream (80ml)
- 2 Tbsp corn syrup (30ml)
Optional Topping
- chocolate shavings
Instructions
Chocolate Bundt Cake Recipe
- Begin by preheating oven to 350°F. Generously grease a 10 cup Bundt cake pan or 2 loaf pans with non-stick spray or butter and a dusting of flour.
- Combine 2 cups all-purpose flour, 2 cups sugar, 3/4 cup dark baking cocoa, 1 1/2 tsp baking soda and 1 tsp of salt in a large bowl. Whisk together until combined.
- In a large bowl, whisk together 1 cup water and 1 tsp of instant coffee or espresso. Once the instant coffee is fully dissolved, add 1 cup melted butter, 1 cup sour cream, 3 eggs, and 1 tsp vanilla. Whisk together until combined.
- Add the wet ingredients into the dry and whisk together until smooth. Pour the batter into the prepared pan or pans.
- If using 2 loaf pans, bake for 45-55 minutes or until a toothpick inserted into the center of the cake comes out with a few moist crumbs. If using a bundt pan, bake for 50-65 minutes.
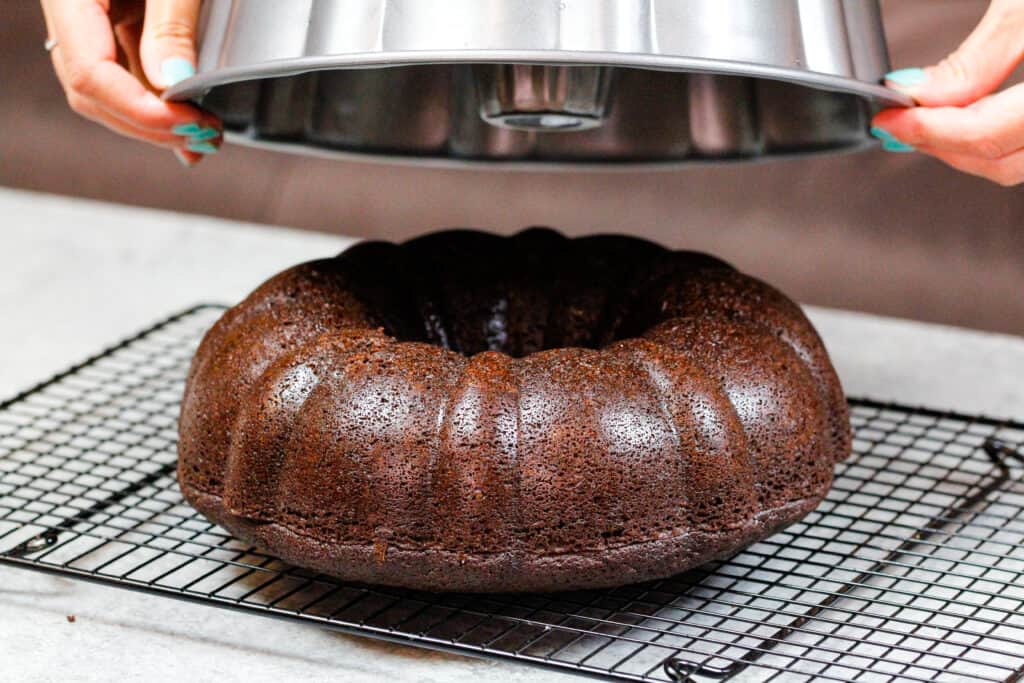
- Remove from oven and let the cake sit in the pan for about 20 minutes. Carefully invert the pan(s) onto a wire rack to remove the cake from the pan. Let the cake finish cooling there.
Chocolate Glaze
- Make the chocolate glaze as the cake cools.
- Place 2/3 cup milk chocolate chips in a heat proof bowl and set aside.
- Heat 1/3 cup heavy cream in a heatproof bowl in the microwave for 45 seconds to 1 minute, until it's gently bubbling.
- If you don’t have a microwave or prefer to use the stove top, you can heat the cream over a medium heat in a pan until it begins to simmer. Remove from heat.
- Gently pour the heavy cream over the chocolate chips, making sure they're covered with cream. Allow the mixture to sit for 1-2 minutes.
- Stir slowly until the cream and chocolate are fully combined, then add in 2 tablespoons of corn syrup and mix until incorporated. The glaze should look shiny and smooth.
Decorating This Chocolate Sour Cream Pound Cake
- Top the cooled cake with a generous drizzle of chocolate glaze, and some chocolate shavings and enjoy!
Notes
Yield
This chocolate pound cake recipe feeds about 20 people.
Using Different Types of Pans
I like to make this recipe using two loaf pans like these. However, this recipe can also be made in a Bundt cake pan!
To make mini bundt cakes, fill each baking cavity 2/3 full and bake in a 350 F oven for about 20 minutes. The bake time can vary based on the size of cavity, so keep a close eye on them.
Bake time can also vary based on the size of your pan and your oven. I recommend checking in on your cake every 5 minutes once it's been in the oven for 45 minutes.
How To Store This Chocolate Sour Cream Cake
Store any leftover cake at room temperature in an airtight container for up to 3 days.
It can also be frozen (topped or not) for up to 1 month if stored in an airtight container.
Nutrition Information
Yield
20Serving Size
1Amount Per Serving Calories 339Total Fat 15gSaturated Fat 9gTrans Fat 0gUnsaturated Fat 5gCholesterol 65mgSodium 234mgCarbohydrates 47gFiber 1gSugar 35gProtein 4g