
I’ve wanted to make a berry Chantilly cake for the longest time and this Spring I finally got around to it!!
Berry Chantilly cakes are usually made with fluffy white cake layers, frosted with a Chantilly cream, and filled with loads of fresh berries. Sounds pretty incredible, right??
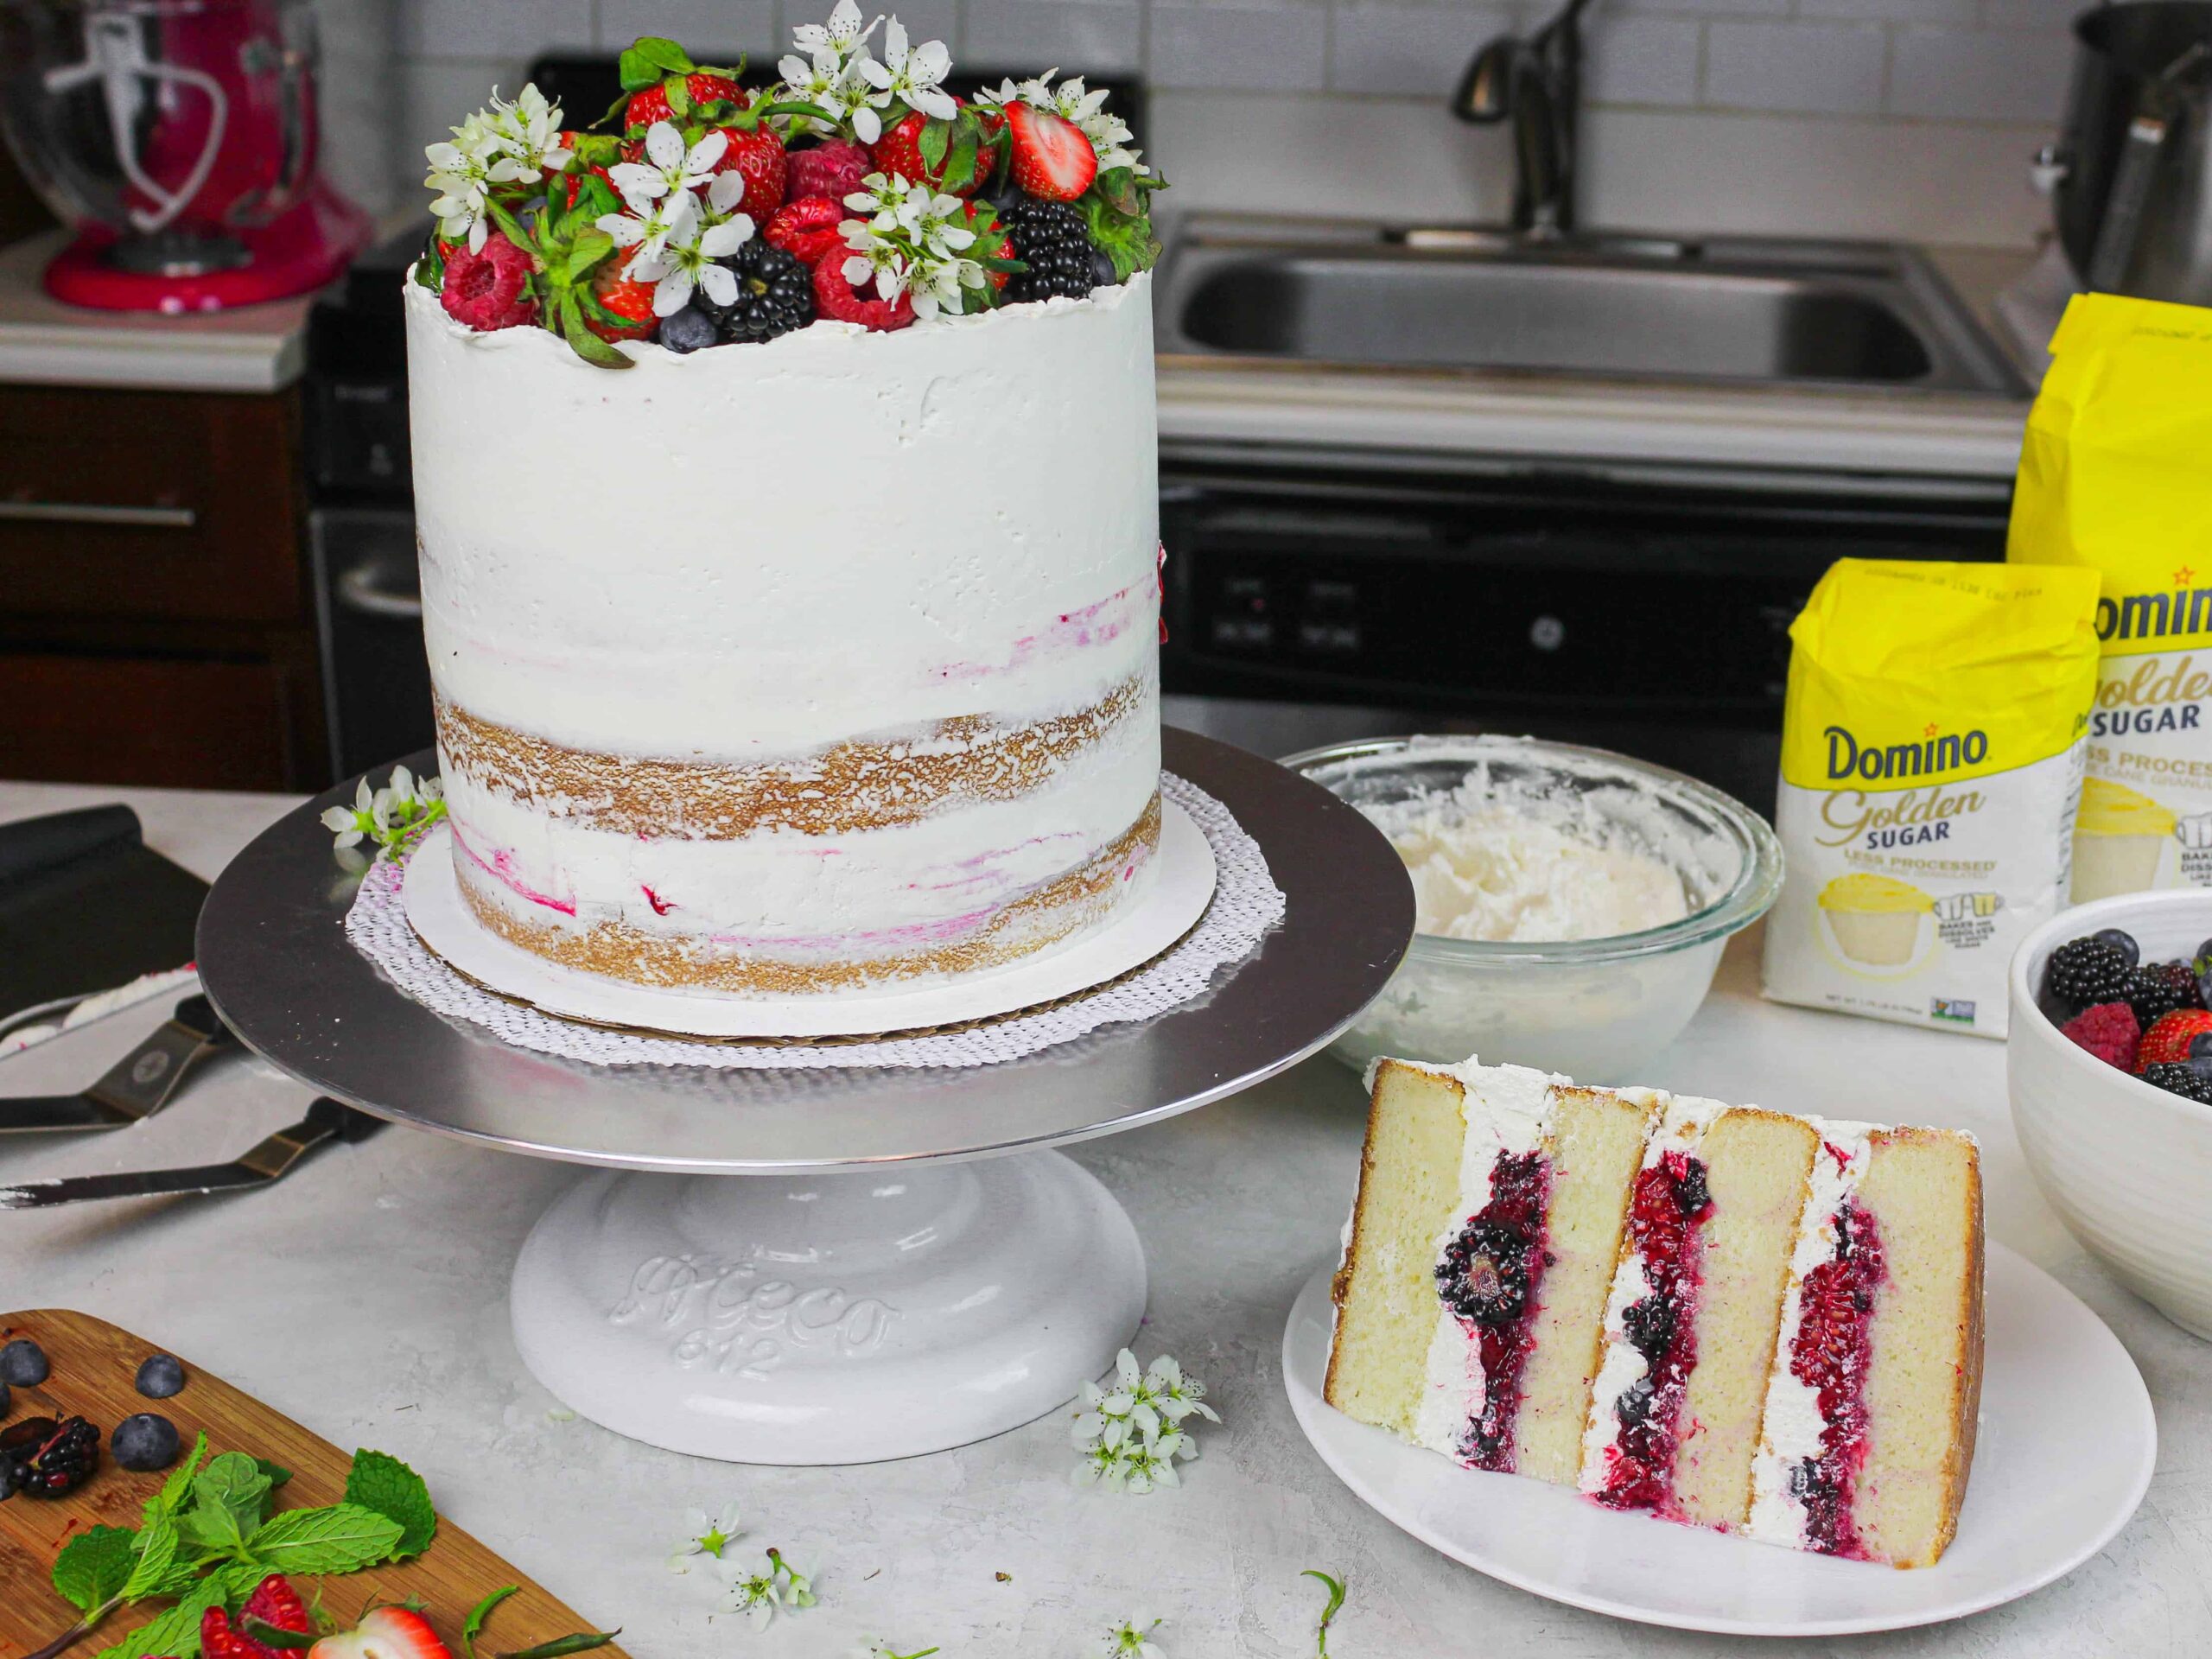
To top all of that off, my version of this cake also uses Domino® Golden Sugar! This adds a fantastic layer of flavor that really elevates this cake.
The Trick to Making this Mixed Berry Cake Filling
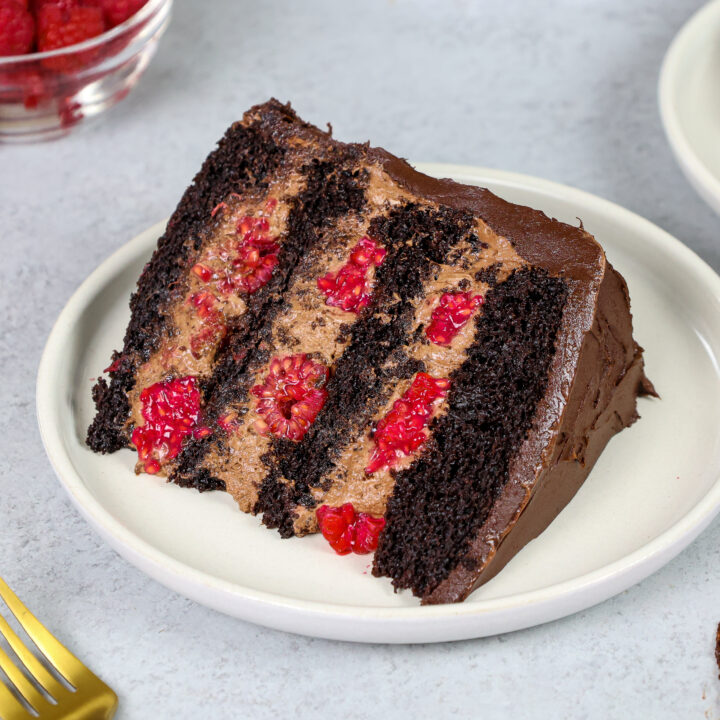
My favorite part of this golden berry Chantilly cake is the mixed berry cake filling. It’s packed with flavor and adds so much flavor to this cake.
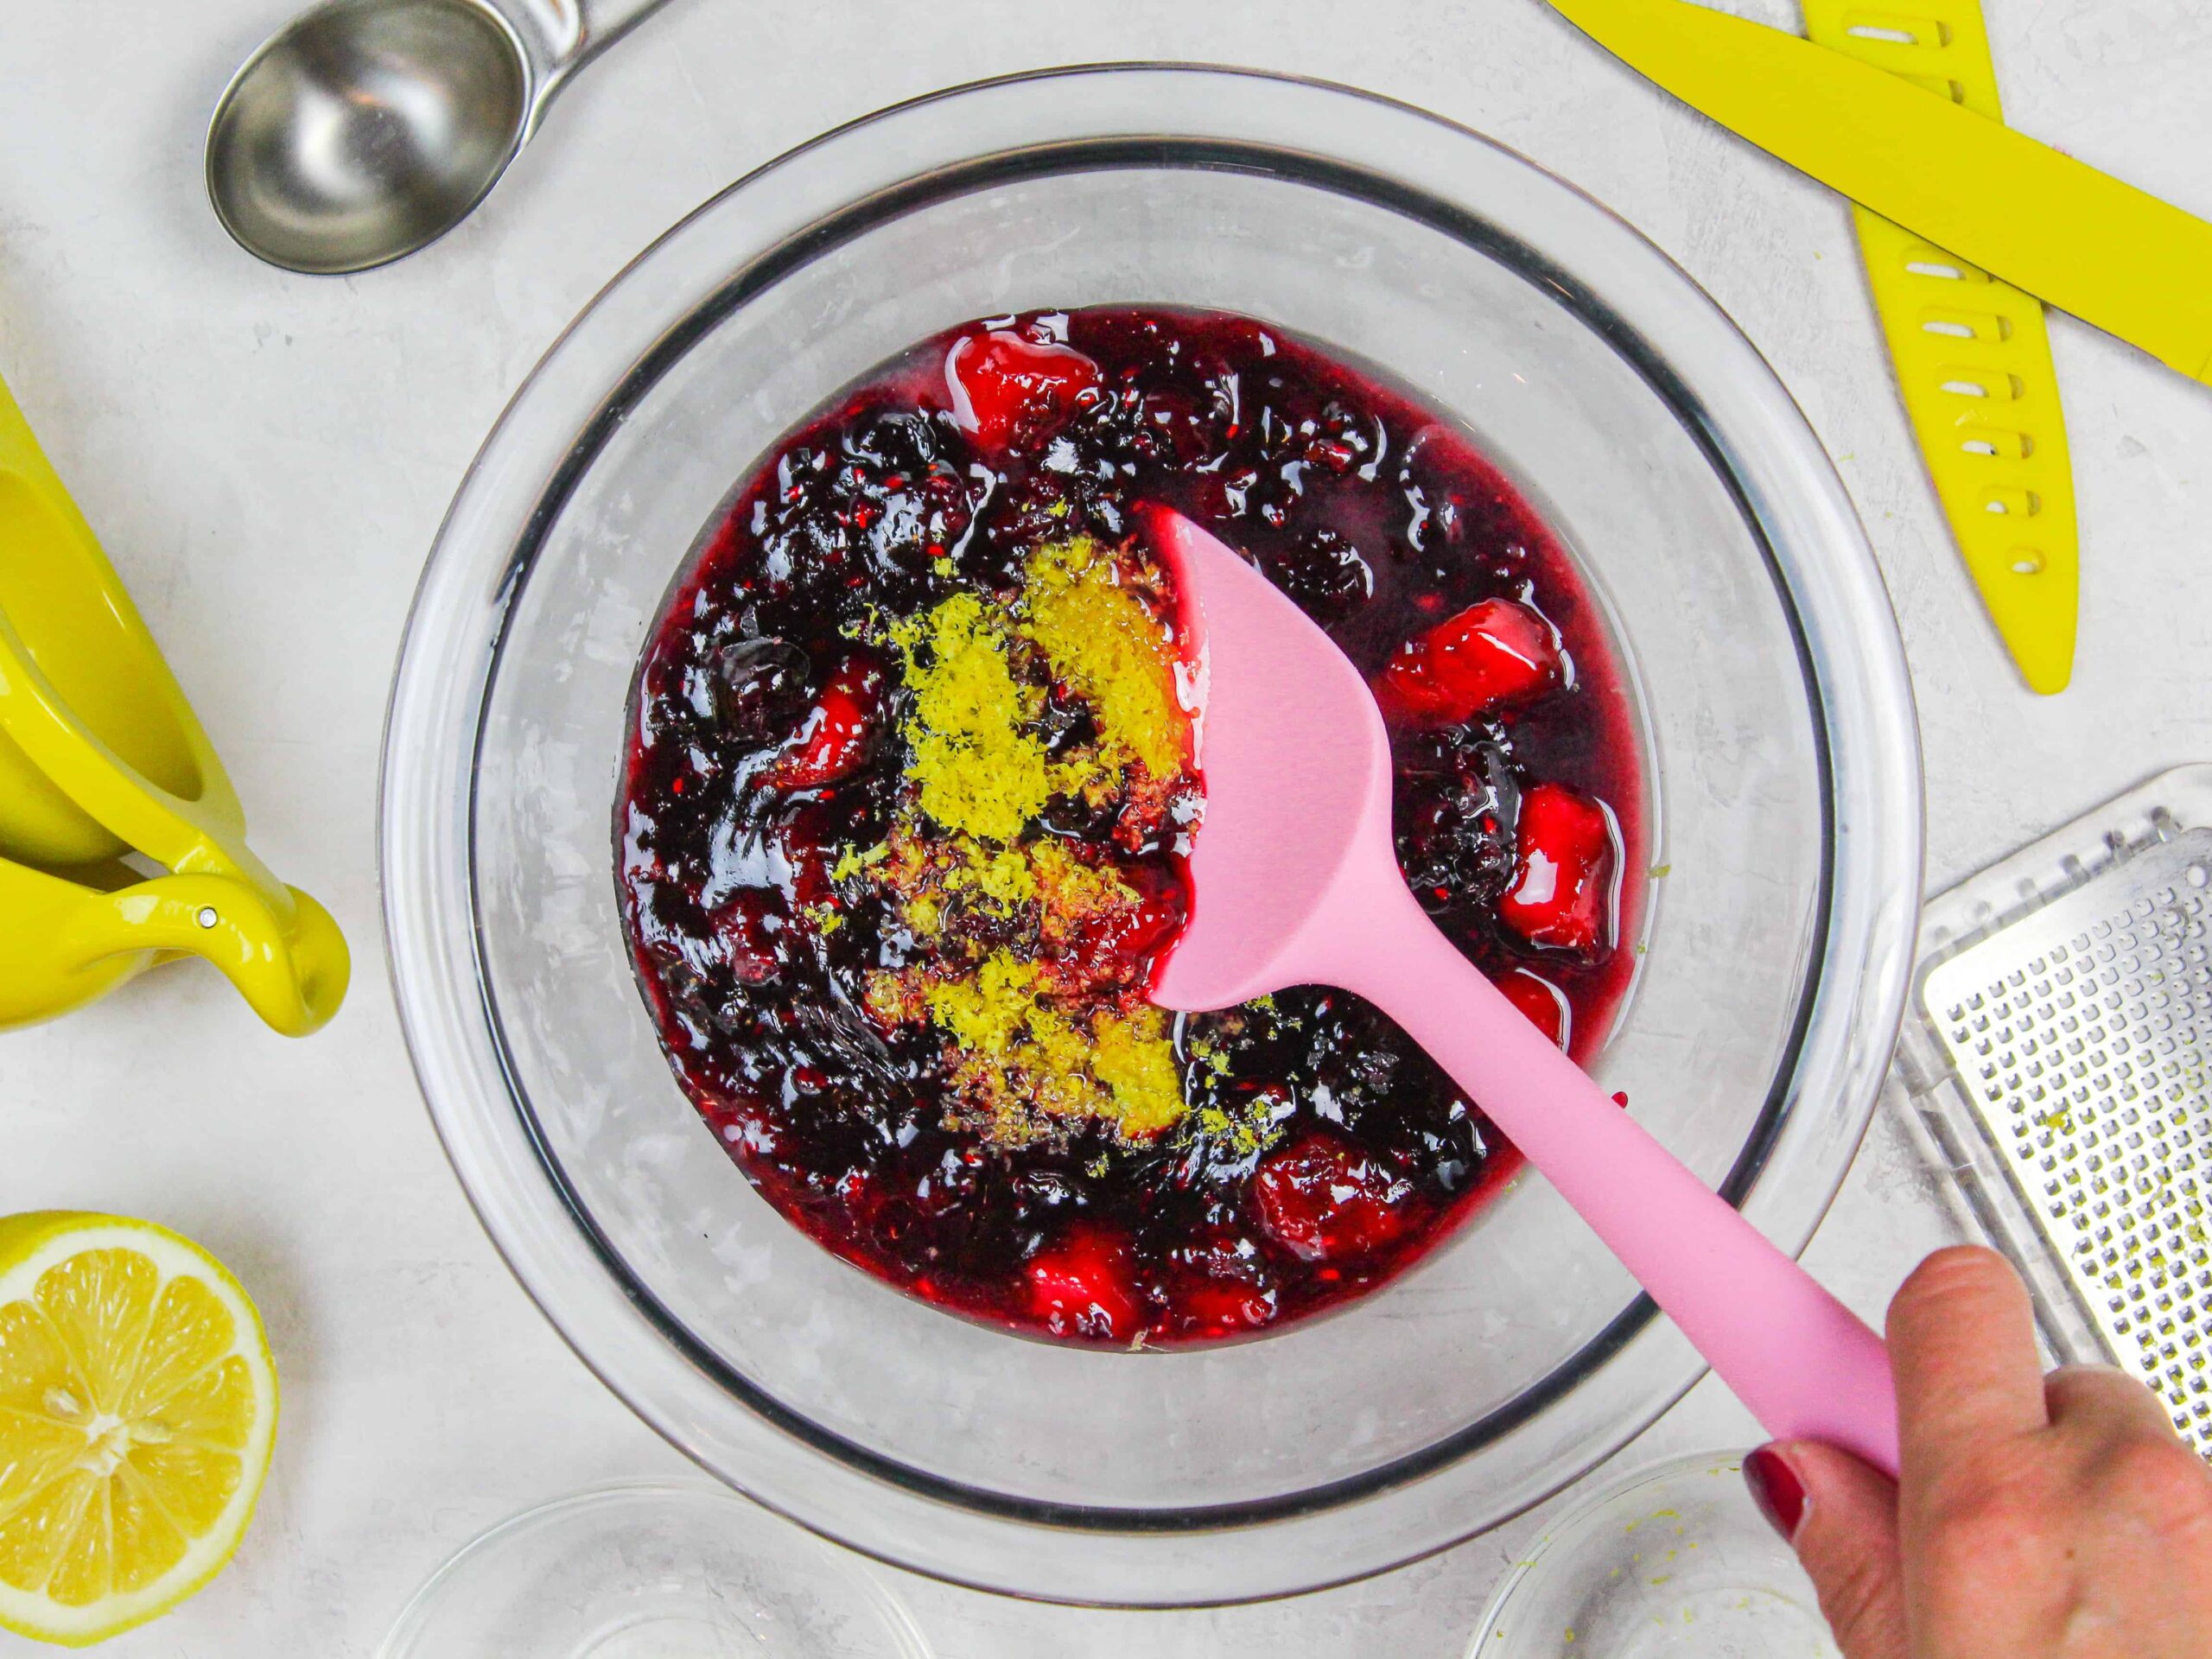
While you could just add fresh berries between the cake layers, I find that cooking down a mixture of berries with sugar and a touch of lemon really concentrates the flavor.
To help thicken the filling, I like to add a slurry of cornstarch and water. It makes it so much easier to add the filling to between the cake layers.
This also prevents the juices from seeping out of the cake once it’s assembled.
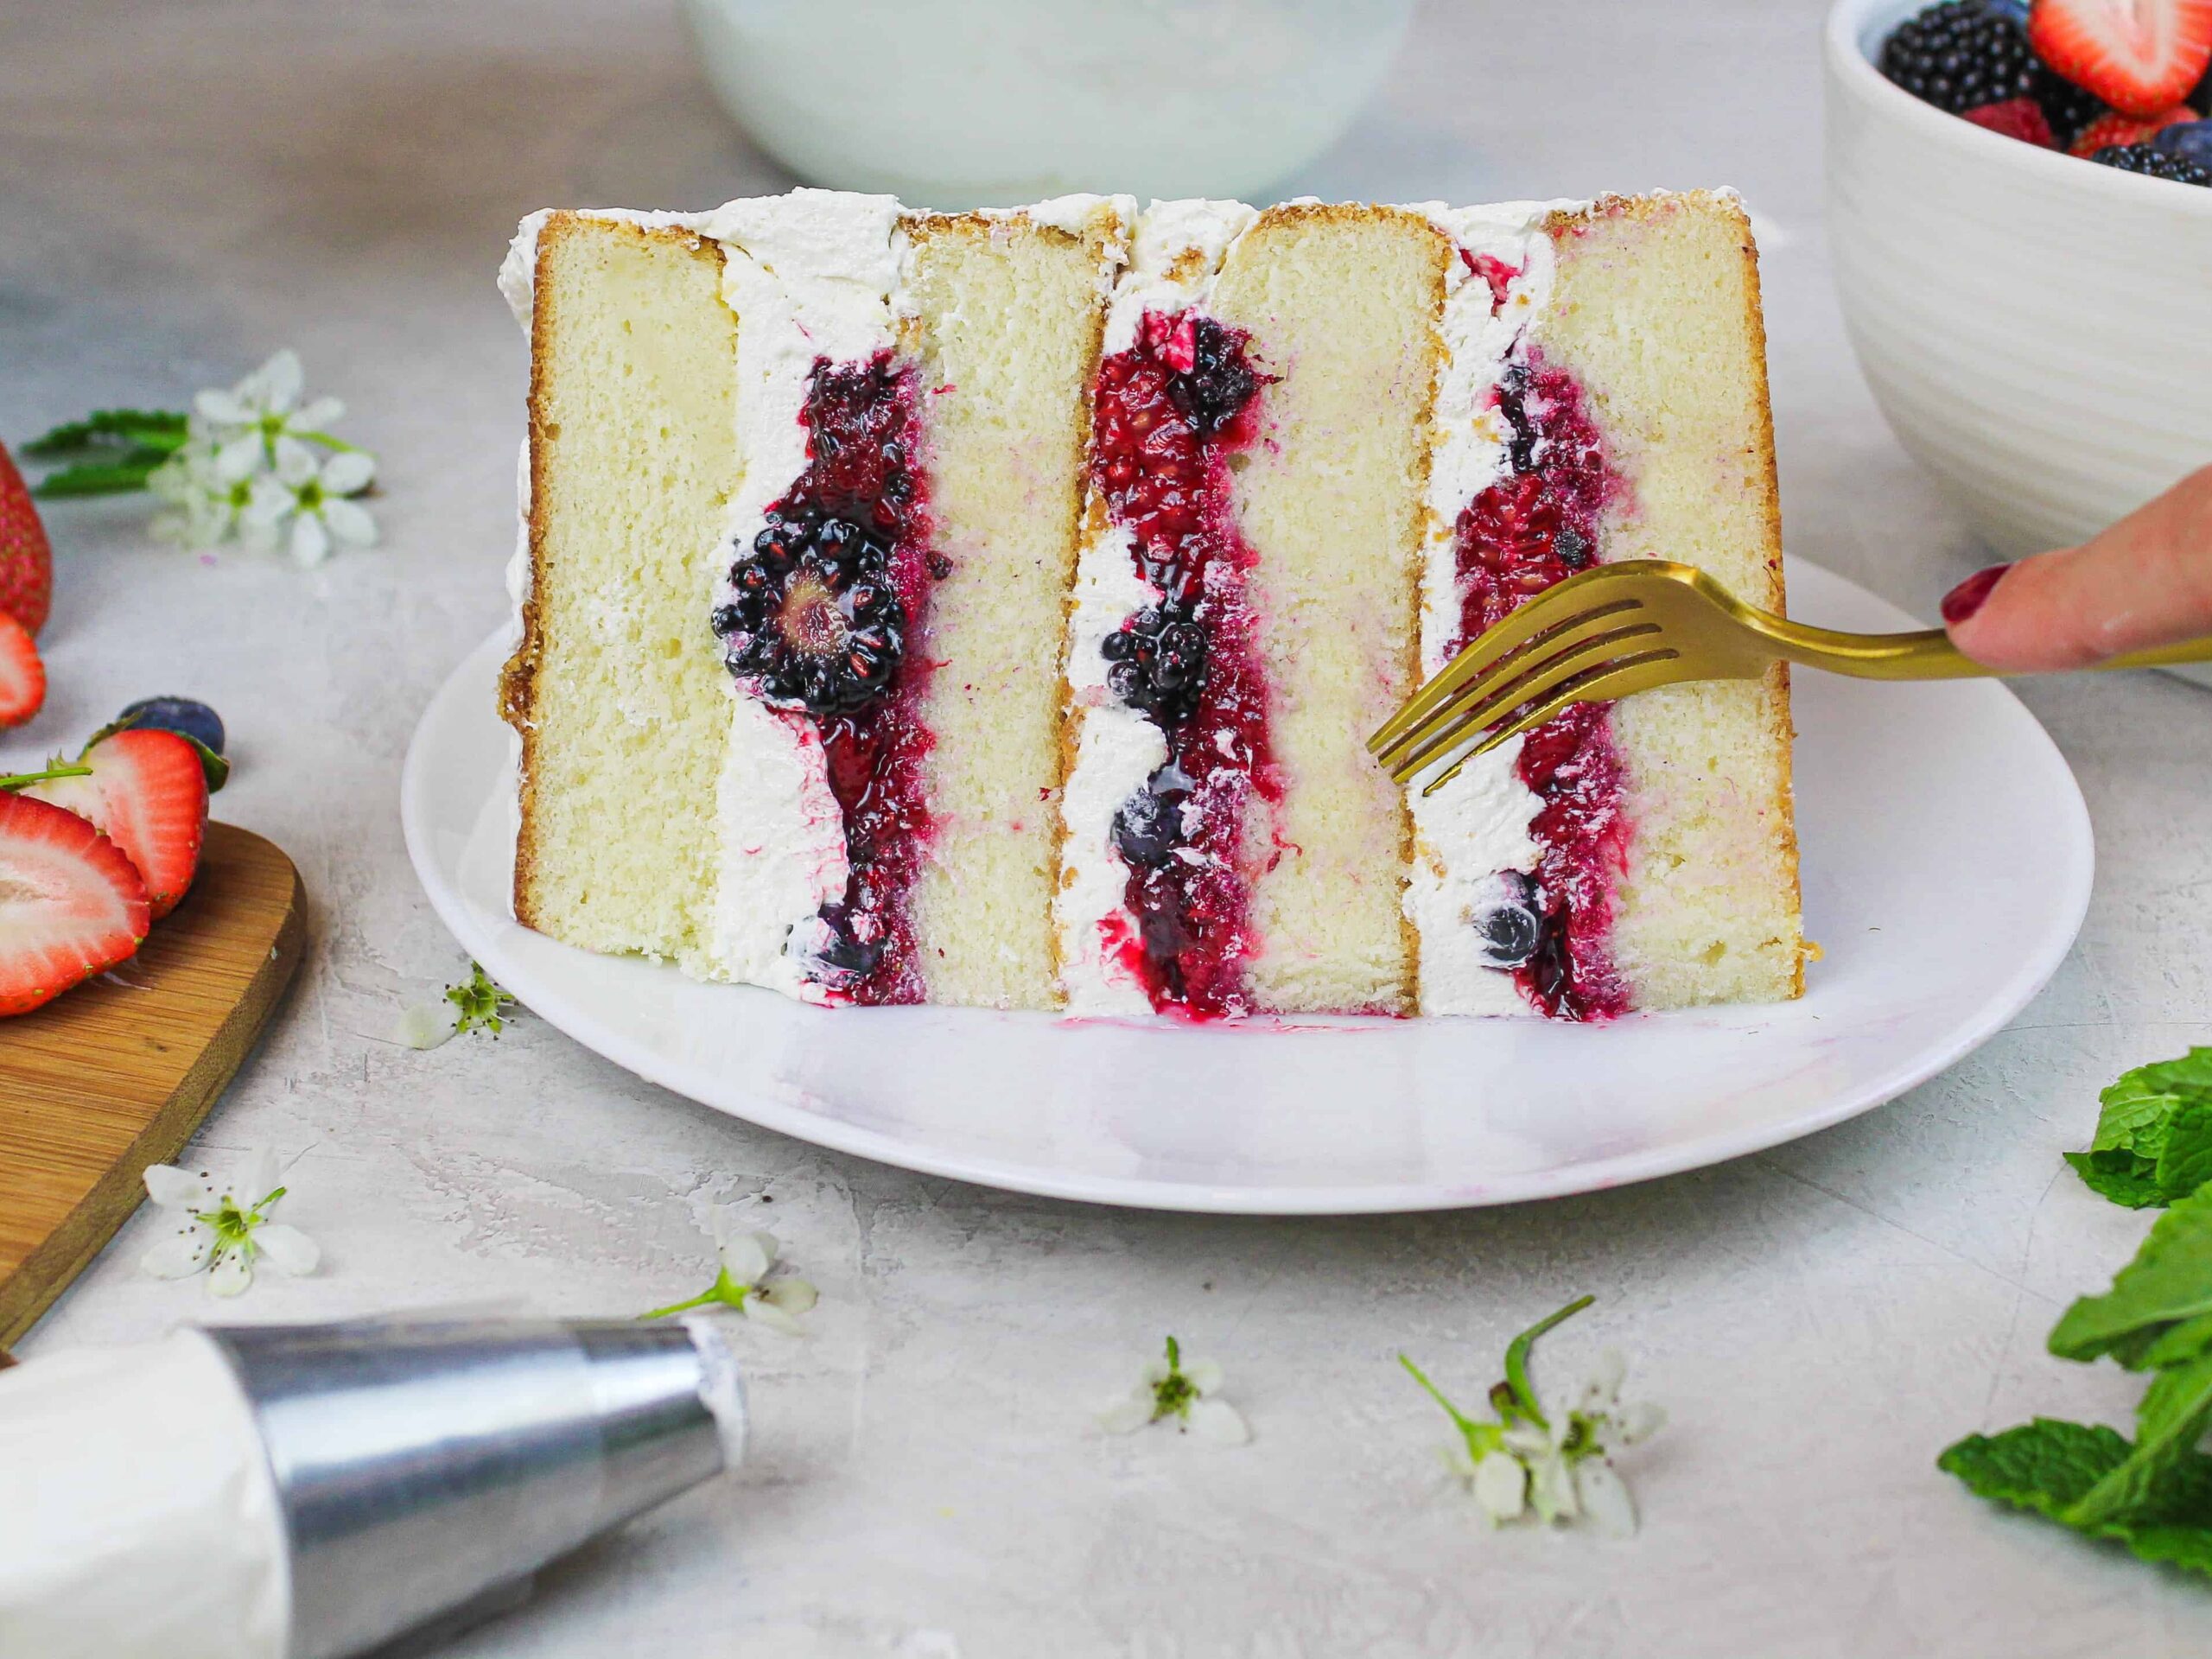
I love berries so much that I actually pressed fresh berries on top of the filling before covering it with frosting! This adds another layer of texture to this cake, which I am a huge fan of.
The Importance of Leveling Your Cake Layers
Usually, I say that leveling your cake layers is optional. Most of my cake recipes bake up pretty flat, so it is possible to assemble your cake without trimming the tops.
However, I highly recommend leveling your cake layers for two reasons.
The first reason is that by removing the caramelization from the top of the cake layer you allow your cake layers to soak up that delicious berry filling!!
The second reason is that this cake ends up being super tall! Leveling your cake layers makes it a lot easy to stack your cake layers. It also makes the cake more stable.
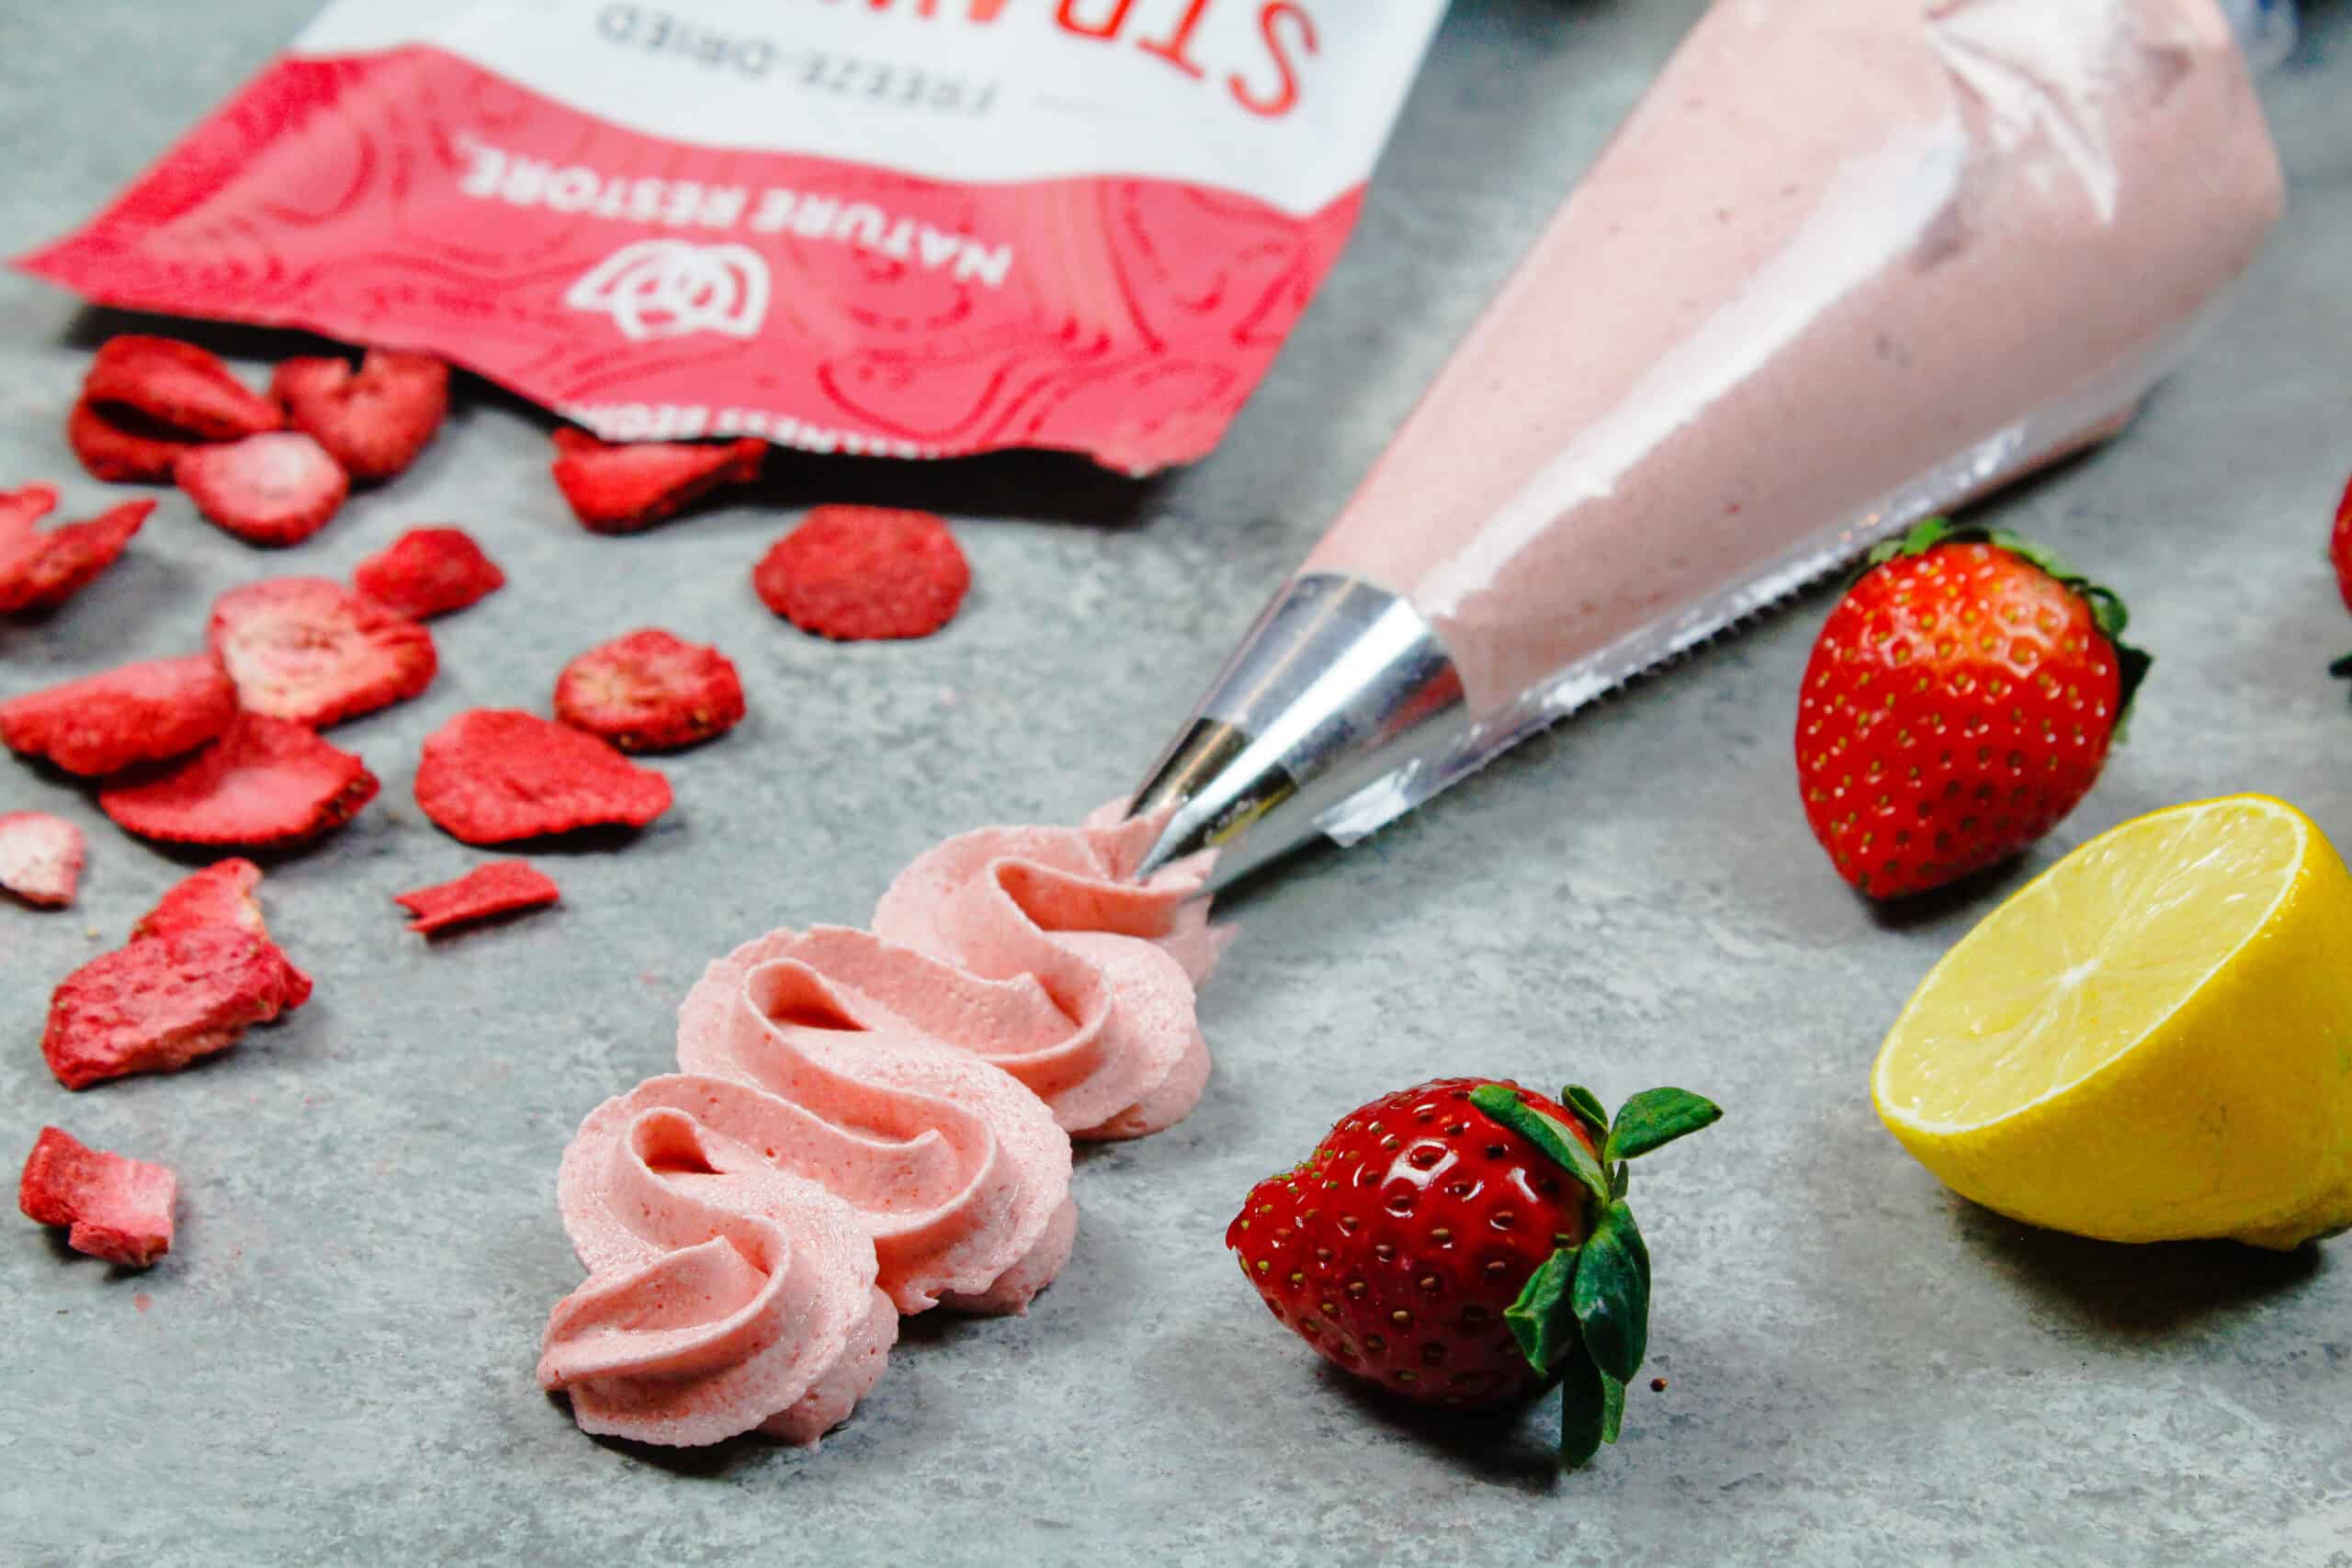
My Spin on This Mascarpone Cream Cheese Frosting
Chantilly cream is usually made with a stabilized whipped cream base. Whipped cream is great, but I’ve found it’s challenging to decorate with!
To me, the most distinguishing thing about this frosting is the mascarpone and cream cheese. That’s where it gets its flavor and silky-smooth texture.
I personally am not the biggest fan of whipped cream, so I decided to go a little rogue when I made my frosting for this cake.
Instead of starting with a whipped cream base, I chose to start with Swiss meringue buttercream! It’s just as fluffy and light and whipped cream but is a bit more stable.
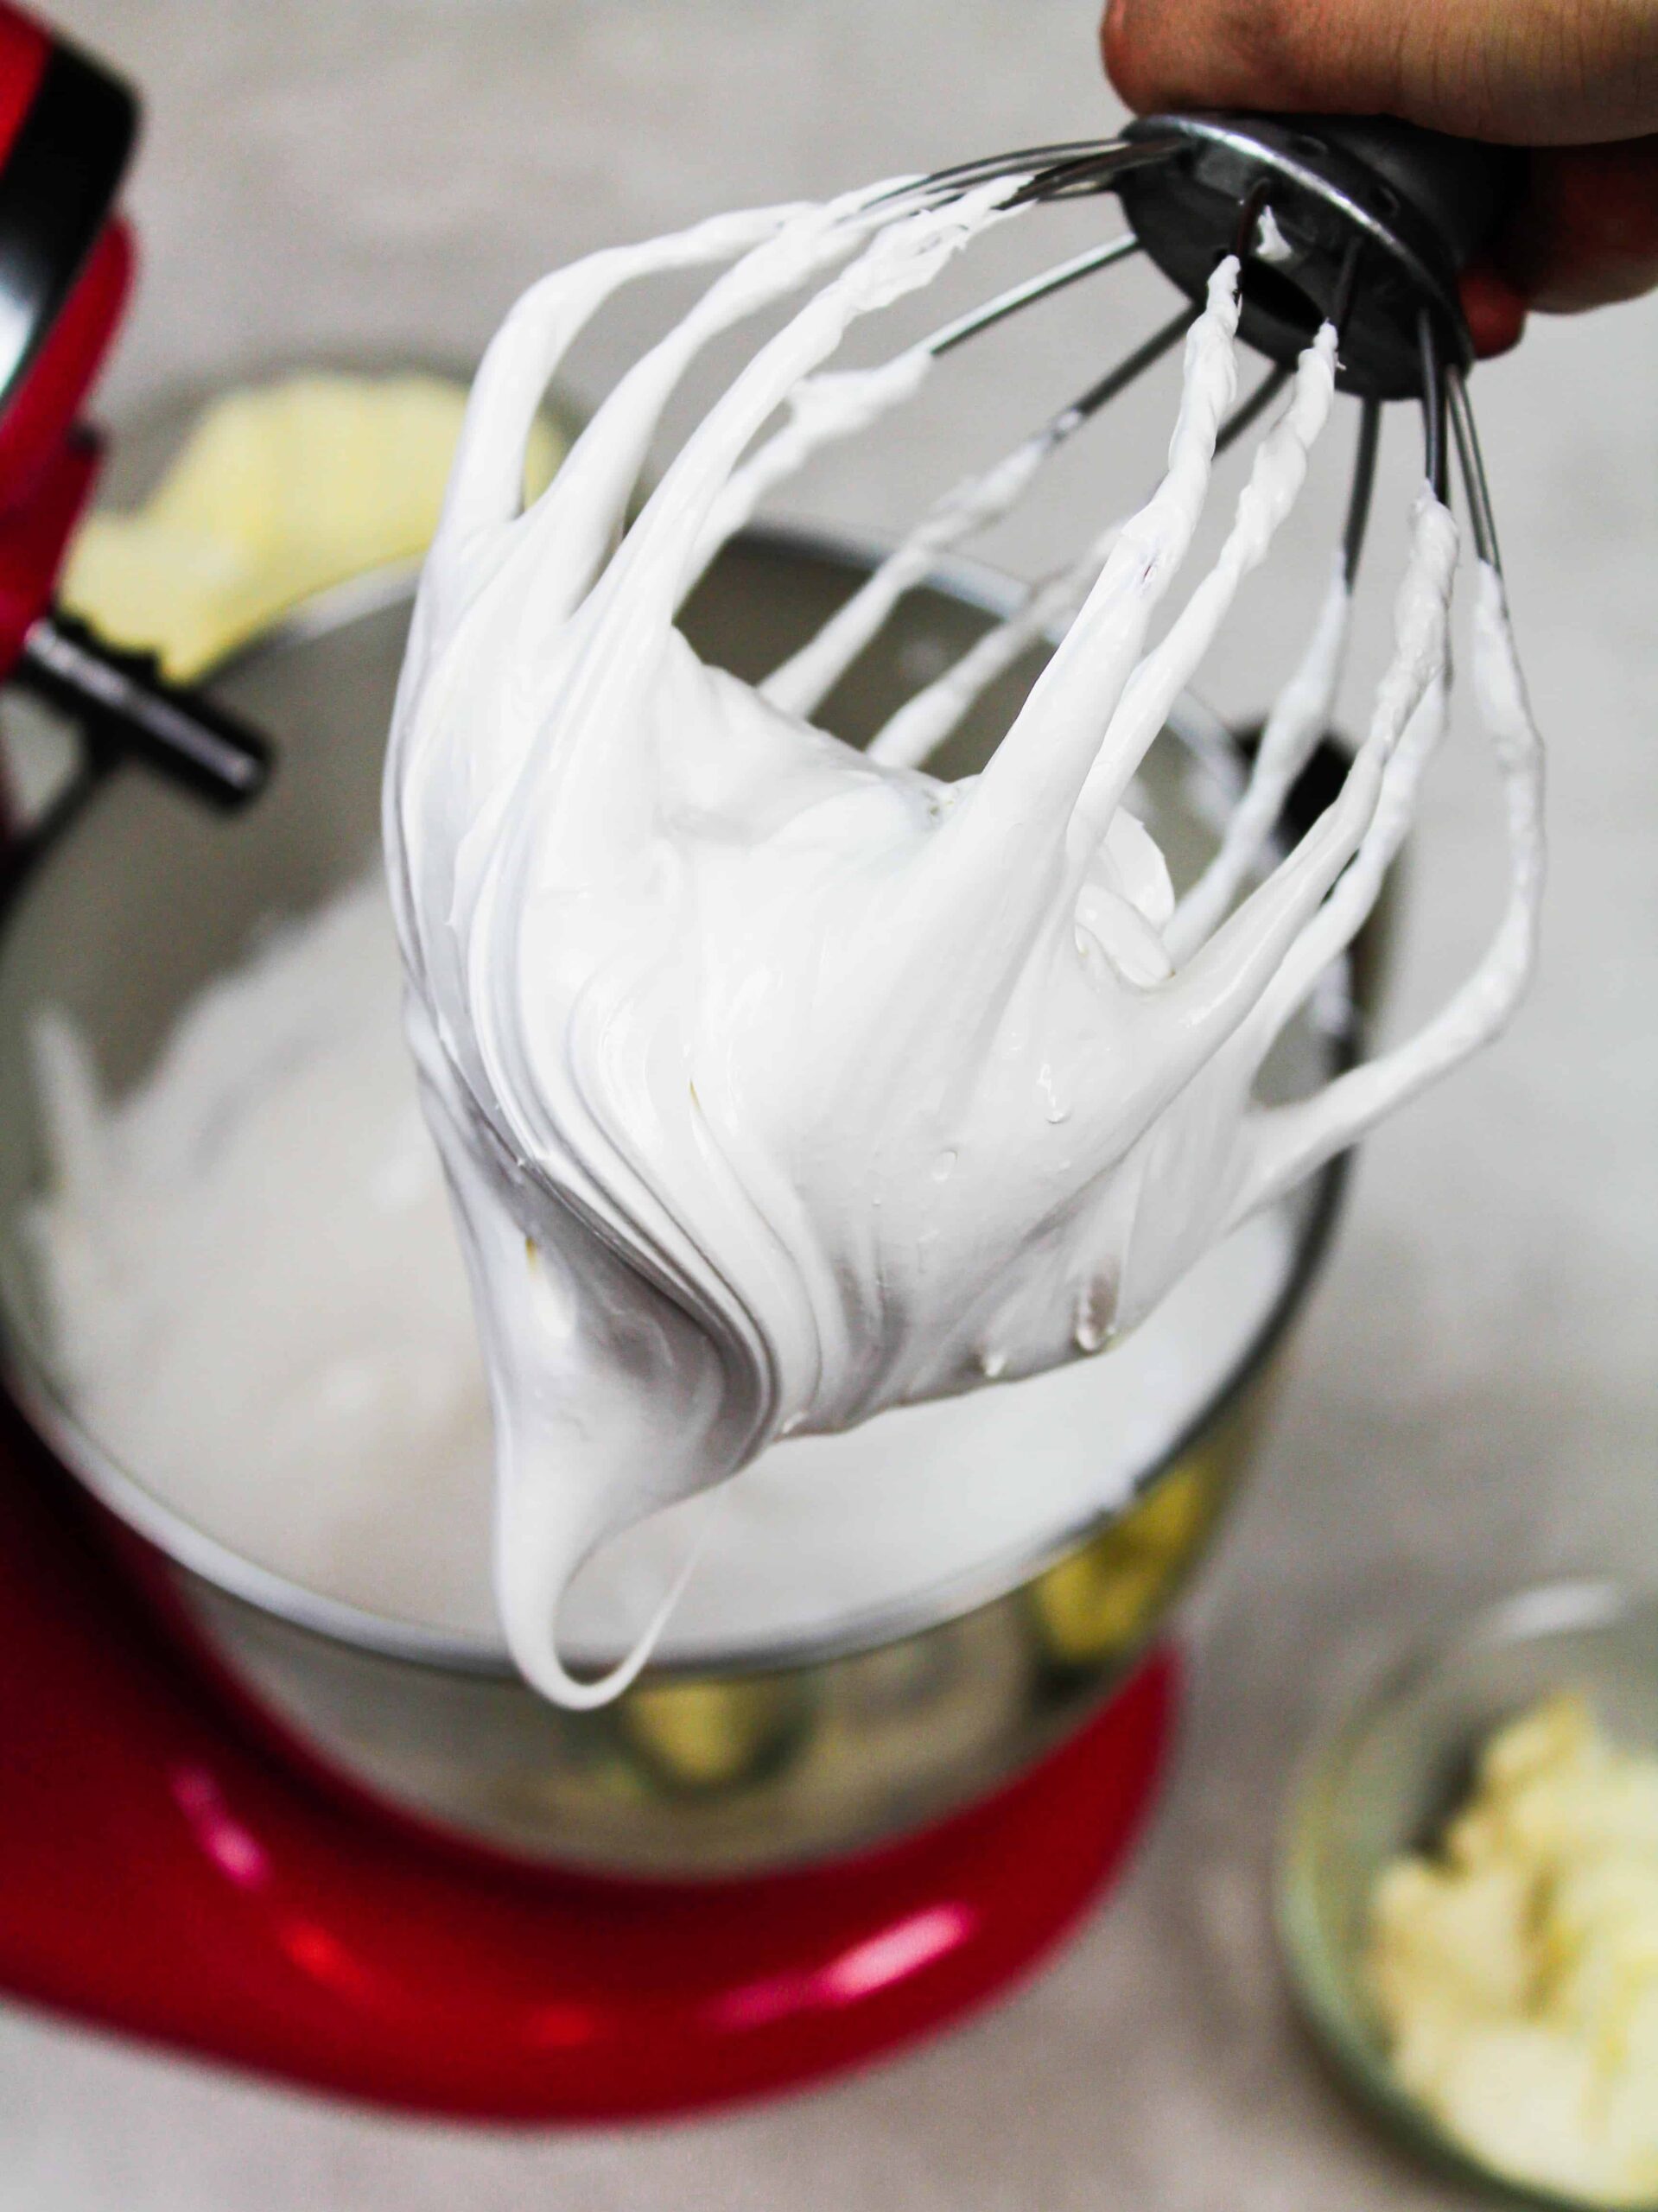
Then by adding the equal parts mascarpone and cream cheese, the frosting on this cake is perfectly balanced and absolutely delicious.
Decorating This Golden Berry Chantilly Cake
The last thing to consider about this cake is how you want to decorate it!
I wanted to decorate this cake in an elegant yet simple way that let the ingredients in this cake be the star of the show.

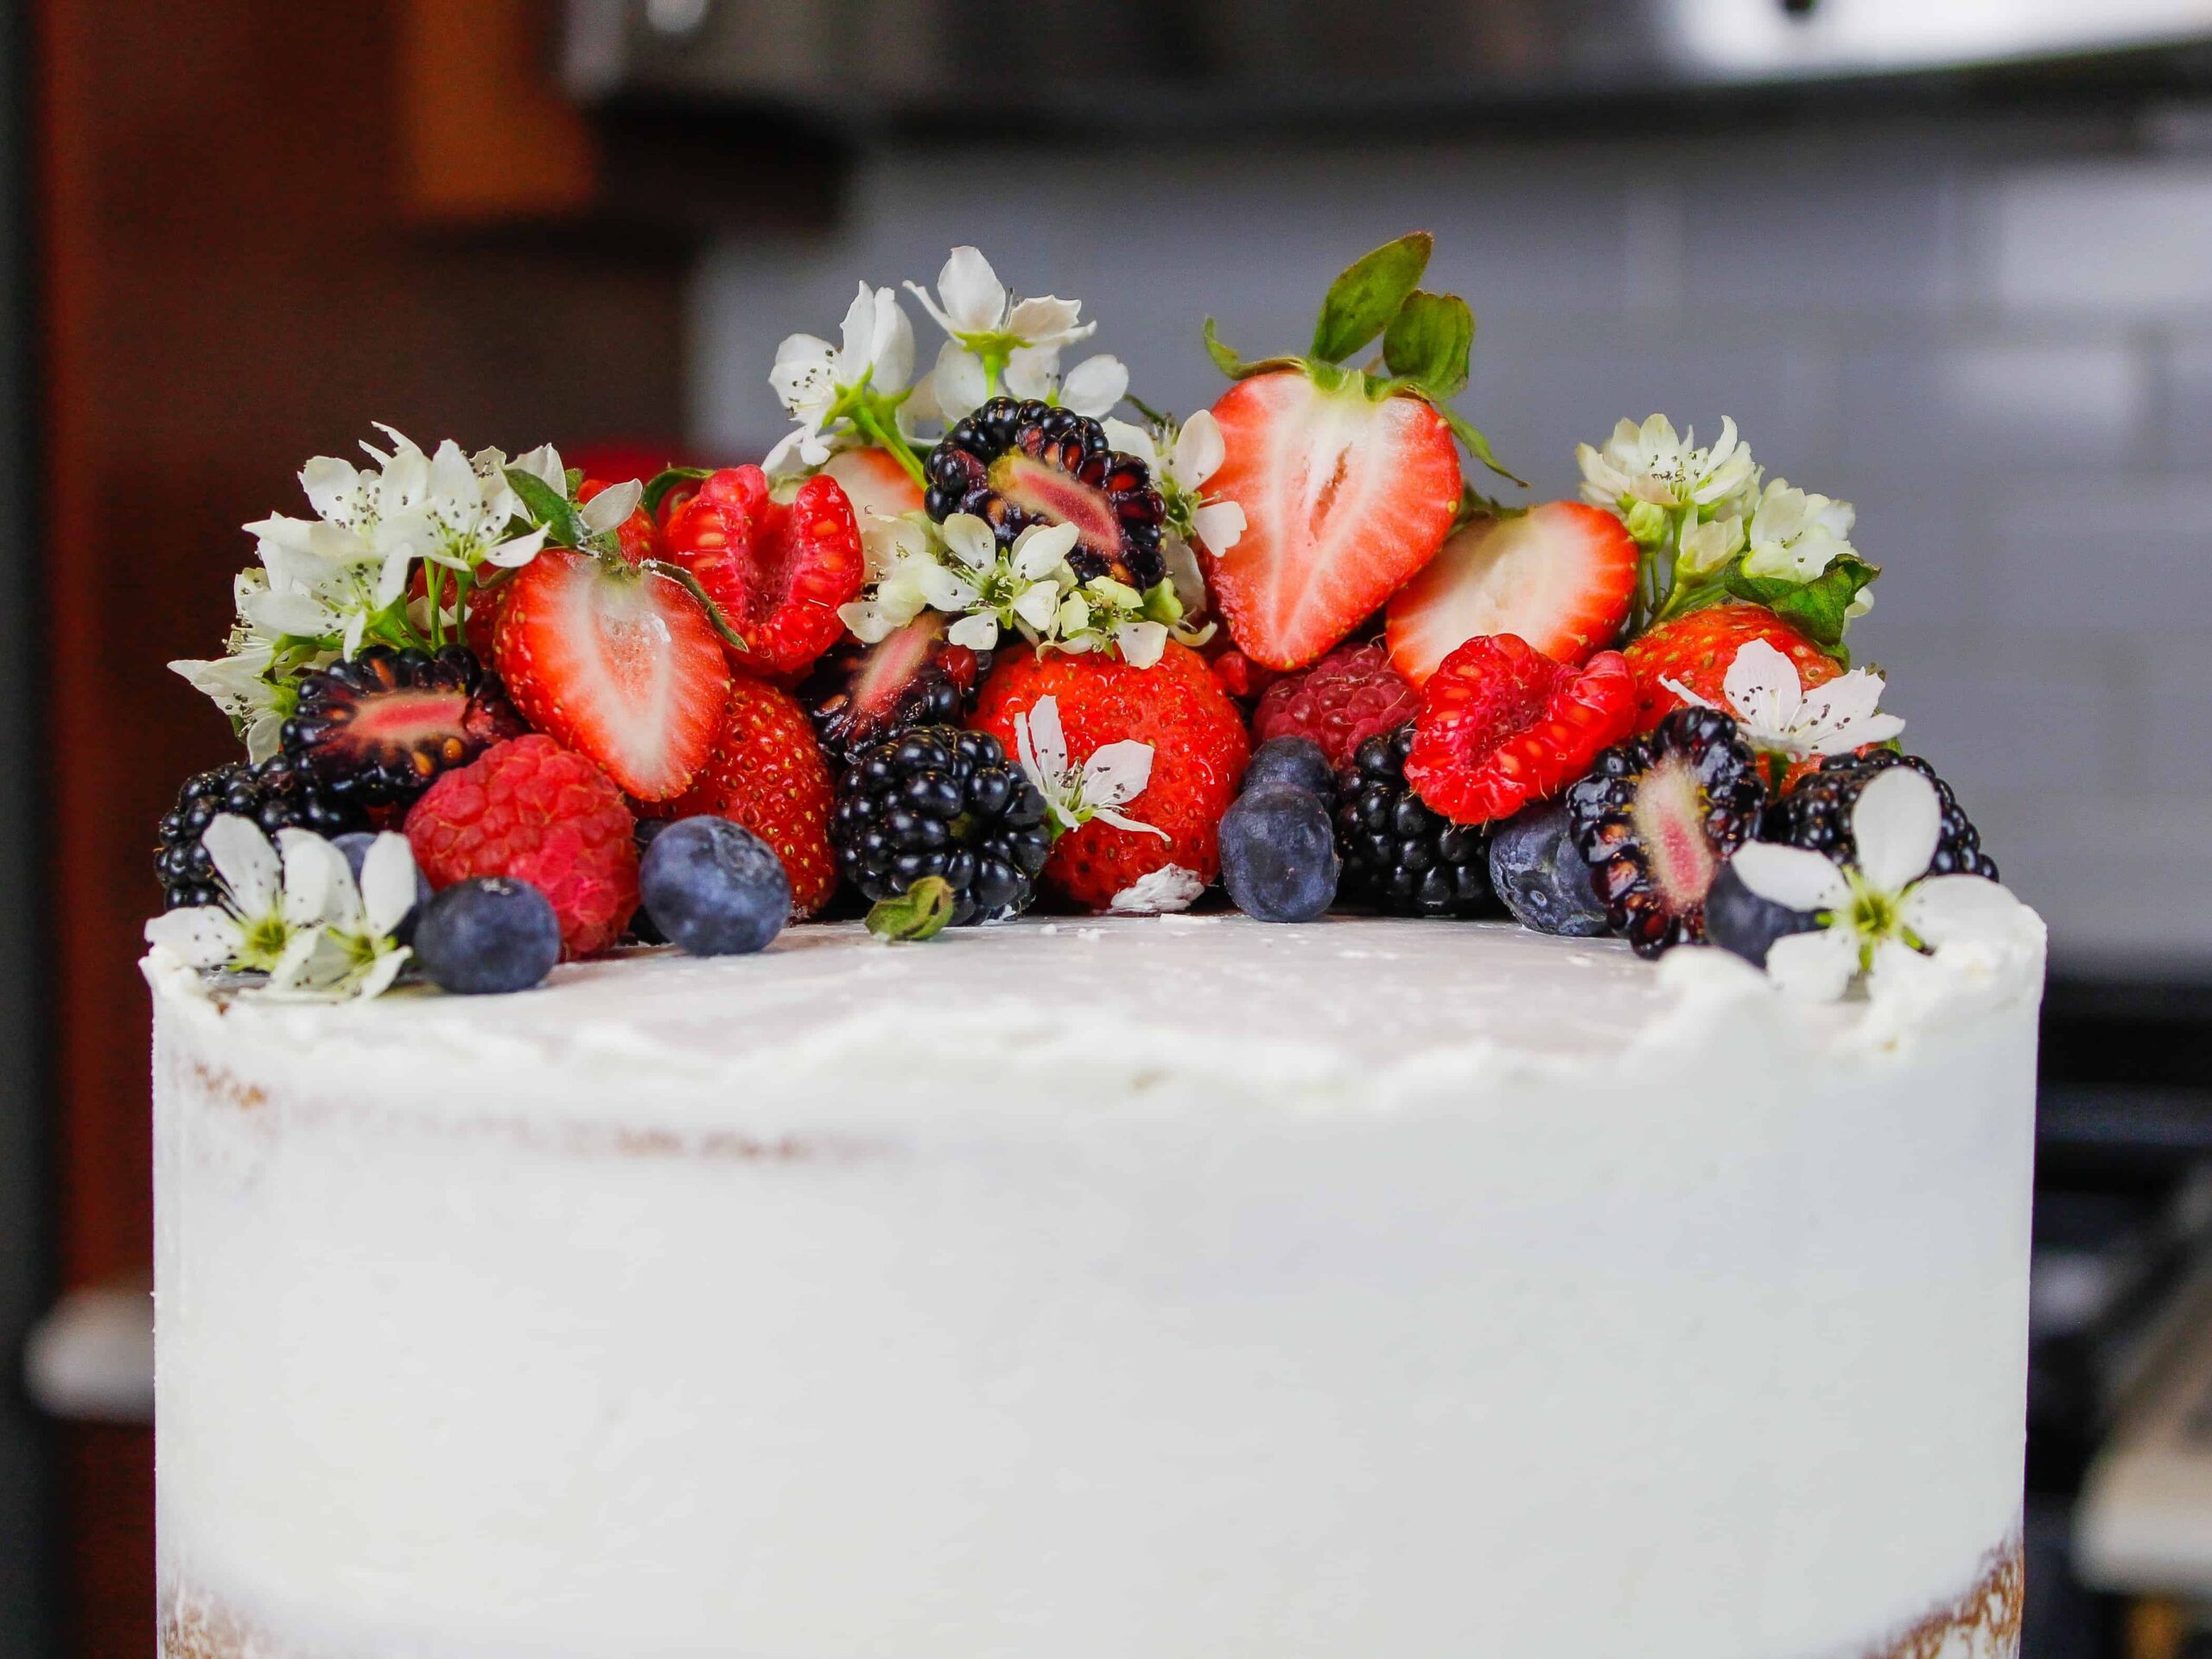
I chose to decorate this cake in a semi-naked style. This lets those delicious vanilla cake layers peak through the frosting!
With that in mind, I decided to pile the same fresh berries that were used in my cake filling on top of this cake. I also added some small, seasonal edible flowers on top of the cake as a finishing touch.
You can decorate this cake however you like, but I swear sometimes all you need are some fresh berries!
Tips for Making the Best Berry Chantilly Cake
- Properly measure your flour (spoon into the cup measure, then level) or use a kitchen scale to measure your dry ingredients.
- Mix your cake batter just until the ingredients are incorporated. This helps the cake layers bake up tender and fluffy.
- Use a serrated knife to level your cake layers once they’re fully cooled, to allow the berry filling to seep into the cake layers.
- Use fresh berries for the cake filling if they are in season, and frozen if they aren’t.
- Chill your cake layers in the freezer for about 20 minutes before assembling the cake, to make it easier to stack and frost.
- If you can’t find golden sugar where you live, you can use granulated sugar in its place.
Making These Cake Layers in Advance and Storage Tips
Make your cake layers in advance and freeze them! It breaks the process up and makes it more approachable.
Make your frosting ahead of time too or save any leftover frosting! It can be stored in an airtight container in the fridge for up to a week, or in the freezer for up to a month.
A frosted cake can last in the fridge for 2-3 days, or in the freezer for up to a week. The buttercream locks in all the moisture, keeping the cake fresh and delicious.
If you cut into the cake and have leftovers, use any remaining frosting to cover the cut section to keep it moist and store in the fridge for up to a week.
Let Me Know What You Think!
If you try this golden berry Chantilly cake recipe, I’d love to hear what think of it! Please leave a rating and comment below with your thoughts.
And don’t forget to tag us @chelsweets and @dominosugar! Use the #chelsweets and #BakeWithGolden on social media so that I can see your amazing creations.
You can learn more about Domino® Golden Sugar and find more great recipes that use Domino® Golden Sugar here.
Other Recipes You Might Like:
Berry Chantilly Cake

This berry Chantilly cake is made with fluffy mascarpone cream cheese frosting & the best mixed berry filling! It tastes just like Summer.
Ingredients
Berry Cake Filling
- 2 cups fresh or frozen mixed berries (raspberries, blackberries, blueberries etc.) (290g)
- ½ cup Domino® Golden Sugar or granulated sugar (100g)
- 1 Tbsp water (15g)
- 1 Tbsp cornstarch (8g)
- 1 Tbsp fresh lemon juice (12g)
- 2 tsp lemon zest (6g)
Soft Vanilla Cake Layers
- 3 cups cake flour (360g)
- 3 cups Domino® Golden Sugar or granulated sugar (600g)
- 2 1/2 tsp baking powder (10g)
- 1 tsp salt (6g)
- 1 cup unsalted butter, room temperature (226g) - 2 sticks
- 1 cup pasteurized egg whites from a carton or about 7 egg whites, room temperature (235g)
- 1 1/2 cups full-fat sour cream, room temperature (380g)
- 2 Tbsp vegetable oil (28g)
- 1 tsp vanilla extract (4g)
Mascarpone Cream Cheese Frosting
- 7 large egg whites (235g)
- 2 cups Domino® Golden Sugar or granulated sugar (400g)
- 1 1/2 cups unsalted butter, room temperature (339g)
- 1/2 cup mascarpone cheese, room temperature (112g)
- 1/2 cup cream cheese, room temperature (113g)
- 2 tsp vanilla extract (8g)
- 1/2 tsp salt (3g)
Decorations
- 1-2 cups fresh berries
- fresh mint sprigs
- edible flowers
Instructions
Berry Cake Filling
- Make the filling first so that it has time to cool and thicken.
- Pour 2 cups of mixed berries and 1/2 cup of sugar into a large saucepan over medium heat and bring to a simmer.
- In a separate small bowl, stir together the 1 Tbsp of cornstarch and 1 Tbsp of water to make a slurry.
- Pour the slurry into the saucepan and stir to combine.
- Let the berry mixture to cook for a several minutes, stirring constantly.
- Once the mixture has thickened, turn off the stove and mix in 1 Tbsp fresh lemon juice and 2 tsp lemon zest.
- Pour into a separate bowl and set aside to cool. To accelerate the cooling process, cover the bowl with plastic wrap and place in the fridge.
Vanilla Cake Layers
- Preheat oven to 325°F / 162°C. Line and grease three, 8” pans or four, 7” pans with parchment rounds.
- Sift together 3 cups cake flour, 3 cups sugar, 2 1/2 tsp baking powder, and 1 tsp salt into the bowl of a stand mixer or a large bowl.
- Mix in 1 cup of room-temperature butter slowly with a whisk attachment on a low speed. Continue to mix until no large chunks of butter remain, and the mixture looks like moist sand.
- Pour in 1 cup of egg whites and mix on low until just incorporated.
- Add in 1 1/2 cups of sour cream, 2 Tbsp oil, and 1 tsp vanilla extract. Mix on a low speed until the batter is smooth.
- Scrape down the sides and bottom of the bowl with a spatula, then beat on a medium speed for 30 more seconds to make sure everything is properly combined.
- Divide batter evenly between the prepared cake pans and bake for 38-40 minutes or until a toothpick comes out with a few moist crumbs.
- Let the pans cool for 10 minutes, then run an offset spatula around the perimeter of the pan to separate the cake from the pan. Place cake layers on a wire rack to finish cooling.
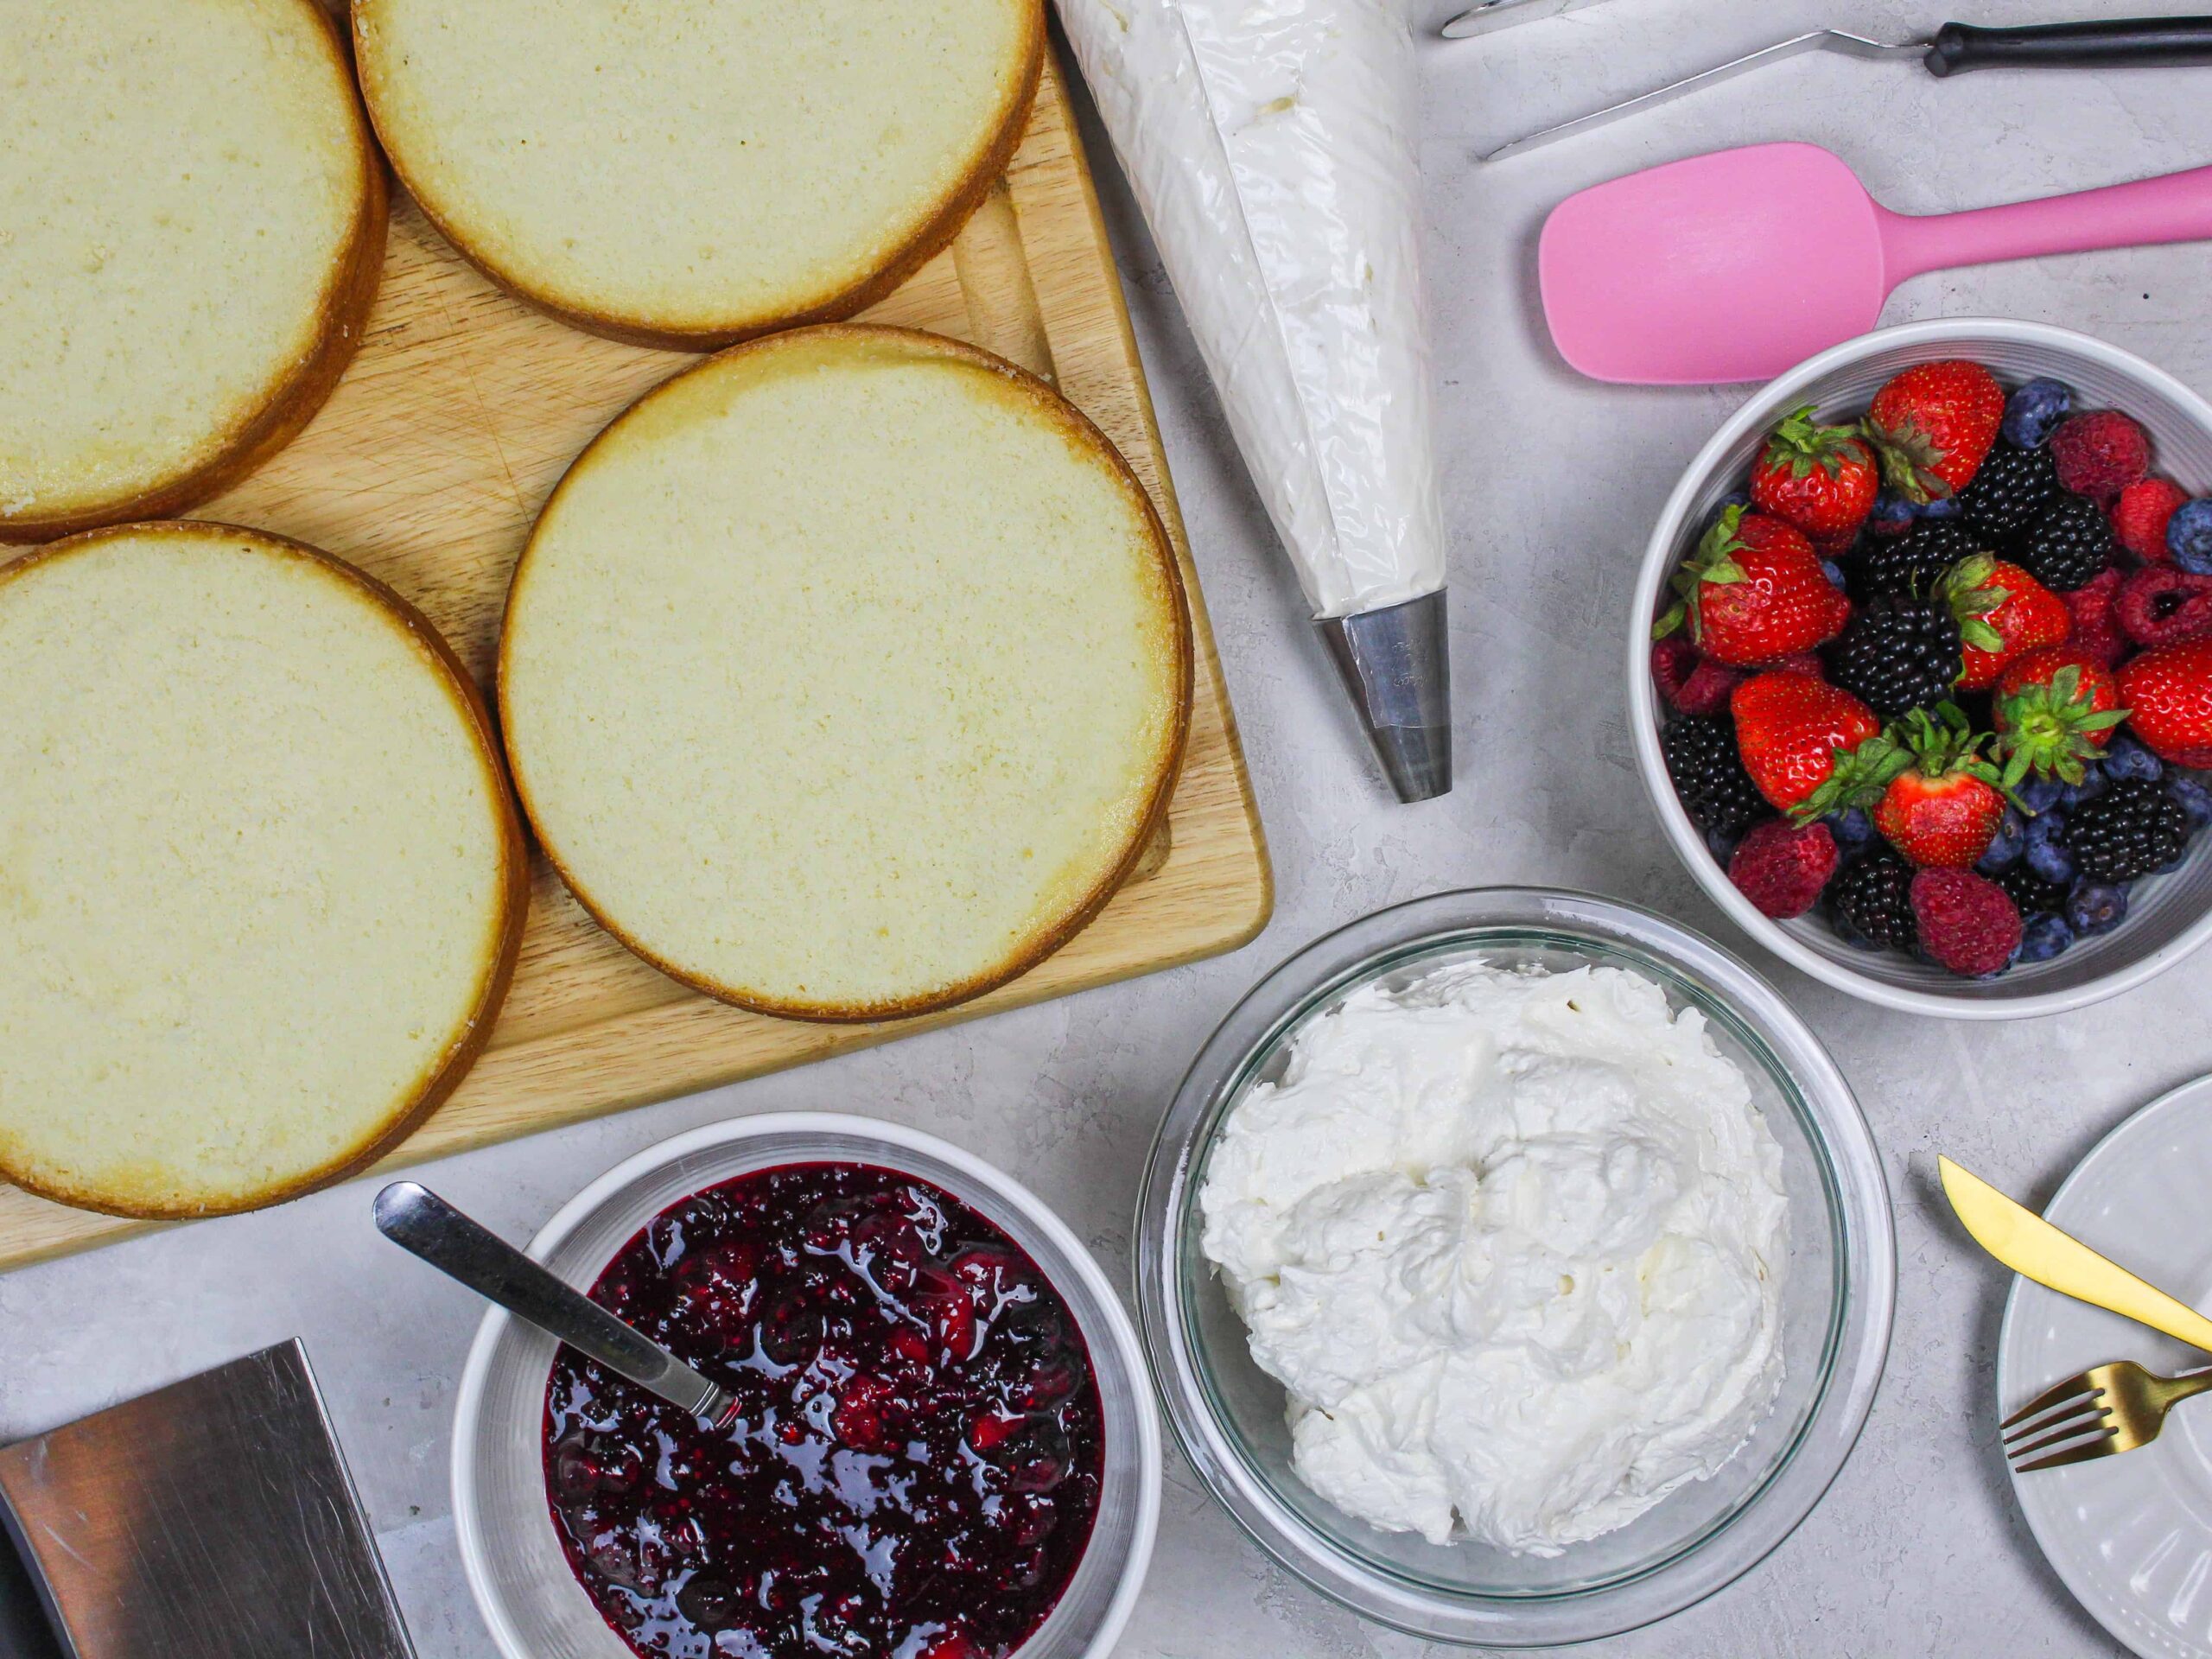
- Once fully cooled, use a serrated knife to level the tops of the layers. Set aside.
Mascarpone Cream Cheese Frosting
- While the cake layers bake and cool, make the mascarpone cream cheese frosting.
- In a medium sized pot, add about 1 inch of water bring to a simmer.
- Before making the frosting, be sure to thorough clean the mixing bowl. If there’s any grease it can make it difficult to make the meringue.
- Add 7 egg whites and 2 cups of sugar into a heat proof mixing bowl.
- Place the bowl on top of the pot filled with simmering water. Make sure the water doesn't touch the bottom of your bowl. The bowl should create a seal over the pot.
- Whisk the mixture constantly for about 3 minutes, until it reaches 160°F / 71°C. You can test the mixture to see if it’s ready by rubbing a tiny bit between your fingertips. The sugar should be fully dissolved, and it should feel super smooth and hot to the touch.
- Lift the bowl away from the pot and dry the bottom with a towel.
- Lock the bowl into place on your stand mixer and beat on medium high using a whisk attachment. Mix for about 10 minutes, or until you have stiff and glossy peaks.
- At this point in time, the bowl should be back to room temperature and no longer warm to the touch. If it’s still warm, it will melt your butter!!
- Gradually mix in 1 1/2 cups unsalted butter at a medium speed.
- In a separate bowl, whisk together 1/2 cup of mascarpone cheese and 1/2 cup of cream cheese until the mixture is fluffy and fully combined. It's important that both of these are properly at room temperature or else they won't mix together properly.
- Mix the whipped cream cheese mixture into the meringue mixture at a medium high speed.
- When the ingredients are fully incorporated, scrape the sides and bottom of the bowl with a rubber spatula.
- Add in 2 tsp vanilla extract and 1/2 tsp salt and mix on a low speed for a couple minutes then set aside. The frosting should have a thick whipped consistency at this point. If it looks lumpy or broken, keep mixing until it looks smooth and thick.
- Place 2/3 of the frosting into a large piping bag and cut a 2 cm opening at the tip of the bag.
Assembling This Berry Chantilly Cake
- Build this cake on a greaseproof cake board or flat plate using a dab of frosting to help stick the first cake layer to the board.
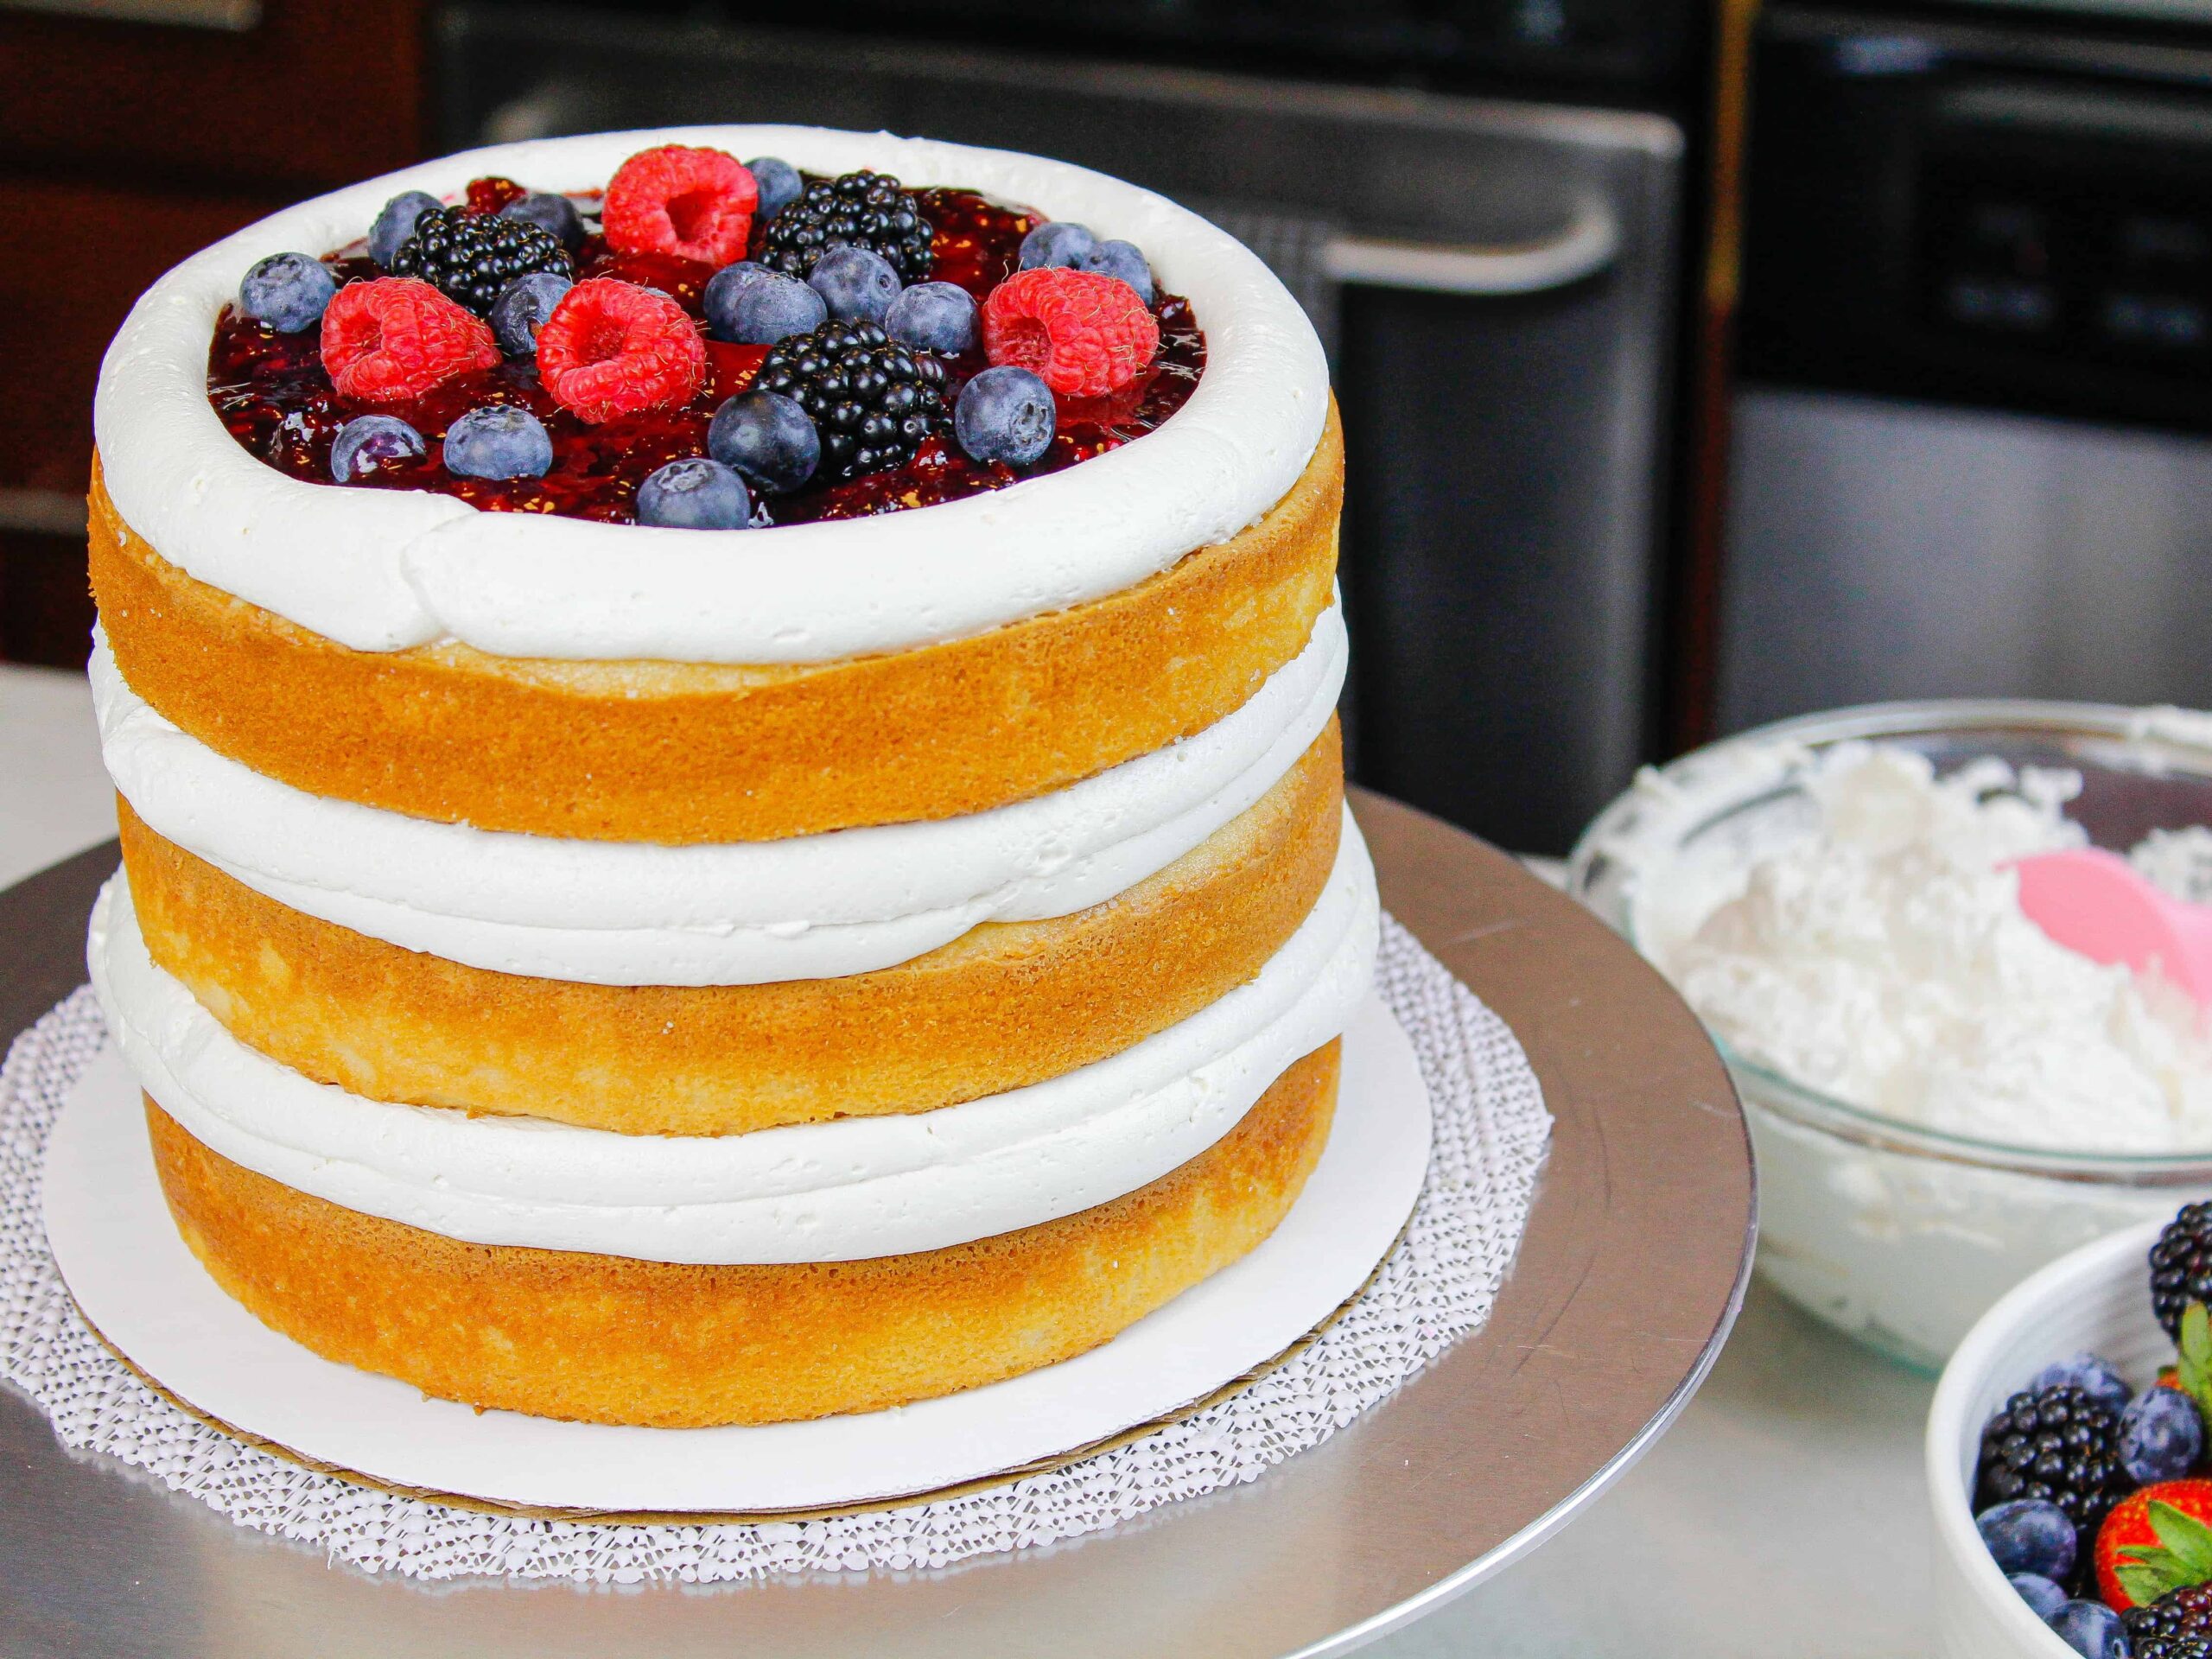
- Pipe a thick frosting ring around the edge of your cake layer to act as a frosting dam for the berry filling.
- Spread 1/3 of the cooled berry filling into the ring of frosting. Top with additional fresh berries (optional) and cover with an even layer of cream cheese frosting. I recommend flipping the top cake layer upside down to make it easier to frost.
- Add a thin layer of frosting around the cake to fully cover the cake layers. We're going for a semi-naked look, so it's ok if you can see the cake layers peeking out through the frosting.
- Smooth using a bench scraper, then chill the cake in the fridge (30 minutes) or freezer (10 minutes) until the frosting is firm to the touch.
- Top the cake with fresh berries and edible flowers, then enjoy!
Notes
Tips for Making the Best Berry Chantilly Cake
- Properly measure your flour (spoon into the cup measure, then level) or use a kitchen scale to measure your dry ingredients.
- Mix your cake batter just until the ingredients are incorporated. This helps the cake layers bake up tender and fluffy.
- Use a serrated knife to level your cake layers once they’re fully cooled, to allow the berry filling to seep into the cake layers.
- Use fresh berries for the cake filling if they are in season, and frozen if they aren't.
- Chill your cake layers in the freezer for about 20 minutes before assembling the cake, to make it easier to stack and frost.
- If you can't find golden sugar where you live, you can use granulated sugar in its place.
Making This Berry Chantilly Cake in Advance
Make your cake layers in advance and freeze them. It breaks the process up and makes it more approachable.
Make your frosting ahead of time too or save any leftover frosting! It can be stored in an airtight container in the fridge for up to a week, or in the freezer for up to a month. Be sure to give it a good stir once it thaws to get the consistency nice and smooth again.
A frosted cake can last in the fridge for 2-3 days, or in the freezer for up to a week. The buttercream locks in all the moisture, keeping the cake fresh and delicious.
If you cut into the cake and have leftovers, use any remaining frosting to cover the cut section to keep it moist and store in the fridge for up to a week.
Nutrition Information
Yield
24Serving Size
1Amount Per Serving Calories 536Total Fat 29gSaturated Fat 17gTrans Fat 0gUnsaturated Fat 10gCholesterol 77mgSodium 309mgCarbohydrates 64gFiber 1gSugar 49gProtein 6g
hayley
Tuesday 8th of November 2022
Beautiful. I want to offer this beauty as a wedding cake option for my sister. I'm a home baker and read your answer to making this a 2 tier cake. What would your answer be for a 3 tier cake?? Thank you for sharing your recipes and tips!
Chelsweets
Saturday 12th of November 2022
Hi Hayley,
Thank you!! My tips would be the same for a 3 tiered cake :) As long as it's properly supported with dowels you should be good to go. Hope that helps, happy baking!
kyla
Friday 9th of September 2022
Does the Swiss meringue frosting need mascarpone cheese and cream cheese?
Chelsweets
Sunday 11th of September 2022
Hi Kyla,
I love this frosting with the mascarpone cheese and cream cheese, but if you want to omit them just add in an additional 1/2 cup of unsalted butter in their place. Hope that helps, happy baking!
Sam
Saturday 23rd of July 2022
Hi - I love this recipe! I am wondering how well the modified icing would dye? I’m looking for a sky blue color, would the gel-food coloring only allow a lighter baby blue?Or do you have another icing you recommend for dying with this cake recipe?
Chelsweets
Sunday 24th of July 2022
Hi Sam,
This is a great question! This frosting can be difficult to color bright colors like sky blue with gel food coloring, but you should be able to if you use the microwave method (https://www.youtube.com/watch?v=LMVSrOen54s), which works so well with this type of frosting!! Hope that helps, happy baking!
Allyson
Sunday 10th of July 2022
Just made this but my frosting is too thin how to I get it thicker and more whipped like rather than soupy. HELP!!!
Chelsweets
Sunday 10th of July 2022
Hi Allyson,
I'm so sorry to hear that! Sometimes that can happen if the meringue was too warm, or if the cream cheese, butter, or mascarpone cheese were too warm :/ It can also happen if your kitchen is really warm.
The best way to save it is to pop the bowl and whisk in the fridge for 10-15 minutes, then rewhip it . Repeat this process until it gets thicker and gets its shape back. Hope that helps for next time and that you were able to salvage this batch, happy baking!
Tangia
Thursday 7th of July 2022
Hi, would it be okay to use the whole eggs or does it have to be egg whites only. I love your recipes!
Chelsweets
Tuesday 12th of July 2022
Hi Tangia,
The cake portion of the recipe turns out best with egg whites, but 5 large eggs can also be used to make the cake layers. Happy baking!