
It feels wild saying this out loud, but I’ve been making cake videos and sharing them on social media for 6 years. While the equipment to make YouTube videos and the way I film has changed overtime, the fundamentals are still the same.
In my opinion, a good video can be broken down into three basic components- proper light, high quality footage, and good editing.
These components can be as simple or advanced as you want them to be.
When I first started, I kept things as basic as possible for a couple reasons. The first was that I had no idea what I was doing. The second was that I scared to spend a lot of money on something I didn’t know how to do.
But basic isn’t always bad. The hardest part of trying anything new is just getting started, and I hope this post encourages you to take that first step if it’s something you’ve wanted to try.
What You Need When You’re First Getting Started
My initial investment was about $100, and I used that money to buy 2 basic soft box lights and a cheap tripod for my camera. I initially ordered everything on Amazon (now I order some of my equipment from B&H).
In hindsight, I actually ordered exactly what I needed to get started. This is still what I recommend to people who want to start making cake/dessert videos.
Lighting: Natural vs. Artificial
The lighting you need may vary based on what you’re filming.
If you’re making a quick video of something like chocolate chip cookies, it may take you less than an hour to film the entire process.
And if you have good natural lighting somewhere in your kitchen/house/apt, you might not even need artificial lights.
However, if you’re making a complicated cake design that takes several hours to complete, I highly recommend artificial lights.
It will give your videos a consistent look that lets viewers focus on the cake rather than the constantly changing light.
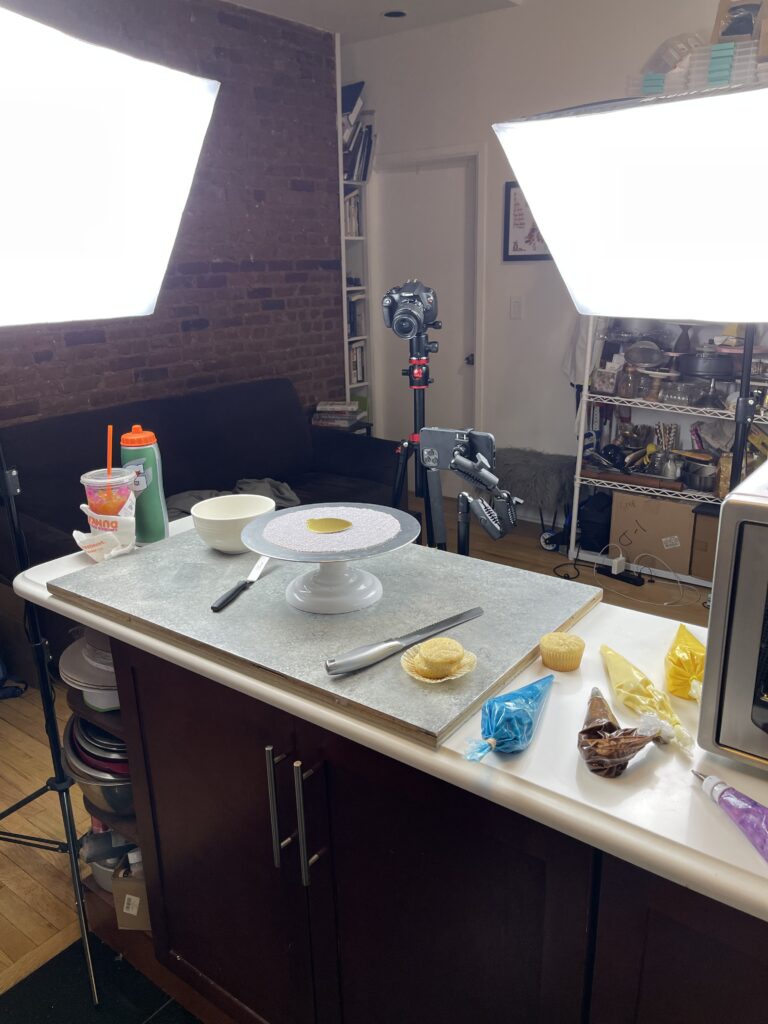
I lived in a ground floor apartment in NYC when I first started making videos and our kitchen got hardly any natural light.
Artificial lights were a must for me and I’m grateful I went that route. It allowed me to film any time of day, including late at night when I got home from my day job.
Lighting: How to Position Your Lights
Now that we’ve talked about lighting as a whole, let’s talk get into the details.
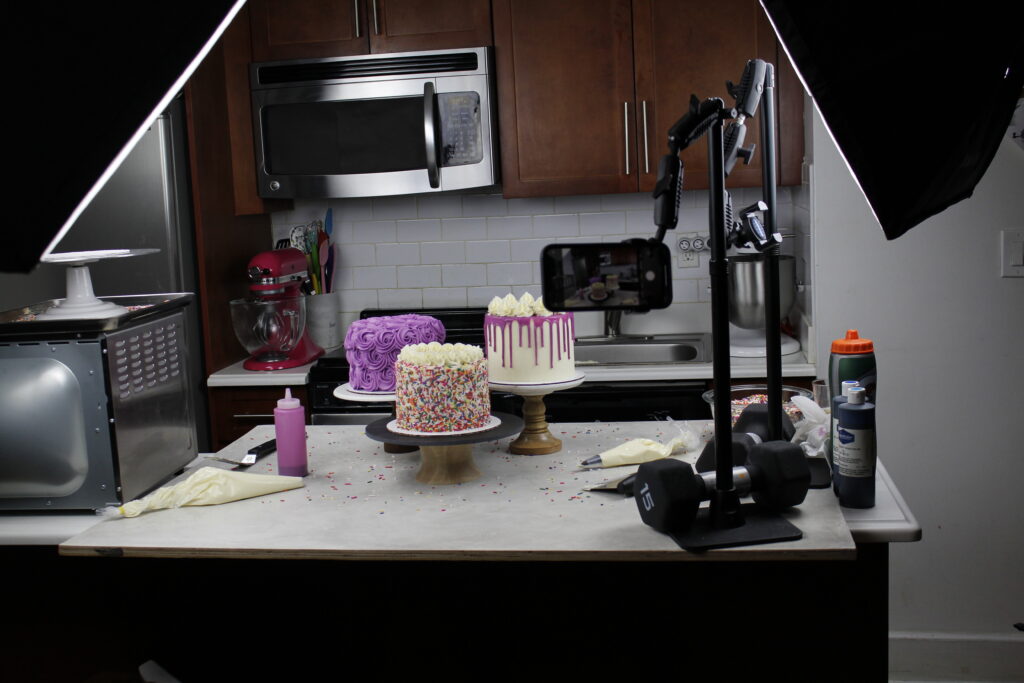
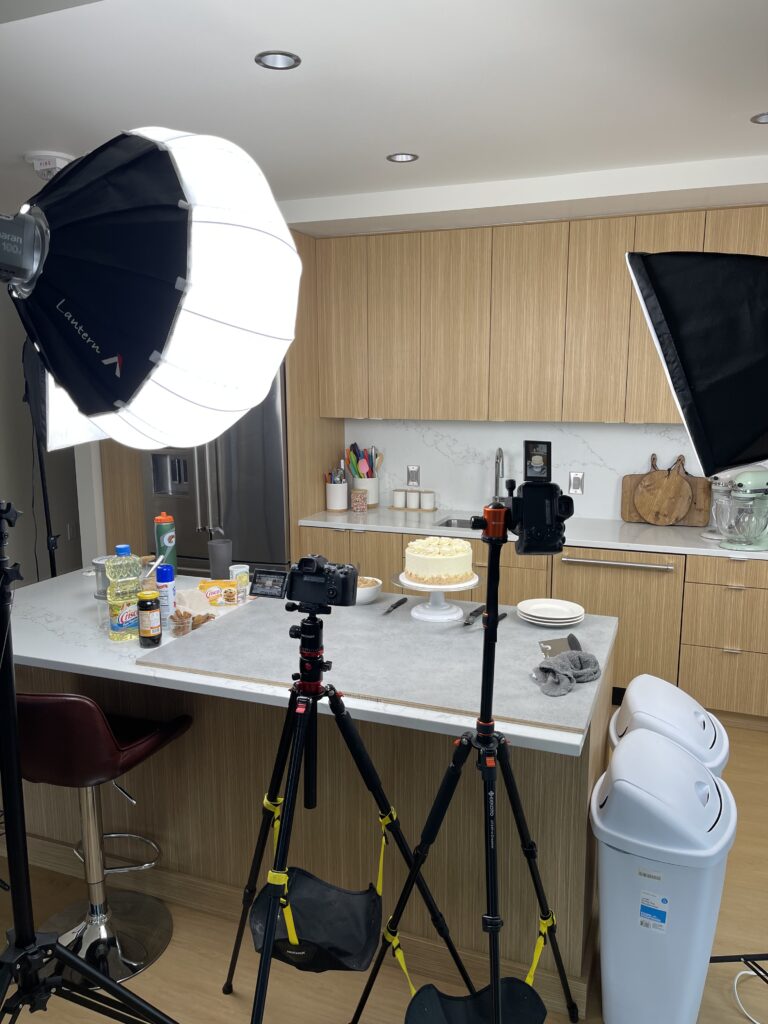
When I first started I had a pretty small kitchen and found that two soft box lights were plenty to brighten up the space.
I placed one off to the side of my camera to highlight my cakes at a 45-degree angle. The other light I placed off to the opposite side of the cake.
This illuminated the cake without blowing it out on camera. It also allowed me to stand behind the cake and decorate it without casting big shadows.
However, every kitchen is different. If you’re not sure where to place your lights, the best way to figure it out is experimenting.
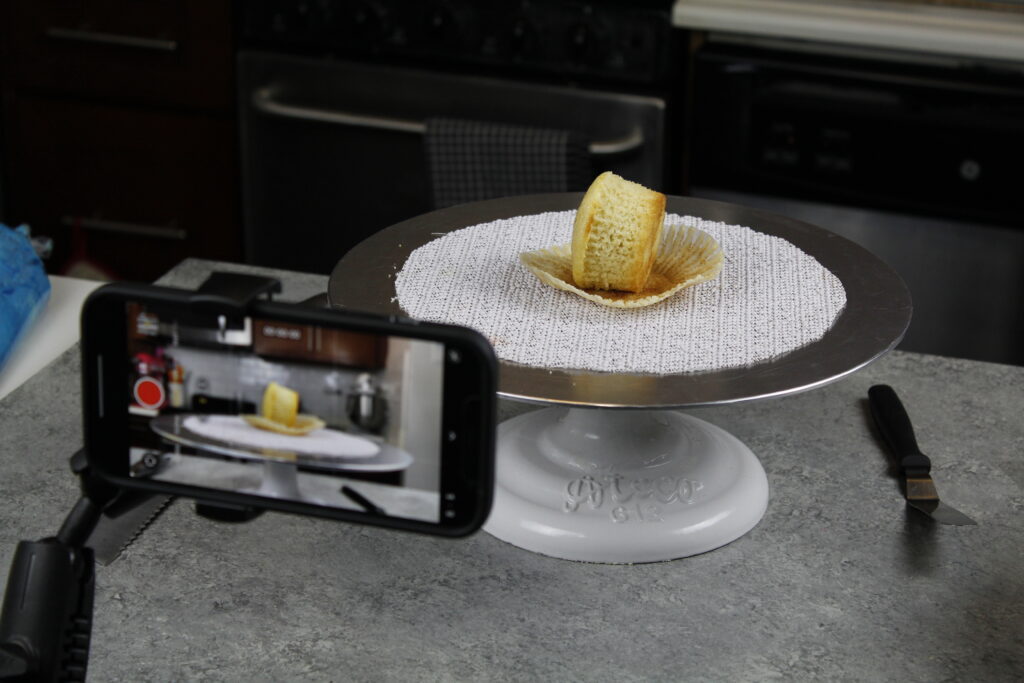
When I moved into a new kitchen this past summer, I placed a stuffed animal on a cake stand and filmed little 10 second clips of me standing behind it, pretending to decorate.
I moved my tripod and camera around to different places and shifted my lights around.
My new kitchen is a lot bigger than my last, and so is the island I film on.
It took me filming and editing several full cake videos to figure out the best way to film in my new space.
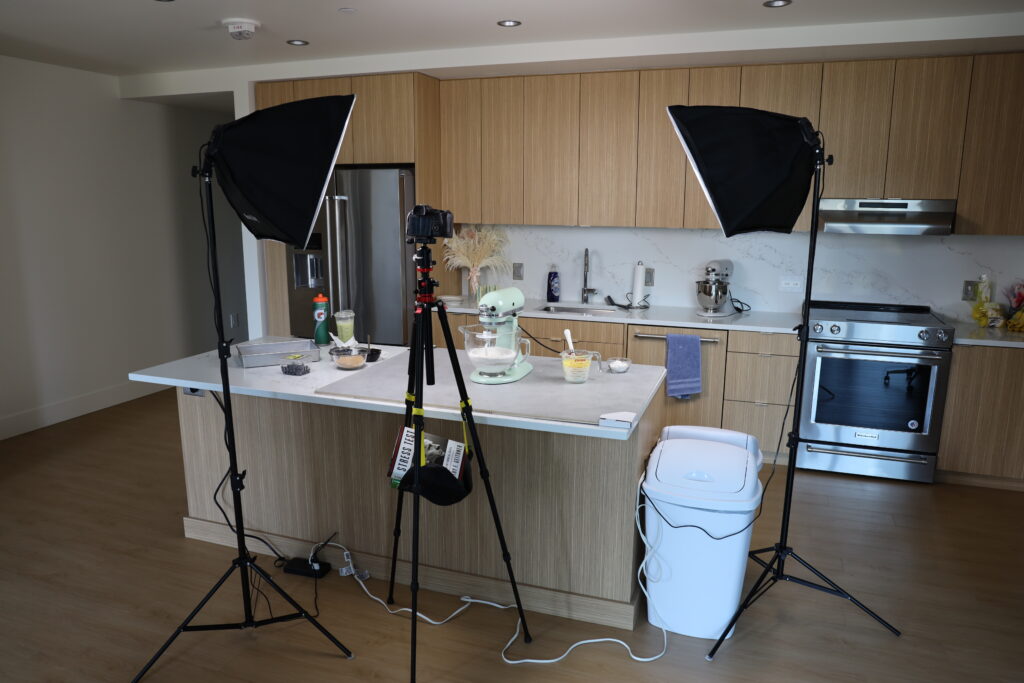
And that totally normal! It’s all a process. I still am making small tweaks to the process, and I’ve been in the same kitchen for a year now.
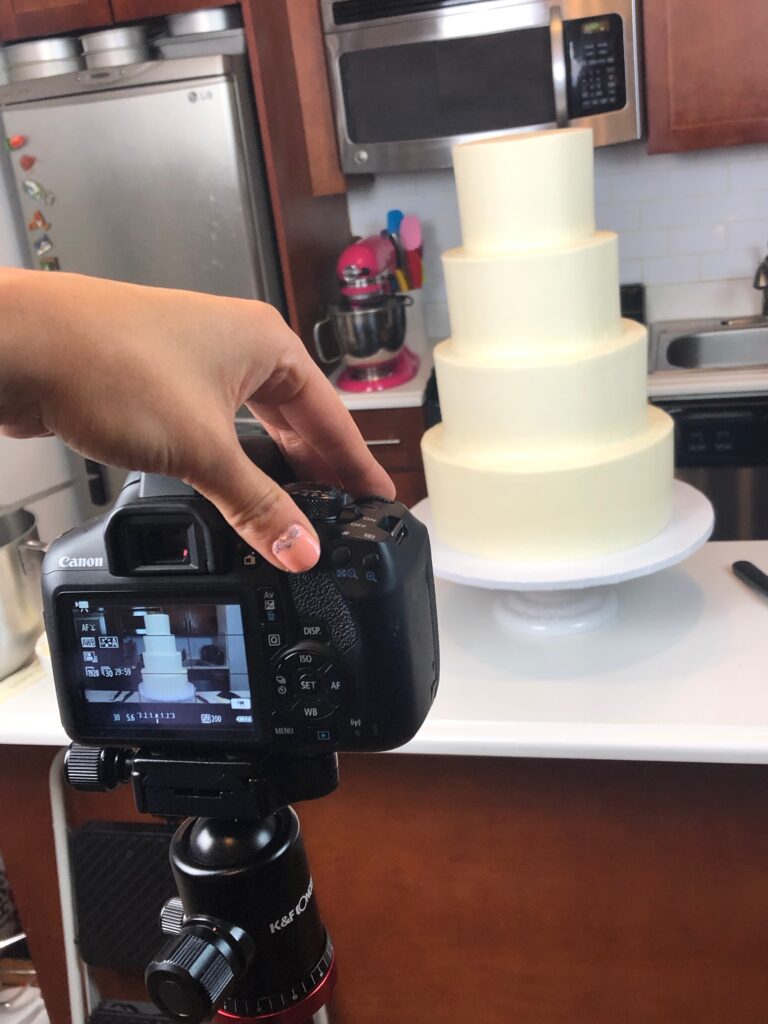
Filming: DSLR Camera vs. Phone
I filmed my first videos with a basic Cannon DSLR camera (got it at Costco for $300 in 2015) that I’d purchased to take pictures of my cakes. Back then phone cameras were nowhere near as advanced as they are now.
These days most phones film in 4k and work great for filming social media videos. When 4k first became a thing in 2020, I filmed some of my videos on my iPhone.
I wanted to see if it was worth it before investing in a nicer camera. The videos turned out great.
I highly doubt anyone watching those videos even noticed a difference between the ones I filmed in 4k on my phone vs. the videos I filmed later in 4k with my new DSLR.
If I were to recommend equipment for someone who was ready to start filming their first videos for social media, I’d recommend just using your phone!
Get a good tripod/stand that can hold whatever type of phone you have and try it out. Film some videos and edit them. See if you think you really need a better camera right away.
It took me several months and videos to start to feel comfortable with the process and enjoy it.
And once I got to that point where I was happy with the positioning of my lights and the way I was filming and edited my videos, I didn’t feel like I needed anything fancier to make my videos. They looked great the way they were!
I finally invested in better equipment a few years in when I started filming content for the Food Network in my kitchen. The projects I was working on covered the costs, so I felt good about making that decision at that time.
Editing: What Type of Software Should I Use on My Computer?
There are TONS of different types of editing software out there these days.
Some people even film and edit their videos directly in app (TikTok or IG). While there are some advantages to doing it that way, I think you have a lot more flexibility with where, when, and how you share your videos if you edit them outside of an app.
The other thing to consider is whether you’ll be editing videos on your phone, tablet, or computer.
When I first started making cakes, I edited the videos on my computer. It was the logical flow because I was uploading the footage from my camera to my computer.
I had a Windows computer and used an extremely cheap software called Filmora Wondershare. I think it was $40 for a yearly subscription. It was super basic but got the job done and was easy to use.
About a year in I got a MacBook and started using iMovie to edit my videos. It’s free and comes with any apple computer or phone. It worked well and also was super easy to use.
The only downside was that there were limited options for things like text and overlays. I don’t do a ton with that type of stuff, but some partnerships require adding their logo or legal disclosures in videos.
This is why I eventually transitioned to Final Cut Pro. It’s quite a bit more expensive ($300 for a license). However, it gives me the tools I need to work on partnerships along with a few other bells and whistles that I enjoy using when I’m editing.
Adobe Premier is what professional video editors use, and really isn’t necessary for most content creators out there.
Unless you’re making cinematic long-form videos or using multiple mics, I’d advise against using it.
While you can do just about anything in it, it’s harder to use and most of us don’t need those advanced features.
Editing: What Type of Software Should I Use on My Phone?
Now that so many people are filming on their phones, sometimes it makes more sense to edit on your phone or tablet too.
I had friends in NYC that would edit videos on their phones on the train during their commute to work and swore by it! And you know what? Their videos looked great.
If you want to stick with filming and editing on your phone, I highly recommend using an app like the mobile version of iMovie or Inshot.
Process: How Should I Store All My Footage?
The final thing I wanted to cover is what to do with all your footage and edited content. Because no matter what you chose to film with, you’re going to end up with a ton of footage.
I upload my raw footage to an external hard drive once I’ve completed a project. I upload all my edited content to my iCloud. Rarely do I actually need old raw footage, but it’s good to have just in case I do.
Some content creators highly recommend backing up raw footage on two external hard drives, so that if something happens to one, you’ll have a backup. I personally do not think doing that is worth it for me, but to each their own.
As for storing my edited content on my iCloud? I love it. It’s super easy to access any of my cake videos from my computer or phone. I’ve organized it in a way that makes it super easy to find things!
I have a folder for every baking project, which includes the different formats of the edited videos (one for YT, one for IG, one for TikTok, and one for my blog), and the edited pictures.
This works really for me, but it’s all about creating a system that works well for you.
Let Me Know What You Think
I hope you found this helpful and feel inspired to make your first video! If you have any additional questions, please leave a comment below.
Other Posts You Might Like:

Julia Asantewaa
Saturday 29th of October 2022
Awww you are such a wonderful soul... I really appreciate this ideas
Chelsweets
Saturday 5th of November 2022
Aw thank you Julia!! Glad you found this post helpful :)