
How have I never shared my funfetti cake recipe?! It’s mind blowing, especially considering it’s my very favorite cake flavor.
In fact, my husband and I love it so much it’s going to be the largest tier of our wedding cake!
And that’s saying a lot, I’ve made a ton of different cake flavors over the years. When I think about why I love it so much, it’s hard to say why.
I grew up on funfetti boxed cake mix, and I think I’ve always had a soft spot in my heart for it. Or maybe it’s just all the sprinkles!!
Technically I’ve included it in past recipes, like in my funfetti cookie dough cake. But most of you aren’t trying to make a cake that over the top (there’s a cookie dough filling, chocolate drip, sprinkle coating…etc.).
You want a moist, easy to make, and absolutely delicious funfetti cake recipe that you can make from scratch.
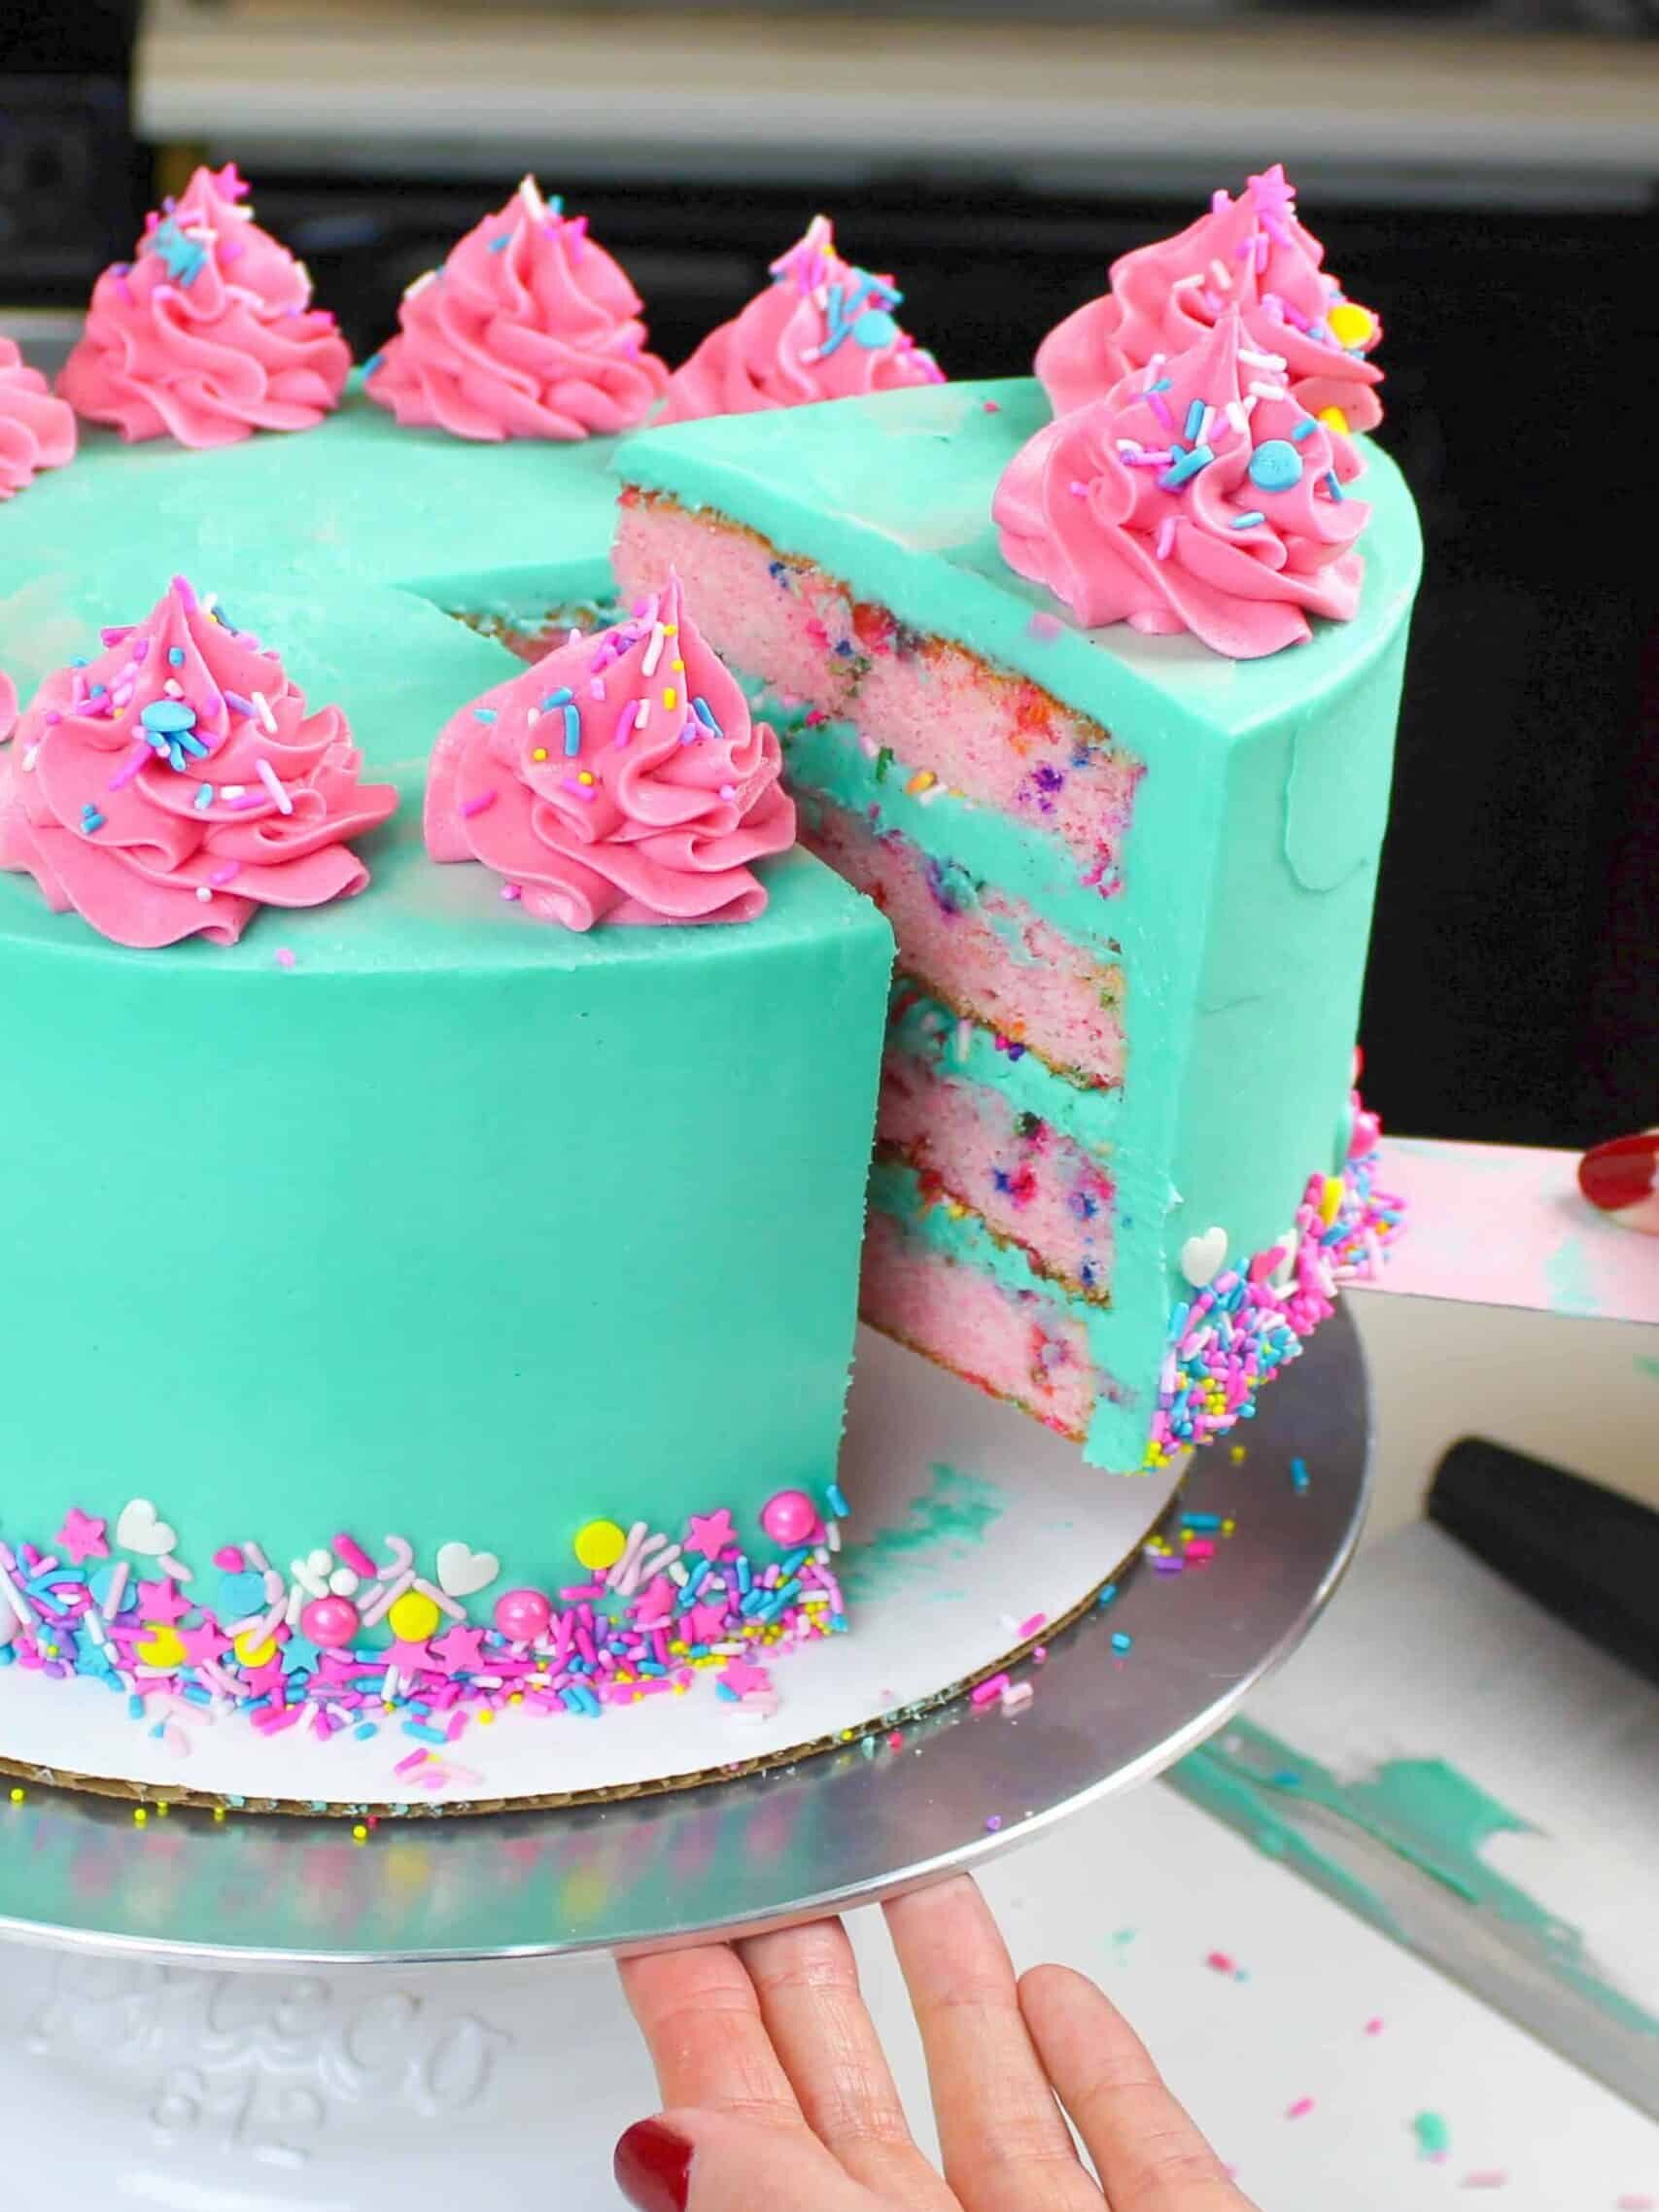
I took things a bit further and colored both the cake batter and buttercream with gel food coloring, but this is totally optional 🙂 I just couldn’t resist!!
What is Funfetti Cake?
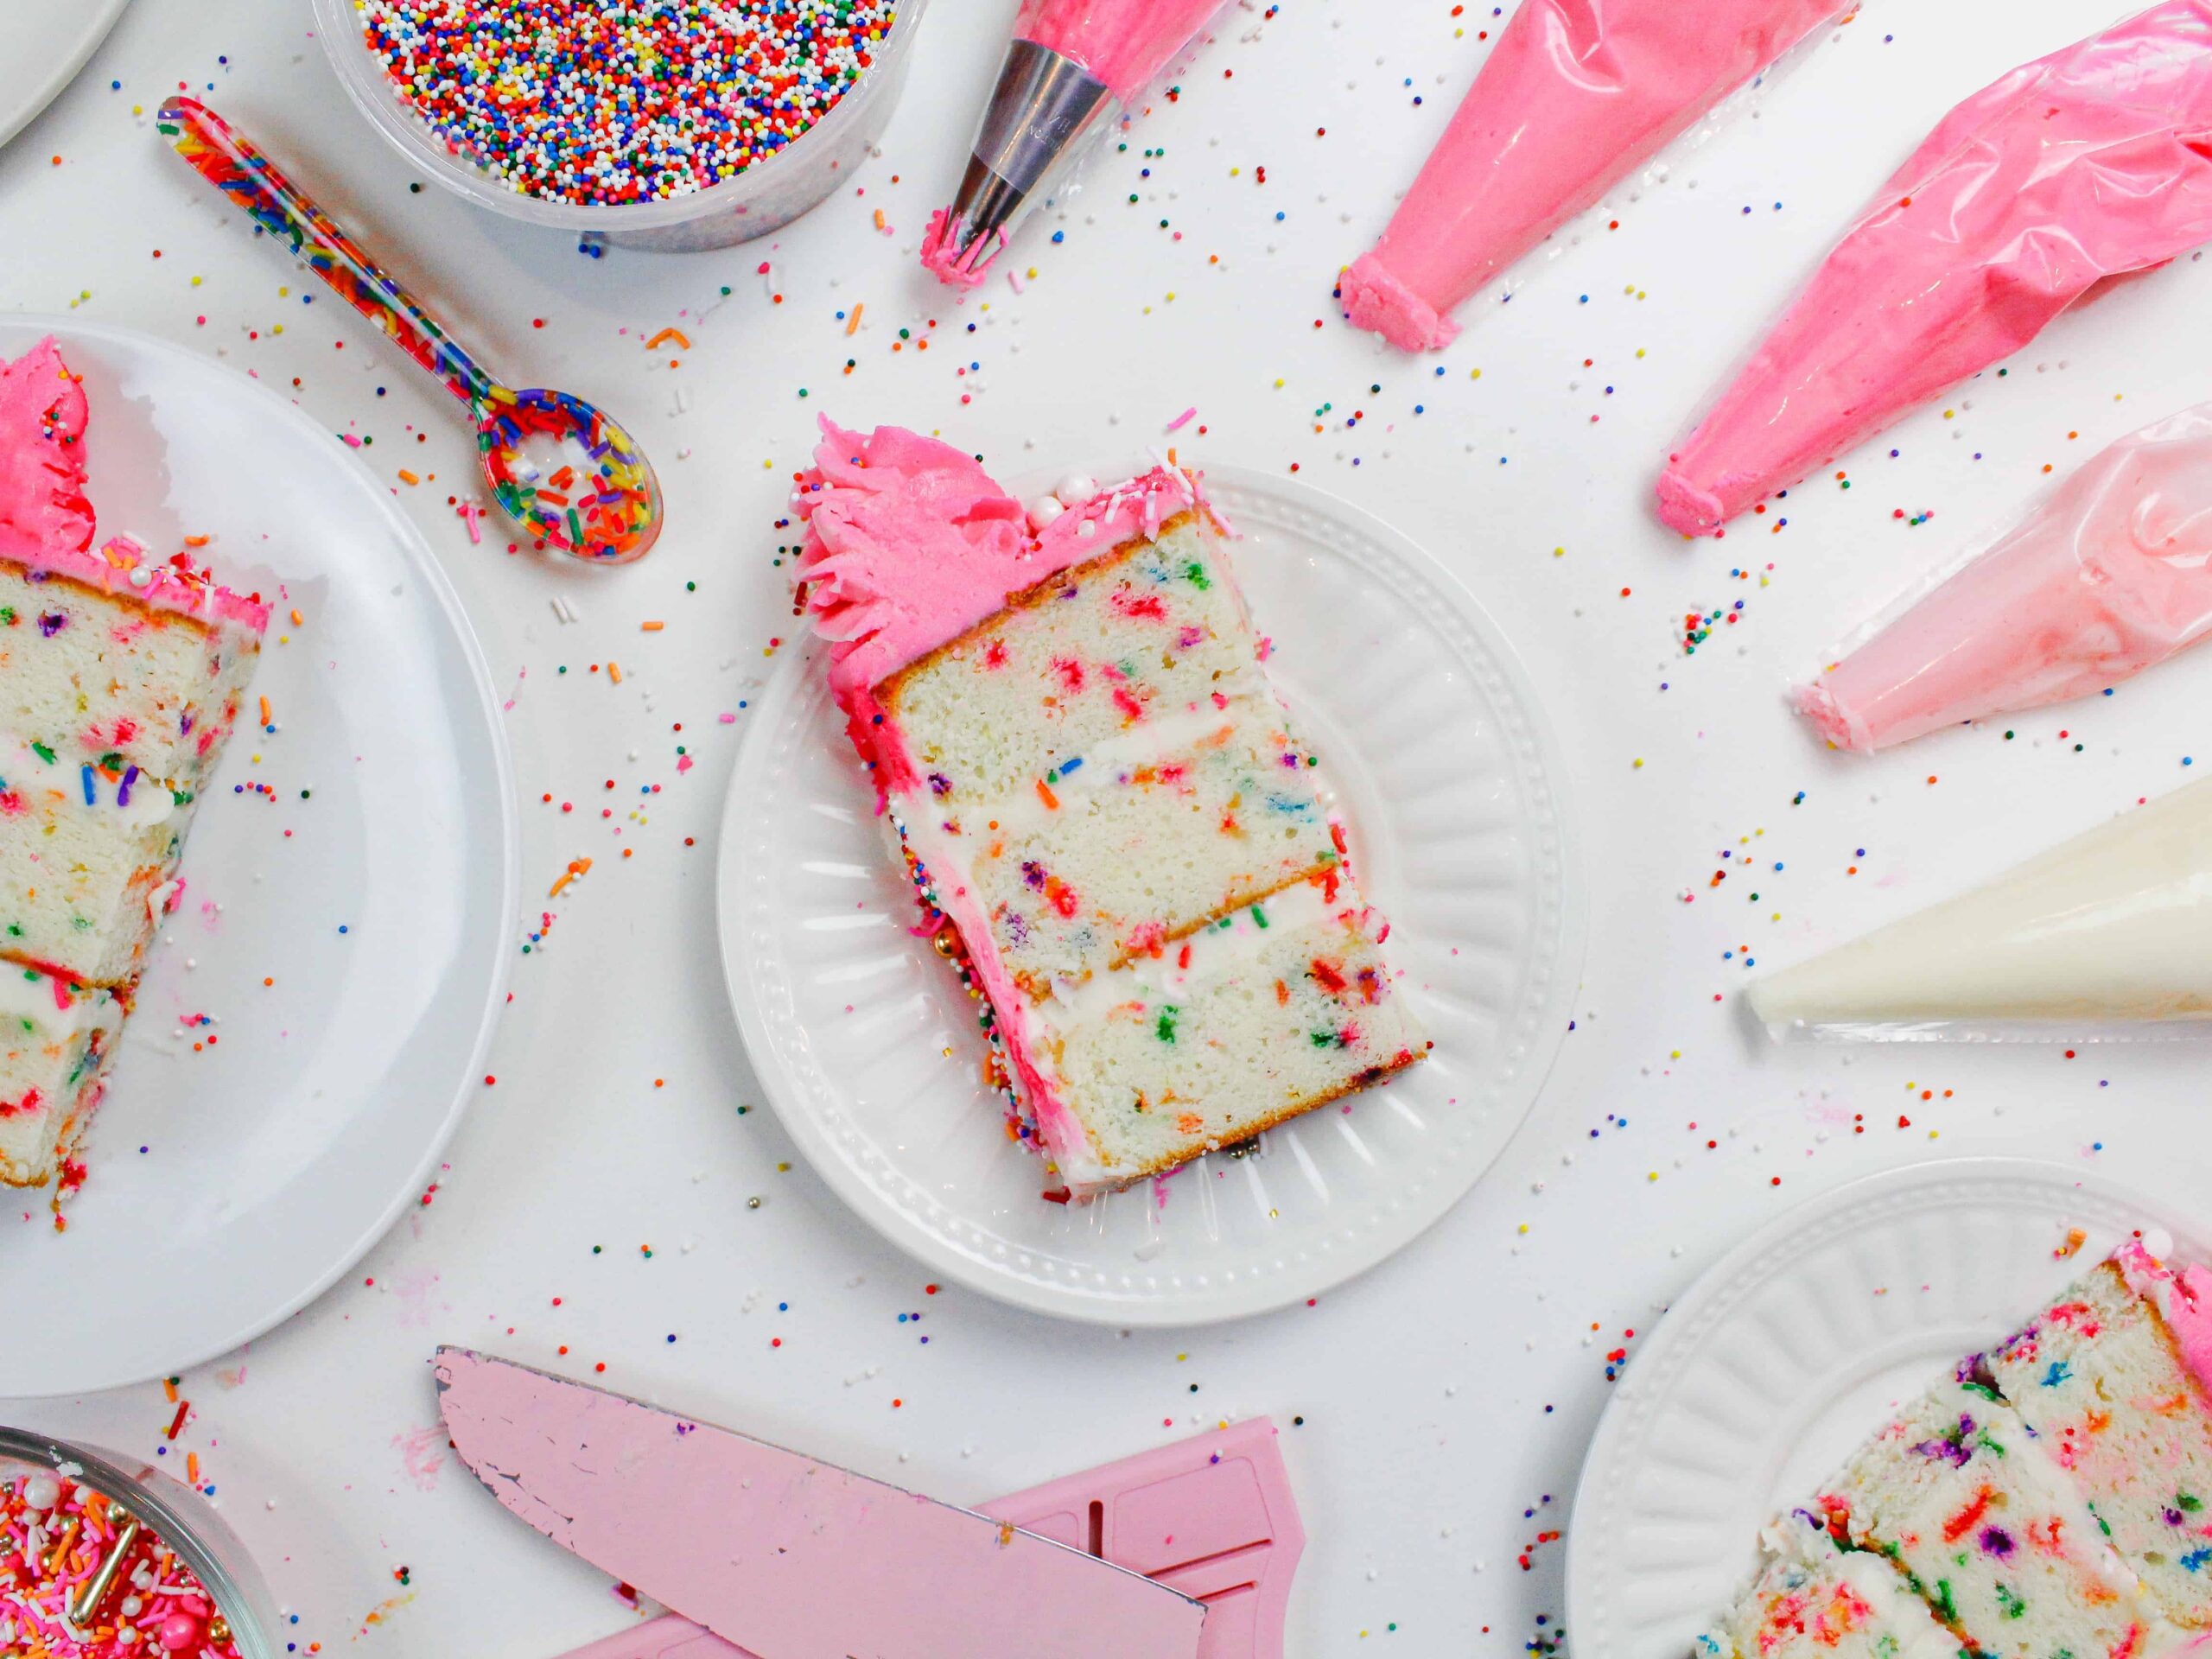
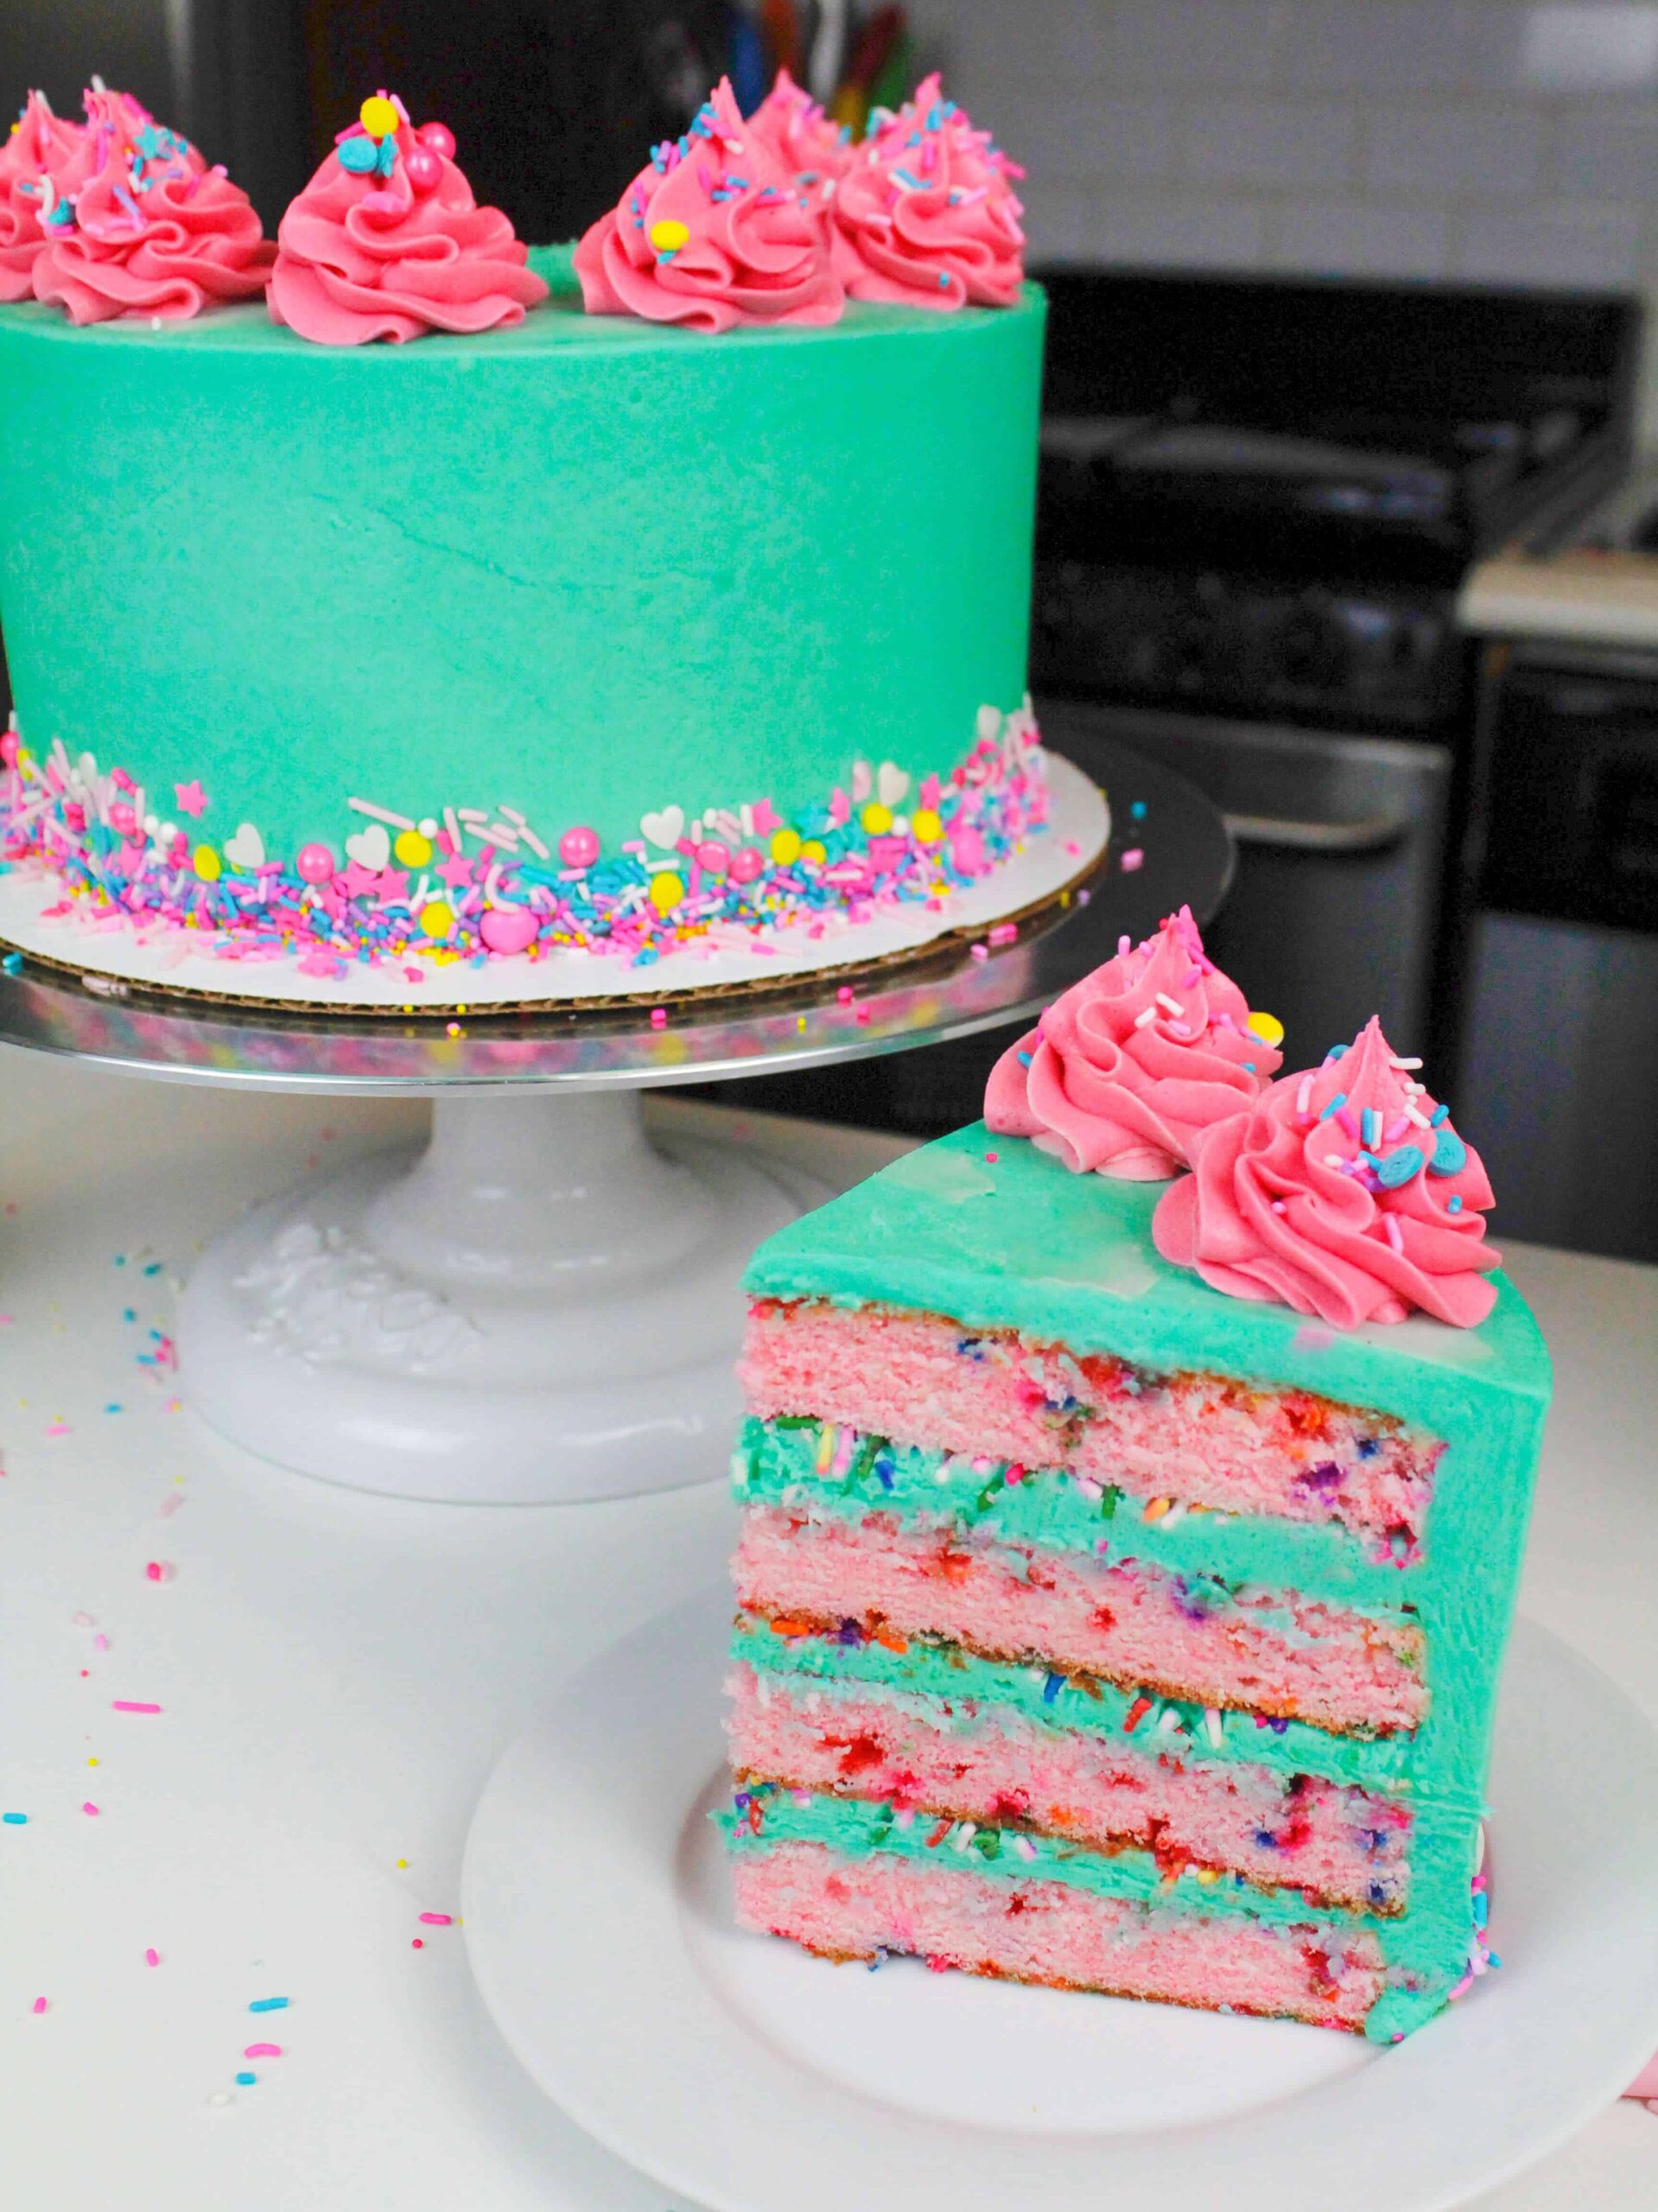
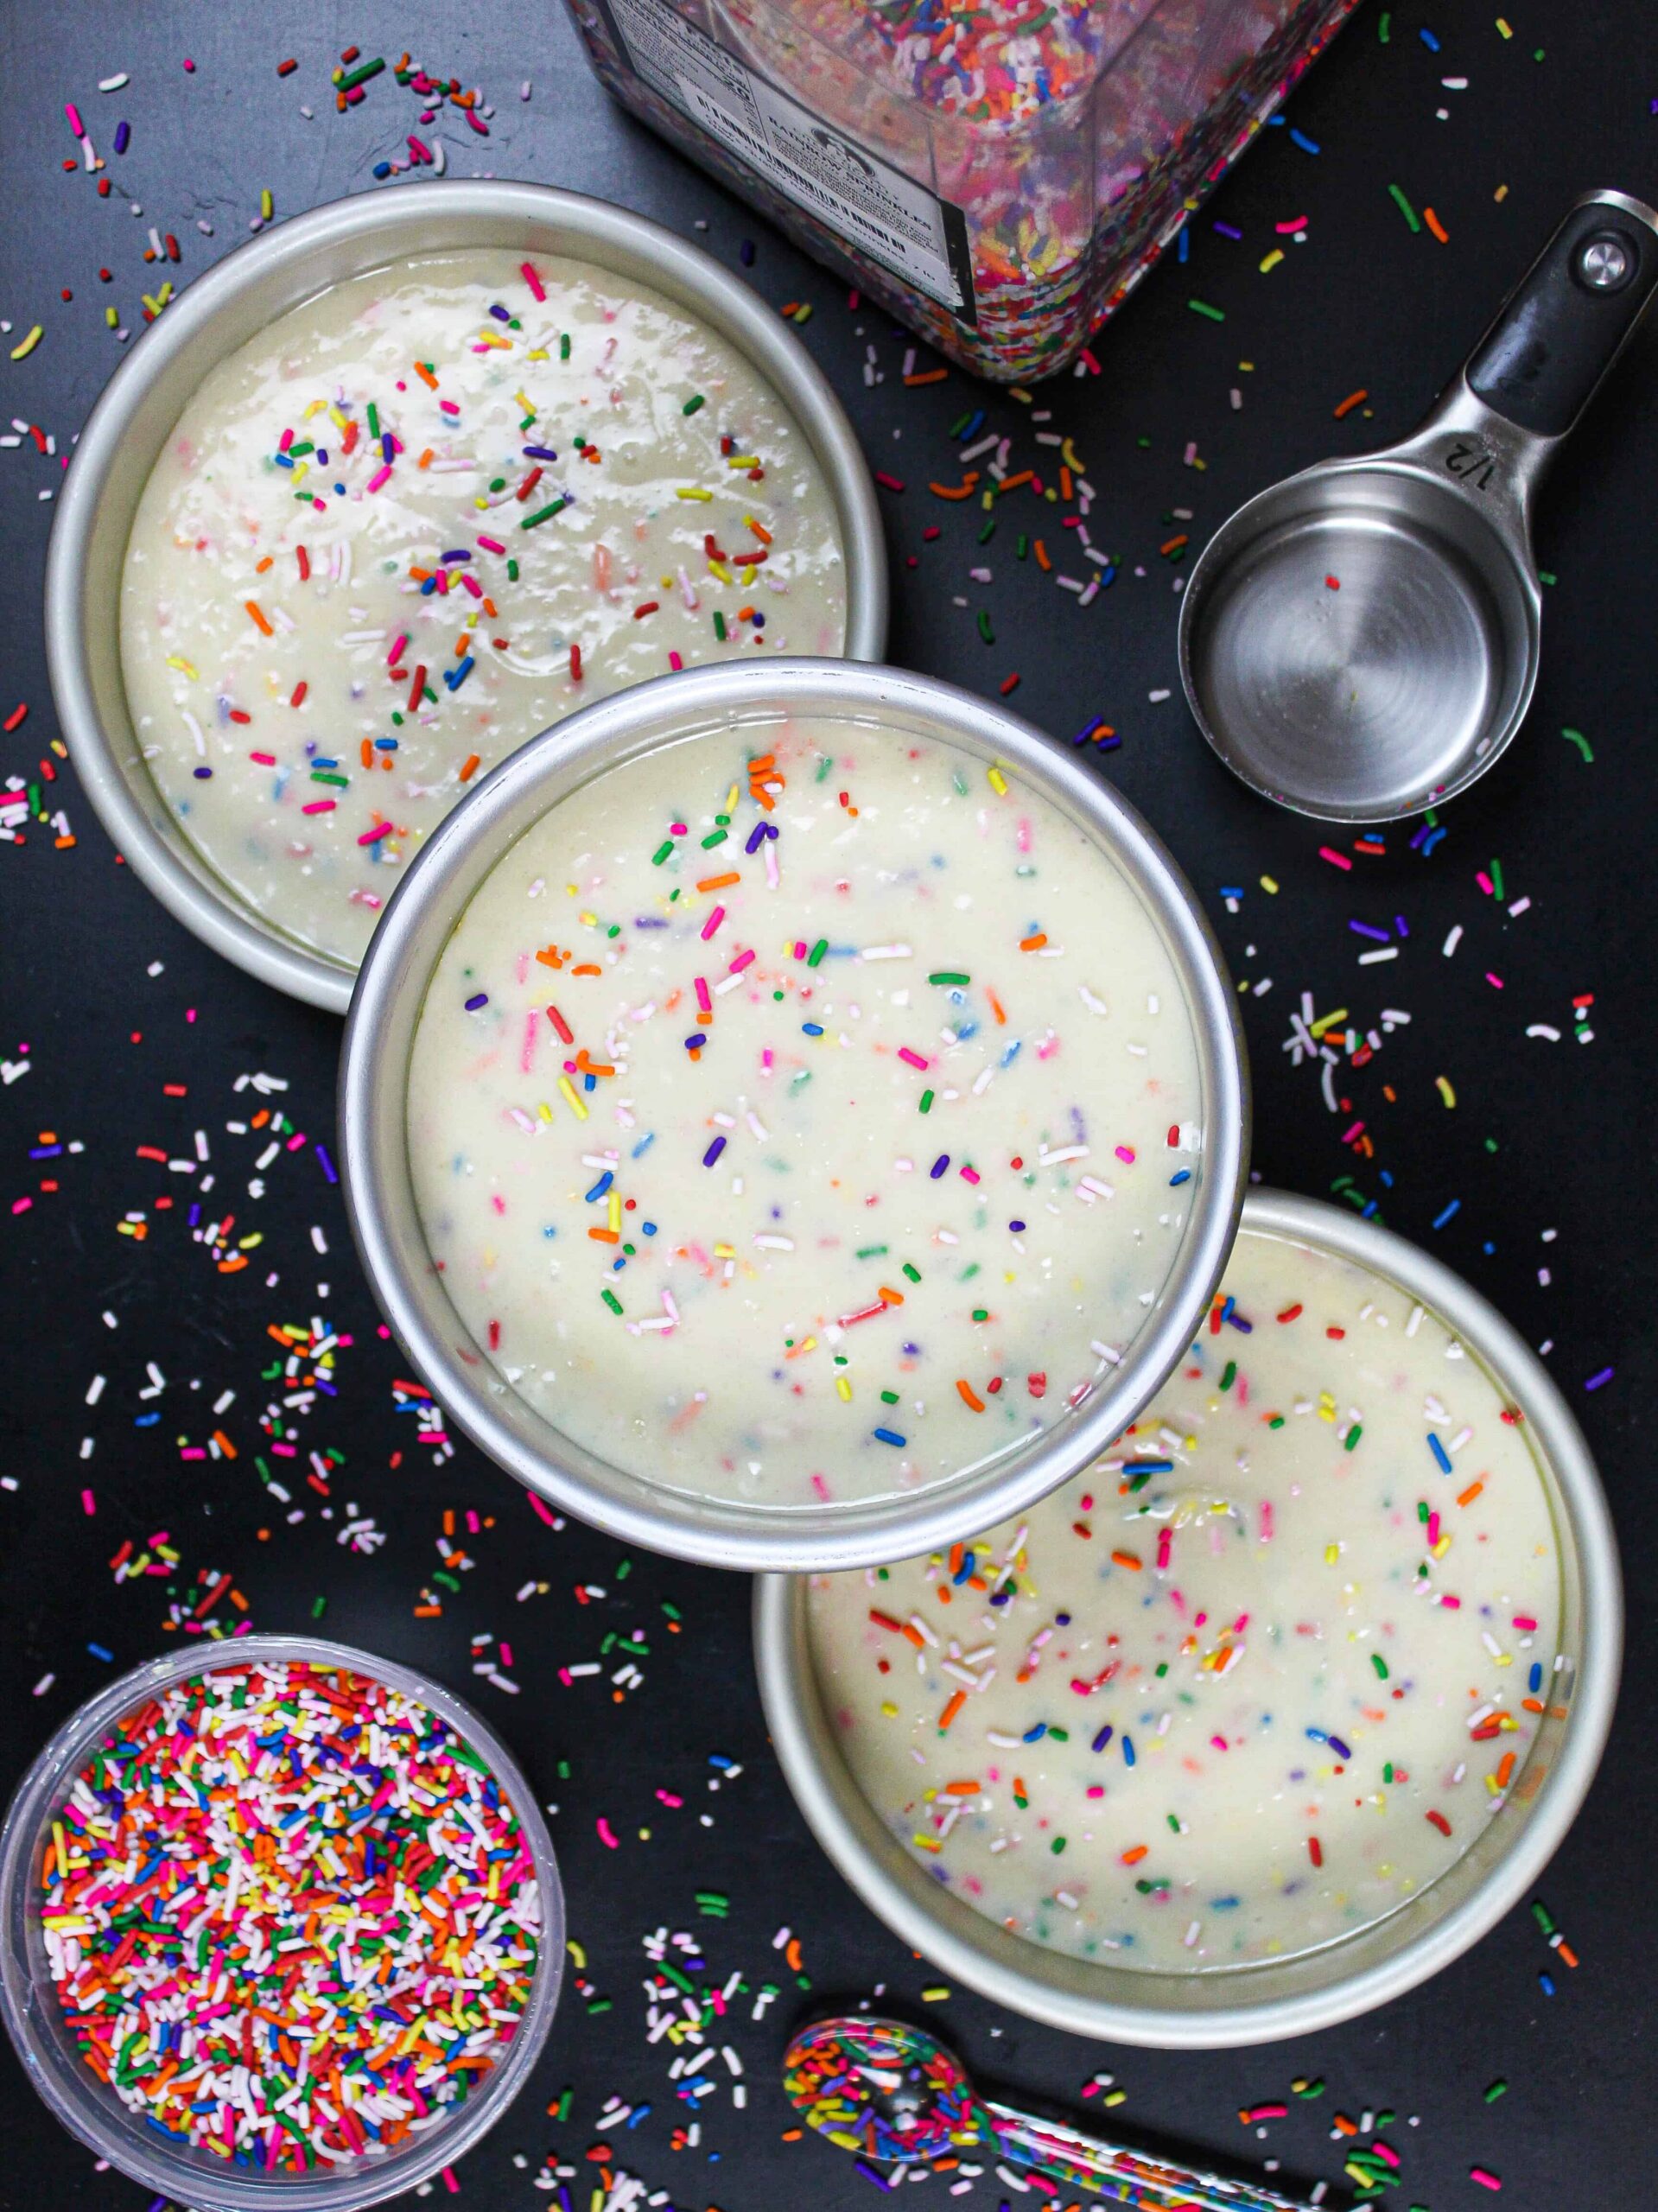
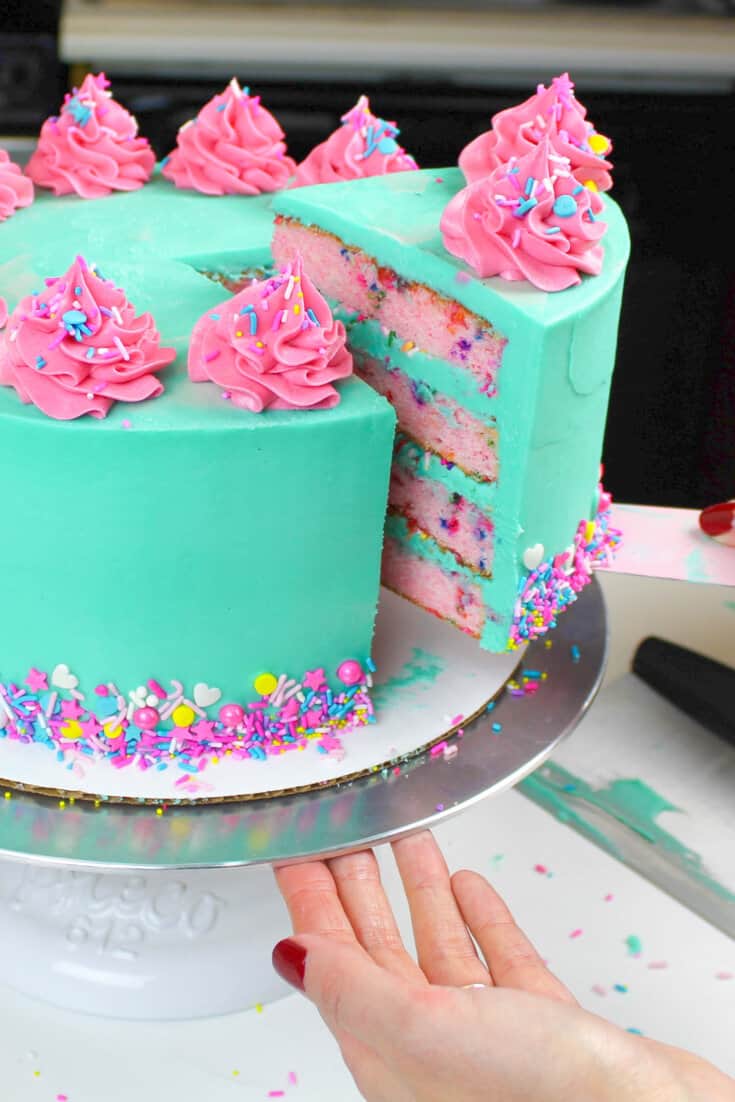
Funfetti cake is usually a moist vanilla cake base. It has rainbow sprinkles folded into the batter, and baked right into the layers. The sprinkles add both a pop of color, and a bit of texture to each bite.
Most funfetti cakes incorporate sprinkles into the decoration or design of the cake as well!
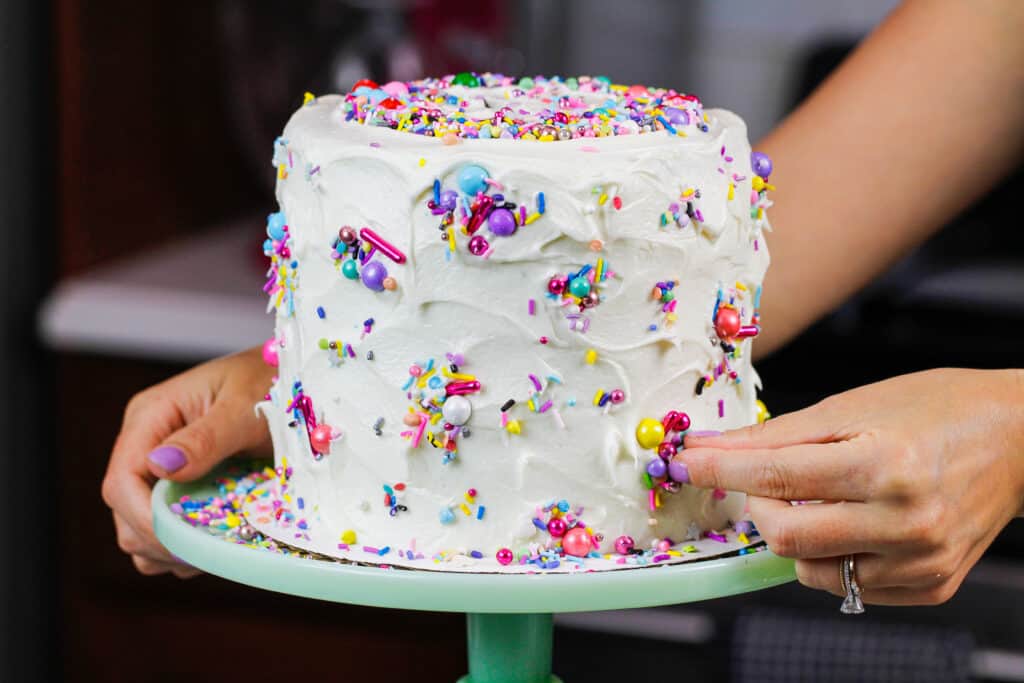
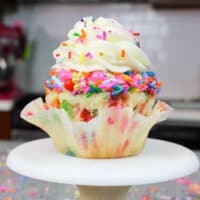
Sprinkles are usually used to decorate the outside of the cake. Sometimes they’re gently pressed into the frosting, to completely coat the cake (just like the tiny smash cake below).
Another popular look is to use a special sprinkle blend around the base or sides of the cake.
Or to really take things to the next level, you can even fill the center with sprinkles.
What Types Of Sprinkles Should I Use To Make Funfetti Cake?
While you might think all sprinkles are created equal, sadly you’re wrong. When making a funfetti cake, you have to be sure you use the right type of rainbow sprinkle.
The best sprinkles for making a funfetti cake are rainbow jimmies. They are the longer sprinkles that you used to (and may still) put on your ice cream.
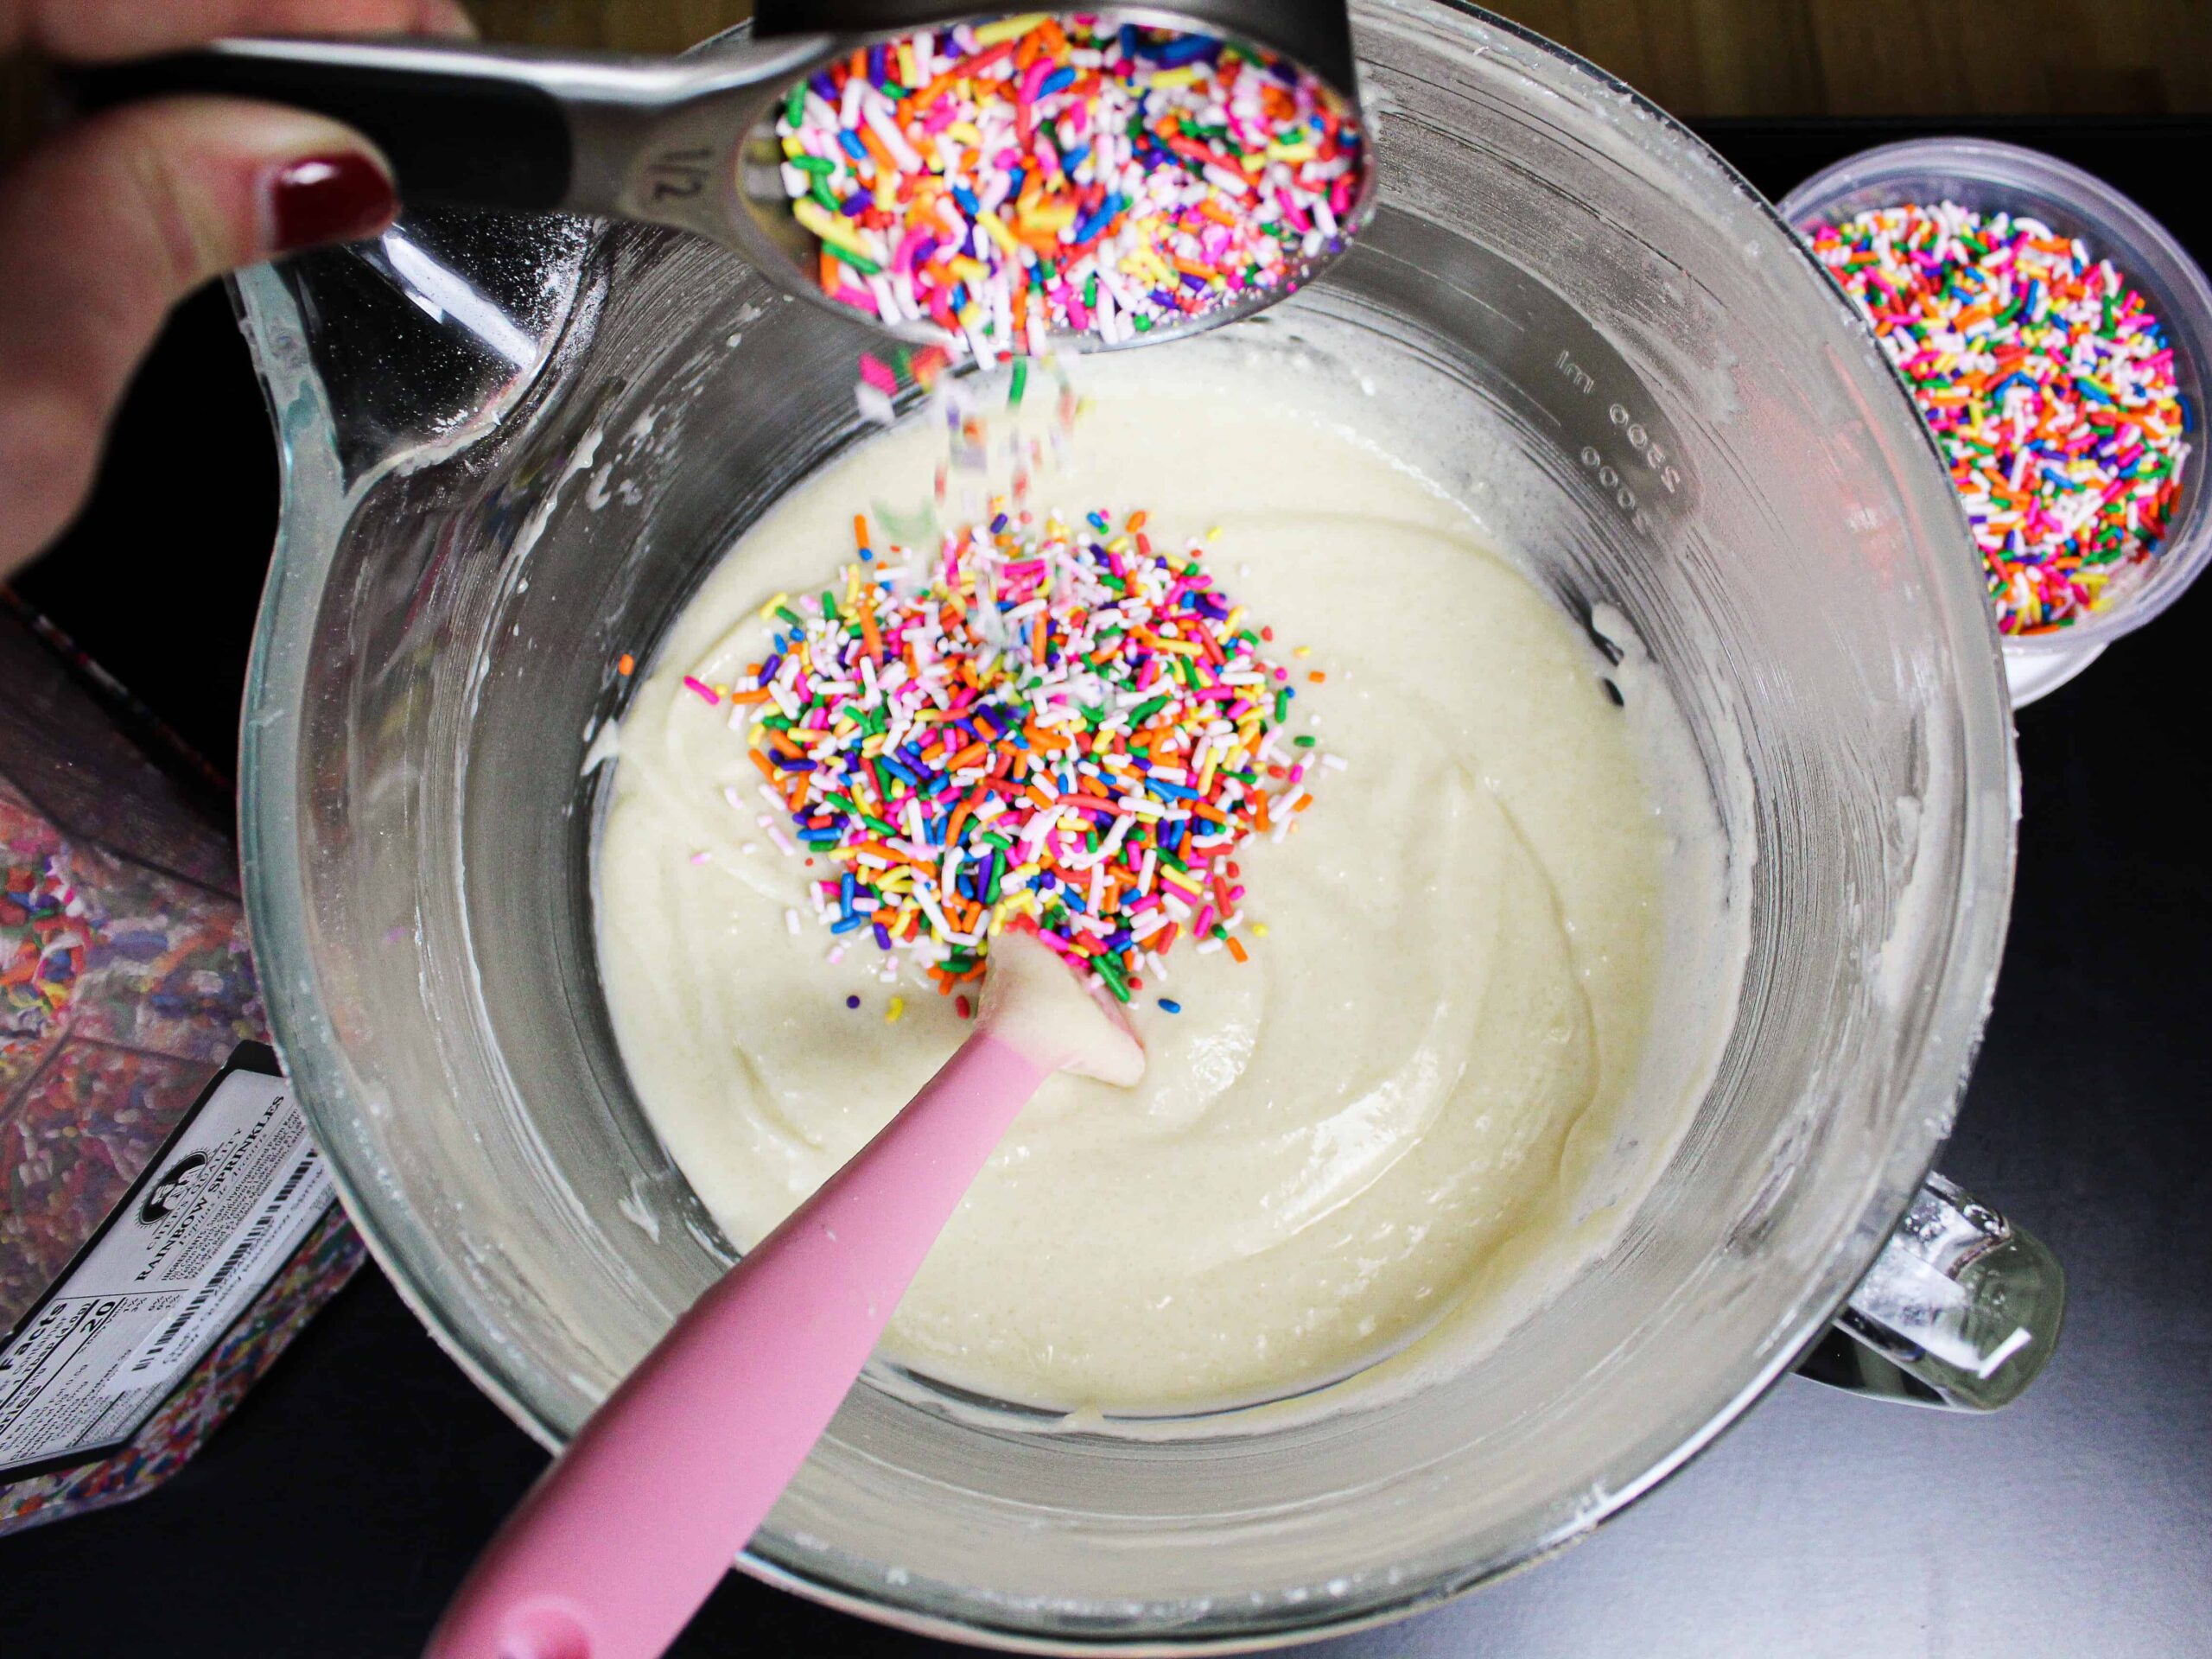
These sprinkles keep their color, and won’t immediately bleed into your batter.
This is important, because it will help your batter say white while you add it to your pans. This will allow the color of the sprinkles to really shine through once the layers are baked.
If you really want to be picky about your sprinkles, I also recommend getting a rainbow sprinkle blend that doesn’t have any chocolate/brown sprinkles in it.
Funfetti cake layers look so much better without any brown sprinkles!
The type of sprinkle you should NOT use are the tiny, round, rainbow sprinkles. They’re called nonpareils, and they are the true enemy of funfetti cake layers.
Nonpareils will start to bleed their colors the second they’re stirred into your cake batter, resulting in a creepy, pink/grayish batter.
This can also happen if you let your rainbow jimmies sit in your batter for an extended period of time, and then try to stir it.
The key takeaways? Only use rainbow jimmies in this funfetti cake recipe, gently fold them into your batter, and immediately pour into your cake pans.
Funfetti vs Confetti Cake?
In my mind, sprinkle cake layers have always been called funfetti. But when I was doing a little keyword research, I learned that a majority of you (about 80%) call it confetti cake.
Back in the day, a lot of the boxed cake mixes called it confetti cake mix. My theory is that we call it the name we grew up with.
Pillsbury is the only brand that dubs its sprinkle cake mix funfetti, and I’m like 90% sure we used Pillsbury mix when I was as a child!!

While I clearly am outnumbered on this one, I definitely think that calling sprinkle cake layers funfetti is just more…fun! No pun intended.
What Makes This Funfetti Recipe So Delicious?
There are lots of funfetti cake recipes out there. Why is this one the best (in my opinion)? There are a few reasons.
This cake recipe is based off of my vanilla layer cake recipe which is amazing on its own. It’s a butter cake recipe, can be made in one bowl, and is pretty much foolproof.
This recipe also uses buttermilk, which makes tender cake layers, and adds so much moisture! It also gives this cake a delicious tang, which pairs so well with the sweet buttercream the cake is frosted with.
While buttermilk can be found in most grocery stores, some parts of the country or foreign countries don’t sell it! If you’re having a hard time getting your hands on buttermilk, don’t worry.
You can make your own buttermilk! For each cup of buttermilk that the recipe calls for, use 1 tablespoon of white vinegar or lemon juice plus enough milk to fill 1 cup.
You also can use plain, low-fat yogurt as an equal substitute, cup for cup.
This funfetti cake recipe also uses the tiniest bit of almond extract. It can be omitted if you’re worried about tree nut allergies. Otherwise, I highly recommend including it.
It added just a hint of almond flavor, which makes this cake feel even more special. Almond extract reminds me of wedding cakes, and it takes this cake recipe to the next level.
How Should I Decorate My Funfetti Cake??
Over the years I’ve decorated my funfetti cakes a lot of different ways. I highly recommend using some assortment of fancy sprinkles, rainbow frosting, and/or cute candles!
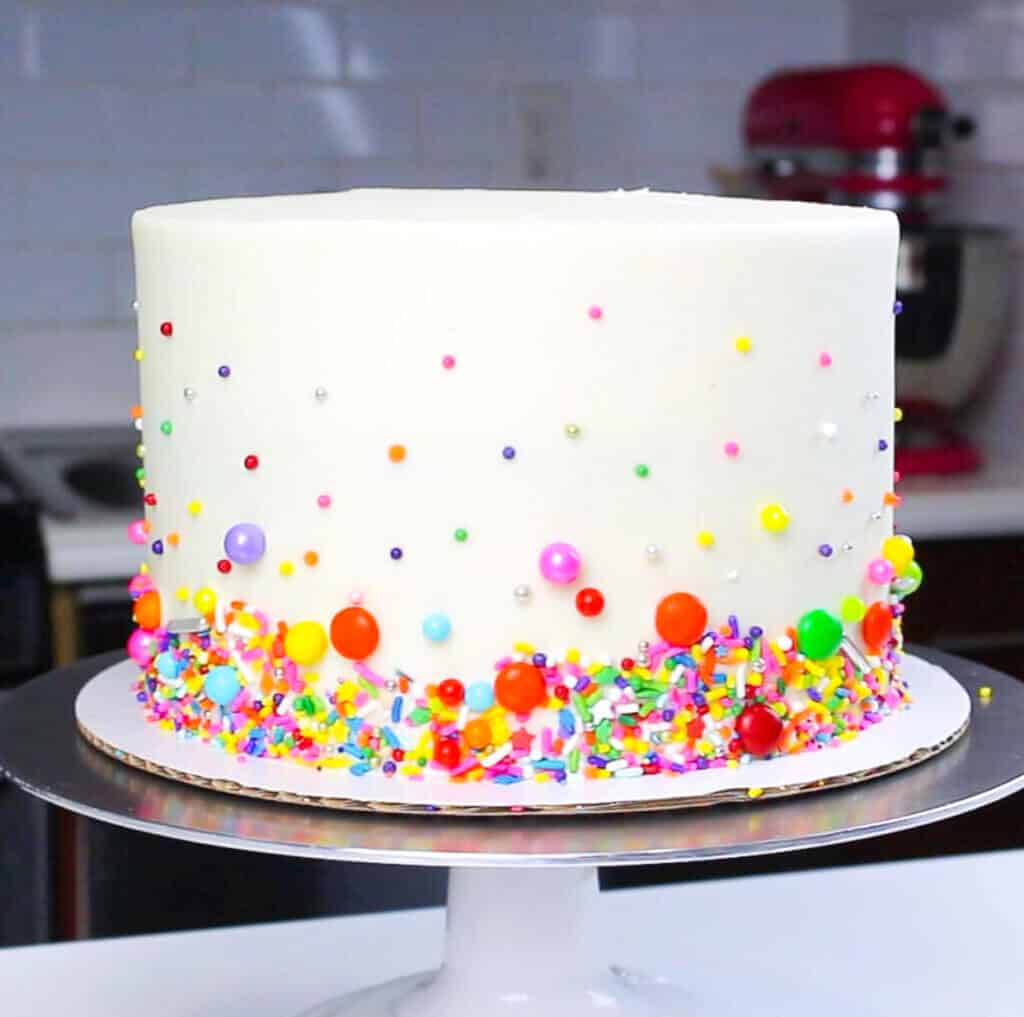
Below is an ombre sprinkle look I did a couple years ago. Sometimes all you need is a cute sprinkle blend!!
I’ve also made some epic sprinkle covered funfetti cakes in the past, including the funfetti cookie dough cake below.
The most important thing to keep in mind when decorating a cake is to have fun. That’s the whole reason why we bake, right?!
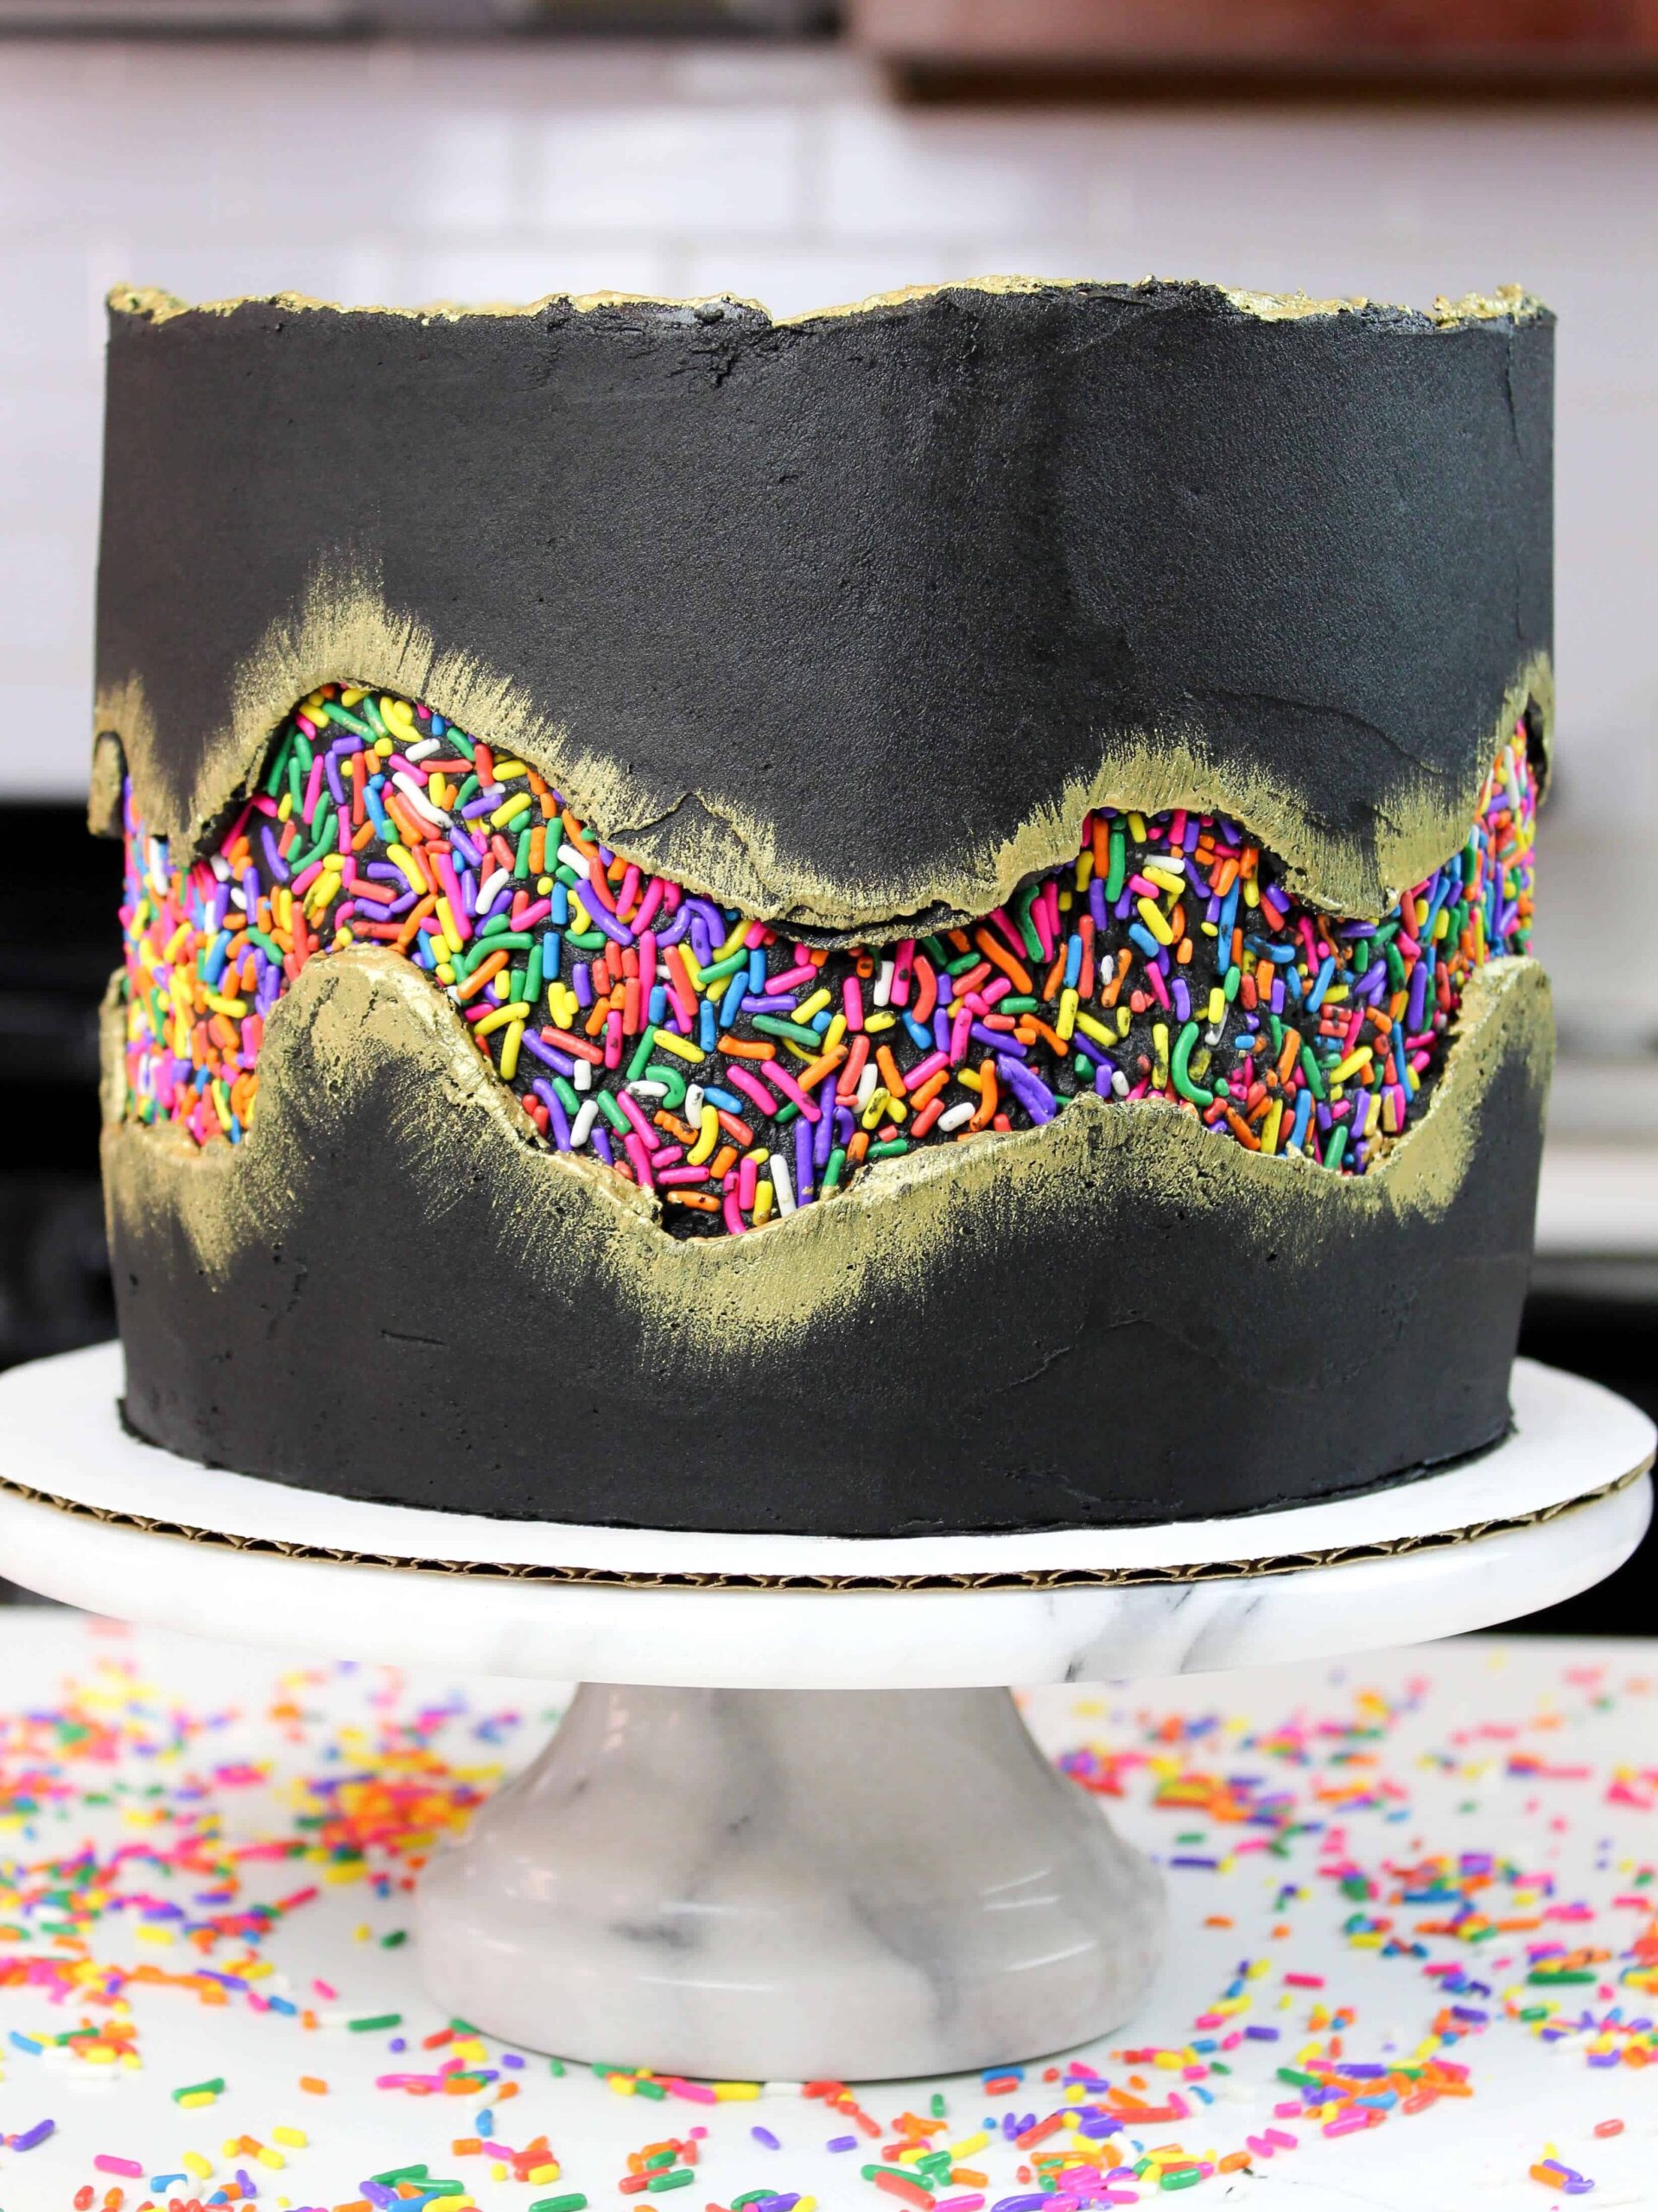
Or to hop on the latest sprinkle cake trend, you could make a fault line sprinkle cake!!
It’s made with my funfetti cake recipe, and is frosted with my black buttercream frosting.
Tips for Making This Funfetti Cake Recipe
- Ingredients at room temp mix together better! Set out any cold ingredients ahead of time.
- Be sure to properly measure your flour (spoon into the cup measure, then level). Or better yet, use a kitchen scale to measure your dry ingredients.
- Once you add in the flour, mix your cake batter just until the ingredients are incorporated. This will ensure your cake layers are tender and fluffy.
- Use a kitchen scale to weigh your cake pans as you fill them. It helps the cake layers bake to the same height and bake more evenly.
- Bang your cake pans on the counter before putting it in the oven. This brings any air bubbles that are trapped in the batter to the surface.
- Level your room temperature or thawed cake layers with a serrated knife to make them easier to stack.
- Chill your cake layers in the freezer for about 20 minutes before assembling the cake. It makes it so much easier to frost them!
- If you want to make funfetti cupcakes, I recommend trying my funfetti cupcake recipe (I like the texture better for cupcakes)
- Use my small batch funfetti cake recipe to make a 6-inch layer cake.
Making These Cake Layers in Advance and Storage Tips
Make your cake layers in advance and freeze them. It breaks the process up and makes it more approachable.
Make your frosting ahead of time too or save any leftover frosting! It can be stored in an airtight container in the fridge for up to a month or in the freezer for up to 3 months. Be sure to give it a good stir once it thaws to get the consistency nice and smooth again.
A frosted cake can last in the fridge for up to a week, or in the freezer for up to a month. The buttercream locks in all the moisture, keeping the cake fresh and delicious!
If you cut into the cake and have leftovers, use any remaining frosting to cover the cut section to keep it moist and store in the fridge for up to a week.
Let Me Know What You Think!
I’d love to hear your thoughts on this funfetti cake recipe! Are you team funfetti or team confetti??
If you try this recipe, please tag me @chelsweets and use #chelsweets so I can see your beautiful creations!!
Also leave a comment below and/or a rating to let me know your thoughts.
Other Recipes You Might Like:

Funfetti Cake
This amazing funfetti cake recipe is made from scratch and is so easy to make. It's tender, moist, and packed with flavor and sprinkles!!
Ingredients
Funfetti Cake
- 3 cups all-purpose flour (360g)
- 3 cups granulated sugar (600g)
- 2 1/2 tsp baking powder (10g)
- 1 tsp salt (6g)
- 1 cup or 2 sticks unsalted butter, room temperature (226g)
- 1 cup pasteurized egg whites from a carton or about 7 egg whites, room temperature (240ml)
- 1 1/2 cups buttermilk, room temperature (360ml)
- 2 Tbsp vegetable oil (28g)
- 2 tsp vanilla extract (8ml)
- 1 1/2 tsp almond extract - optional (6ml)
- 3/4 cup of rainbow jimmies or long strand sprinkles (130g)
- gel food coloring (if desired)
Vanilla Buttercream Frosting
- 2 cups unsalted butter, room temp (452g)
- 1 Tbsp vanilla extract or vanilla bean paste (12g)
- 1/2 tsp salt (3g)
- 7 cups powdered sugar (875g)
- 1/4 cup heavy cream or whipping cream (60g)
Decorations
Instructions
Funfetti Cake Layers:
- Preheat the oven to 350°F/175°C. Line four 7 inch pans or three 8 inch round pans with parchment rounds and grease with non-stick cooking spray.
- Mix 3 cups all purpose flour, 3 cups sugar, 2 1/2 tsp baking powder and 1 tsp salt together in a stand mixer with a paddle attachment or hand mixer until fully combined.
- Mix in 1 cup of room temperature, unsalted butter slowly into the dry ingredients on a low speed. Continue to mix until no large chunks of butter remain, and the mixture looks like moist sand.
- Pour in 1 cup of egg whites and mix on low until just incorporated. Mix in 1 1/2 cups buttermilk in two installments, on a low speed.
- Add in 2 Tbsp of vegetable oil, 2 tsp of vanilla extract, and 1 1/2 tsp almond extract and mix at a low speed until fully incorporated. If you want to color these cake layers, add in the gel food coloring with the oil and extracts.
- Scrape down the sides of the bowl with a rubber spatula, then beat on a medium speed for about a minute to make sure everything is properly mixed together. This also helps lighten the texture of the cake layers a bit.
- Fold 3/4 cup of sprinkles into the cake batter using a rubber spatula and mix until they're evenly distributed.
- Divide batter evenly between the prepared cake pans.
- Bake for 34-36 minutes or until a toothpick comes out clean. Allow the pans to cool for 10 minutes, then run an offset spatula around the perimeter of the pan to separate the cake from the pan.
- Place cake layers into the freezer for 45 minutes to accelerate the cooling process. Once the layers are fully cooled, carefully flip the pans and remove the layers from the pans.
- Use a serrated knife to level the tops of the layers, then set aside. If you make these in advance, wrap and freeze them at this point.
Vanilla Buttercream Frosting:
- While the cake layers bake and cool, make the vanilla buttercream frosting.
- Beat 2 cups of unsalted butter on a medium speed for 30 seconds with a paddle attachment until smooth.
- Mix in 1 Tbsp of vanilla extract and 1/2 tsp salt on a low speed.
- Slowly mix in 7 cups of powdered sugar on a low speed. Add 1/4 cup of heavy cream halfway through to make the frosting easier to mix.
- Continue to mix on a low speed for a few minutes until the desired consistency is reached.
- If the frosting is too thick, add in additional cream (1 Tbsp at a time). If the frosting is too thin, add in more powdered sugar (quarter of a cup at a time).
- If you want to color the buttercream, add in the gel food coloring once the frosting is fully made.
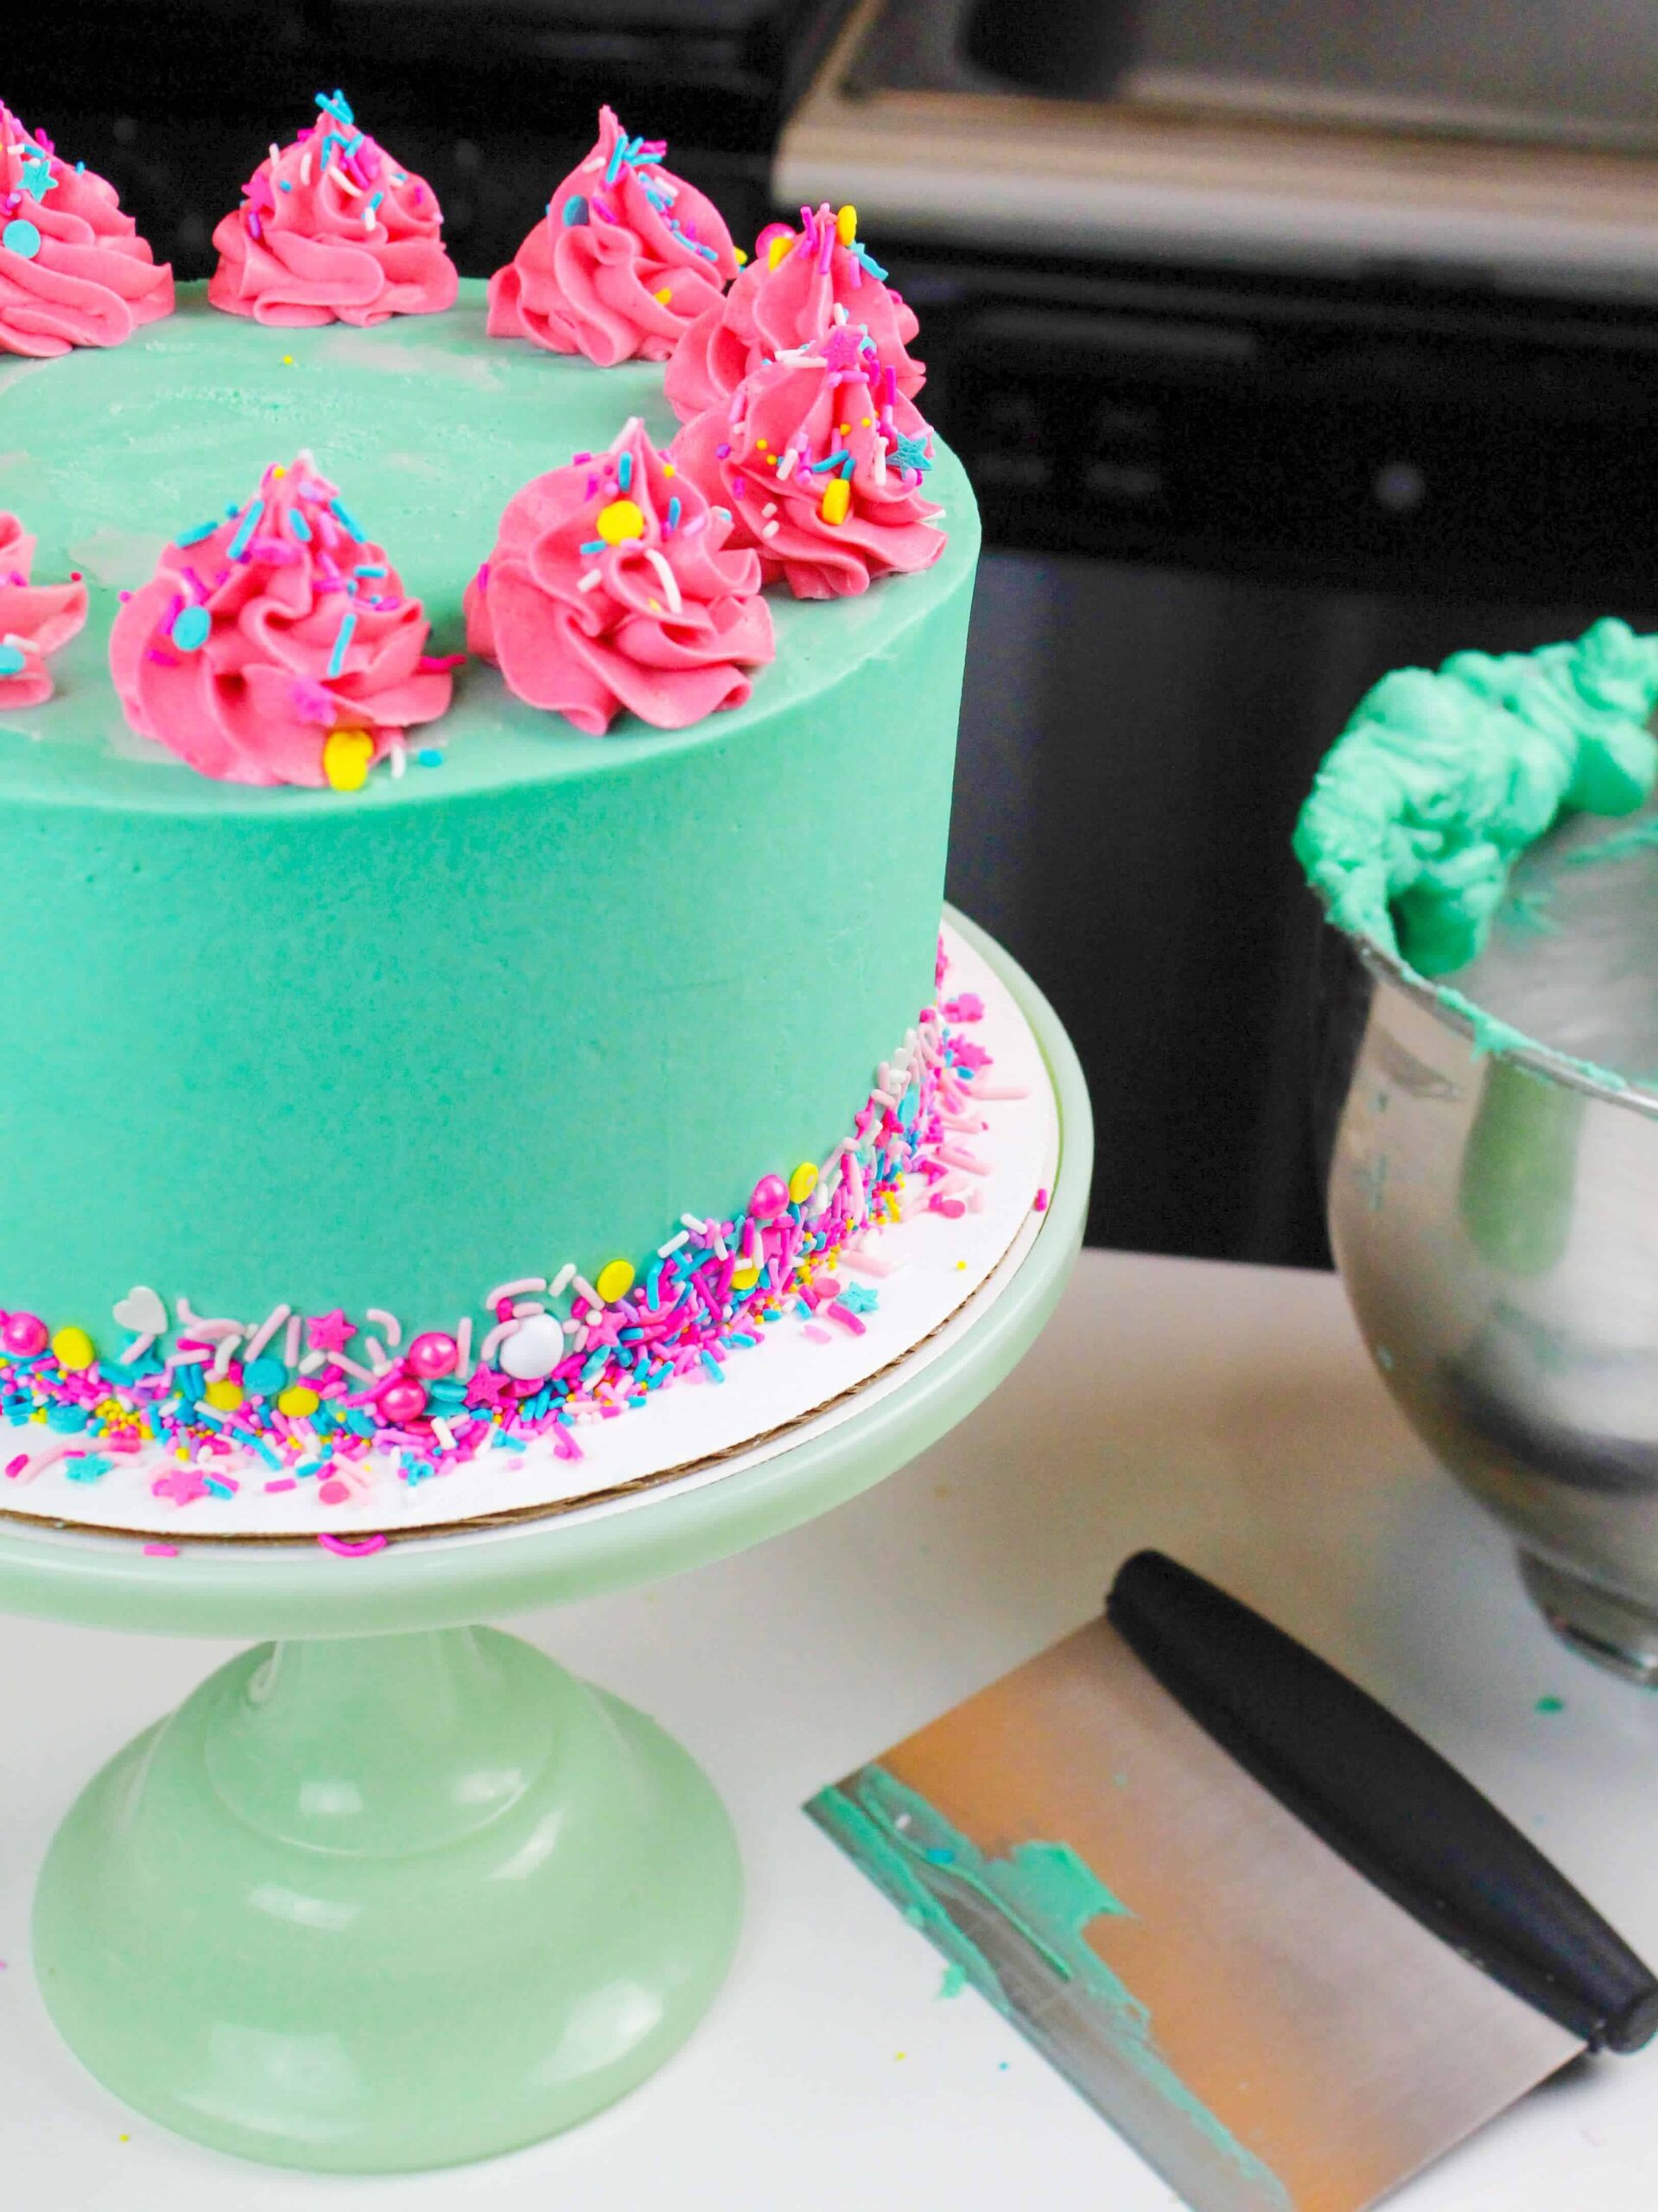
- Reserve about 1 1/2 cups of frosting to make a separate color to pipe swirls on top of the cake. Place this frosting in a piping bag fit with a Wilton 1M frosting tip.
- Color the remaining frosting with gel food coloring.
- In this cake I used turquoise Americolor gel food coloring to make the blue frosting, and deep pink Americolor gel food coloring for the swirls on top of the cake.
Assembling This Funfetti Cake:
- Stack and frost cake layers on a greaseproof cake board using a dab of frosting to help stick the first cake layer to the board.
- Add an even layer of buttercream between each cake layer with a large offset spatula.
- Spread a thin coat of frosting around the cake to fully cover the cake layers. Smooth using a bench scraper, then chill the cake in the fridge (30 minutes) or freezer (10 minutes) until the frosting is firm to the touch.
- Add a second, thicker layer of frosting to the cake and smooth using a bench scraper. Then decorate as desired! I used a Wilton 1M piping to pipe large swirls on top of the cake.
Notes
Funfetti Cake Recipe Variations
This recipe can also be used to make a sheet cake! One batch will make 2, 9 inch x 13 inch cake layers that are about 1 inch tall. Bake at 350°F/175°C for 30-35 minutes.
One batch of cake batter makes about 1800 grams. If you plan use three circular cake pans, add 600 grams of batter into each pan. If you plan use four circular cake pans, add 450 grams of batter into each pan.
Tips for Making the Best Funfetti Cake
- Properly measure your flour. Either spoon it into the cup measure, then level with a knife or use a kitchen scale.
- Make sure your ingredients are at room temperature to help them mix together better.
- Chill your cake layers in the freezer for about 20 minutes before assembling the cake. This makes them easier to stack and frost.
- Level your room temperature or thawed cake layers with a serrated knife to make them easier to stack.
- Crumb coat and chill your cake, then smooth on a second layer of frosting. This will help make sure your final coat of frosting is crumb-free and beautiful.
- Make sure your buttercream is the right consistency before frosting your cake. It will help give your cake proper structure and make it easier to decorate.
Making this Funfetti Cake in Advance and Storage Tips
- Make your cake layers in advance and freeze them. It breaks the process up and makes it more approachable.
- Make your frosting ahead of time too or save any leftover frosting! It can be stored in an airtight container in the fridge for up to a month, or in the freezer for up to 3 months. Be sure to give it a good stir once it thaws to get the consistency nice and smooth again.
- A frosted cake can last in the fridge for up to a week or in the freezer for up to a month. The buttercream locks in all the moisture, keeping the cake fresh and delicious!
- If you cut into the cake and have leftovers, use any remaining frosting to cover the cut section to keep it moist and store in the fridge for up to a week.
Nutrition Information
Yield
24Serving Size
1Amount Per Serving Calories 687Total Fat 35gSaturated Fat 20gTrans Fat 0gUnsaturated Fat 13gCholesterol 86mgSodium 297mgCarbohydrates 92gFiber 0gSugar 78gProtein 4g
Kelly
Friday 18th of November 2022
Thank you for posting this! My daughters and I (with the help of grandma) just made your three-layered, violet outside/pink inside funfetti cake for my 5 year old's fairy-themed birthday party! It's sitting pretty in the fridge ready to be admired and then eaten! Such a great recipe. Thanks again. :) <3
Chelsweets
Saturday 19th of November 2022
Hi Kelly,
Aw I love that, that sounds like such a cute cake!! Thank you so much for sharing :) And happy belated birthday to your daughter!!
Lauren
Sunday 13th of November 2022
This is definitely a 1 in 1.3 chance you’ll respond because you have so many followers but fingers crossed. I love this cake but I can’t seem to get it to not be dense.
First time it was super dense, everything was measured in cups, baked in 5x3 fat daddios pans 2/3ish full. 350 degrees and ended up being about 55 minutes. Crispy on top and edges but wasn’t baked through until 55 minutes. SUPER DENSE (but delish).
2nd time I said ok maybe it was too much flour and the pans used need to be lower and slower. So I measured by grams which ended up being less flour / sugar than the first time. Liquid was the same. Same sized pans baked at 330 degrees this time per fat daddios tip for their pans, took the same time - about 50 ish minutes. Still crispy top and edges and still super dense :(
Any clue!? I’m mixing until JUST incorporated, and had done the extra 30 seconds or so on medium speed as the recipe said to help with fluffiness. IM DETERMINED to figure this out b
Chelsweets
Saturday 19th of November 2022
Hi Lauren,
So sorry to hear that!! How many 5-inch cake layers are you making with one batch of this recipe? I would recommend making it in at least 6-inch pans, if not 7- or 8-inch pans! I think that will help with the texture a lot. Making smaller, thicker layers does require a super long bake time, which will make the top quite crispy.
One other thing to keep in mind is that this is a butter cake recipe, not a sponge cake recipe. So the texture is meant to be different and more dense than a classic sponge cake. However, it should still have a nice crumb!!
The only other things I can think of that would make the texture denser is if the ingredients aren't all at room temperature, or if your baking powder is old / expired. Baking powder can start to lose its potency after 6 months. Both of those things can have a huge impact on how much the cake layers rise.
Hope it's one of those things, and that we can figure it out together <3
Lauren
Wednesday 19th of October 2022
Hey hey! This was so delicious, but my cake did come out super dense. Any thoughts as to why? I used 3 5x3 fat daddiez pans and it baked for about 55 minutes. It was moist still but super dense. Still amazing though!
Chelsweets
Sunday 23rd of October 2022
Hi Lauren,
This recipe does bake up a bit denser than a sponge cake, but it shouldn't be super dense! If that's the case, it could be few different things! Common culprits include using too much flour (not fluffing up the flour, then spooning and leveling it in a cup measure or using a scale), using ingredients that aren't fully at room temperature, or that step #6 was skipped! Mixing the batter on a medium speed for about a minute once it's made helps make sure everything is properly mixed together and lighten the texture of the cake layers.
Do you think it could have been either of those? If not, we can keep working together to try to figure out what it might have been!
Shelby
Thursday 15th of September 2022
I only have one cake pan. What do you suggest for cooking them separately?
Chelsweets
Tuesday 20th of September 2022
Hi Shelby,
No worries! The batter can sit at room temperature for a few hours. Bake one layer at a time and making however many cake layers the recipe calls for with the size of pan you have. Happy baking!
Kelly
Tuesday 13th of September 2022
Hello! I have loved all of your recipes!! I have a question about this one. I just made it and the top and sides of it taste almost gummy. I can’t taste the inside as it’s for a party but I’m worried. Is this normal? Will the inside taste okay or did I do something wrong? Any help would be greatly appreciated!
Chelsweets
Tuesday 20th of September 2022
Hi Kelly,
I'm so sorry to hear that! I'm not 100% sure what you mean when you say gummy, but sometimes the top of the layers is a little sticky because of all the buttermilk in this recipe. If that's what you mean, then your cake layers should be just fine!
A great way to test if the layers are fully baked is to stick a toothpick or scribe into the center of the cake layers and see what it looks like coming out. There should be a few moist crumbs, but as long as it isn't wet, then the cake layers are fully baked.
If the inside was gummy as well, the layers may have been underbaked. If that's the case, it may have been caused by using cold ingredients (not brought to room temp) or it may mean your oven runs a little cold. Hope that helps, and that your cake layers ended up tasting great!